Quick Start Guide
Before compiling EDK2 and EDK2-Platform code ensure you perform the following steps:
- Create a project folder name “vf2_uefi”
> mkdir vf2_uefi
- Setup environment
export GCC5_RISCV64_PREFIX= <RISCV_tool_chain>
export PACKAGES_PATH=<project_path>/vf2_uefi/edk2:<project_path>/vf2_uefi/edk2-platforms
export EDK_TOOLS_PATH=<project_path>/vf2_uefi/riscv-edk2/BaseTools
<RISCV_tool_chain> - version 10.0.2
- Download U-Boot SPL, Linux, and SD Card images from here.
Refer here documentation for detail instruction to generate linux.iso
Refer here documentation for detail instruction to generate u-boot-spl.bin.normal.out
Perform the following steps to download the codes:
- Git clones the code
> cd <project_path>/vf2_uefi
> git clone https://github.com/starfive-tech/edk2
> git clone https://github.com/starfive-tech/edk2-platforms
- Checkout Starfive VisionFive2 EDK2 tag
> cd edk2
> git submodule update --init
> cd ..
- Checkout Starfive VisionFive2 EDK2-Platform tag
> cd edk2-platforms
> git submodule update --init
> cd ..
Perform the following the clean-up and build the code:
- Setup and clean the project
> cd edk2
> source ./edksetup.sh
> make -C ./BaseTools clean
> make -C ./BaseTools
> make -C ./BaseTools/Source/C
> source ./edksetup.sh BaseTools
> cd ..
- Build UEFI image
> build -a RISCV64 -t GCC5 -p <project_path>/vf2_uefi/edk2-platforms/Platform/StarFive/JH7110SeriesPkg/JH7110Board/JH7110.dsc
Build image is located in ../Build/JH7110/DEBUG_GCC5/FV/JH7110.fd
Please refer to the guide here
Please refer to the guide here
Please refer to the guide here
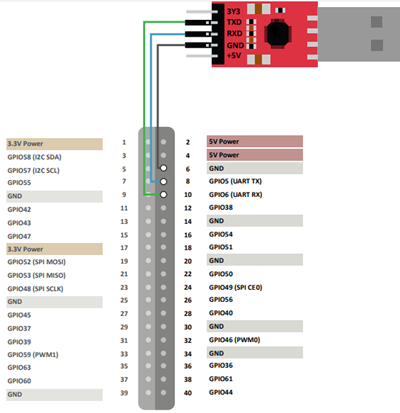
Connect the jumper wire between the USB-to-Serial converter and the Debug pins of VisionFive 2 40-pin GPIO header. The following figure is an example:
- Download Tera Term with this link
- Setup Tera Term:


- Set board to boot from SD Card or eMMC or QSPI Flash

Note: If booting from eMMC, hold the reset button for more than 3 seconds to reset the board.
- Power up the board
- List all and read mapped partitions in SD Card, eMMC and QSPI Flash
> map -r
> FS0:
> ls
Result:
Linux auto-boot can be enabled by creating a startup.nsh file based on the guide here
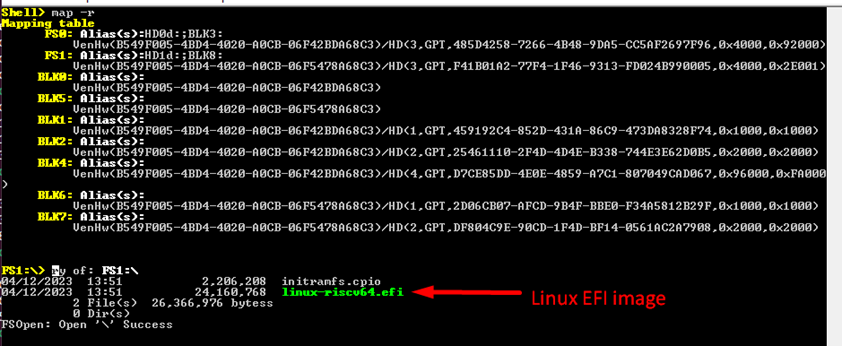
- Select a device that contains the Linux EFI image in UEFI Shell:
> FS1:
> ls
Note: FS1 is just an example. You may select other devices FS* that contains the image as well.
Result:

- Load initramfs
> initrd initramfs.cpio
- Load and run the Linux EFI image
> linux-riscv64.efi console=tty1 console=ttyS0,115200 debug rootwait earlycon=sbi
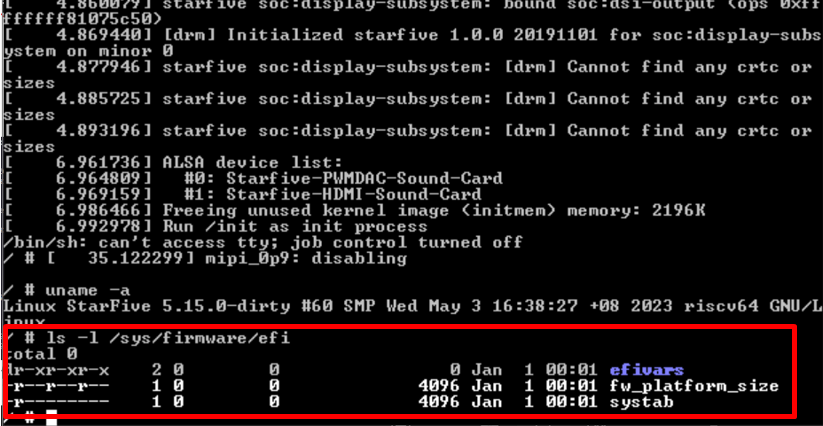
- Verify that Linux is booting from UEFI
> root
> ls -l /sys/firmware/efi
Result: