How To Guide
This page provides a short explanation of the process for creating a tactile diagram. When you're ready to make your own diagrams, we suggest following one of our walkthroughs.
Let's assume you're starting from a Powerpoint slide that has some graphical content, and you want to provide an assessable version of the slide to a colleague who is vision-impaired.
The first step is to remove all of the extra detail in this slide. There is a lot of content that is visually interesting, but not meaningful. For example, the four boxes in the slide are different shapes and colors, but the shapes and colors are not meaningful. Similarly, the background is cool looking, but it does not convey any information. Let's make all of the shapes uniform and get rid of the background. Regardless of your audience, removing extraneous detail from slides is a good idea!
Monospace fonts work much better than variable space fonts for conversion to braille. Larger fonts (24pt or larger) also tend to convert better. Increase the font size and switch to a monospace font like courier new.
Much better!
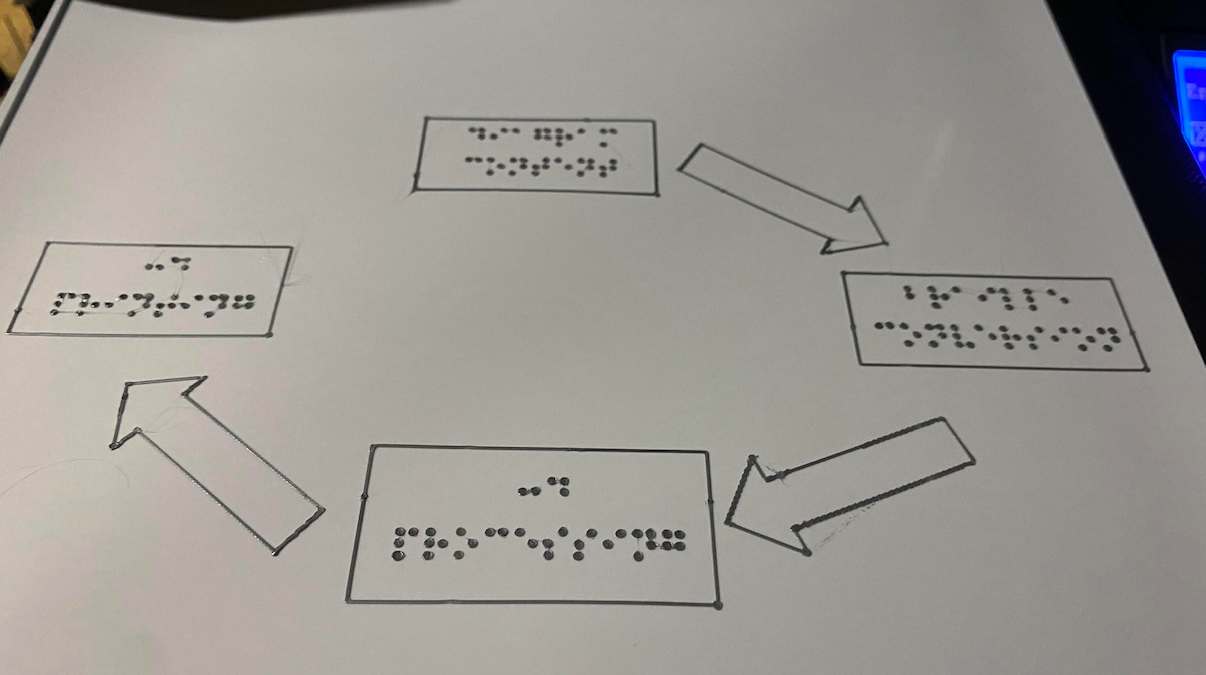
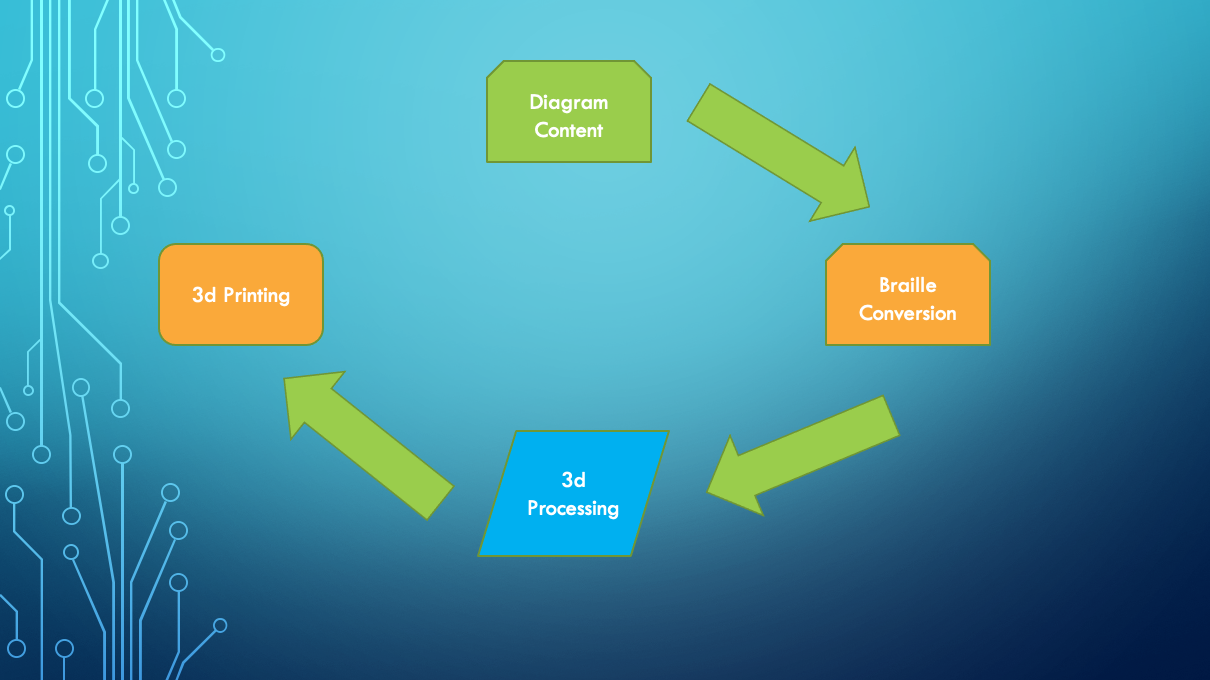
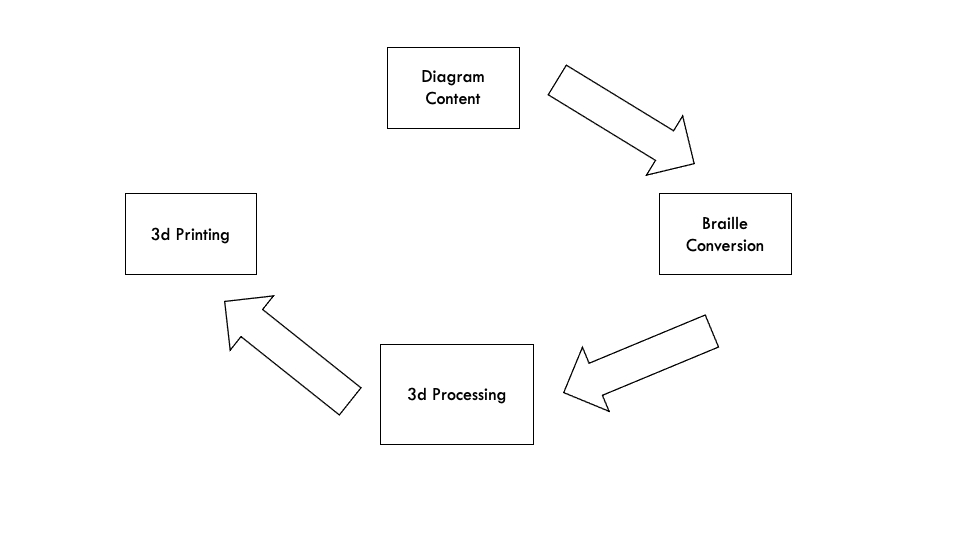
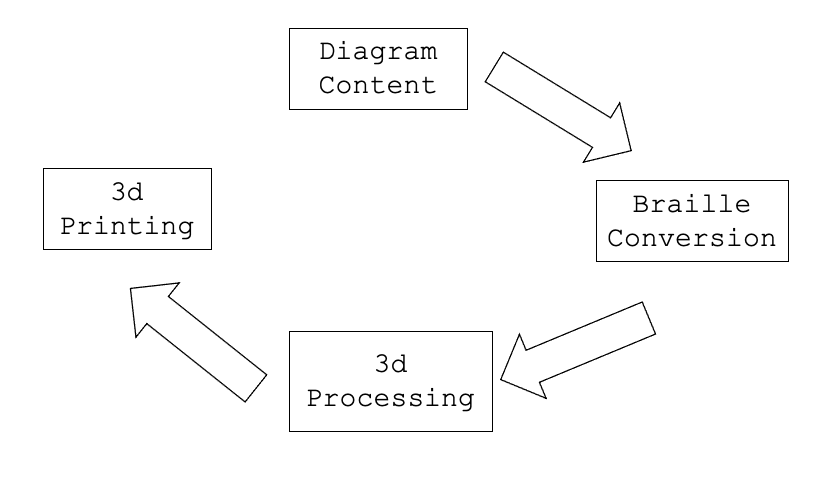
There are a few methods available for conversion to Braille:
- Use a braille font (TSBVI has some options here).
- Use Inkscape to convert text to braille in an SVG Image.
- Use a script to convert text to braille in an SVG Image (an example is available here)
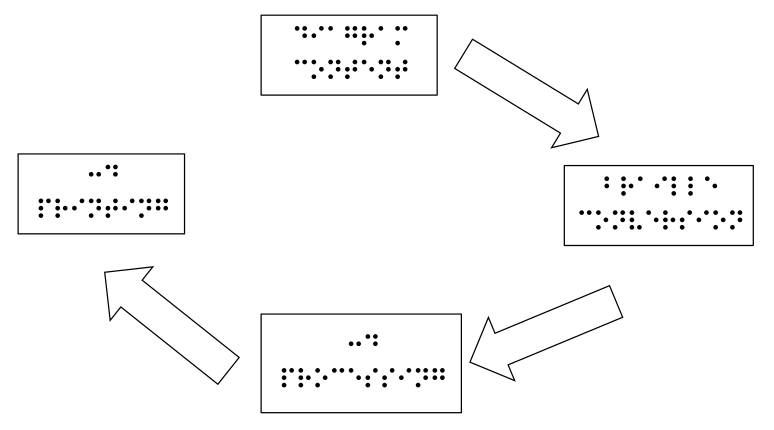
The result is a graphic that is in black and white, with braille text:
There are a few methods available for this as well:
- Use an online converter tool: png to stl or svg to stl
- Note this may or may not yield acceptable results as well the model scale will need to be adjusted in your slicer
- Use a script to convert an image to a 3d model (an example is available here)
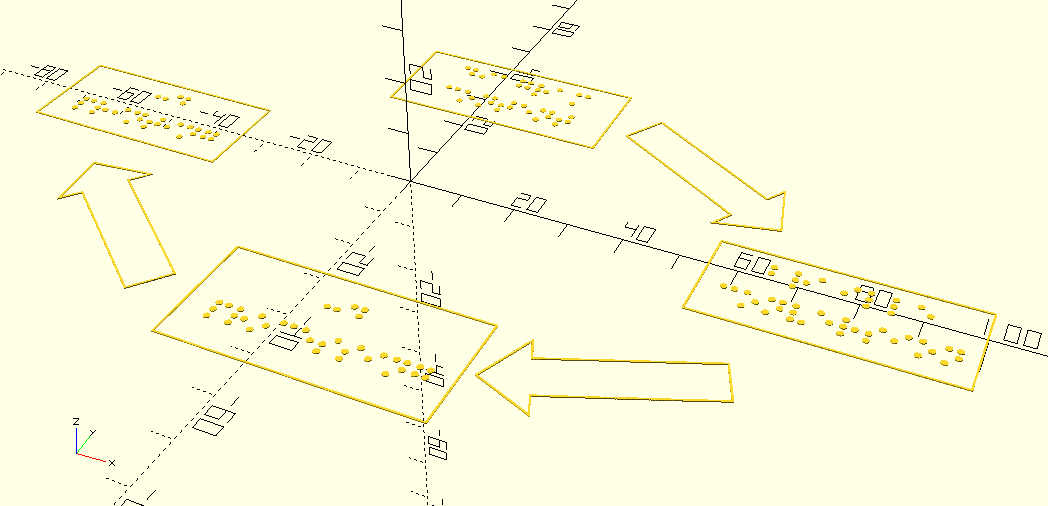
Once you have the 3d model (usually in the form of an STL file) you can print it! To print the 3d model you need a 3d printer. We've tested a few 3d printers, which are discussed on the 3d-printers page.
Use a slicer like Cura to generate set of printer-specific instructions for assembling your tactile diagram. There are a lot of specific settings to consider for your slider, which are discussed in the 3d-printer-settings and the printing tips pages.
Most of the time you'll want to print your tactile diagram on paper. We discuss paper types and attachment mechanisms on the tactile-diagram-paper page.