


Convert any photos and videos into an artwork


Stylize any photo or video in style of famous paintings using Neural Style Transfer.
- This is hundreds of times faster than the optimization-based method presented by Gatys et al so called fast style transfer.
- We train a feedforward network that apply artistic styles to images using loss function defined in Gatys et al paper.
- Feed forward network is a residual autoencoder network that takes content image as input and spits out stylized image.
- Model also uses instance normalization instead of batch normalization based on the paper Instance Normalization: The Missing Ingredient for Fast Stylization
- Training is done by using perceptual loss defined in paper Perceptual Losses for Real-Time Style Transfer and Super-Resolution.
- Vgg19 is used to calculate perceptual loss more working described on paper.
- For inferencing or generating images any system will work. But size of output image is limited as per system. Large images needs more momory to process. GPU is not must for inferencing but having it will be advantageous.
- For training GPU is must with tensorflow-gpu and cuda installed.
- If there is no access to GPU at local but want to train new style, there is a notebook
Fast_Style_Transfer_Colab.ipynbopen it in colab and train. For saving model checkpoints google drive is used. You can trust this notebook but I do not take any responsibility for data loss from google drive. Before running check the model save checkpoints path as it can override existing data with same name. - Training takes around 6 hours in colab for 2 epochs.
Python 3.6 or higher. Tested with Python 3.7, 3.8, 3.9 in Windows 10 and Linux.
tensorflow-gpu>=2.0ortensorflow>=2.0numpymatplotlibpillowopencv-python
This implementation is tested with tensorflow-gpu 2.0, 2.2, 2.7 in Windows 10 and Linux
There are two ways to install python in windows using Python 3 installer or Anaconda. Installing python with anaconda or miniconda is recommended. In linux Python 3 is installed by default but we can also install miniconda or conda into linux.
Create a new python virtual environment using conda or venv and activate it. If Anaconda or Miniconda is installed use conda else use venv to create virtual environments.
- Using conda
conda create --name artist
conda activate artist
conda install pip- Using venv in linux
python3 -m venv path/to/create/env/artist
source path/to/create/env/artist/bin/activate- Using venv in windows
python -m venv path\to\create\env\artist
path\to\create\env\artist\Scripts\activateThe command below will install all the required dependencies from requirements.txt file.
pip install -r requirements.txt- Download some Pretrained Models trained on different paintings styles to start playing without need to train network
- copy and unzip checkpoints inside
data/models
If get stuck in installation part follow these additional resources
- Input Parameters for a script can be set by using config file or using command line arguments.
- All configs file are located inside
configsfolder. - If config file path is passed as command line argument then all parameters will be read by script from it, otherwise input parameters are needed to be passed as command line arguments. Using config files will reduce lines to be typed in command line also easy to track all the parameters that can be tweaked.
Stylize only one image at a time
python style_image.py --config=configs/image_config.jsonor
python style_image.py --checkpoint data/models/udnie/model_checkpoint.ckpt --image data/images/content.jpg --image_size 1366 768 --output output/styled.jpgStylize all images inside a folder.
python style_multi_images.py --config=configs/multi_images_config.jsonor
python style_multi_images.py --checkpoint data/models/udnie/model_checkpoint.ckpt --path data/images/content.jpg --image_size 1366 768 --output output/styled.jpg
Use style_video.py to transfer style into a video.To view all the possible input parameters view its configs/video_config.json these parameters can be passed as command line arguments as well.
python style_video.py --config=configs/video_config.json
Use style_webcam.py to transfer style into live webcam recording.To view all the possible input parameters view its configs/webcam_config.json these parameters can be passed as command line arguments as well.
python style_webcam.py --config=configs/webcam_config.json- Download coco 2014 dataset and extract it inside data/train directory. It can be extracted to anywhere in computer as long you defined its path inside
configs/train.json. or in command line arguments. You can also use any other dataset with images, I have tried with some small datasets but results were not good. It needs more experimentation.
!wget http://images.cocodataset.org/zips/train2014.zip data/train
!unzip -qq data/train/train2014.zip- Get your style image ready. It can be a file link over http or path to file in local
- Edit
configs/train.jsonwith parameters as your linking especiallycheckpoint,style_imageandtrain_path. You can also pass these as command line arguments when runningtrain.pyscript. It depends on your preferences. - Run
train.pyscript
python train.py --config=configs/train_config.json- If want to train style images in google colab a notebook
Fast_Style_Transfer_Colab.ipynbis provided. Open it in colab and train. For saving model checkpoints google drive is used. You can trust this notebook but I do not take any responsibility for data loss from google drive. Before running check the model save checkpoints path as it can override existing data with same name.
We can also perform gatys style transfer by using slow_style_transfer.py script. You can use it for styling images but it takes more time to generate an image. To view all the possible input parameters view configs/slow_style_config.json these parameters can be passed as command line arguments as well.
The benefit of this method is that we can create different stylized images using different style images without training a network for that particular style, but it takes some time to create a single stylized image. This method is prefered to test different styles and check which one is working great before training a network for that style.
python slow_style_transfer.py --config=configs/slow_style_config.json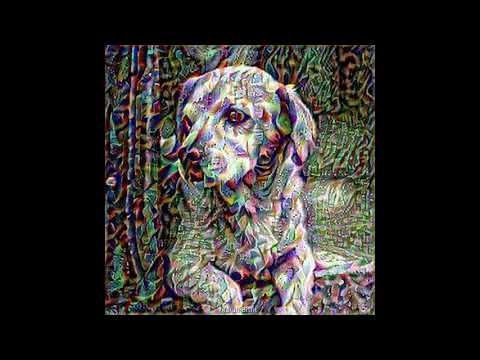


Contributions are highly welcome that will improve quality of project. Folks with high end machines are welcome to train new styles and contribute. For style models contribution Contact me
Copyright (c) 2020 Tarun Bisht. Free for personal or research use. Contact me for commercial use.
- A Neural Algorithm of Artistic Style
- Perceptual Losses for Real-Time Style Transfer and Super-Resolution
- Instance Normalization: The Missing Ingredient for Fast Stylization
- Image from Unsplash by Heather Gill
Support this project through patreon