Total time taken: ~12 hours (https://github.com/thechaudharysab/ExpenseTracker/commits/main)
Spelling mistakes expected in the ReadMe file.
The App has a total of three screens:
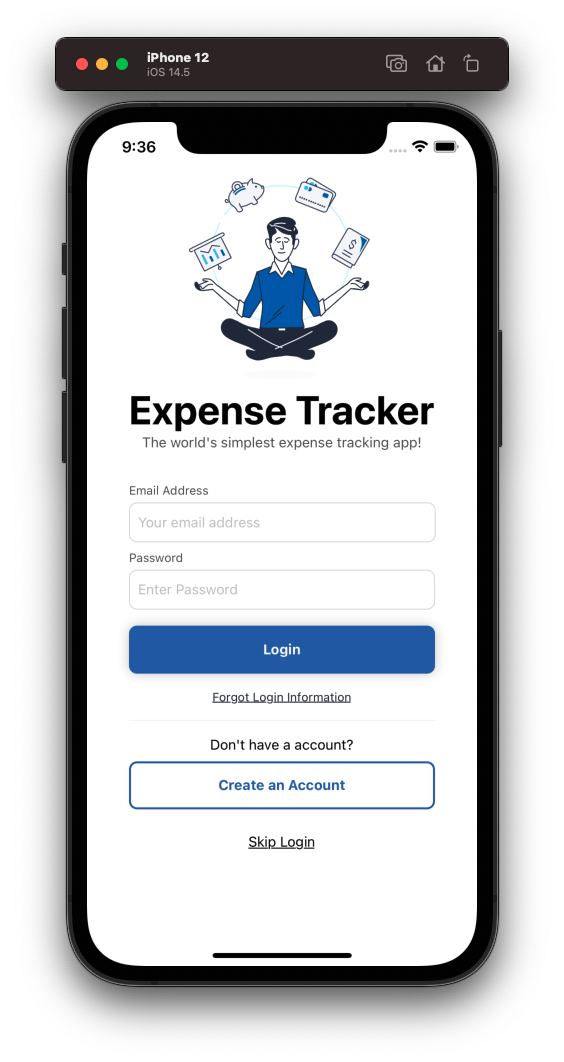
- Login Screen
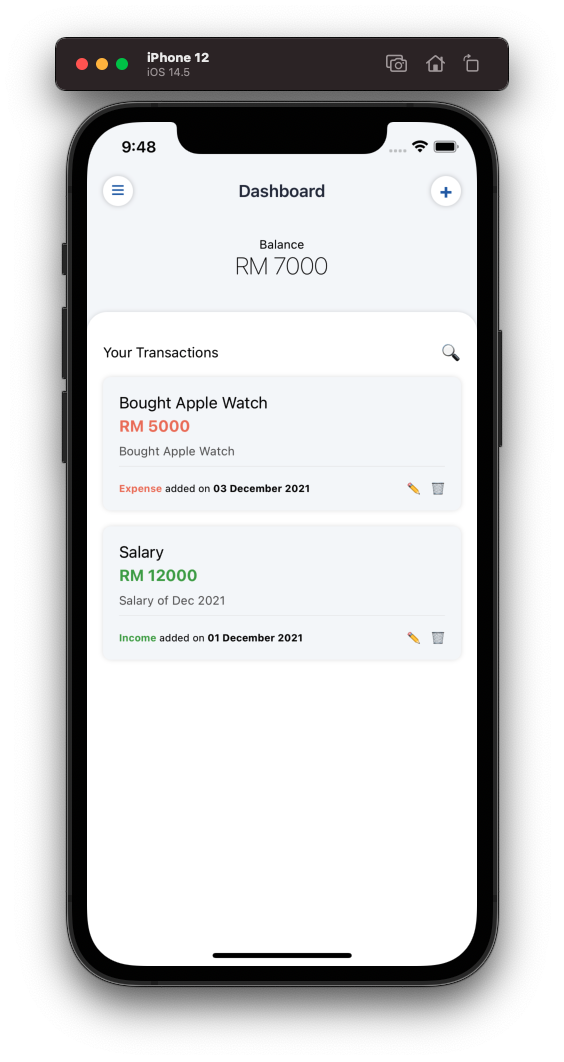
- Dashboard
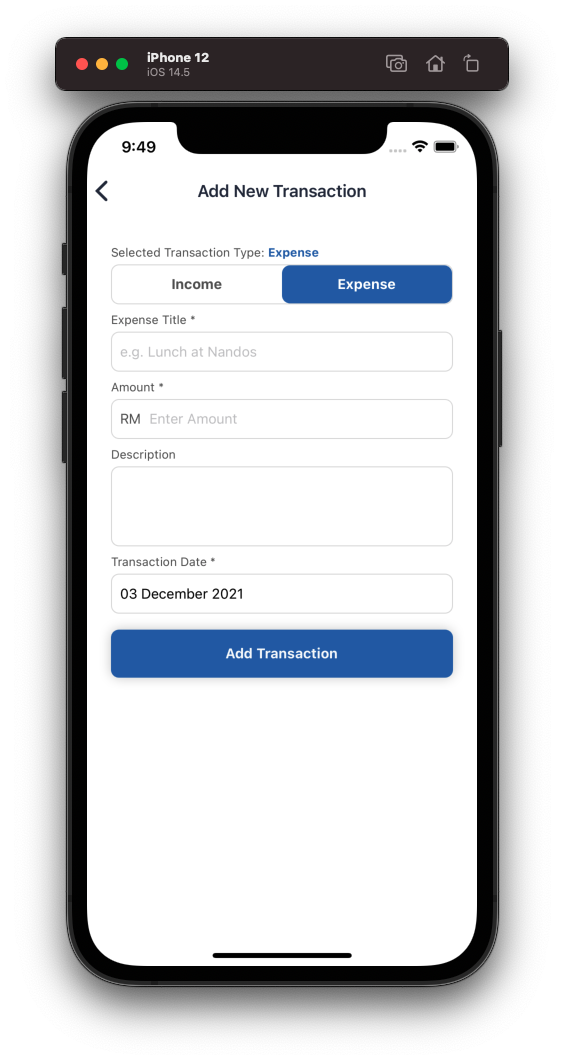
- Add Transaction
The login screen is just design. There is no authentication implemented in the project. This screen was created to demonstrate the front-end side of the react-natve experience. Althought there is a simple if-else check if you add test@domain.com and 12345678 as password and press Login will take you to Dashboard or you can simply tap on Skip Login.
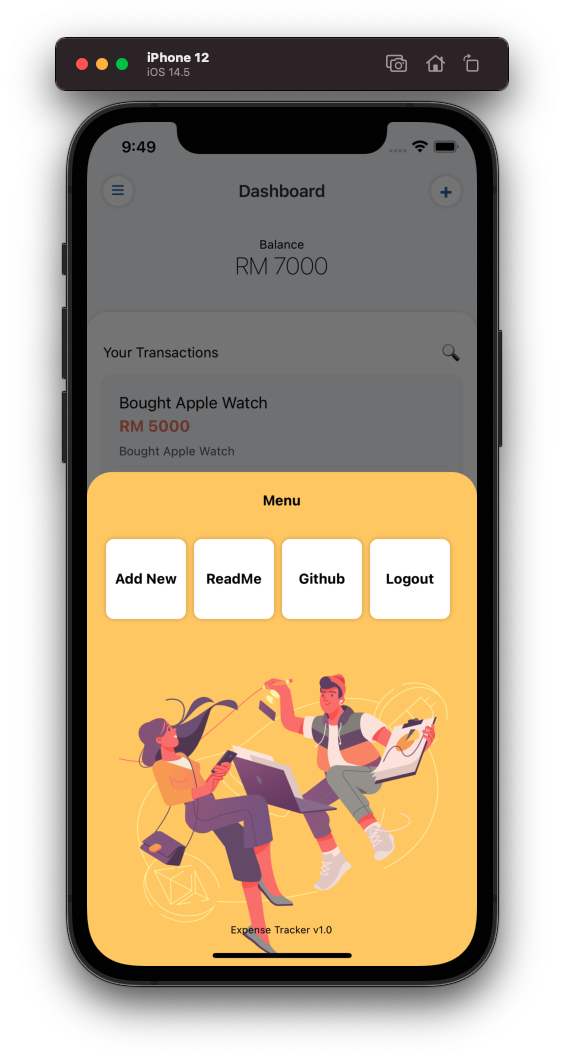
On Dashboard you can see the total balance that is calculated by adding all the income and subtracting all the expenses amounts (in float). It also shows all the transactions sorted from latest date to the oldest date and you can also delete a transaction, edit and search functionalities are not implemented in this version. You can navigate towards adding a transaction as well as you can see the menu card from where you can logout, add new transaction ad go to github and read me links.
The add transaction screen is a form in which you can select the expense type, title, description (optional) and date of when that transaction occured (by default today's date will be selected).
As the timeline was limited so I tried to cover as much as possible. I have installed packages where needed (keepig the time constraint in consideration) but I have also created custom components.
I have't used Redux or Context API as the app structure doesn't required as this is a small app and maybe in futurre if I work on it then I'll use.
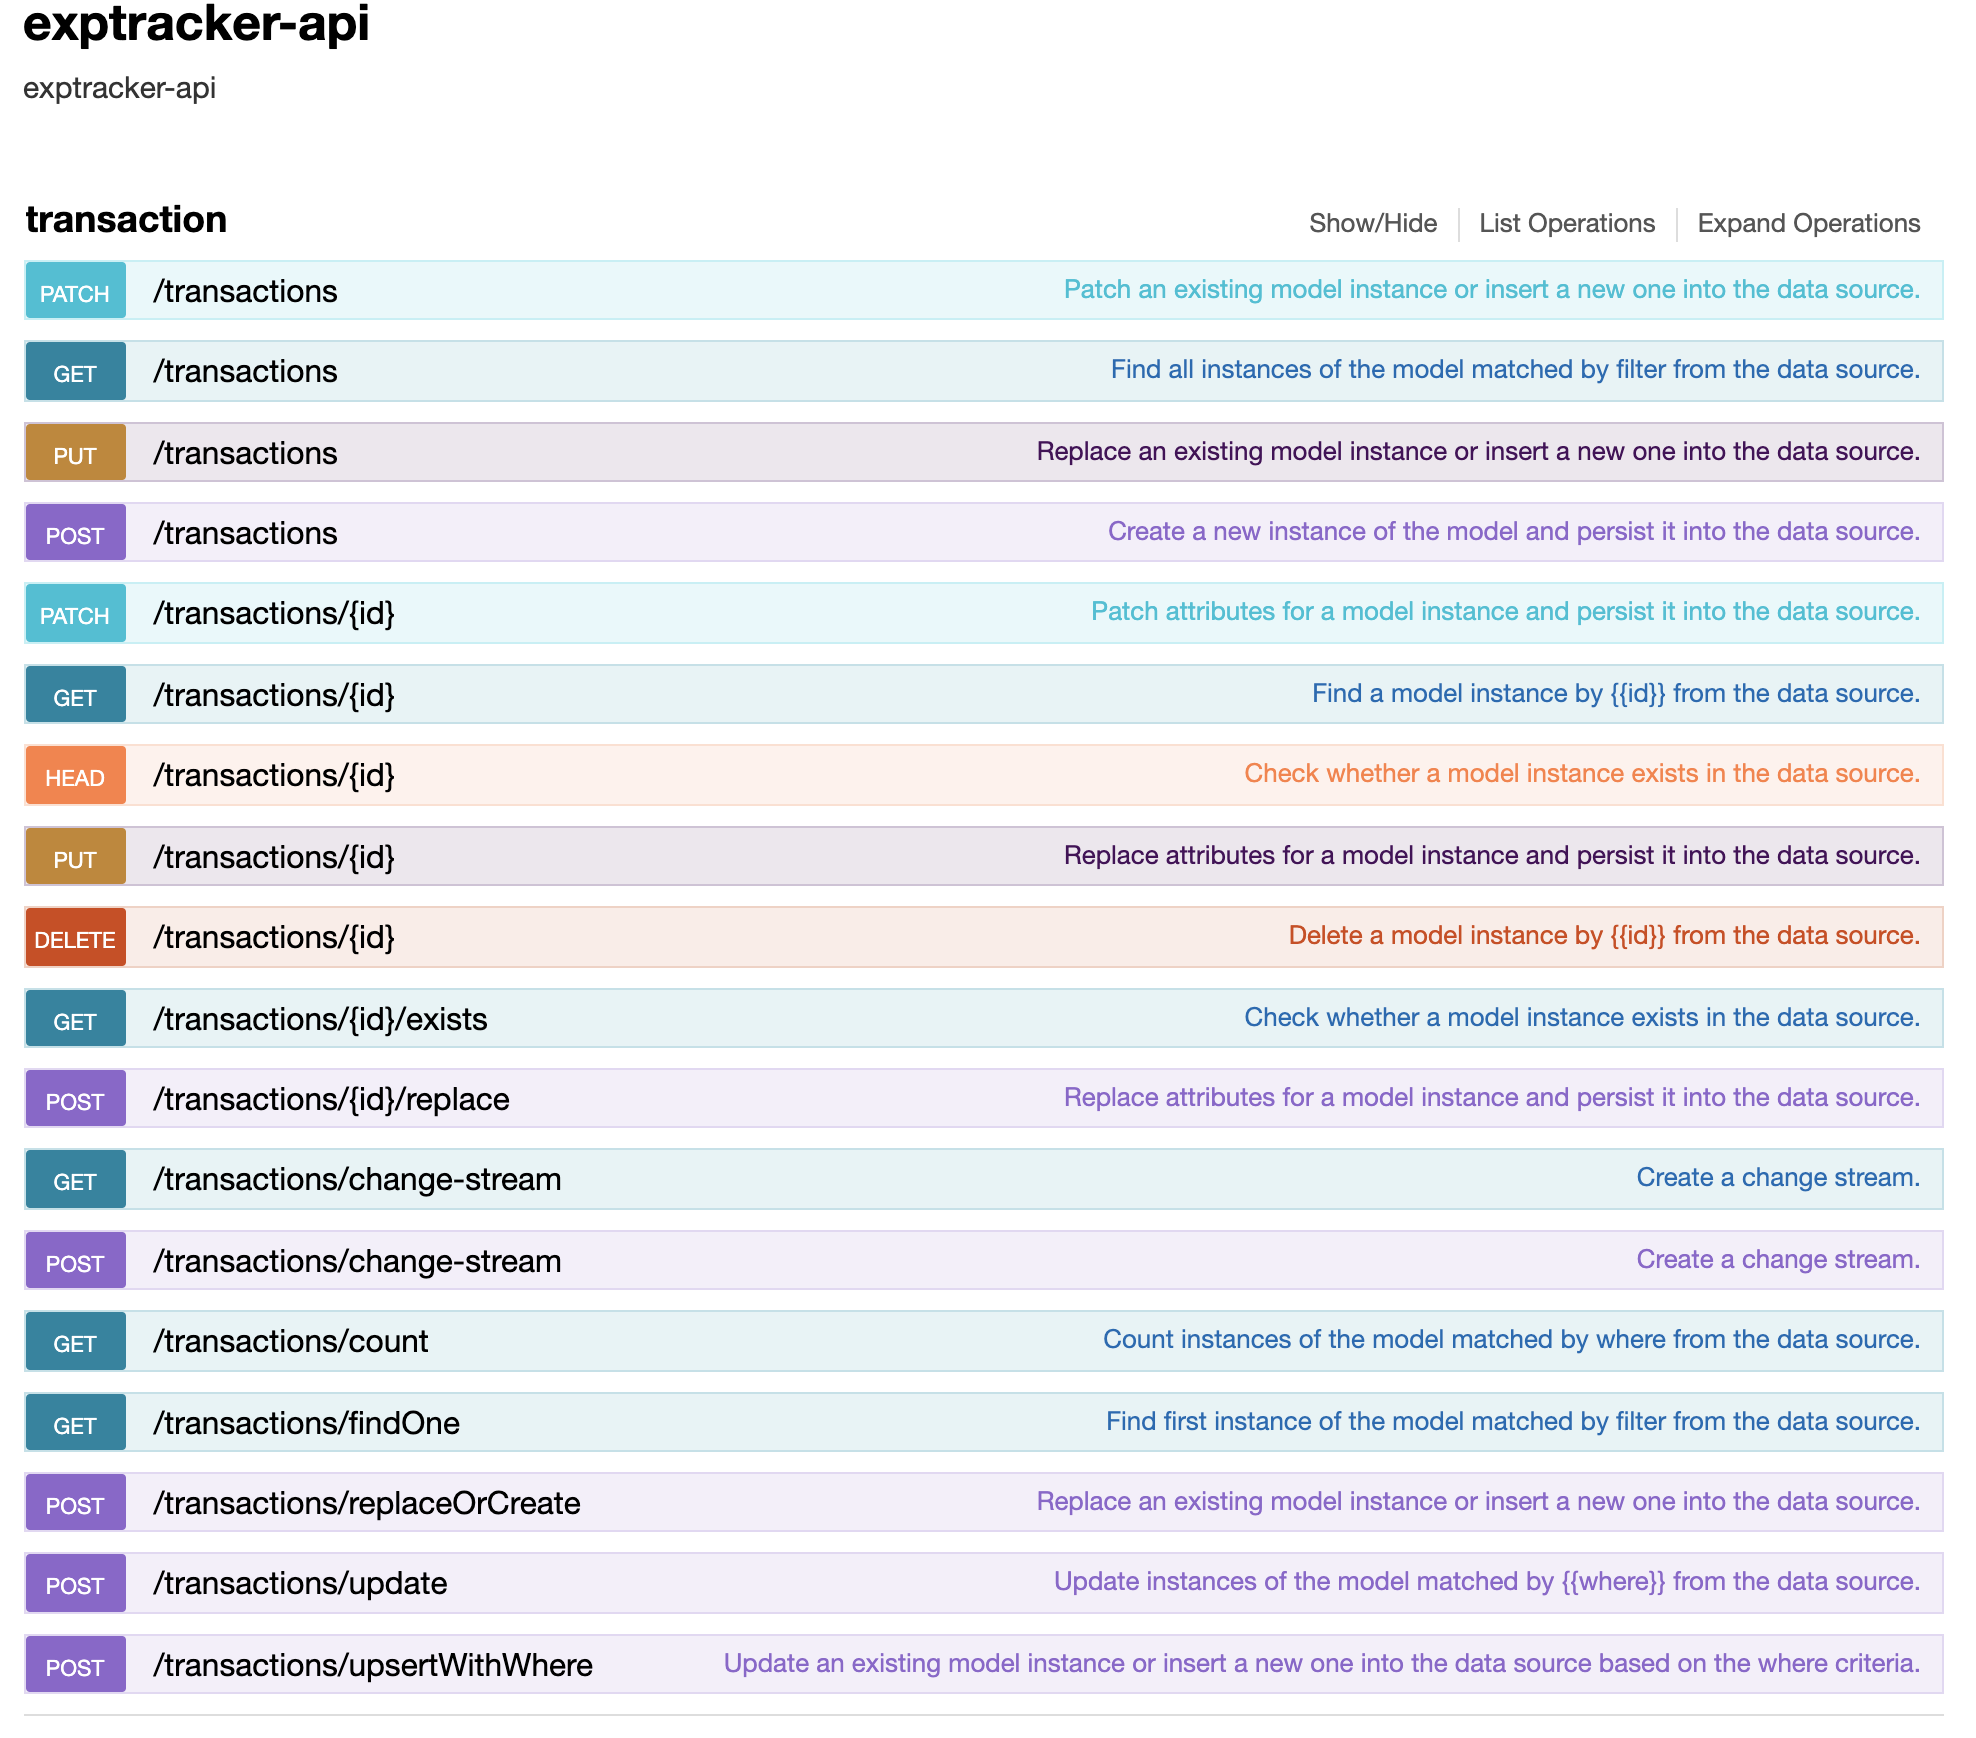
For the API side I have implemented three GET, POST, and DELETE. But I wanted to implelemt all these APIs that I have created using LoopBack (A node module) but the implemented ones show that all of these APIs can be implemented in the same manner as I did the others. If you want to see the full list of APIs you can goto http://localhost:3000/explorer/ after you run the server it'll show you something similar to the screenshot below:
If you want to run the happy case scenario, run the app on iOS at this stage.
After you clone the project and open the project folder, you'll have see two folders:
- ExpTrackerApp
- exptracker-api
Both are required in order to successfully run the project and here is a step by step guide on how:
- Open
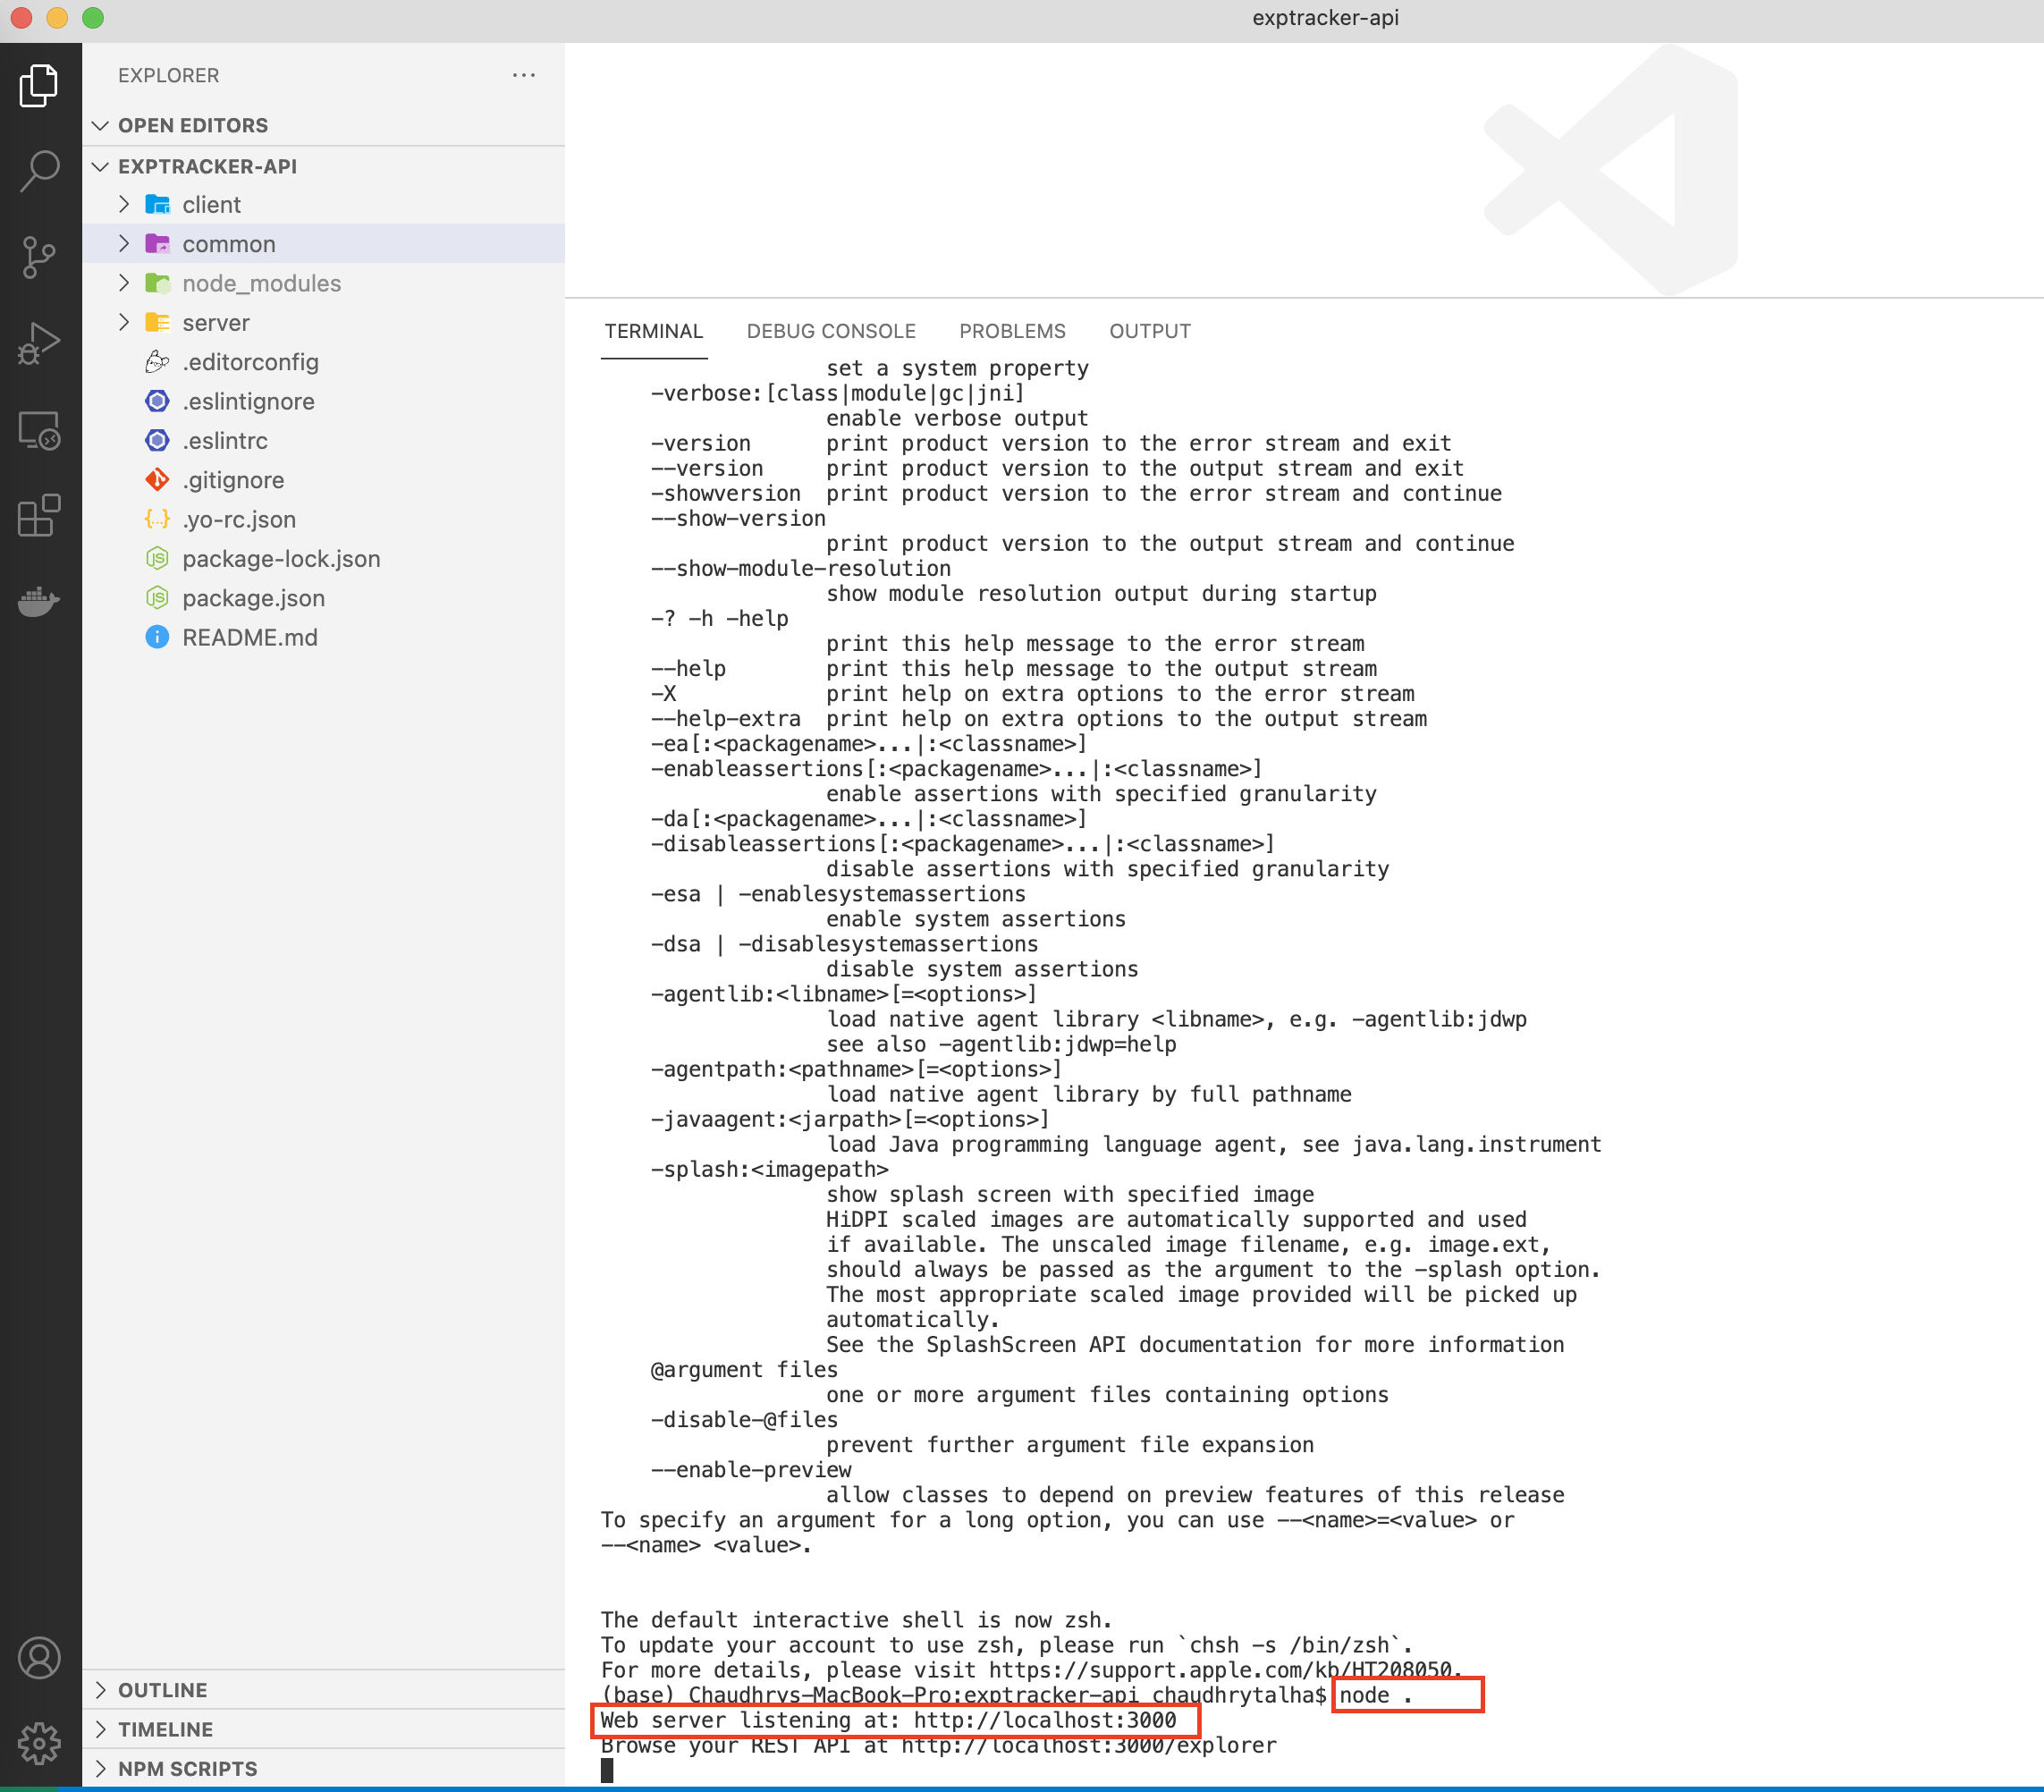
exptracker-apifolder in VSCode and in the terminal runnpm install. - Then after that the same bash terminal inside VSCode run
node .command and it should open show you a Web server listening at link as highlighted in the image below:
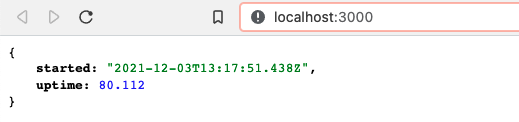
- Open the
http://localhost:3000/in your browser just to make sure that the server is running.
- Next open a new instance of VSCode and open
ExpTrackerAppin it. - From terminal in the newly opened VSCode, run
npm install - For iOS: From the same terminal run
cd iosthepod installthencd ..then to run the appnpx reac-native run-ios - For Android: (If you are running it in a simulator) In
ExpTrackerAppgotosrc/utils/constants.jsand changelocalhostto you local IP address for example change fromhttp://localhost:3000/apitohttp://YOUR_LOCAL_IP:3000/apiand save the file to run again.
If you run into Network error on android or ios first make sure the api is running. If it is then for android you need to replace localhost with your local IP address.
If you face any other issues than Network Error issues with the Android try the following from the terminal inside VSCode that has the ExpTrackerApp folder opened. In the terminal write cd android and then run these commands one after the other:
rm -rf ./app/src/main/res/drawable-*rm -rf ./app/src/main/res/raw./gradlew clean
Then try npx reac-native run-android again.