5090Z LVGL GUI with Okapi Chassis Control
Since 5090Z has disbanded, the team has given me permission to release their TP GUI. 5090Z did not use Okapi for TP. But it looked interesting so when I decide to make a toy for my dog to chase, I though why have him chase a $50 RC car when he could chase a $500 V5 chassis. Since I stared with PROS 3.1.6 it needed to work across multiple files. Figuring out how to do that took longer than it should (don't ask) but I'm not a programmer. Since then some teams have asked how to do that so I decided to combine my Okapi code with the 5090Z GUI. Now the kernel is PROS 3.2.0 but code retains the multi-file format.
To make sure this fusion worked I added an auton in which I did/do have some issues with Okapi turnAngle completing the turn. This prompted the addition of a live telemetry tab and the ability to run auton from opcontrol via the LCD. Also, when an auton function is selected during opcontrol the telemetry tab is set to the active screen. It should be easy enough to see how to move "lv_set_tab_act" to make telemetry be active of normal auton runs if desired.
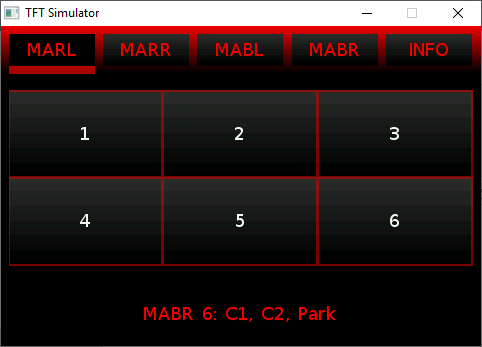
There are 6 tabs: Auton Red Left, Red Right, Blue Left, Blue Right, Info, and Telm. The tabs are selected by touching them. Each of the auton tabs has 6 buttons to select an auton for that starting position. There is a status bar at the bottom of the screen to indicate which auton was selected. The name of the auton is set in the robot_gui.h file. When the matrix button is pressed the status bar at the bottom displays the auton name.
Images are taken from the original version created on the PC and ran on the LVGL PC Simulator.
MARL stands for Match Auton Red Left (I don’t remember why the M is there since these selects
are also used for skills.) The status bar, SB, shows no auton has been selected.

After selecting an auton the SB shows the Auton# and a short text description. (See robot.h
for auton text description.)
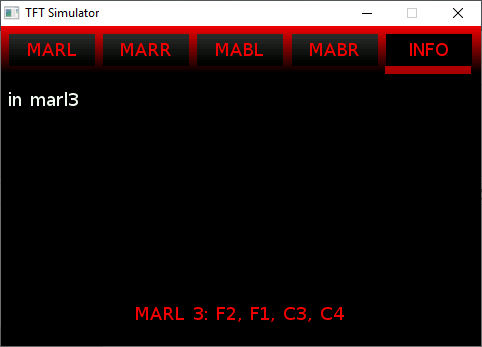
There is also an INFO tab for displaying text on a selected line. The auton function on the
PC Sim prints out its name. This was to test the point to function which was a new concept
for the coder.
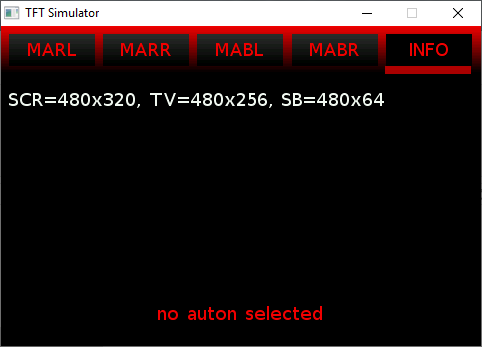
Notice that these images do not have a VEX header bar. This cause some issues with sizing the
objects on the V5 Brain. Since styles were (and still are) a foriegn concept to the coder and
myself, I spent time with him getting the spacing optimal for V5. This is why the info tab
prints the usable screen dimensions.
The robot.h file describes all the attributes of the robot. This includes ports usage, chassis characteristics used for Okapi, and the extern variables for use in opcontrol and auton files.
Disclaimer, since I am not programmer, I don’t know that Okapi is used correctly for a multi-file project but it seems to work in both opcontrol and auton functions. Also, this code should be considered unsupported and use at your own risk.
Here is a video of a pathfinder run testing different profile controllers for straight line and curved movement.
