A simple yaml parser for OpenCV datatypes to Matlab using the new Matlab C++ Data API. The mexfile readcvYaml can be used to transfer data efficiently from OpenCV to Matlab though yaml files. The parser is able to infer the correct datatype at runtime and return it in a corresponding Matlab structure. It uses the OpenCV filestorage class and was tested both in 3.4 as 4.0. Additionally the parser is able to fold indexed variables with same basename into a multidimentional structure.
In the latest update (v2.0) windows mex function and compile instructions are added. Additionally the parces is greatly improved, now allowing nested mixed structures (map,vector) and multichannel matrices. This allows to import raw image data directly from YAML file, however other practical use cases are possible with other data types using matrix container. List of updates:
- Windows mex function
- Multichannel matrix
- Mixed nested structures
- Automatic type deduction of nested structures
- Delimiter option for sequences numbered structures
- File extension safety
cd mex/It's not necessary but good to have level 3 optimisation. by default optimisation level 2 is used. Latest version must be compiled with C++17 support (flag-std=c++17"). Make sure to link with the correct open cv library and include paths:
mex -v CXXFLAGS="\$CXXFLAGS -std=c++17" COPTIMFLAGS="-O3 -fwrapv -DNDEBUG" ../src/readcvYaml.cpp -I [path_to_includes] -L [path_to_lib]e.g.:
mex -v CXXFLAGS="\$CXXFLAGS -std=c++17" COPTIMFLAGS="-O3 -fwrapv -DNDEBUG" ../src/readcvYaml.cpp -I/usr/local/include/opencv4 -L/usr/local/lib/ -lopencv_coreFor Windows link to Pre-built libraries. See general procedure to install OpenCV below. Ensure the to set path to OpenCv DLLs (available via https://opencv.org/) and set mex to VS compiler and compile:
mex -v COMPFLAGS="$COMPFLAGS /std:c++17" COPTIMFLAGS="-O3 -fwrapv -DNDEBUG" ../src/readcvYaml_win.cpp -I"F:\opt\OpenCV-4.5.1\opencv\build\include" -L"F:\opt\OpenCV-4.5.1\opencv\build\x64\vc15\lib" -lopencv_world451 -lopencv_world451dIf mex was successful a verbose message will be printed in the console. Additionally use the provede genMex function.
You do this the easiest by navigating to mex folder and calling:
addpath(pwd); savepath;From now the readcvYaml mex function should be accessible from any path in you matlab environment
Please use the following DOI to cite cvyamlParser:
Please refer to the licence file for information about code distribution, usage and copy rights. The code is provided under BSD 3-Clause License. Refer to the links below for additional licence info regarding OpenCV and Matlab: https://opencv.org/license/ https://in.mathworks.com/pricing-licensing.html
call readcvYaml on the dataset of choice. The function takes as input the filename and the sort option. By default readcvYaml will parse the variables names listed in the yaml file and assign this to a structure with corresponding fields. E.g.:
dataA = readcvYaml('data/test_data.yaml')

 =
   struct with fields:

           structA1: [1×1 struct]
           structA2: [1×1 struct]
            structB: [1×1 struct]
     structnumbered: [1×1 struct]
              matA0: [6×12 double]
              matA1: [6×12 single]
              matA2: [6×12 single]
              matA5: [6×12 single]
              matB1: [5×12 single]
               vec1: [1.2000 1.3000 1.4000]
               vec2: [1.1000 1.3000 1.1000]
              myint: 100
            myfloat: 100.5000
           mystring: 'Brown Vox'

data.structA1

   struct with fields:

     a: 1
     b: 'string1'
     c: 10.2000
     d: [1 2 3 4 5]
In readcvYaml a handy option is implemented to sort the data based on basename and numeric identifier. When using the sorting option entries that have a unique basename will be folded into multidimentional struct. This is very handy when you have similar datasets that belong to the same category or experimental condition etc. This is done like so:
dataB  = readcvYaml('data/test_data.yaml','sorted')
=
  struct with fields:

              matA: [1×4 struct]
              matB: [1×1 struct]
           myfloat: [1×1 struct]
             myint: [1×1 struct]
          mystring: [1×1 struct]
           structA: [1×2 struct]
           structB: [1×1 struct]
    structnumbered: [1×1 struct]
               vec: [1×2 struct]
The sorting then stores the matrices with matA basename in 2d strructure that can be accessed with:
dataB.matA(4).matA

   6×12 single matrix

     50   960   168     0   960   168     0   960   166     0   962   162
      0   966   156     0   968   154     0   964   160     0   960   168
    ...
Normally not allowed to be contructed directly via matlab but possible via C++ API. delimiter "_" stripts numbers from node names:
dataC = readcvYaml('data/test_data.yaml','','_')
dataC.structnumbered
= struct with fields:
0: 'string'
1: 1
2: 3.3000
3: 4
4: 5
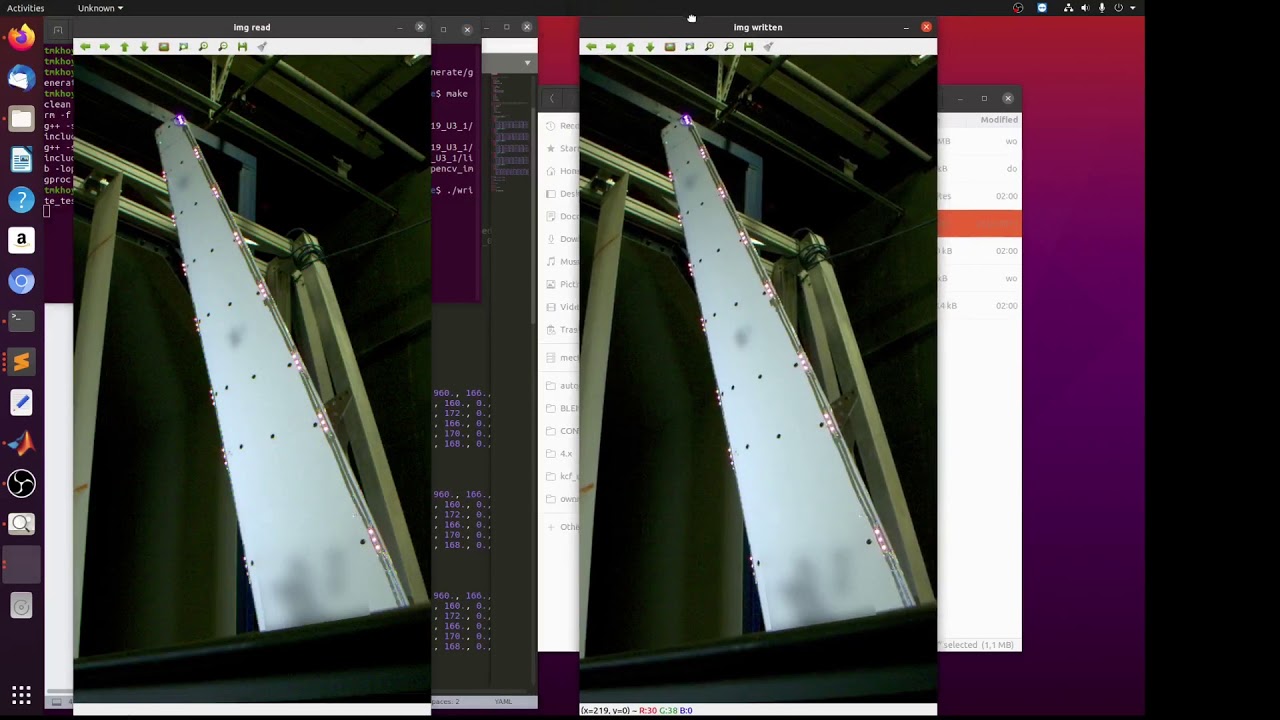
5: [1 2 3]Since v2.0 multichannel matrix support is added. This allows to import raw image data, or any other data directly from YAML:
img_data = readcvYaml('data/multi_channel.yaml','_')

%note opencv uses BGR covert to RGB
img_RGB = img_data.img(:,:,[3 2 1]);

figure();
% show image,
imshow(img_RGB)
The numerical identifier does not have to be continuous, the sorting wil sort and store in ascending order. I.e.: A1, A2, A7, A12 and so forth. s.matA(1).index stores the numerical identifier.
The parser will automatically identify the datatype of the stored variable and return this in the structure. It is able to handle all common types used in OpenCV and Matlab environments. Common datatypes are that are returned from OpenCv to matlab:
OpenCV 		--> 	Matlab  	--	sizeof
CV_8U ,CV_8US 	-->	int8_t(char)	--	1
CV_16S,CV_16U	-->	short		--	2
CV_32S		-->	int		--	4
CV_32F		-->	float		--	4
CV_64F		-->	double		--	8
The parser can convert vectors, matrices and single variables stored in yaml file. Nested structures of mixed types are allowed. Although untested it should also work with xml files. Refer to the test_data.yaml and genyamlData.cpp see an example of how the data is generated. For generating image data see write_test_img.cpp
A benchmark results are provided for linux and osx platforms in folders linux and osx. The benchmark test were perfomed on standard Dell Optiplex 7400 and 2,3 GHz Intel Core i5 16G macbook, respectively.
To run the benchmark follow the steps:
Go to src folder and compile genyamlData:
cd src/
g++ -std=c++11 genyamlData.cpp -o genyamlData -I [path_to_cv_includes] [opencv_core_lib]
e.g.:
g++ -std=c++11 genyamlData.cpp -o genyamlData -I /usr/local/include/opencv4 -lopencv_coreThen run with:
genyamlData [outout_path_of_yaml] e.g.:
genyamlData ../data/test_data.yamlIn folder benchmark a simple script is provided to run readcvYaml on your own data. Simply choose the number of iterations with N parameter and run benchmarktest_cvYaml.m. The benchmark was performed for 5x[1000x3] double, 5x[2000x3] float, 5x[2000x3] int, and 5x[3000] double, 5x[6000] float and 5x[6000] int vectors. See test_data.yaml for the actual dataset.
Here the result of the benchmark test on linux Optiplex system. The sorting is slightly more expensive as expected but negligible for the current dataset.
| Average t per iteration | Boxplot data |
|---|---|
 |
 |
General procedure to install OpenCV with Pre-built libraries:
- download libraries to local path (https://opencv.org/releases/) e.g. F:\opt\OpenCV-4.5.1
- set environment variable PATH to include the DLLs \opencv\build\x64\vc15\lib
- ensure to have latest VS Windows Visual Studio SDK.
- In the VS installer app modify -> individual options -> add Windows Universal CRT SDK
- set mex compiler to VS -> mex -setup -> VS
- link libraries and provide include path to mex: -I"[dir]\opencv\build\include" -L"[dir]\opencv\build\x64\vc15\lib"
- dependencies: -lopencv_world451 -lopencv_world451d