These Python Pygame applications are for creating 8x8 pixel images and animations for loading onto either a Raspberry Pi [Sense HAT] (https://www.raspberrypi.org/blog/buy-the-sense-hat-as-seen-in-space/) (as used on the Astro Pi), [UnicornHat] (http://shop.pimoroni.com/products/unicorn-hat) or [UnicornPHAT] (https://shop.pimoroni.com/products/unicorn-phat) LED matrix.
It offers a choice of several colours for the LEDs:
Red, Blue, Green, Yellow, White, Orange, Pink, Purple, Cyan
See my [blog] (http://richardhayler.blogspot.com/2015/06/creating-images-for-astro-pi-hat.html) for more details, screenshots, updates and other Raspberry Pi projects.
###Installation
This software is written for Python3.x
- Install the pypng Python3 module
sudo pip3 install pypng
- Install the appropriate library for your HAT
- Clone this repo
- Run startx then open a terminal window.
- Run 8x8grid.py. This will detect which kind of HAT you have and run the appropriate sub-program ( 8x8grid-unicorn for UnicornHat) or 8x8grid-sense.py (for Sense HAT). If you are using a Unicorn PHAT, type 'y' when asked and 8x8grid-unicornphat will be run. You can, of course, just run either program directly (which will also work if you want to use Python2.x).
This Python program uses pygame and the Sense/UnicornHAT APIs to create and edit single frames or multi-frame animations. The animations can be exported as Python code or a single frame can be saved as an 8x8 png.
Animations and single frames can be directly loaded on the the LED matrix.
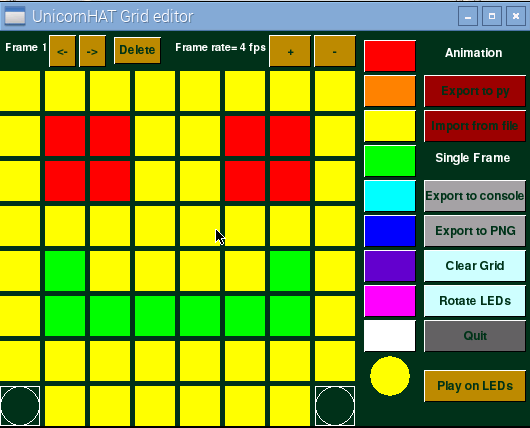
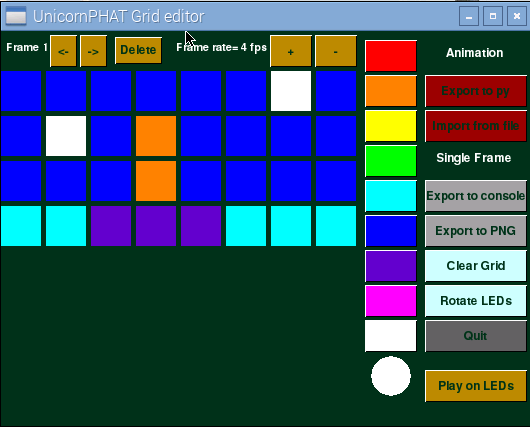
##Buttons
###Export
There are two ways to load a pattern on to the LED matrix using Python:
- As an 8x8 pixel png file (load_image()
- As a 64 element list, with each element being the RGB value of the led (xxxxx())
So to build and display an animation, we either need a series of pngs or a bunch of consecutive lists.
There are three export methods from the animator program, two for simgle frames and one for the entire sequence.
####Single Frame
Export to console: simply prints the current frame as a list to the console. (terminal window).
Export to png: creates an 8x8 pixel png of the current frame, image8x8.png
####Animation
Export to py: generates a .py file which when run, will display the animation on the LED matrix. The file contains a few lines of Python and the raw list containing each frame (itself a list) as elements. If you want to use the list in another Python program, simply copy-n-paste the FRAMES list from the file. The output file is always called animation8x8.py and will be overwritten without warning you if it already exists.
When you've saved an animation, I recommend you copy anaimation8x8.py to another filename to avoid accidental overwriting.
If your animation is just a single frame, this method will work fine too and is the recommended way of saving your work.
###Import
The 'Import from file' loads the contents of animation8x8.py into the editor.
###Basic features
On the right hand side are a set of buttons to select the desired LED colour. If you want a different colour then you can edit (or add) a setColourXXX function in 8x8grid-xxxxhat.py and change the RGB value.
The currently selected colour is shown in the circle below the buttons.
To set an LED's colour, click on its position in the editing window. If the LED is already set to a colour then clicking again will turn it to off, even if you have selected a new colour as the current one in use. Clicking a second time will set the LED to the new colour.
To add a new frame, click on the >> button. This will create a duplicate on the current frame and increment the frame number displayed above. If you want a blank frame rather than a copy of the preceding one, just click the 'clear frame' button.
The >> button is also used to move to the next frame if one exists. There is currently no way to add a new frame in between existing frames.
Similarly, the << button moves backwards through the frames of the animation.
The 'Play on LEDs' button will load the image you have created onto the LED matrix and – if there is more than one frame - run through the frames of the00 animation.
To increase or decrease the speed at which the animation is played on the LED matrix, use the + and – buttons. You should the Frames per Second (FPS) value change accordingly. Note that this will also alter the frame-rate set in the exported .py file (default is 1 fps).
The 'Rotate LEDs' button will rotate the image displayed on the LEDs by 90 degrees clockwise for SenseHAT and UnicornHAT and 180 degrees for UnicornPHAT. It will not alter the orientation of the image within the editor.
As mentioned earlier, the 'Clear Grid' button will set all the LEDs on the screen to off (this will not affect any image loaded on to the LED matrix).
The 'Delete' button will remove the current frame and set the displayed frame to be the previous on in the series (e.g. if you're editing frame 6 and press the 'Delete' button, you will set the current frame to number 5).
The 'Quit' button will exit the program.
###Colour Definitions:
RED: [255,0,0]
BLUE: [0,0,255]
GREEN: [0,255,0]
PURPLE: [102,0,204]
PINK: [255,0,255]
ORANGE:[255,128,0]
YELLOW:[255,255,0]
WHITE:[255,255,255]
CYAN: [0,255,255]