AWS Device Farm integration with Jenkins CI
This plugin provides AWS Device Farm functionality from your own Jenkins CI server:
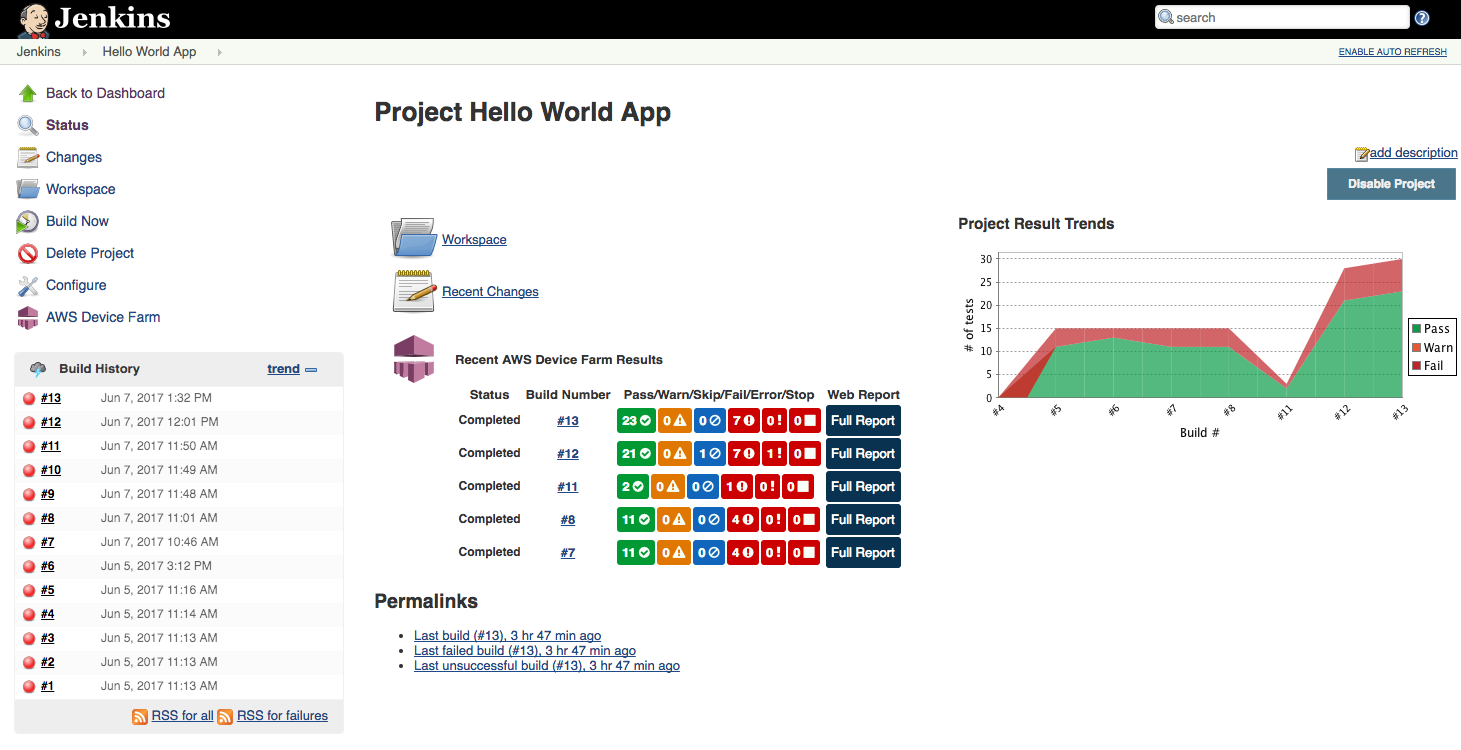

It also can pull down all of the test artifacts (logs, screenshots, etc.) locally:

- Clone the GitHub repository.
- Import the Maven project into your favorite IDE (Eclipse, IntelliJ, etc.).
- Build the plugin using the Makefile (
make clean compile). - The plugin is created at
target/aws-device-farm.hpi.
- Copy the
hpifile to your Jenkins build server and place it in the Jenkins plugin directory (usually/var/lib/jenkins/plugins). - Ensure that the plugin is owned by the
jenkinsuser. - Restart Jenkins.
- Log into your Jenkins web UI.
- On the left-hand side of the screen, click “Manage Jenkins”.
- Click “Manage Plugins”.
- Near the top of the screen, click on the “Advanced” tab.
- Under the “Upload Plugin”, click “Choose File” and select the AWS Device Farm Jenkins plugin that you previously downloaded.
- Click “Upload”.
- Check the “Restart Jenkins when installation is complete and no jobs are running” checkbox.
- Wait for Jenkins to restart.
- Log into your AWS web console UI.
- Click “Identity & Access Management”.
- On the left-hand side of the screen, click “Users”.
- Click “Create New Users”.
- Enter a user name of your choice.
- Leave the “Generate an access key for each user” checkbox checked.
- Click “Create”.
- View or optionally download the User security credentials that were created; you will them them later.
- Click “Close” to return to the IAM screen.
- Click your user name in the list.
- Under the Inline Policies header, click the “click here” link to create a new inline policy.
- Select the “Custom Policy” radio button.
- Click “Select”.
- Give your policy a name under “Policy Name”.
- Copy/paste the following policy into “Policy Document”:
    {
        "Version": "2012-10-17",
        "Statement": [
            {
                "Sid": "DeviceFarmAll",
                "Effect": "Allow",
                "Action": [ "devicefarm:*" ],
                "Resource": [ "*" ]
            }
        ]
    }
- Click “Apply Policy”.
- Log into your Jenkins web UI.
- On the left-hand side of the screen, click “Manage Jenkins”
- Click “Configure System”.
- Scroll down to the “AWS Device Farm” header.
- Copy/paste your AKID and SKID you created previously into their respective boxes.
- Click “Save”.
- Log into your Jenkins web UI.
- Click on the job you wish to edit.
- On the left-hand side of the screen, click “Configure”.
- Scroll down to the “Post-build Actions” header.
- Click “Add post-build action” and select “Run Tests on AWS Device Farm”.
- Select the project you would like to use.
- Select the device pool you would like to use.
- Select if you'd like to have the test artifacts (such as the logs and screenshots) archived locally.
- In “Application”, fill in the path to your compiled application.
- Select the test you would like run and fill in all required fields.
- Click “Save”.
- AWS SDK 1.10.5 or later.