This repository contains all files and explanations needed to perform the second lab of the CESE4010 - Advanced Computing Systems course at the Delft University of Technology.
Quick version:
- Download the baseline project.
- Implement each of the stages of an image processing pipeline using only CUDA
- You cannot use any CUDA-Accelerated Libraries or other external libraries, only pure CUDA / C / C++.
- Benchmark each of the stages.
- Optimize the final pipeline as much as you can.
- Write a report.
- Turn in your report.
- Rejoice with the knowledge that you have gained.
The long version:
The questions below can be read as a sequence, and they will become a sort of lab manual!
Answer: NO, DO NOT FORK IT (publicly). See the Lab 1 statement about this.
CUDA is NVIDIA's proprietary (freeware) programming model for GPGPU. Originally CUDA stood for Compute Unified Device Architecture. We can use CUDA to program GPGPUs like we did with OpenCL. However, CUDA has some advantages and some dis- advantages that will be discussed in the lectures.
One major advantage of CUDA that the toolchain around it is very mature.
Especially the profiling tool is very useful for this lab.
You are expected to use nsight-sys for this lab.
Also, the CUDA API is a bit more abstract, so it's a bit easier to write
CUDA code.
Even if you don't have an NVIDIA GPU, you can still install the CUDA toolkit.
This is useful if you want to use the graphical profiling tool nsight-sys.
For Ubuntu, you can install the CUDA toolkit by sudo apt install nvidia-cuda-toolkit. For Nsight, please download the .deb package from the link below.
NVIDIA has a few nice ones on their Developer Blog:
A CMake script has been supplied with the baseline project. If you are in the project directory, you can type:
mkdir debug
cd debug
cmake ..
This will create a build directory, go into that directory, and lets CMake create the project files there. Note that the CMake script will exclude files from the build where you are supposed to implement technologies that your systems doesnt have any support for (it will complain about this on the command line).
Now you can build it with:
make -j8And run it with
./imgproc-benchmark -hTo show help information.
The baseline project implements an image processing pipeline that attempts to make an image look as if it was reflected in rippling water.
It performs the following steps. Suppose we start with the following image:
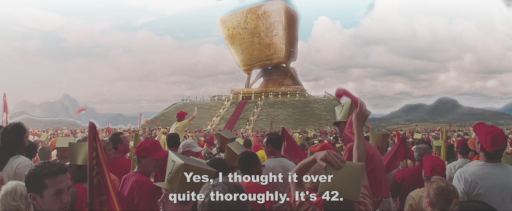
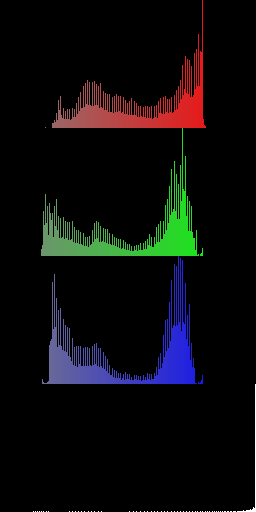
- Histogram calculation
- We count the number of pixels with a specific intensity for each color channel.
- This is used to determine the parameters for the next step.
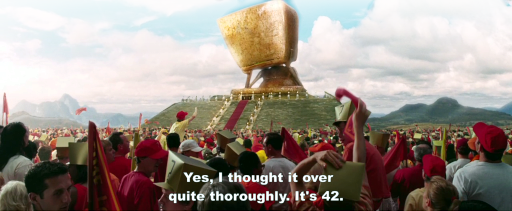
- Contrast enhancement.
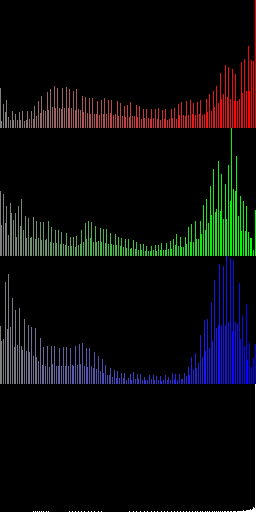
- We enhance the contrast by making the histogram "wider" for each channel.
- In this way we get a "clearer" image:
- Also look at the resulting histogram:
- Ripple effect.
- We apply the ripple effect by doing some trigonometry.

- Gaussian blur.
- Because the ripple effect makes some parts of the image look rather jagged, smooth the final image using a Gaussian blur.

- That surely looks fancy!
You should read the baseline source code and figure out how the program works.
Then, you must:
- Implement the whole image processing pipeline using CUDA.
You may get some unexpected outcomes, such as:
- "cudaErrorNoKernelImageForDevice"
- The result is obviously wrong.
These errors might be caused by the fact that the CUDA compiler is using a higher compute capabilities than the GPU supports. You can find your GPU model by typing:
lspci | grep VGASuppose your GPU model is "Quadro K2200". You can find out that the maximum supported compute capability for the K2200 is 5.0 using this link. The default compute capability for CUDA 11.x is 5.2, which is a little higher than what the device can support.
So you need to tell the CUDA compiler that you want to use a lower compute capability to compile your code. You can configure this at the cmake stage:
cmake -DCMAKE_CUDA_FLAGS="-arch=compute_50" ..Remember to clean your cmake cache before re-configuring your project.
We will run the following test for all images that are supplied:
imgproc-benchmark -a <image.png>
You can write the commands in a shell script and execute it with sh filename.sh. All commands in that file will be automatically executed. A sample shell script to locally build and run lab2 is provided in auto_build_run.sh.
Nsight-systems becomes available when you load the CUDA toolkit. Use nsys to access its CLI version.
An example of profiling your application with Nsight-systems:
nsys profile ./imgproc-benchmark -a ../images/42.png
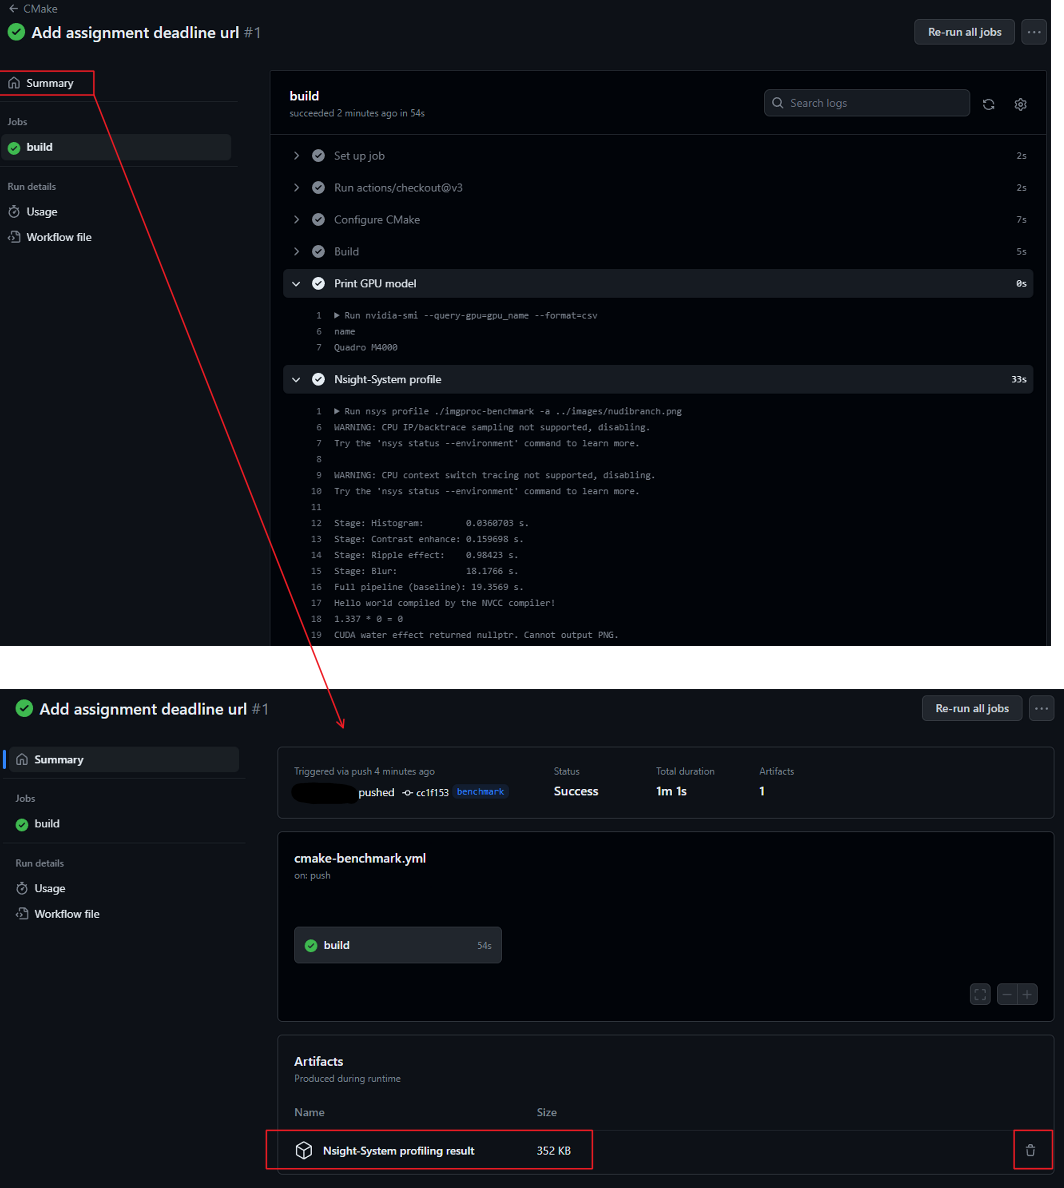
After execution, you can find a report file called report{x}.nsys-rep in your build folder. Copy this file to your computer and open it with Nsight-systems installed on your computer (CUDA-supported GPUs not required). You should be able to see a detailed visual result like the one below.

For lab2, you can use the GitHub Runner to benchmark and profile your code by pushing your code to the benchmark branch. The Nsight system report is available in Artifacts. Notice that Nsight reports will be removed after 24 hours because of the storage limitation.
IMPORTANT: Delete your Nsight report by clicking the trash bin after downloading it.
For students who do not want to install Nsight-system on their computers, you can try an obsolete tool called nvprof. Just put nvprof in front of your application command.
Install nvprof: sudo apt install nvidia-profiler
Example: nvprof ./imgproc-benchmark -a ../images/42.png
Yes. It's called the NVIDIA Visual Profiler, or nvvp on the command line.
If you install the toolkit on your laptop, you can use this GUI to visualize the
profile.
You can then run nvprof with the --output-profile <profile file name>.nvvp option.
You can also enable --analysis-metrics for more elaborate nvvp options.
Example:
nvprof --analysis-metrics --output-profile imgproc-benchmark.nvvp ./imgproc-benchmark -a ../images/42.png
After you've run your application within nvprof, you can then copy the file
to your laptop/desktop and open it in the visual profiler tool. This presentation elaborates some more details with examples on using nvprof.
The largest one, the other ones are supplied for debugging purposes. It is not recommended to start with the largest one. Only when you are sure your implementation is fully debugged for the smaller images, it makes sense to start the benchmarks on the largest one. Avoid running large images on the login node because the login node is for debugging purposes. Performance results from the login node might be inaccurate under heavy load.
You can find them here:
You can do so, but it should not be necessary, unless you find any bugs. If you find any, please let us know, and we will try to update the baseline projects as soon as possible.
Other than that, if you change any of the files, you should explain in your report why you did so.
Yes. This is a the LaTeX template and it is actually mandatory to use this template.
- PNG support by:
https://github.com/lvandeve/lodepng - Image 42.png is a still from "The Hitchhiker's Guide to the Galaxy" by Touchstone Pictures.
- The Nudibranch lives happily at approximately
0°21'31.1"S 121°51'08.7"E.