The demo lets you easily build a smart indoor garden and connect it to the Tuya IoT Platform. With the Tuya Smart app, you can control this garden and monitor plants anytime. The demo describes the development process and provides a material list, circuit diagram, and complete code. You can build a smart garden with the WB3S module and connect it to the Tuya IoT Platform to achieve the following functions:
- Remote control with an app.
- Dim the warm white and multi-color grow light.
- Self-watering and scheduled light filling.
| Smart Indoor Planter Lite |
|---|
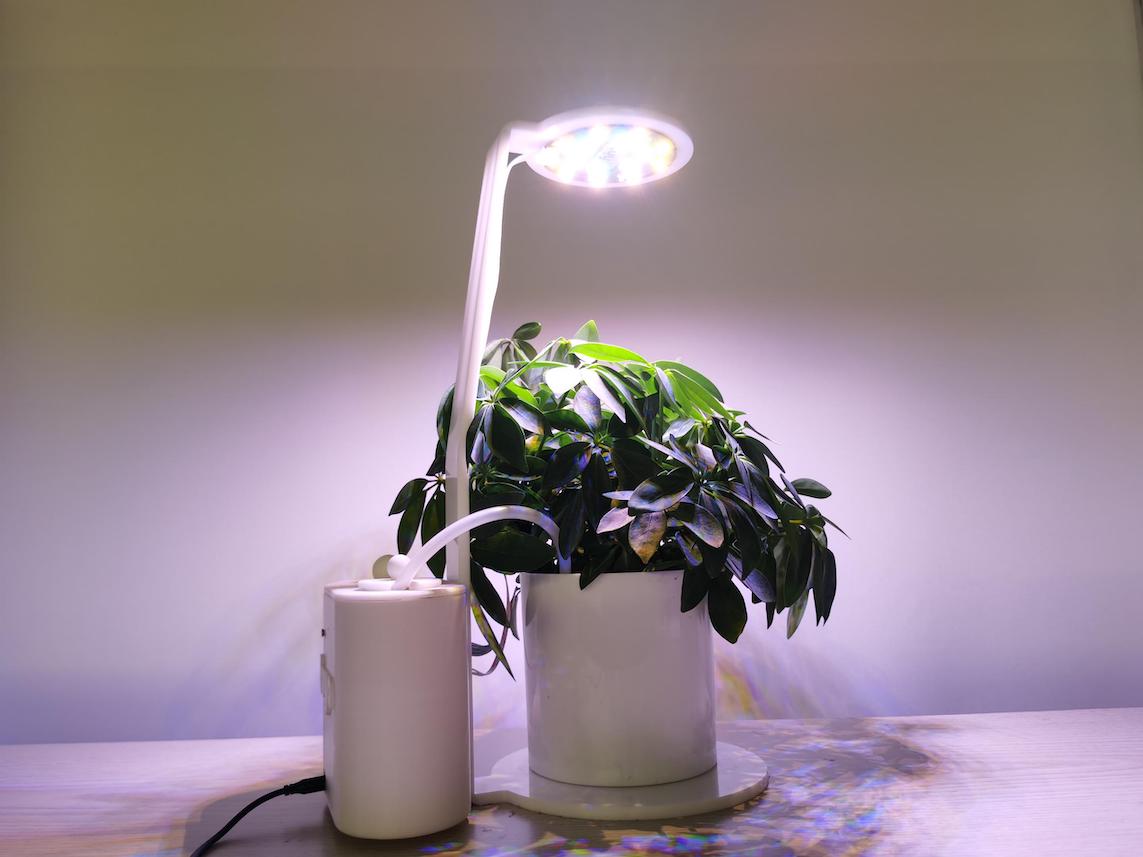 |
| Smart Indoor Planter Lite Demo |
-
Download the SDK.
-
Download the demo to the
appfolder in the SDK directory.$ cd apps $ git clone https://github.com/tuya/tuya-iotos-embeded-demo-wifi-ble-smart-planter-lite -
Execute the following command in the SDK root directory and start to build firmware.
sh build_app.sh apps/tuya-iotos-embeded-demo-wifi-ble-smart-planter-lite tuya-iotos-embeded-demo-wifi-ble-smart-planter-lite 1.0.0
-
For more information about flashing and authorization, see Burn and Authorize WB Series Modules.
├── src
|    ├── plant_driver
|    |      └── plant_pwm.c         // PWM driver. The PWM API on the SoC layer is called and re-encapsulated.
|    ├── plant_soc               // APIs running on the SoC layer.
|    ├── tuya_device.c           // Entry file of application layer.
|    ├── app_plant.c             // The application layer.
|    └── plant_control.c         // Control logic of each functional component.
|
├── include				// Header file directory
|    ├── plant_driver
|    |      └── plant_pwm.h
|    ├── plant_soc
|    ├── tuya_device.h
|    ├── app_plant.h
|    └── plant_control.h
|
└── output              // Production
Entry file: tuya_device.c
Function: device_init()
- Call
tuya_iot_wf_soc_dev_init_param()for SDK initialization to configure working mode and pairing mode, register callback functions, and save the firmware key and PID. - Call
tuya_iot_reg_get_wf_nw_stat_cb()to register callback of device network status. - Call the initialization function
app_plant_init()in the application layer.
- Send DP data:
dev_obj_dp_cb() -> deal_dp_proc() - Report DP data:
dev_report_dp_json_async()
| Function name | OPERATE_RET dev_report_dp_json_async(IN CONST CHAR_T *dev_id,IN CONST TY_OBJ_DP_S *dp_data,IN CONST UINT_T cnt) |
|---|---|
| devid | For gateways and devices built with the MCU or SoC, the devid is NULL. For sub-devices, the devid is sub-device_id. |
| dp_data | The name of DP struct array |
| cnt | The number of elements in the DP struct array |
| Return | OPRT_OK: success. Other values: failure. |
| Light board | Water pump | Soil moisture sensor |
|---|---|---|
R P24 |
Relay P14 |
ADC3 P23 |
G P7 |
||
B P6 |
||
W P8 |
Demo Center: https://developer.tuya.com/en/demo/smart-planter
You can get support from Tuya with the following methods:
- Tuya IoT Developer Platform: https://developer.tuya.com/en/
- Help Center: https://support.tuya.com/en/help
- Service & Support: https://service.console.tuya.com