Installer for Red5 Pro Server
NOTE: if you are running CentOS 7, please verify that in /usr/local/red5pro/conf/webrtc-plugin.properties
openssl=false. You may have to modify that file manually. This must be set for WebRTC to function on CentOS.
The Red5 Pro installer is a shell script that will install a single server Red5 Pro instance. The script presents a collection of menu-driven options to help achieve various Red5 Pro setup tasks including SSL certificate via Letsencrypt, adding/changing license key, and managing the red5pro service. You may also check your Red5 Pro installation and verify which version of Java you are running.
Red5Pro supports the following Linux distributions: Ubuntu 16.04 or Centos 7.x
The script requires super user privileges to execute and carry out subtasks. Hence you must execute the script as a superuser on your linux system (sudo...).
NOTE 1 : The entire content provided in the 'installer' directory of this repo is required.
NOTE 2 : This installer cannot be used to deploy more than one installation of Red5 Pro on the same instance. To install a new distribution you need to uninstall the previous one.
CentOS only instructions:
Most CentOS distributions do not include
git, so you must install it manually. In your server's command line, run the following command:
sudo yum -y install git
For both Ubuntu & CentOS: From your server's command line enter the following commands:
git clone https://github.com/red5pro/red5pro-installercd red5pro-installersudo chmod +x *.shsudo ./red5proInstaller.sh
You are now running the installer!
- Press 1 then Enter to open the installer menu.
- Press 1 then Enter again to install the latest red5pro build.
- (Press 2 if you have a custom build of red5pro)
On linux you can hit
CTRL + Cin the terminal anytime to interrupt/abort a script execution.
The configuration file conf.ini is located in the same location as the program itself. It contains the basic configuration information needed for the installer script to run. Some of the configurations can be changed and some are fixed. Below is the content of the conf.ini file.
# JAVA REQUIREMENTS
# -------------------
MIN_JAVA_VERSION="1.8"

# Backup Folder => [ located in home directory ]
# ----------------------------------------------
DEFAULT_BACKUP_FOLDER=red5pro_backups

# Download folder name => [ Resolved in current directory ]
# ----------------------------------------------
RED5PRO_DEFAULT_DOWNLOAD_FOLDER_NAME=tmp

# Red5pro install location
# ----------------------------------------
DEFAULT_RPRO_INSTALL_LOCATION=/usr/local
DEFAULT_RPRO_FOLDER_NAME=red5pro

# Logging settings
# ----------------------------------------
RED5PRO_LOG_FILE_NAME=rpro_installer.log
RED5PRO_LOGGING=true

# CUSTOM URL LOCATION
# ---------------------------------------
RED5PRO_DOWNLOAD_URL=

# INSTALLER CLEANUP
# ---------------------------------------
RED5PRO_INSTALLER_OPERATIONS_CLEANUP=1

# MINIMUM PERCENTAGE OF SYSTEM MEMORY TO ALLOCATE TO JVM
# ---------------------------------------
RED5PRO_MEMORY_PCT=80
RED5PRO_UPFRONT_MEMORY_ALLOC=true

# INSTALL RED5PRO AS SERVICE BY DEFAULT
# ---------------------------------------
RED5PRO_INSTALL_AS_SERVICE=true

# SERVICE TYPE [ init.d (1) or jsvc (2)
# ---------------------------------------
RED5PRO_SERVICE_VERSION=2

# SSL INSTALLER
# ---------------------------------------
RED5PRO_SSL_LETSENCRYPT_FOLDER_NAME=letsencrypt
RED5PRO_SSL_LETSENCRYPT_GIT=https://github.com/letsencrypt/letsencrypt
REDRED5PRO_SSL_LETSENCRYPT_EXECUTABLE=letsencrypt-auto
RED5PRO_SSL_DEFAULT_HTTP_PORT=5080
RED5PRO_SSL_DEFAULT_HTTPS_PORT=443
RED5PRO_SSL_DEFAULT_WS_PORT=5080
RED5PRO_SSL_DEFAULT_WSS_PORT=443
RED5PRO_SSL_DEPRECATED_WS_PORT=8081
RED5PRO_SSL_DEPRECATED_WSS_PORT=8083MIN_JAVA_VERSION: Minimum version of java (JRE/JDK) that is required by the installer to install Red5 Pro on the system. This value should not be changed by the user.DEFAULT_BACKUP_FOLDER: Filepath of the Red5 Pro backup directory. This is useful if you are installing Red5 Pro while there is already an installation present.The installer prompts you to back it up to a safe location before proceeding with the new installation.DEFAULT_RPRO_INSTALL_LOCATION: Red5 Pro install directory path (default is/usr/local).DEFAULT_RPRO_FOLDER_NAME: Name of the Red5 Pro folder (default isred5pro).RED5PRO_LOG_FILE_NAME: Name of installer log file. Defaults torpro_installer.log.RED5PRO_LOGGING: Boolean flag to enable or disable logging. Defaults totrueRED5PRO_DOWNLOAD_URL: Custom Red5 Pro archive URL for installation. The url should host your own Red5 Pro archive in a valid structure. Must link directly to the archive, not to a directory.RED5PRO_INSTALLER_OPERATIONS_CLEANUP: Choose whether or not to remove the downloaded Red5 Pro zip file after installation is finished. Set to1to remove the zipfile and0to leave it in place. (Default value is1, as this option can be helpful in debugging).RED5PRO_INSTALL_AS_SERVICE: Determines whether the installation process of Red5 Pro is followed by Red5 Pro service installation automatically by default or not. Setting the value tofalsedisables service installation prompt during normal Red5 Pro installation. Defaults totrue.RED5PRO_MEMORY_PCT: How much (percentage) of system memory to allocate for JVM to Run Red5 Pro. Defaults to80.RED5PRO_UPFRONT_MEMORY_ALLOC: Indicates whether minimum jvm memory should be allocated with the maximum memeory allocable upfront. Defaults totrue.RED5PRO_SERVICE_VERSION: The default installation will set up Red5 Pro service usingsystemctl(option2). If you prefer to use the older method (/etc/init.d) change this value to1.RED5PRO_SSL_LETSENCRYPT_FOLDER_NAME: The Letsencrypt SSL installer directory name. This is created in the installer directory. This option should not be edited.RED5PRO_SSL_LETSENCRYPT_GIT: Letsencrypt SSL installer GIT repo URLRED5PRO_SSL_LETSENCRYPT_EXECUTABLE: The Letsencrypt SSL installer executable. This option should not be edited.RED5PRO_SSL_DEFAULT_HTTP_PORT: Red5 Pro default HTTP port. This is used by the SSL installer to configure the HTTP port value (5080is the default).This option should not be edited.RED5PRO_SSL_DEFAULT_HTTPS_PORT: Red5 Pro default HTTPS port. This is used by the SSL installer to configure the HTTPS port value (443is the default). This option should not be edited.RED5PRO_SSL_DEFAULT_WS_PORT: Red5 Pro default unsecure websocket port. This is used by the SSL installer to configure the unsecure websocket port value (5080is the default).This option should not be edited.RED5PRO_SSL_DEFAULT_WSS_PORT: Red5 Pro default secure websocket port. This is used by the SSL installer to configure the secure websocket port value (443is the default). This option should not be edited.RED5PRO_SSL_DEPRECATED_WS_PORT: Red5 Pro deprecated unsecure websocket port. This is used by the SSL installer to configure the unsecure websocket port value for older builds (8081is the default). This option should not be edited.RED5PRO_SSL_DEPRECATED_WSS_PORT: Red5 Pro deprecated secure websocket port. This is used by the SSL installer to configure the secure websocket port value for older builds (8083is the default). This option should not be edited.
As the script runs in the terminal, it detects the operating system details such as Distribution (OS name), Version (OS version), Kernel type (64/32 bit), User's home directory, Red5pro default backup directory (located inside the home directory) and the default install location (the current directory).
The detected information is printed on screen and then the menu which allows you to select an operation mode is rendered. The program supports two modes of operation:
- Basic Mode: Provides most of the options for new installations.
- Utility Mode: Provides utilities for doing more with the Red5 Pro installation
You can select a menu option by typing the number that represents that option and pressing [ ENTER ]
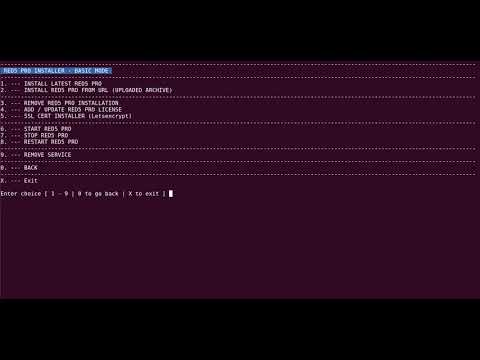
The basic mode provides all the options commonly required to setup a new Red5 Pro installation and other operations such as starting / stopping the red5pro service. The basic menu option allows you to:
Allows you to install Red5 Pro from the https://www.red5pro.com website. You must have an existing account on red5pro.com to use this option. Before proceeding, the script checks for a few basic requirements:
- Java: Java (JRE / JDK 1.8 is required to install Red5pro)
- unzip: Unzip utility is required to unpack zip archives.
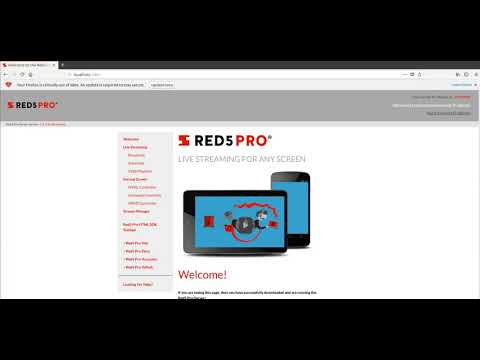
Once the requirements are met the script proceeds to 'obtaining the latest Red5pro from Red5pro.com'. At this point, it prompts you for site credentials (email & password). This information is posted to the website to help authenticate your download. If authentication succeeds, it begins downloading the latest Red5 Pro archive file from red5pro.com.
* If an existing script is found, the script tries to stop Red5 Pro, in case it was running, before it can continue.
* If there is an existing Red5 Pro installation found at the location, the files will be backed up to the default backup location
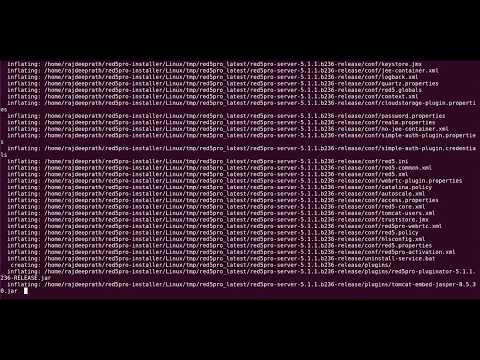
The program then extracts the archive file's content and copies the Red5 Pro files into the install location.
Depending on whether the libraries are found in the OS distribution, the script helps you install them using the platform specific installation method. (ie: Ubuntu uses apt-get, where as CentOS uses yum to install libraries).
The script prompts to determine if an autostart service is required for the Red5 Pro installation. If user accepts, The program creates a startup script for the current OS platform. This script helps Red5 Pro start automatically with the operating system.
ScreenCast
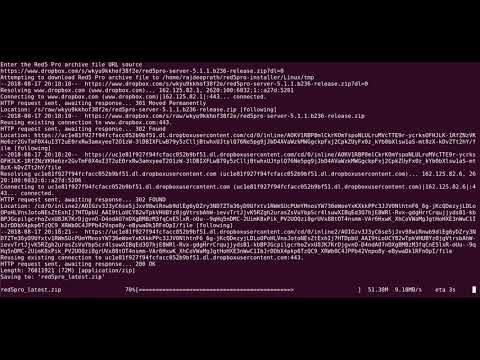
This option lets you install Red5 Pro from an arbitrary Red5 Pro server archive located anywhere on the internet or LAN. In case you have a custom version of Red5 Pro that you wish to install you should use this option. As long as the archive structure matches, you can host the file anywhere on the internet. This feature is specifically useful when installing pre-customized Red5 Pro builds.
Here, the script checks the basic Red5 Pro requirements as with the first option (INSTALL LATEST RED5PRO). Once requirements are met, it prompts you for the fully qualified URL of the Red5 Pro server archive (From S3 bucket or dropbox etc). Please verify that the file is publicly accessible. You MUST link DIRECTLY to the archive, not to a directory containing it.
Custom archives should be in one of two forms:
-
Single level archive: An archive created from inside the
red5proroot directory, by selecting/adding all the files to archive. ie{archive.zip} => red5.sh. -
Two level archive: An archive created from outside the
red5proroot directory matching the archive structure that is available from red5pro.com.ie{archive.zip} => {red5profolder} => red5.sh.
The program extracts the archive file's content and copies the Red5 Pro Server files into the install location. The rest of the process is exactly the same as for the first option (INSTALL LATEST RED5PRO).
ScreenCast
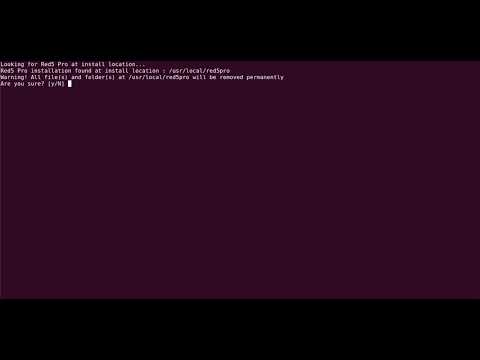
This option lets you remove an existing Red5 Pro installation. Removal deletes all the files and removes the red5pro service (if it exists).
On selection of this option, the program looks for existing Red5 Pro installation in the install location. If an installation is found, the user will be prompted to confirm the removal action. If user confirms it (by pressing Y + [ ENTER ] ), the script deletes the red5pro installation as well as any red5pro service installed on the OS.
ScreenCast
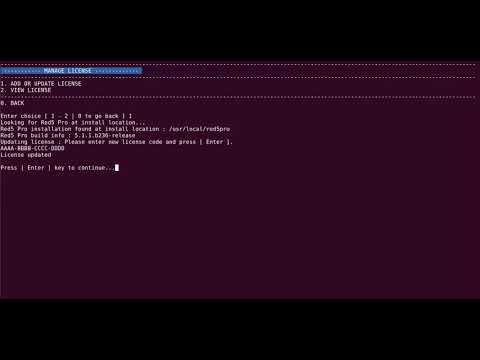
This option navigates to a sub-menu which allows us to view, install and update a Red5 Pro license.
1. ADD / UPDATE LICENSE : Provides option to add a new license or update one if it already exists. The program looks for an existing Red5 Pro Server installation and then the LICENSE.KEY file at expected location. If a file is found it allows you to enter a red5pro license code from the terminal interface.
2. VIEW LICENSE : Provides option to view an existing Red5 Pro Server license via the LICENSE.KEY file. The program looks for an existing Red5 Pro Server installation and then the LICENSE.KEY file at expected location. If a file is found it displays the content of the file on terminal.
ScreenCast
This option allows you to install a free SSL certificate (Obtained via letsencrypt CA), on your Red5 Pro instance. Prior to using this option you need to make sure you have a valid DNS name that points to your instance.
The installer script uses the Red5 Pro SSL page as guide to create a SSL installation automation.
Installer supports newer builds (>=5.4.0 and onwards) as well as older builds (<=5.3.x) by checking for websocket implementation using the presence of the
websocket-x.x.x.jarfile in the plugins directory. New websocket implementation uses websockets classes from the tomcat plugin and thewebsocket-x.x.x.jaris no longer present in the newer builds.
Prerequisites for SSL Installation:
Domain Name: You should have a valid domain / subdomain name for which the SSL certificate is to be requested.DNS A record: You should have a valid DNS typeArecord created for your domain management panel, that maps the public IP of the instance where Red5 Pro is running to the domain / subdomain name.Port Allowance: Standard SSL port (443) as well as http port (80) must be open for the certificate generation to be successful.
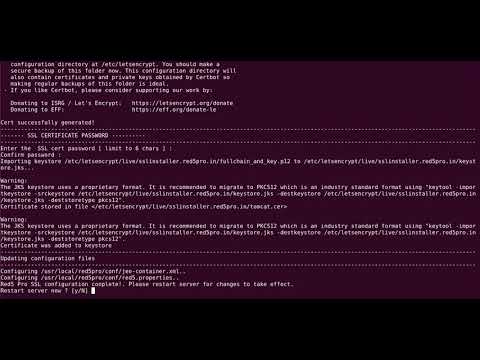
ScreenCast
This option allows you to start the Red5 Pro Server. On selecting this option, the program first checks to see if a red5pro service is installed on the system or not. If a red5pro service is found, it attempts to start Red5 Pro Server using the service. If no service was installed it attempts to start the Red5 Pro Server using 'red5.sh' script located at the Red5 Pro Server install location.
ScreenCast
This option allows you to stop the Red5 Pro Server. On selecting this option, the program first checks to see if a red5pro service is installed on the system or not. If a red5pro service is found, it attempts to stop the Red5 Pro Server using the service. If no service was installed it attempts to stop Red5 Pro using 'red5.sh' script located at the Red5 Pro Server install location.
ScreenCast
This option allows you to restart the Red5 Pro Server.This option is available only if Red5 Pro is installed as a service.
This option allows you to install or uninstall Red5 Pro service. If Red5 Pro service was registered during installation, the option displays REMOVE SERVICE, otherwise as INSTALL AS SERVICE. Selecting REMOVE SERVICE will remove the installed red5pro service, whereas selecting INSTALL SERVICE will install the red5pro service.
Check the default install location for an existing Red5 Pro Server installation and displays the version if found.
Selecting this option lets you see the current java version on your system. If java is not found, the program will print a message to notify the same.