Home
uShadow edited this page Sep 30, 2014
·
18 revisions
The calibration process is essential to make finger pointing and clicking accurate. For the theoretical explanation of the process, please refer to section 3.2 of this draft paper.
The calibration steps are:
- Delete the following entries (the entire lines) in config/calibration.properties: screen-pts, image-pts, image-test-pts.
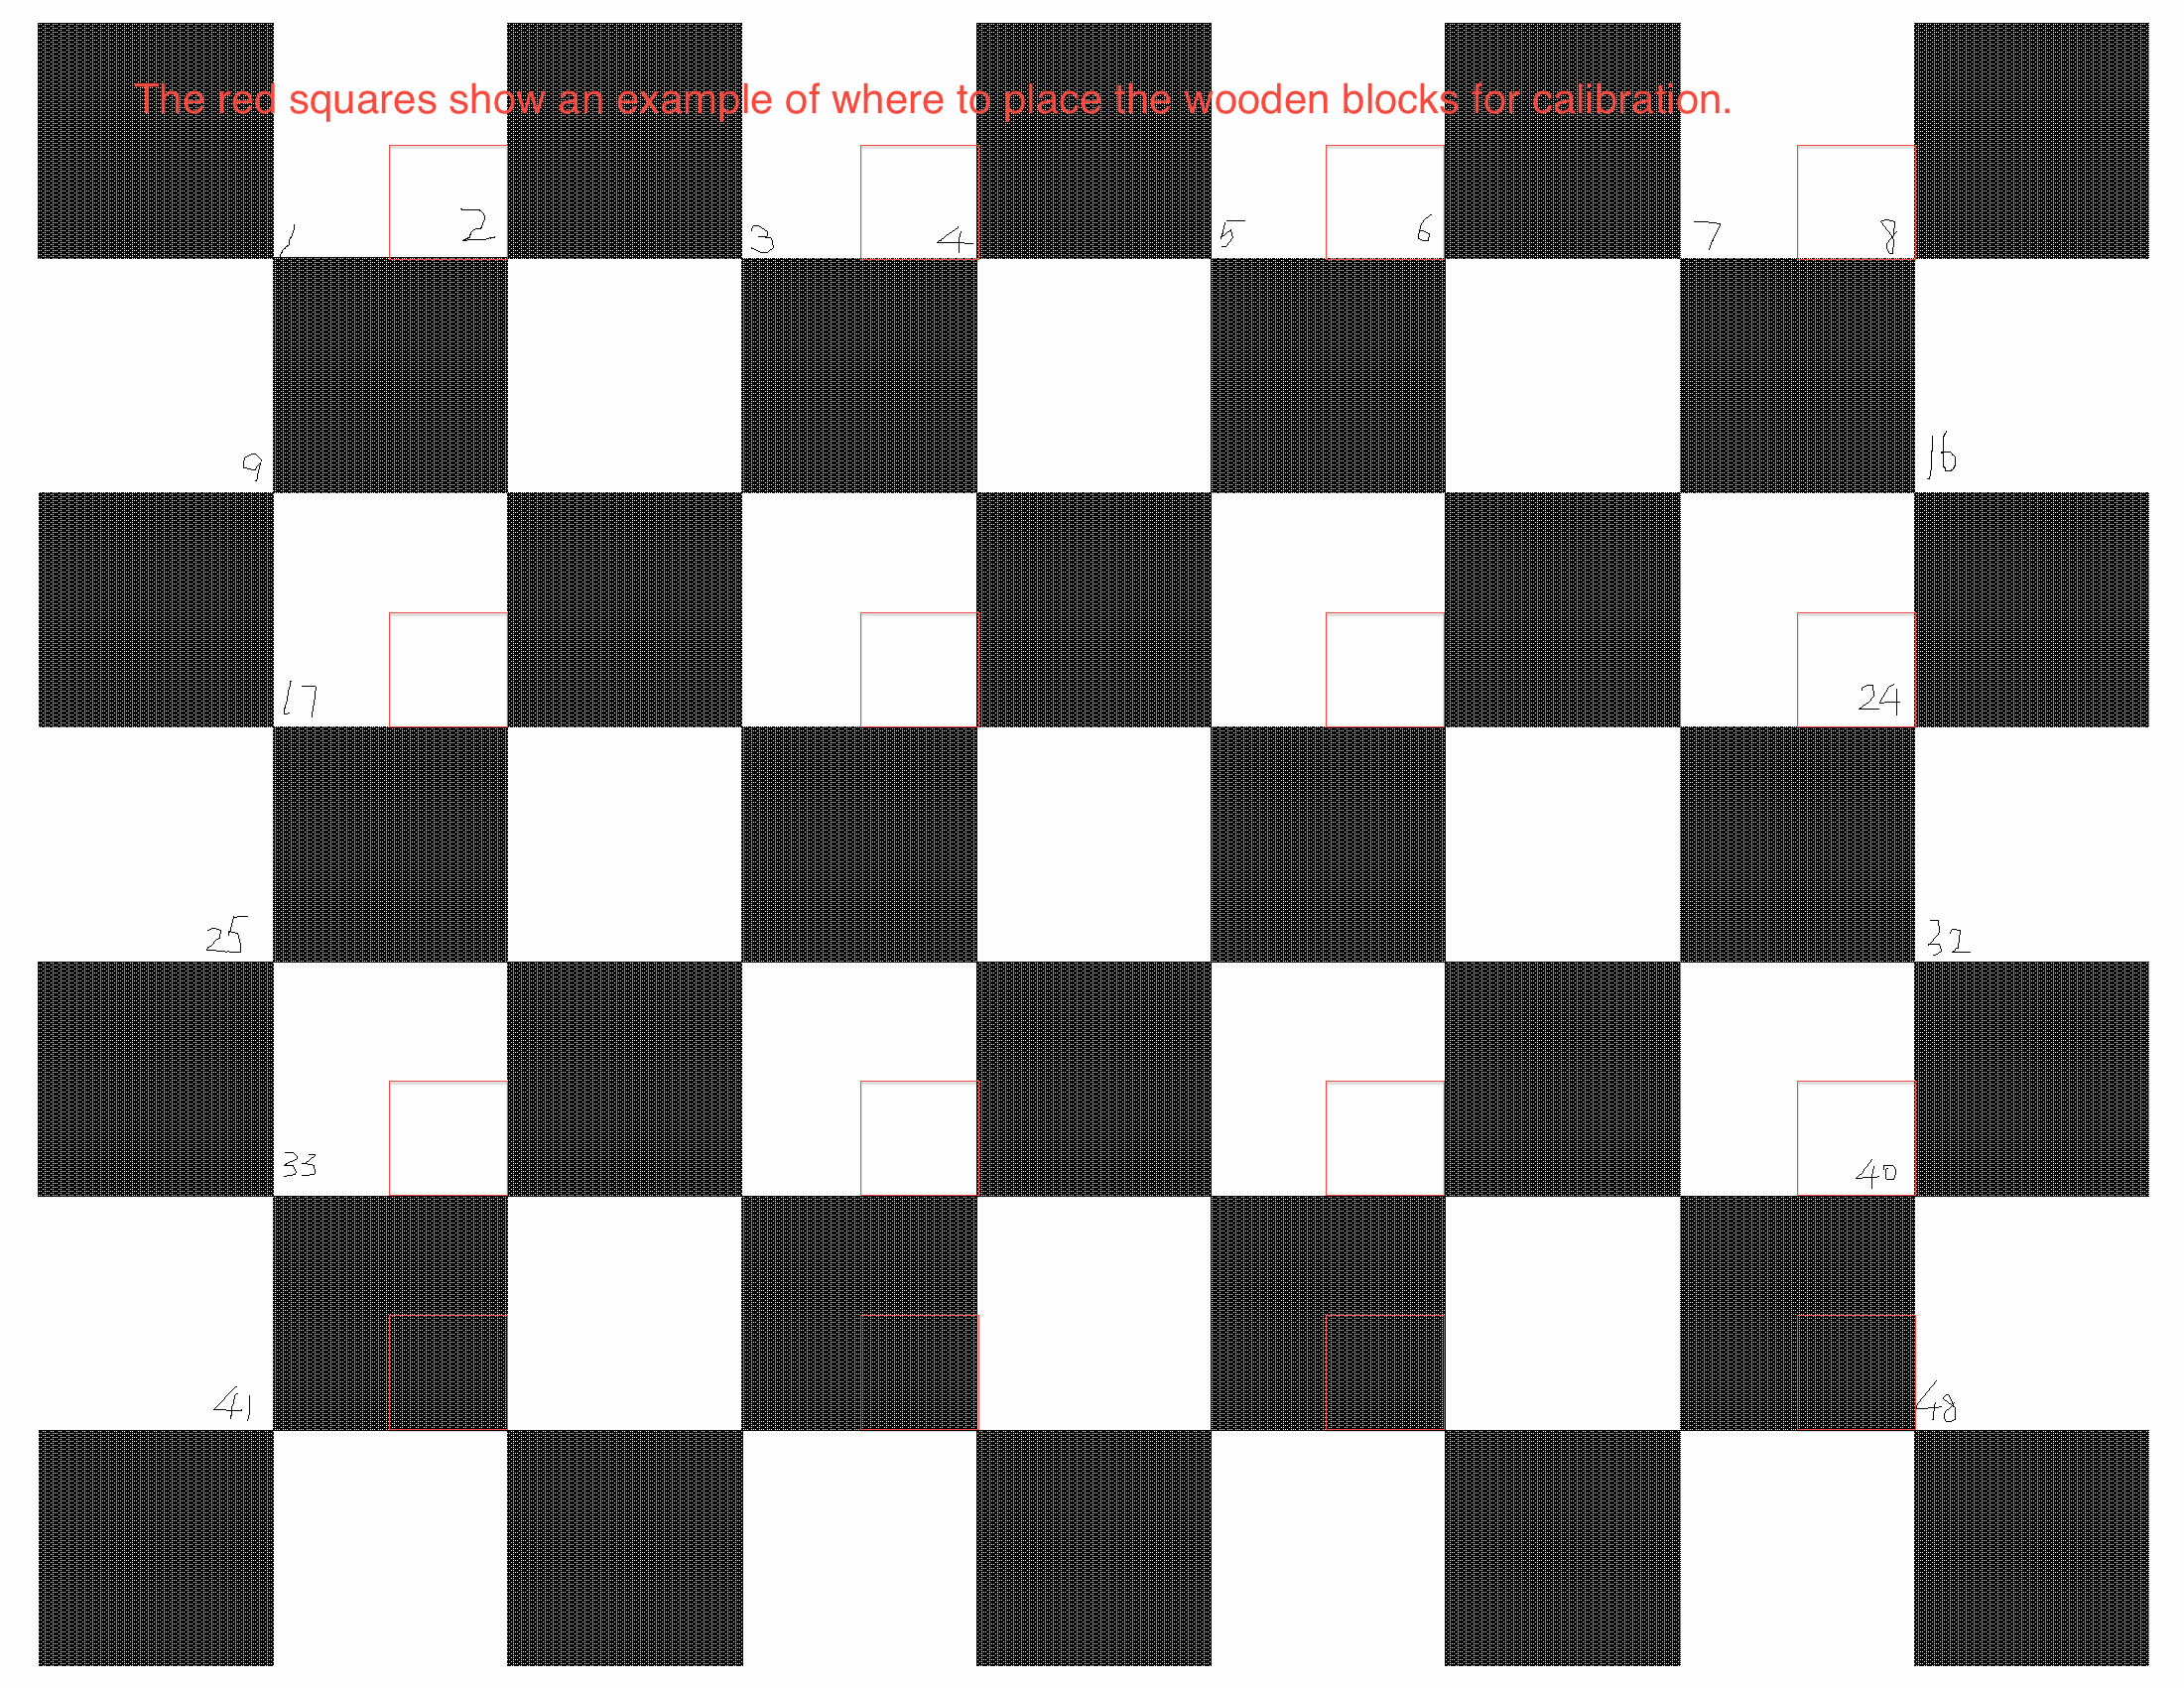
- Run
ant CalibrationApp, and place 16 wooden cubic blocks at the corners of the checkerboard image. This is to create some depth difference for the depth sensor. See figure 3 in the draft paper. - Click at the bottom right corner of each wooden block. When you finish, click "1" to update the screen points. The points are also saved in data/calibration/Screen.pts.
- Click "P" to capture a depth image.
- Click the corresponding corner of the blocks in the depth image in the same order. When you finish, click "2" to update depth image points. The points are also save in data/calibration/Image.pts.
- Click "A" to run the calibration computation which uses the corresponding screen points and depth image points. The computed calibration parameters are save in data/calibration/calibration.txt by default.
- Click "Q" or Escape to exit the program.
To test the calibration error, we need to label another set of corresponding points in the screen coordinate and image coordinate systems. We can do these optional steps before clicking "A".
- Focus on the checkerboard window and click "C" to clear the points on the checkerboard.
- Rearrange the blocks so that they are on different corners.
- Click at the bottom right corner of the each wooden block. When you finish, click "3" to update the test screen points. The points are also saved in data/calibration/ScreenTest.pts.
- Click "P" to capture another depth image.
- Click the corresponding corner of the blocks in the depth image in the same order. When you finish, click "4" to update test depth image points. The points are also save in data/calibration/ImageTest.pts.
- Click "A" to run the calibration computation. This will also log an average test squared error computed from the corresponding test points to the command line.
- Click "Q" or Escape to exit the program.
During the calibration process, if you want to reuse the previous labeled points, you can specify the previous saved points files in config/calibration.properties.
screen-pts=Screen.pts
image-pts=Image.pts
screen-test-pts=ScreenTest.pts
image-test-pts=ImageTest.pts