Home
Welcome to the East Village Trading Bot Wiki!
Here you will learn how to go from zero to a self-running robot on a web-server. All these steps were done on Windows 10 (version 2004). Most of the steps occur when dealing with the amazon web server. Once you have logged into the server, everything will be in linux commands and will be the same for everyone. If you follow this step by step, exactly, you should be up and running in no time.
To simplify installation, go ahead and register accounts on these four sites. We will be pulling resources from them as we go.
- Register account on https://alpaca.markets -> The exchange we will be trading on. Works with real/paper money
- Register account on https://tradingview.com -> This used to send alerts to the bot based off market strategies
- Register account on https://aws.amazon.com -> We will use this to host our bot and keep it running 24/7
- Register account on https://ngrok.io -> Used to create our static webhook url
- Download FileZilla - https://filezilla-project.org -> Used to easily update our bot in GUI environment
Bookmark these sites and remember your logins as you may need to revisit these sites in the future.
Alright, now for the fun part. You are only 15 minutes away from having your own 24/7 stock trading robot.
Download the East Village Trading Robot folder
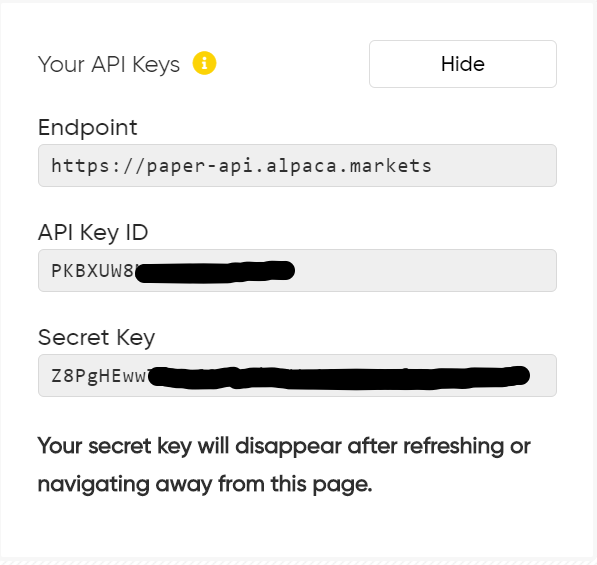
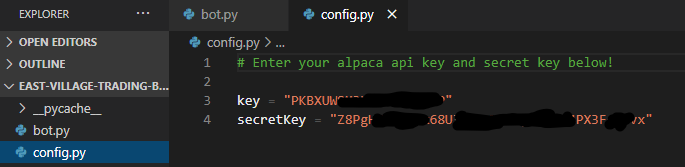
###This works with live or paper trading. I recommend using the paper money api keys


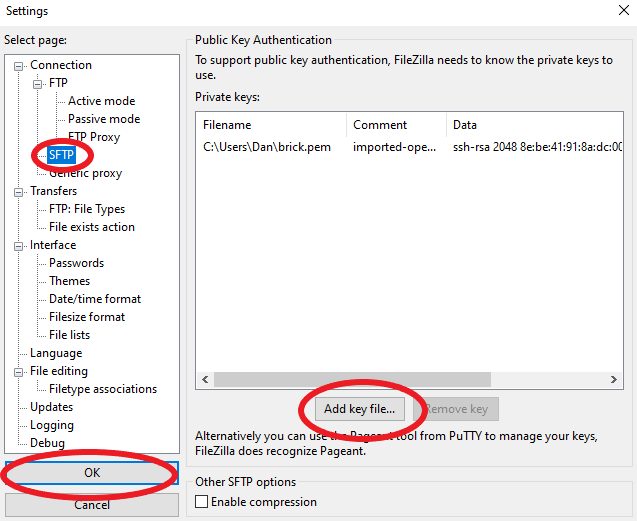
Save the downloaded key pair to your user folder: (ex: C:/Users/your pc user name here/example.pem)`


Login to your ngrok account. After you login you will see see the screen below.
Download the linux (ARM64) file (this is for your linux server). And copy the authentication token into your notepad for later

Login to your ngrok account. After you login you will see see the screen below.
Download the linux (ARM64) file (this is for your linux server). And copy the authentication token into your notepad for later

Install WSL version 2 (windows subsystem for linux). Follow Microsoft's WSL install guide

Once WSL is run in PowerShell (or you are in macOS/linux terminal), copy and paste the text below (replace the path and file name with your own)
cp /mnt/c/Users/YOUR_PC_USER_NAME_HERE/example_REPLACE_with_Your_own.pem ~/example_REPLACE_with_Your_own.pem
We need to change the file permissions so copy and paste this chmod command (replace with your linux subsystem username and .pem file name)
chmod 400 /home/YOUR_LINUX_SUBSYSTEM_USERNAME_HERE/example_REPLACE_with_Your_own.pem
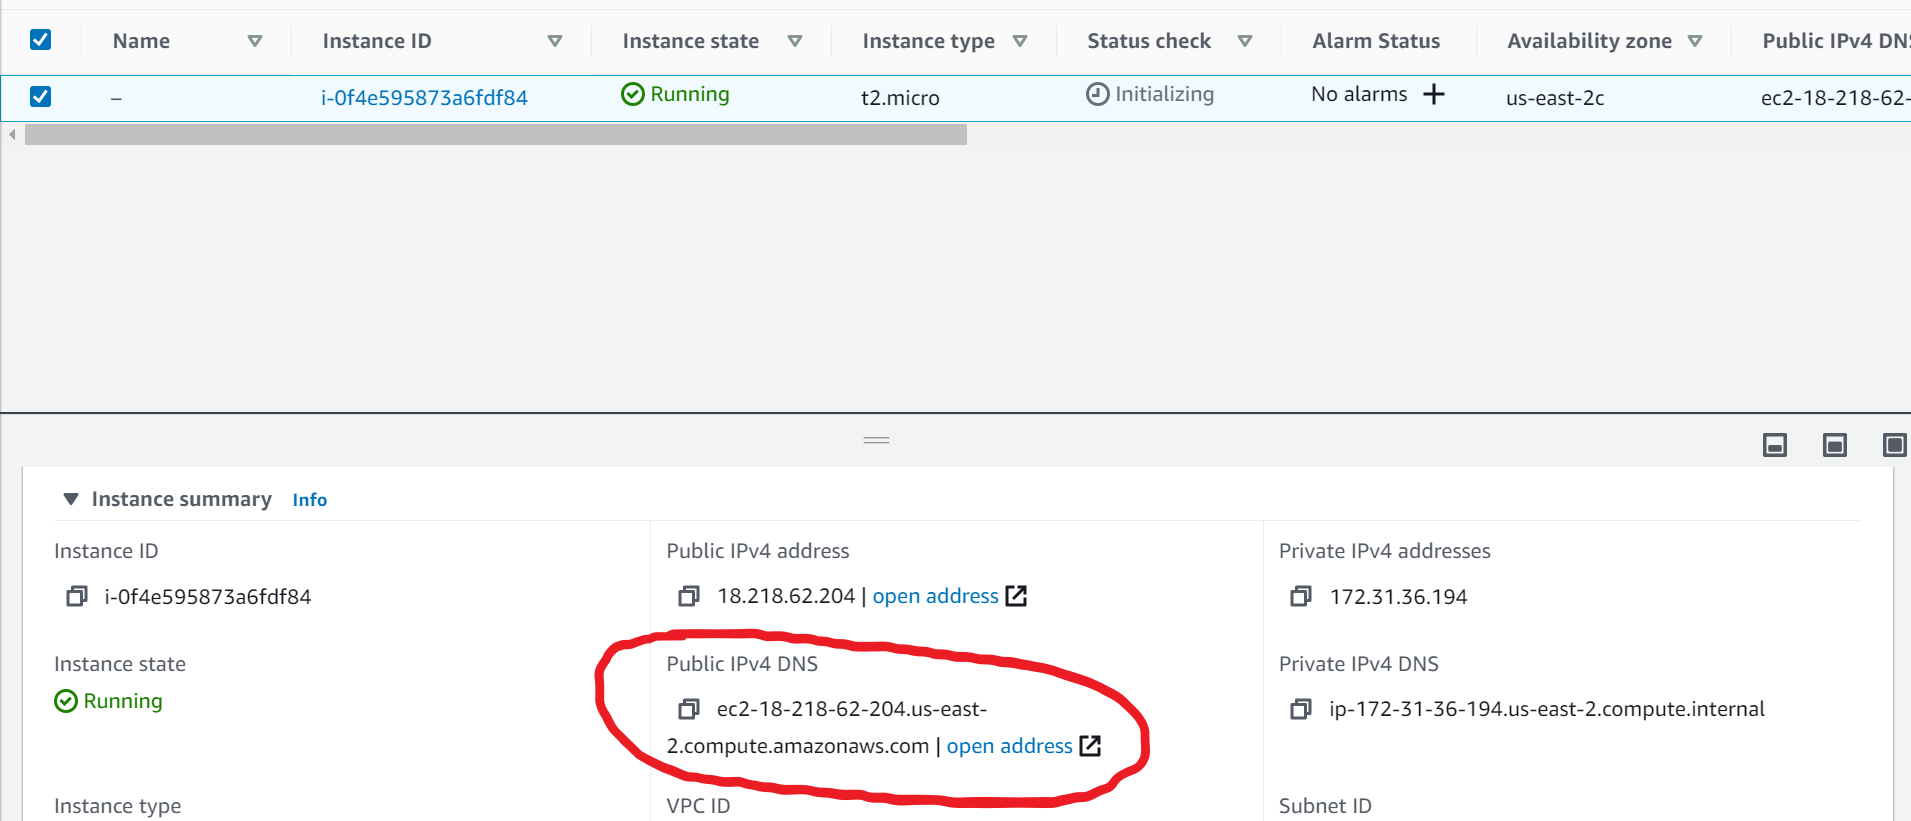
SSH to server using the following line (remember to place with your own .pem file path and your own amazon DNS
ssh -i "/home/YOUR_LINUX_SUBSYSTEM_USERNAME_HERE/example_REPLACE_with_Your_own.pem" ec2-user@COPY_AND_PASTE_THE_SERVER_DNS_FROM_YOUR_NOTEPAD_HERE

Now that we have successfully entered our server, copy and paste the following lines into PowerShell:
sudo yum updatesudo amazon-linux-extras install python3.8sudo yum -y install python3-pipsudo yum install python-virtualenv

mkdir myprojectcd myprojectpython3 -m venv venv

Create a virtual environment, this is where we will run our bot. (copy and paste the line below into your terminal)
. venv/bin/activate
Install flask and requests in the virtual environment (copy and paste the lines below into your terminal)
pip install flaskpip install requests
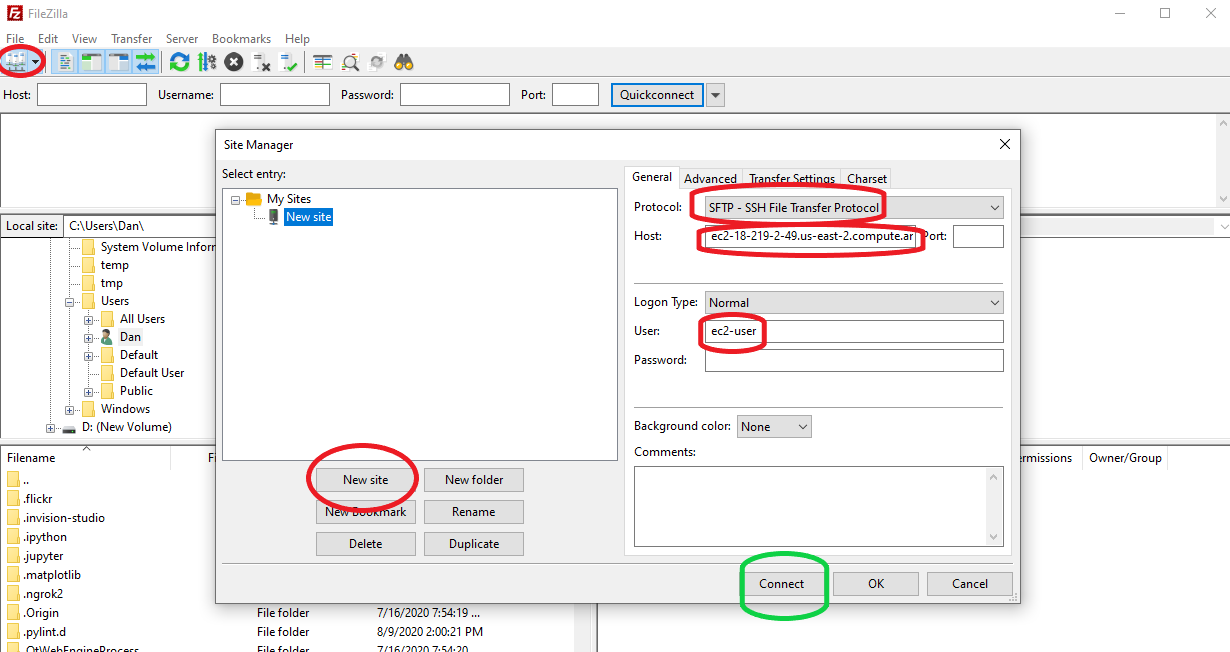
- Locate File on the top bar and click the button directly below it (see screenshot for example)
- Click New site
- Change protocol to SFTP - SSH Transfer Protocol
- Grab your Amazon host DNS from your note pad and paste in the Host: field
- Enter ec2-user for the user field (leave password blank)
- Click connect
- (You may get a window that says "Unknown host key". Press "OK" if you do.
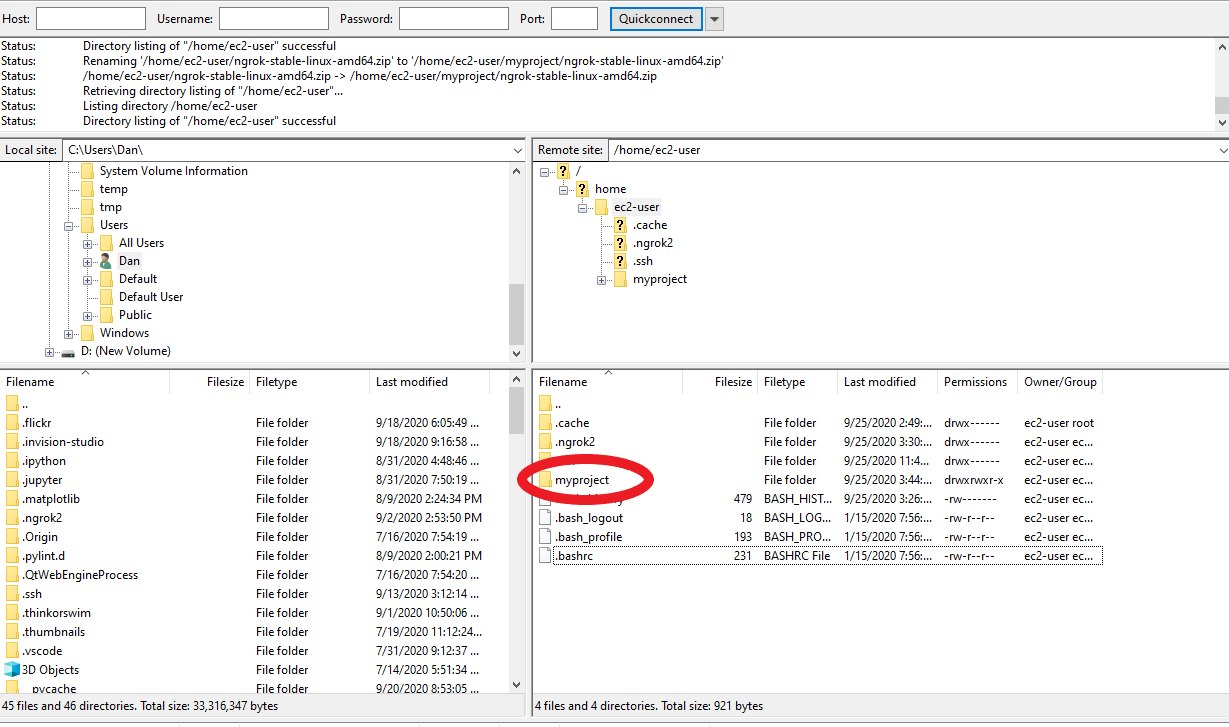
Drag config.py, bot.py, and ngrok-stable-linux-amd64.zip over to the server's /home/ec2-user/myproject/ folder
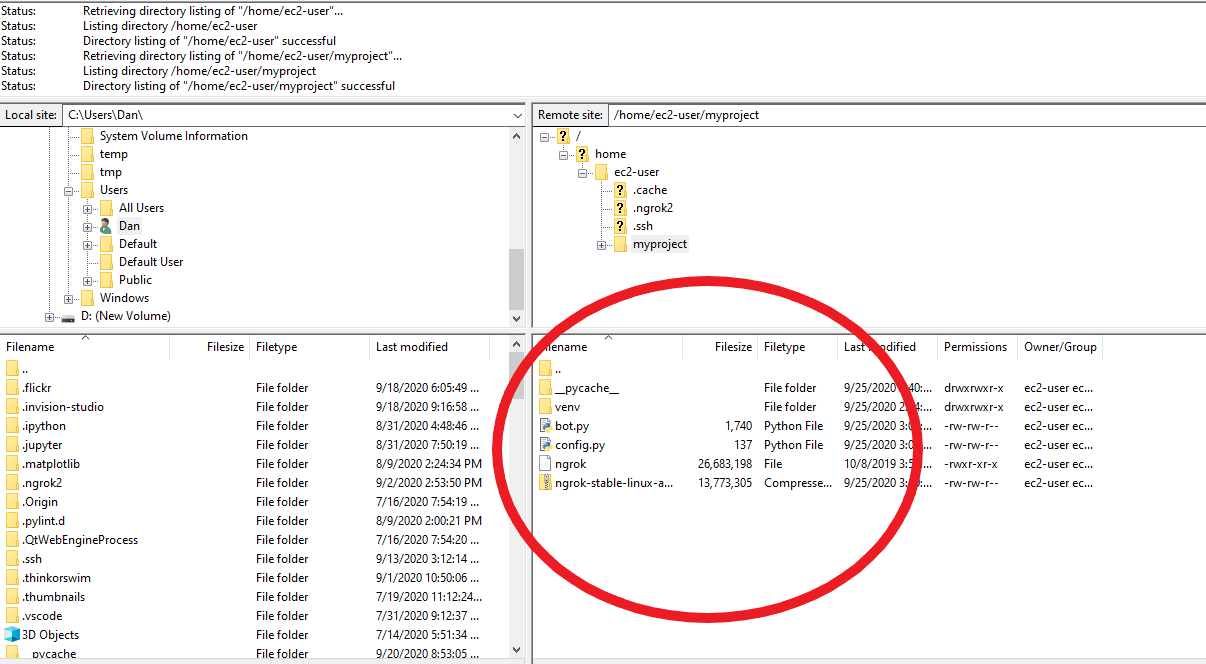
unzip /home/ec2-user/myproject/ngrok-stable-linux-amd64.zip

Open a new "screen" (copy and paste the command below into your terminal). This will open a blank terminal screen
screen -S ngrok

You can think of a screen as a window. We will run our programs in screens and detach to leave them running (like minimizing a window)
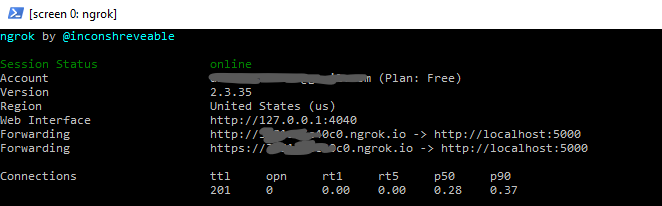
- First, copy and paste the ./ngrok authtoken from your notepad and paste it in the new "screen"
- Copy the line below to launch ngrok and press enter
~/myproject/ngrok http 5000

Your screen should look like the one below. Copy the forwarding url to your notepad. This is your webhook url to use on tradingview.
Press CTRL A+D to detach from screen. Below is a guide on how to operate screens for your future reference:
-
screen -ls- lists all attached/detached screens -
screen -r screen_name_here- Re-attaches to detached screen -
screen -S screen_name_here- Starts a new screen with the name screen_name_here (replace with the name you want) - CTRL+A+D = Detach from screen
- CTRL+C = Quits the currently attached screen (we generally don't want to do this if we want our bot to stay on).
python3 bot.py

Place your webhook url from your notepad in the url field. Make sure to add "/webhook" on the end of it
{ "symbol": "{{ticker}}", "qty": "{{strategy.order.contracts}}", "side": "{{strategy.order.action}}", "type": "market", "time_in_force": "gtc" }