For the JavaScript Web Cryptography API thesis, as an case study, a proof-of-concept end-to-end secure example application for sharing encrypted and digitally signed messages was implemented. The example application is called SecretNotes and it utilizes the new Web Cryptography API for performing cryptographic operations directly on the web browser.
Permanent link for the thesis: http://urn.fi/URN:NBN:fi:amk-201505188702
The example application uses asymmetric public-key and symmetric secret-key cryptography as a means to protect the sent messages and also provides a digital signature that can be verified by the receiver (if the sender chooses to share identity). Symmetric secret-key cryptography is used to encrypt and decrypt the actual message payload, allowing it to be longer than the maximum length that could be normally encrypted using asymmetric cryptography.
The application does not reveal the plain text message, the decryption keys or other metadata such as the sender identity or the receiver's name to the server, so nothing can be leaked or revealed since server does not contain anything that could be used to decrypt the messages (traditionally instant messaging applications store the messages and decryption keys on the server which means that if the server security is compromised all of the messages and the decryption keys needed to decrypt the messages could be leaked).
The only metadata that the example application shares with the server is the fingerprint, an SHA-1 message digest (hash) of the public-key which was used to encrypt the note contents. The fingerprint is used to index the notes on the server so that the notes can be retrieved by the user which have the correct decryption key for reading the notes. The note creation date is managed by the server and the note is automatically expired after 24 hours have passed.
Copy the public/js/config.template.js to public/js/config.js and edit the file to set configuration.
| Variable | Values | Description |
|---|---|---|
| useServerBackend | Boolean | Set to true to enable server backed. Default value is false |
| remoteAddress | String | The http/https endpoint to use for server when useServerBackend is set to true |
Config file contents:
...
app.config = {
  useServerBackend: true,				// Use server backend (true) or local storage (false) ?
  remoteAddress: 'https://localhost'	// Backend address
};
The SecretNotes application can be run in standalone mode.
Directly from GitHub: https://webcryptoapiex.github.io/secretnote/
Or from your own computer by using node to serve the application from localhost by running the following commands:
$ cd server
$ sudo node server.js
Open up the application from https://localhost/
The SecretNotes application can be run with mongodb backend.
Prerequisites:
- MongoDB
The application needs to be started with the noteserver.js to provide the database API for the application by running the following commands:
$ cd server
$ sudo node noteserver.js
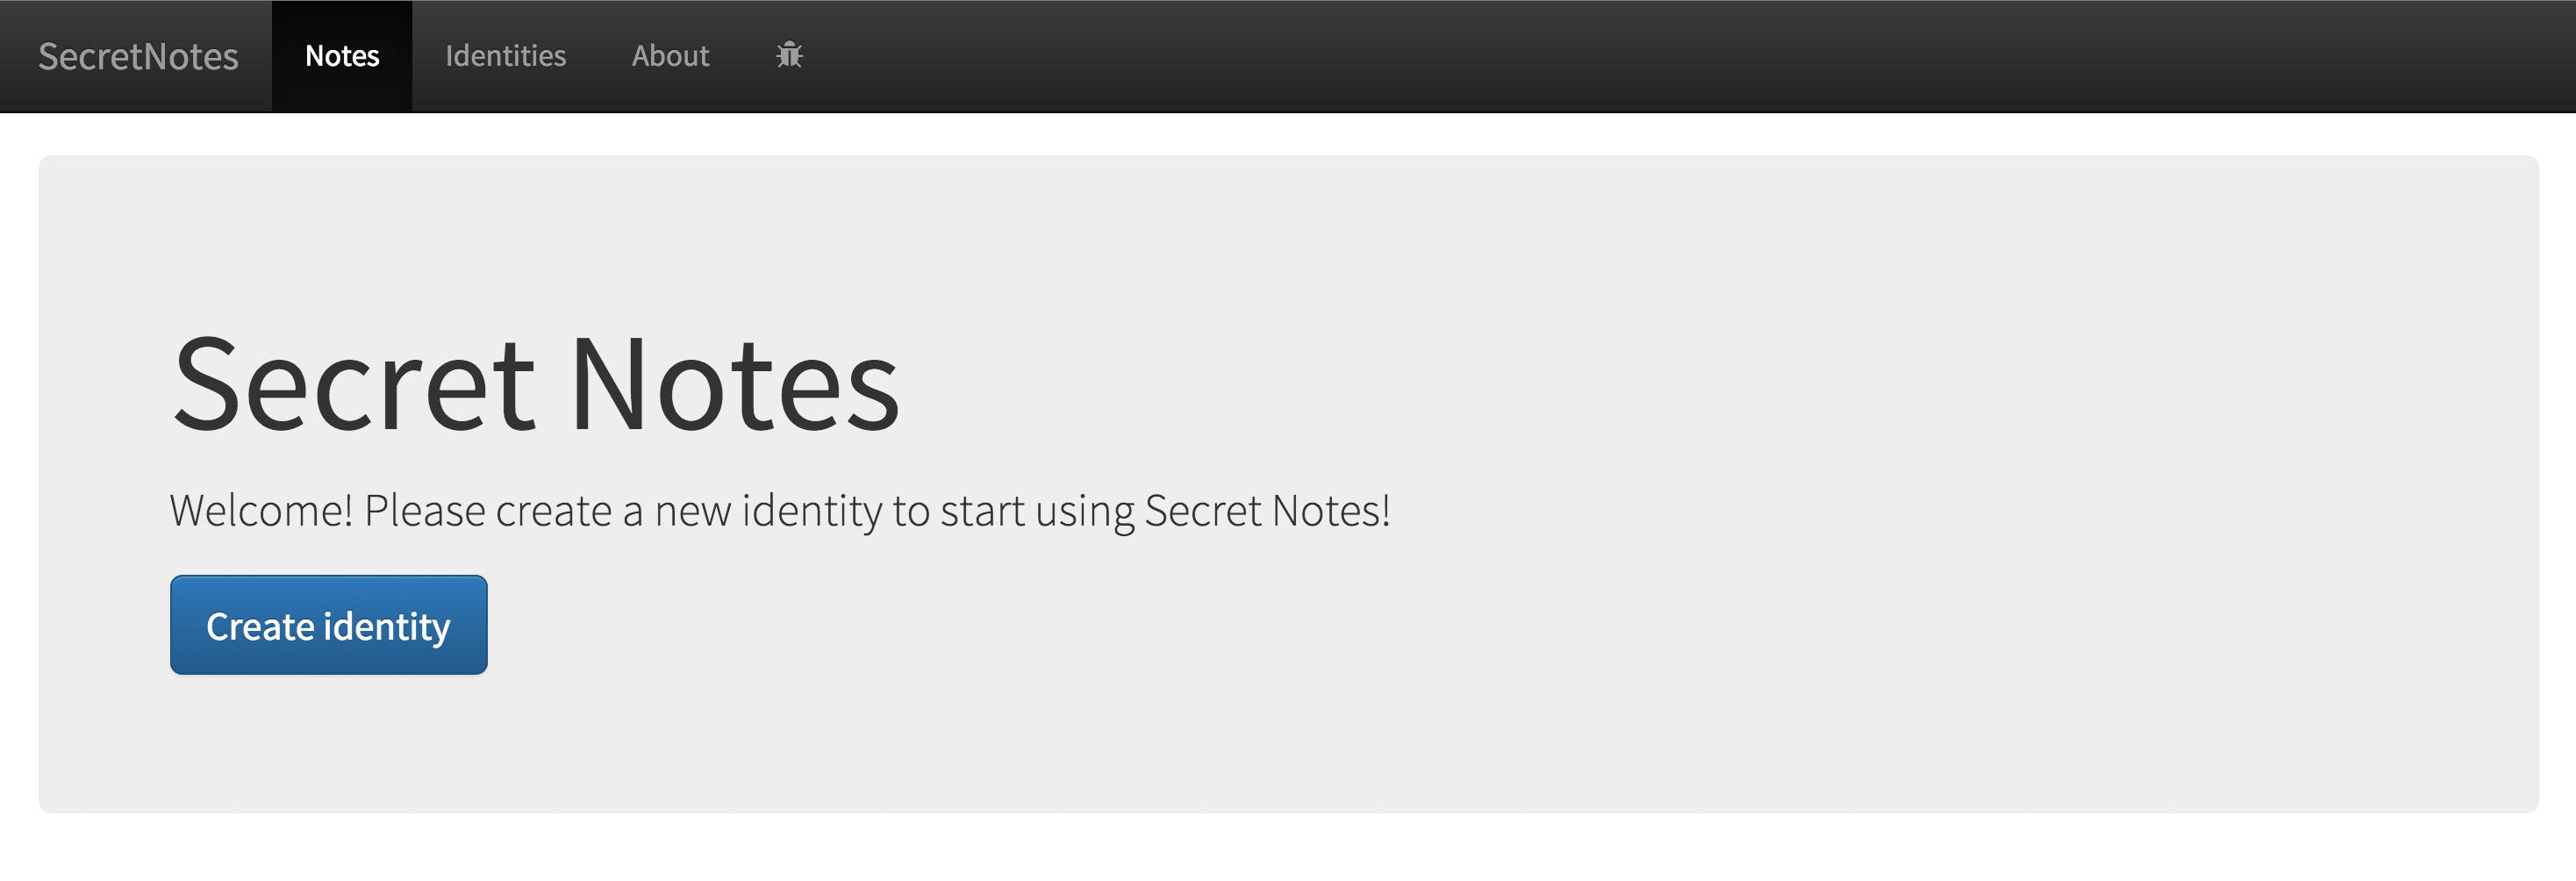
In this section, a simple use case using the example application is presented. The use case scenario is the following: Alice is going to send a digitally signed note to Bob. First, Alice and Bob is going to generate identities on their own computers. Then Bob exports public identity and shares it with Alice so that Alice can send note to Bob using Bob’s public cryptographic key. Since Alice uses Bob’s public cryptographic key to encrypt the sent note, only Bob can open and read the note. Alice is also going to digitally sign the sent note and include Alice’s own public identity with the note so that Bob can reply to Alice’s note and also verify that the digital signature is valid (providing both authentication and non-repudiation) and the note has not been tampered with (providing integrity). First, when Alice opens the application in a web browser, the view as seen in following figure is shown. Since Alice has not created an identity, the application instructs to start by creating a new identity.
Alice chooses to create a new identity. The following figure contains the notes:
-
Alice fills in the name which will be used internally for this identity. The name is not shared and is only used for identifying this identity stored locally.
-
Alice decides not to make the identity exportable which means that Alice’s private identity cannot be exported out of the application. This option gives a extra security since Alice’s private key is not exportable from the JavaScript environment.

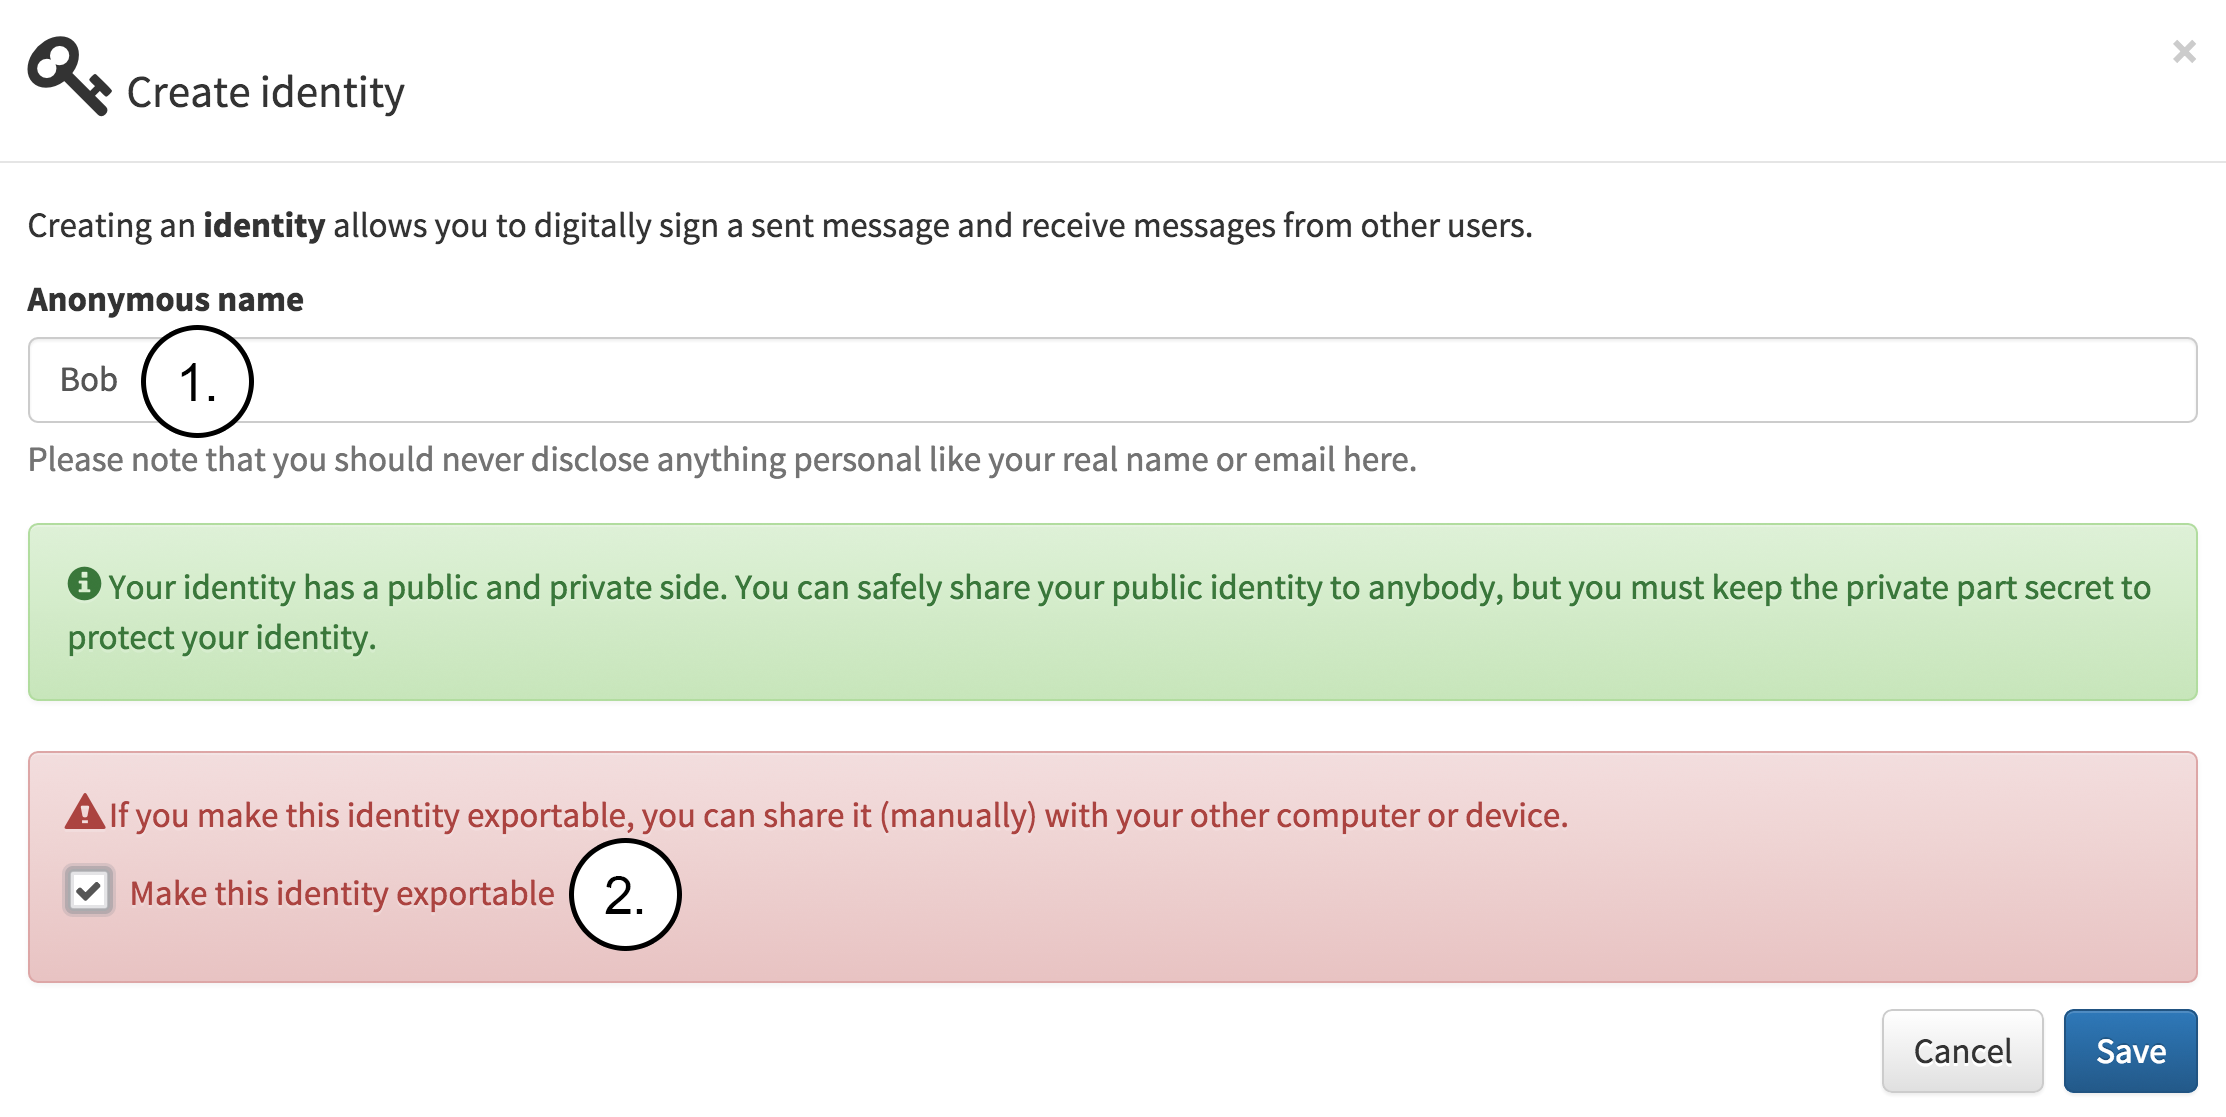
Next, Bob creates an identity on his own computer as seen in the following figure. The figure contains the following notes:
- Bob fills in the name which will be used internally for this identity. The name is not shared and is only used for identifying this identity stored locally.
- Bob decides to make the identity exportable which means that Bob can share his private identity with other devices or computers that he also uses for sending notes.
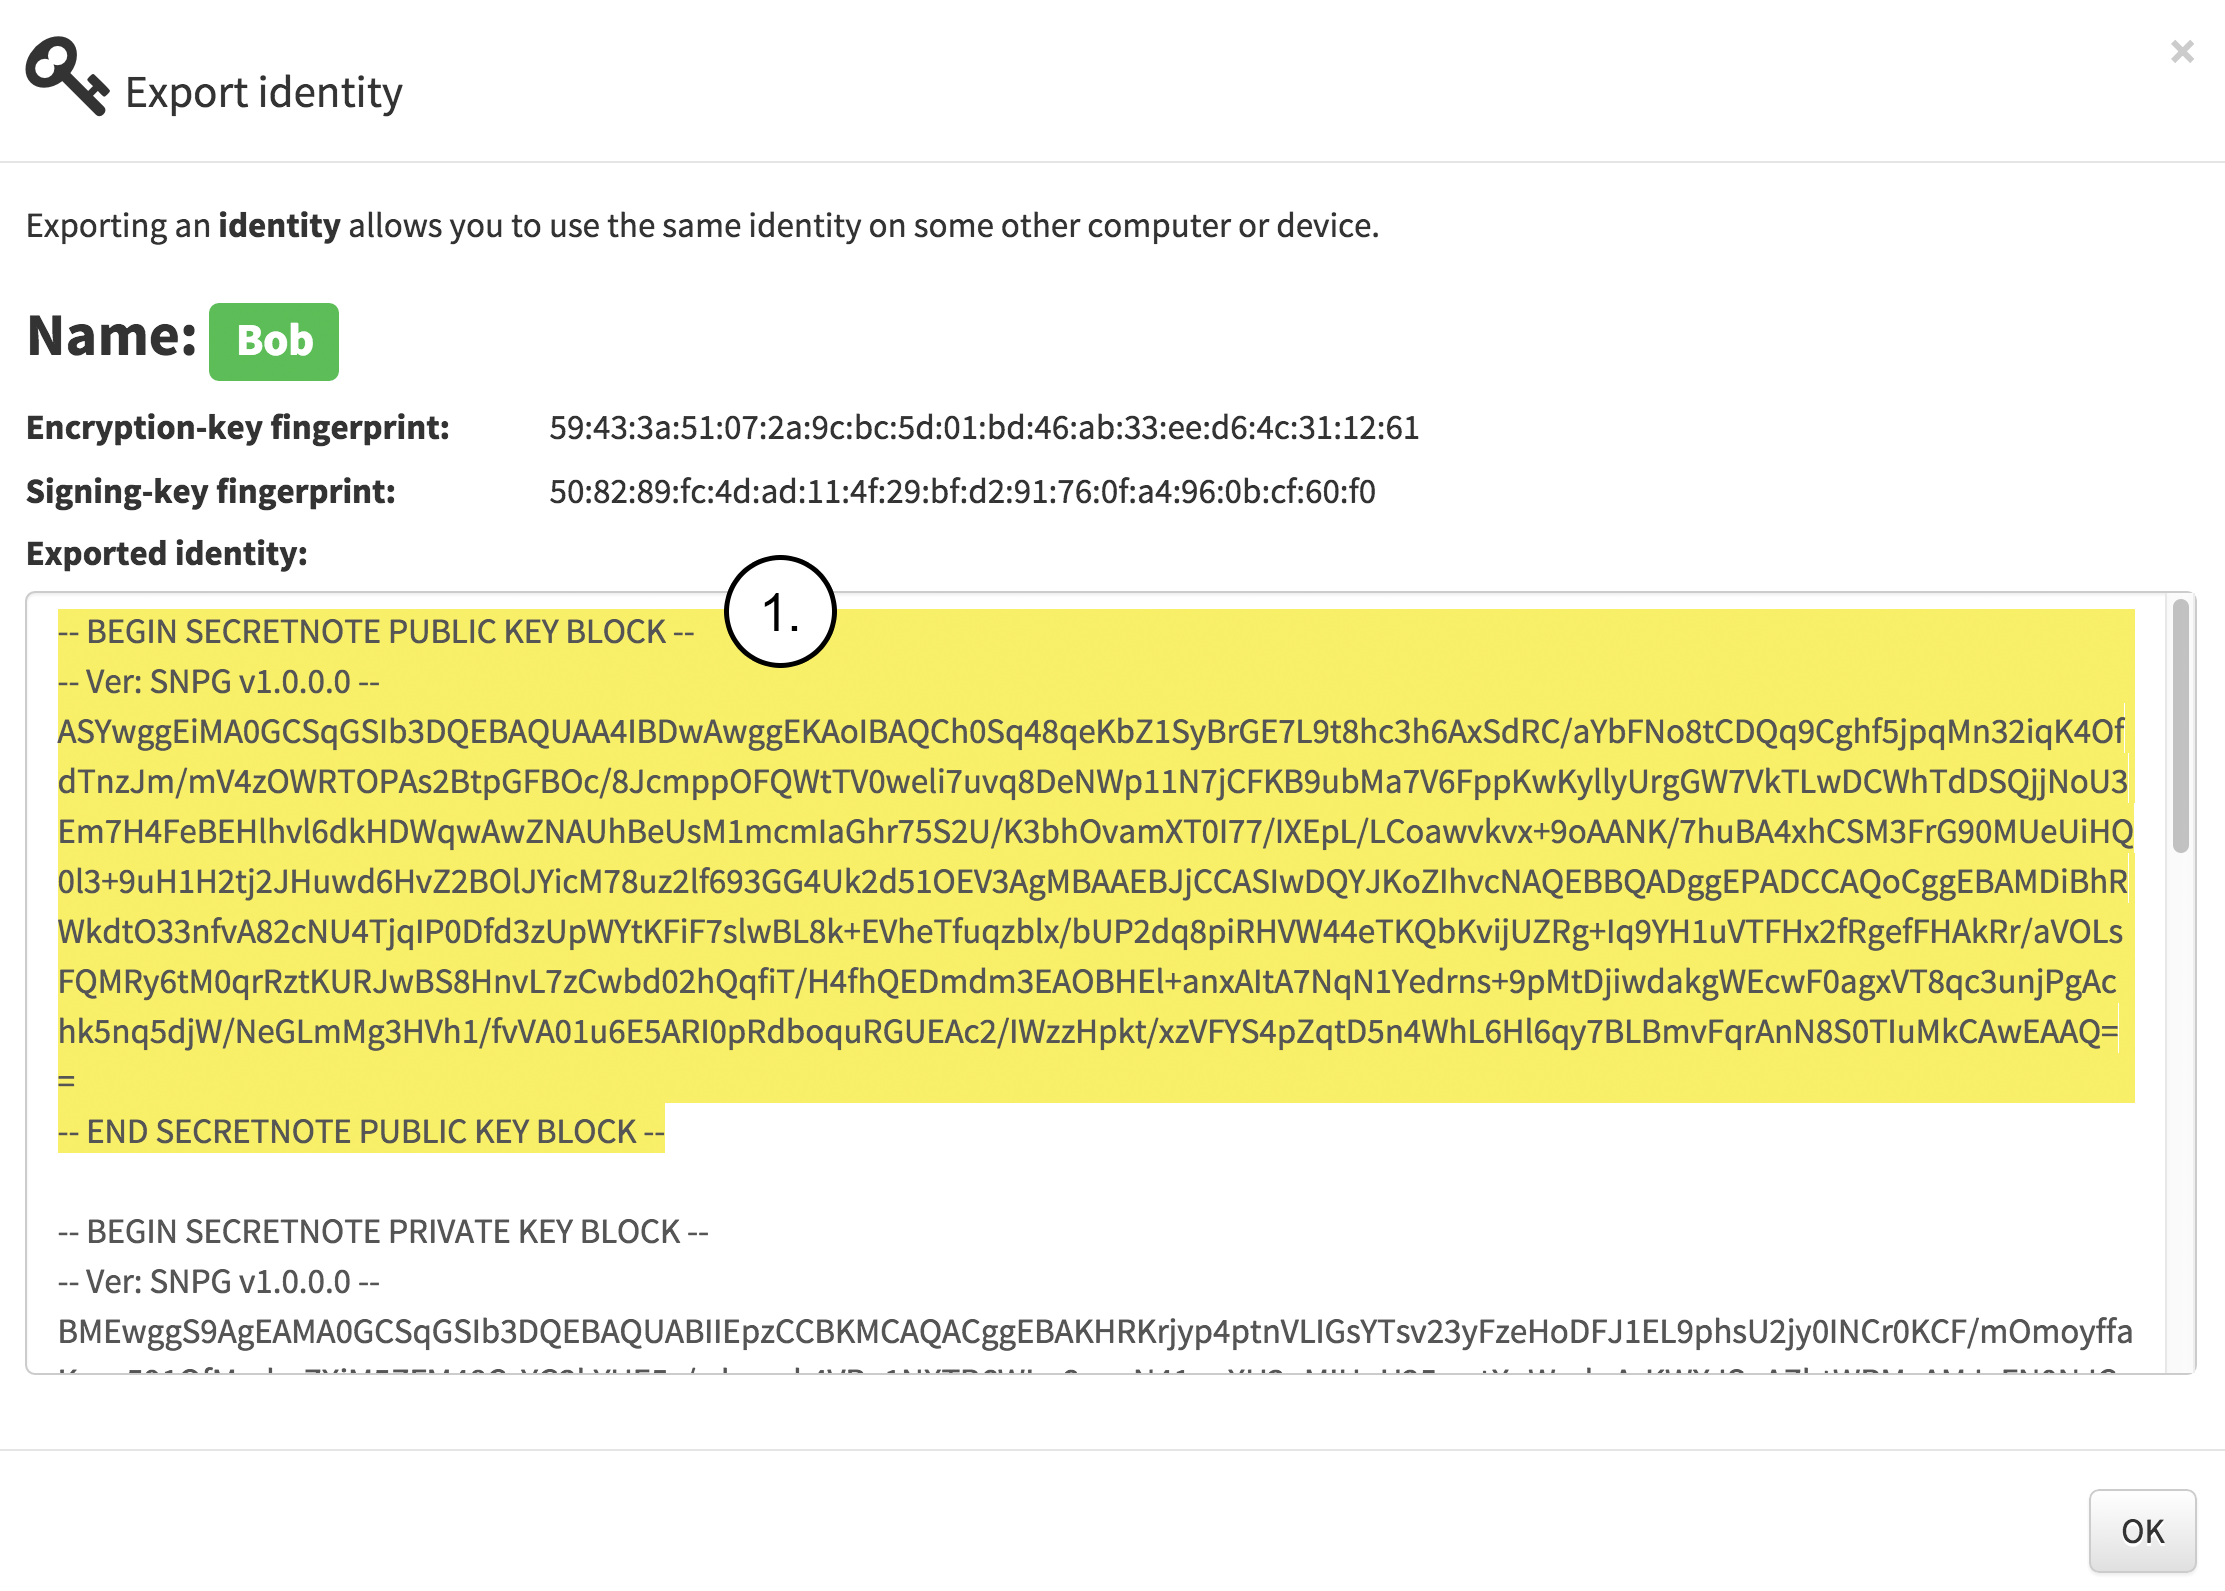
Bob exports the public identity as seen in the following figure. The figure contains the note:
- Bob selects and copies the public part of the identity for sharing it with Alice. Bob can share the public identity using any public or private communication channel.
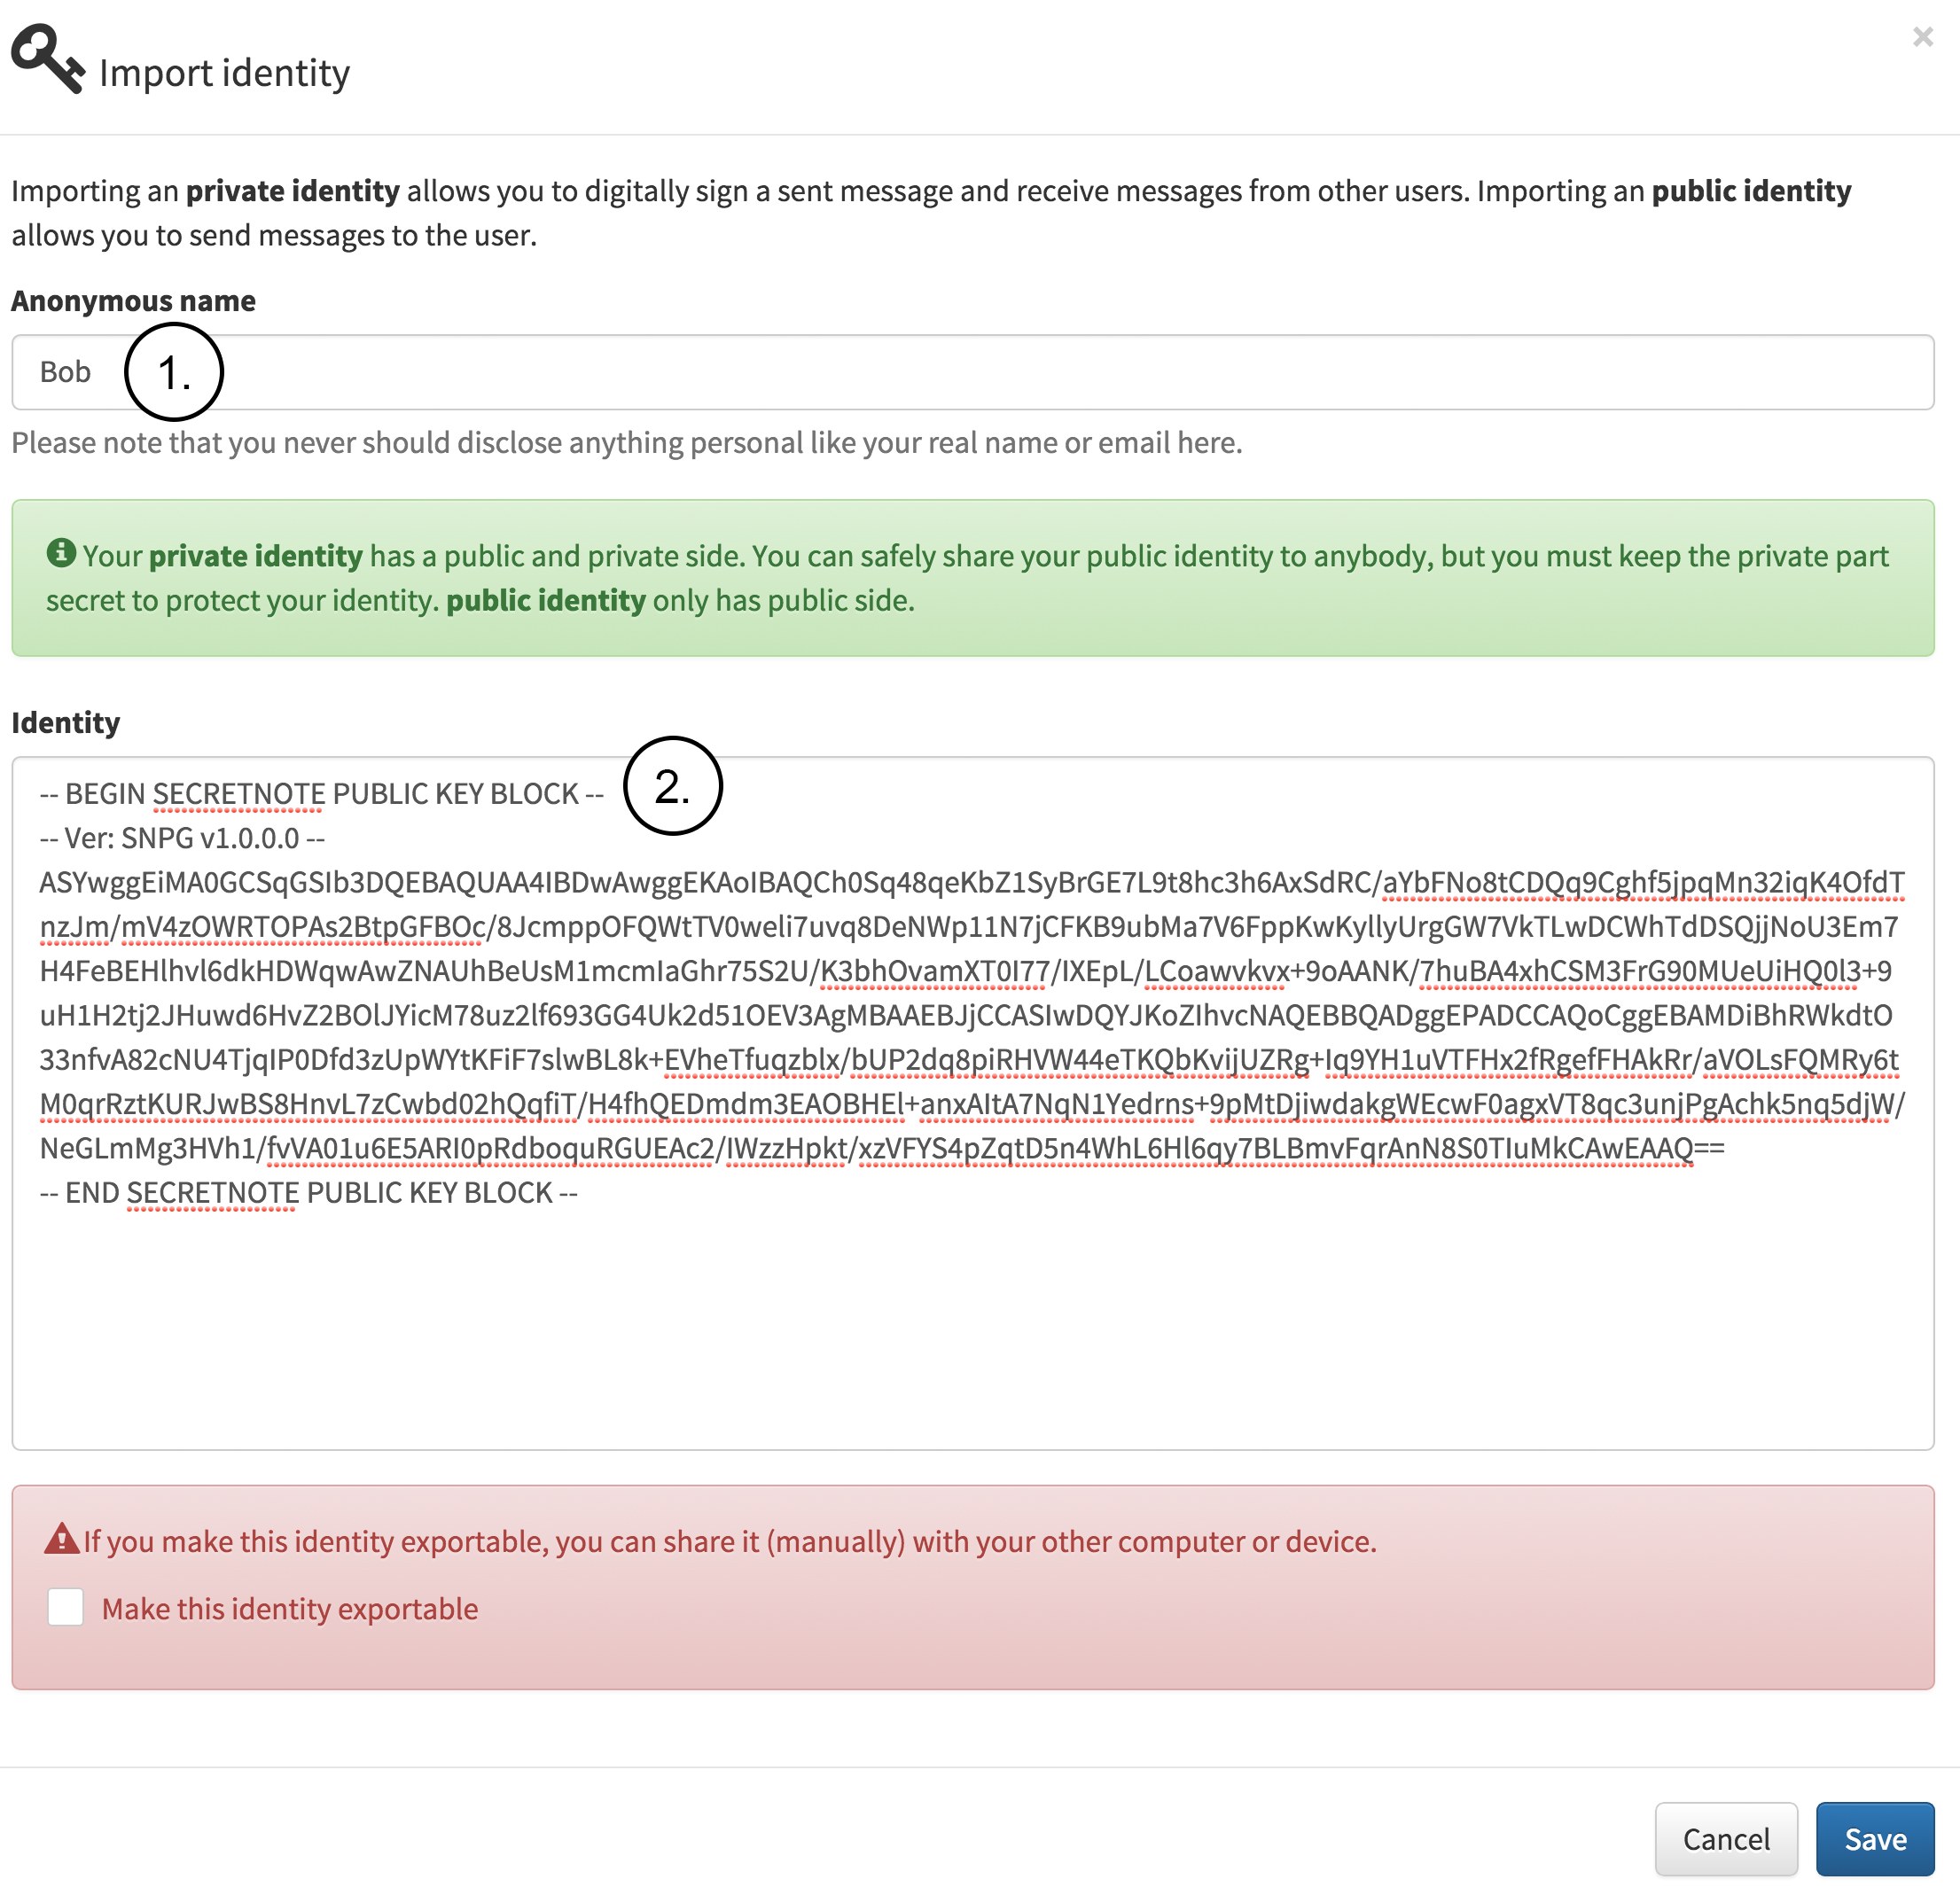
Next, Alice has received Bob’s public identity by email, web page or any other public communication channel and imports it as a known identity as seen in following figure. The figure contains the following notes:
1.Alice fills in the name which will be used internally for this identity.
2.Alice copies and pastes Bob’s public identity into the identity field.
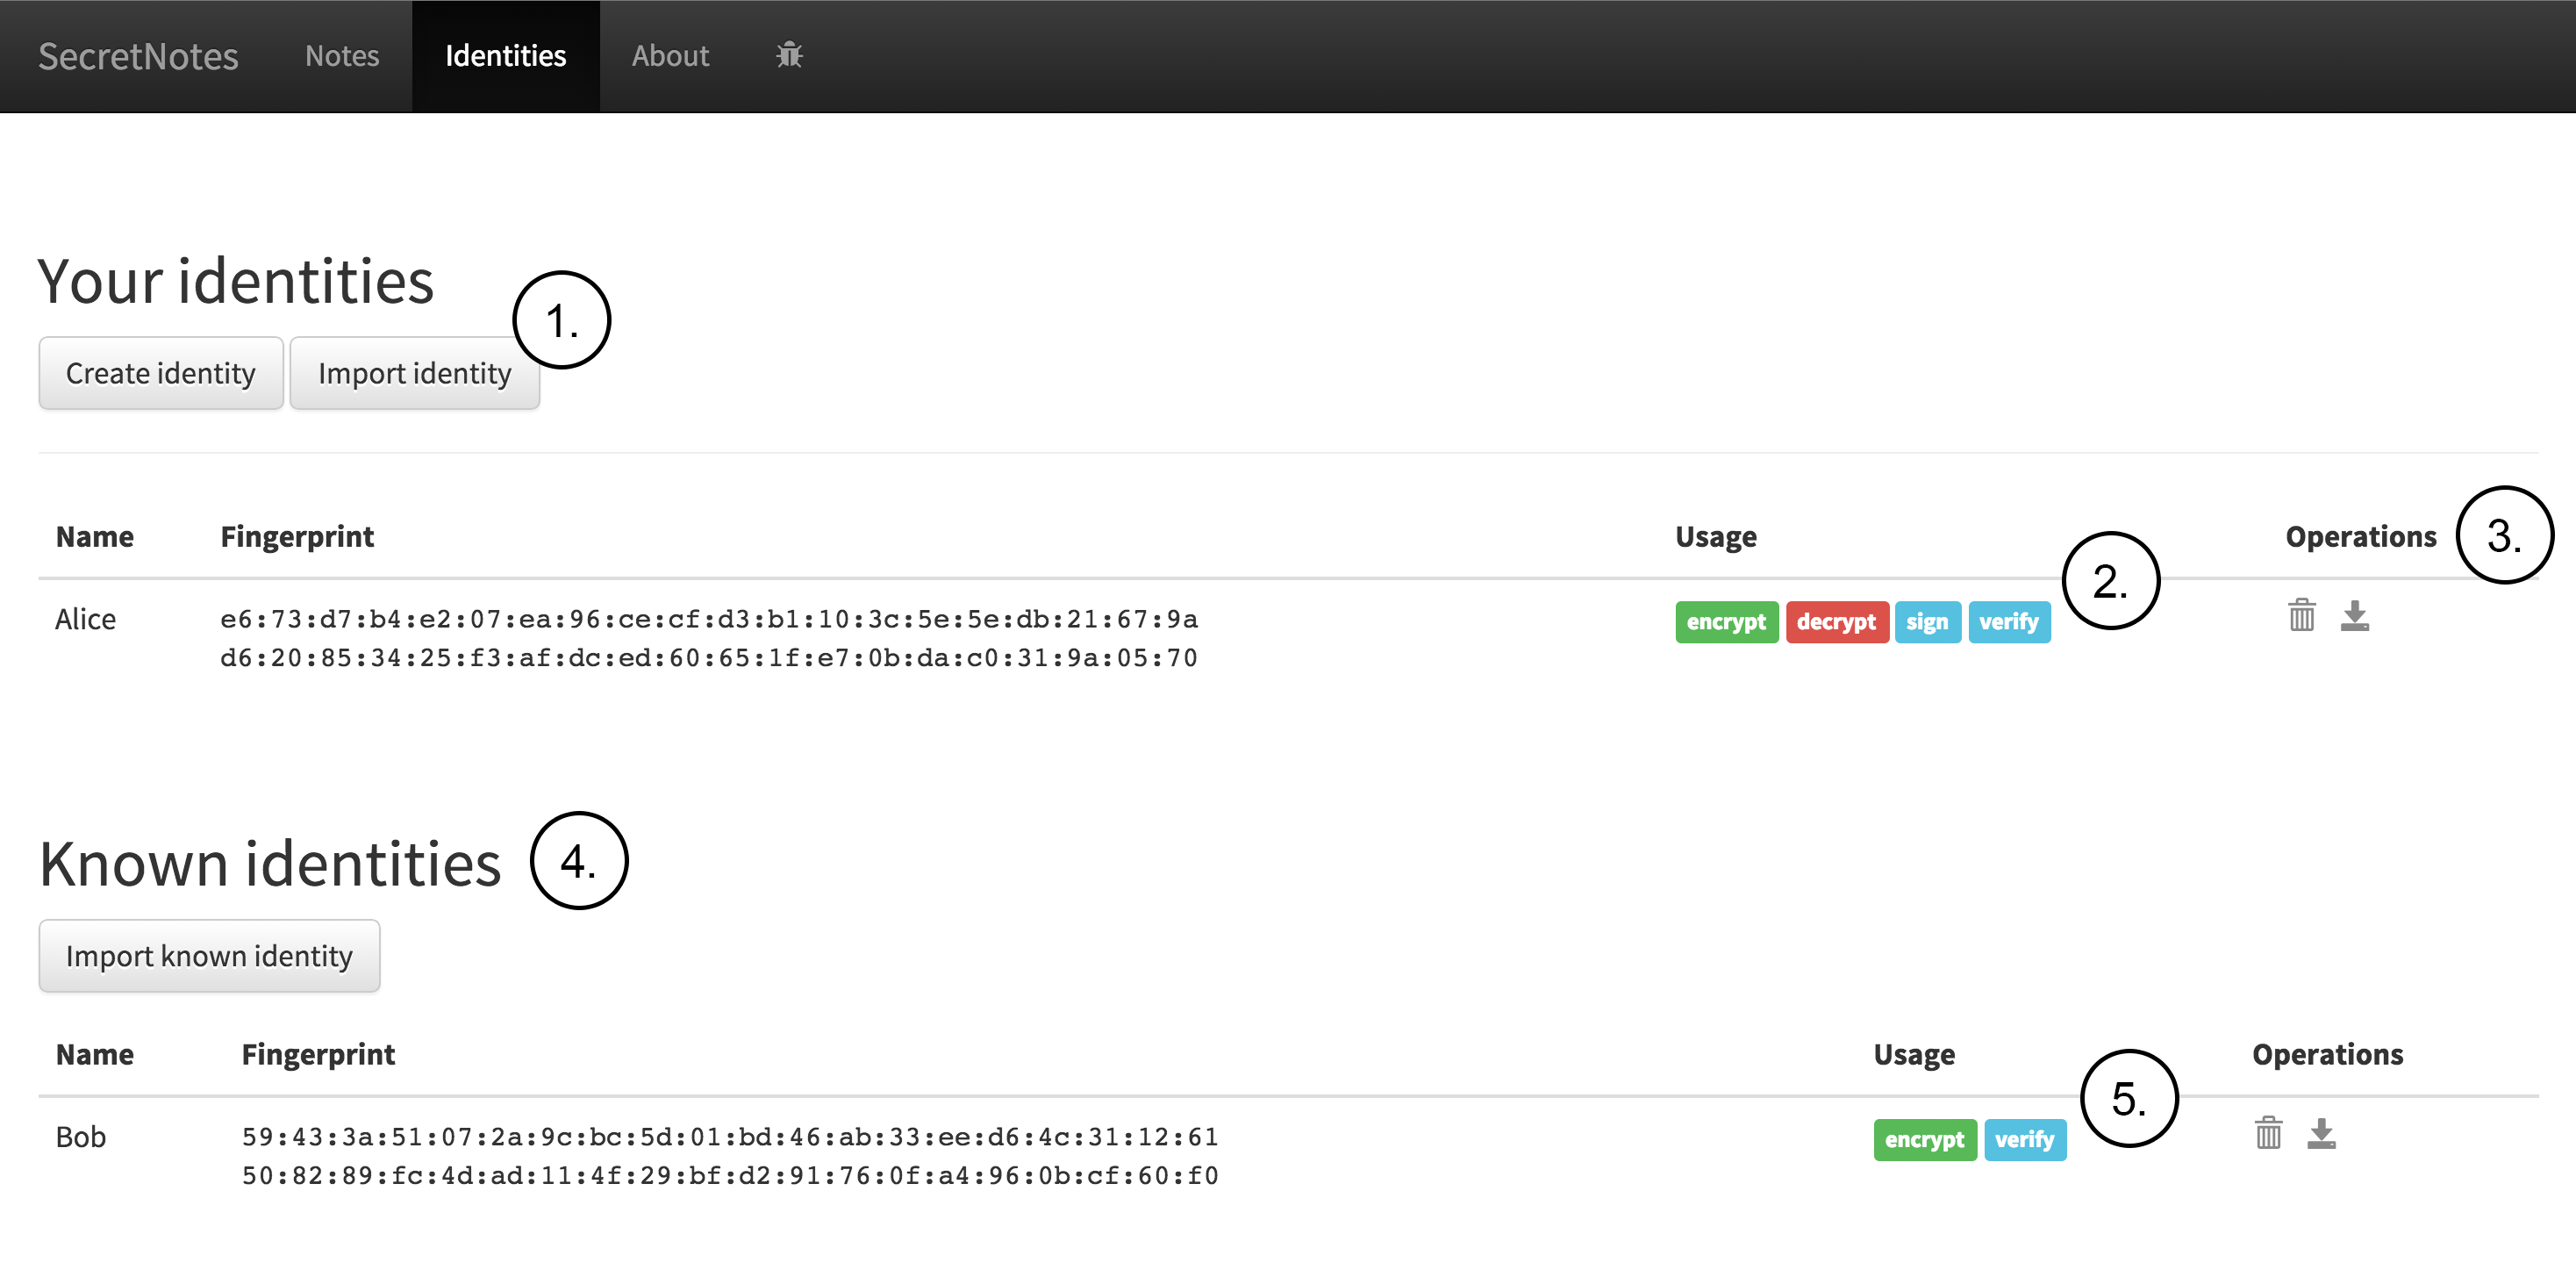
Next Figure shows how Alice can manage identities stored in the browser by using the identities section of the application. The figure contains the following notes:
-
Your identities section contains the private identities and allows the user to create new identity and import identities.
-
Usage section displays the usage information for identity. In this example Alice’s own private identity can be used for encrypting, decrypting, signing and verifying.
-
Identities can be deleted with the trashcan icon and exported with the download icon.
-
Known identities section contains the public identities that have been imported. In this case Bob’spublic identity is listed.
-
Usage section displays the usage information for identity. In this example Bob identity can be used for encrypting and verifying.
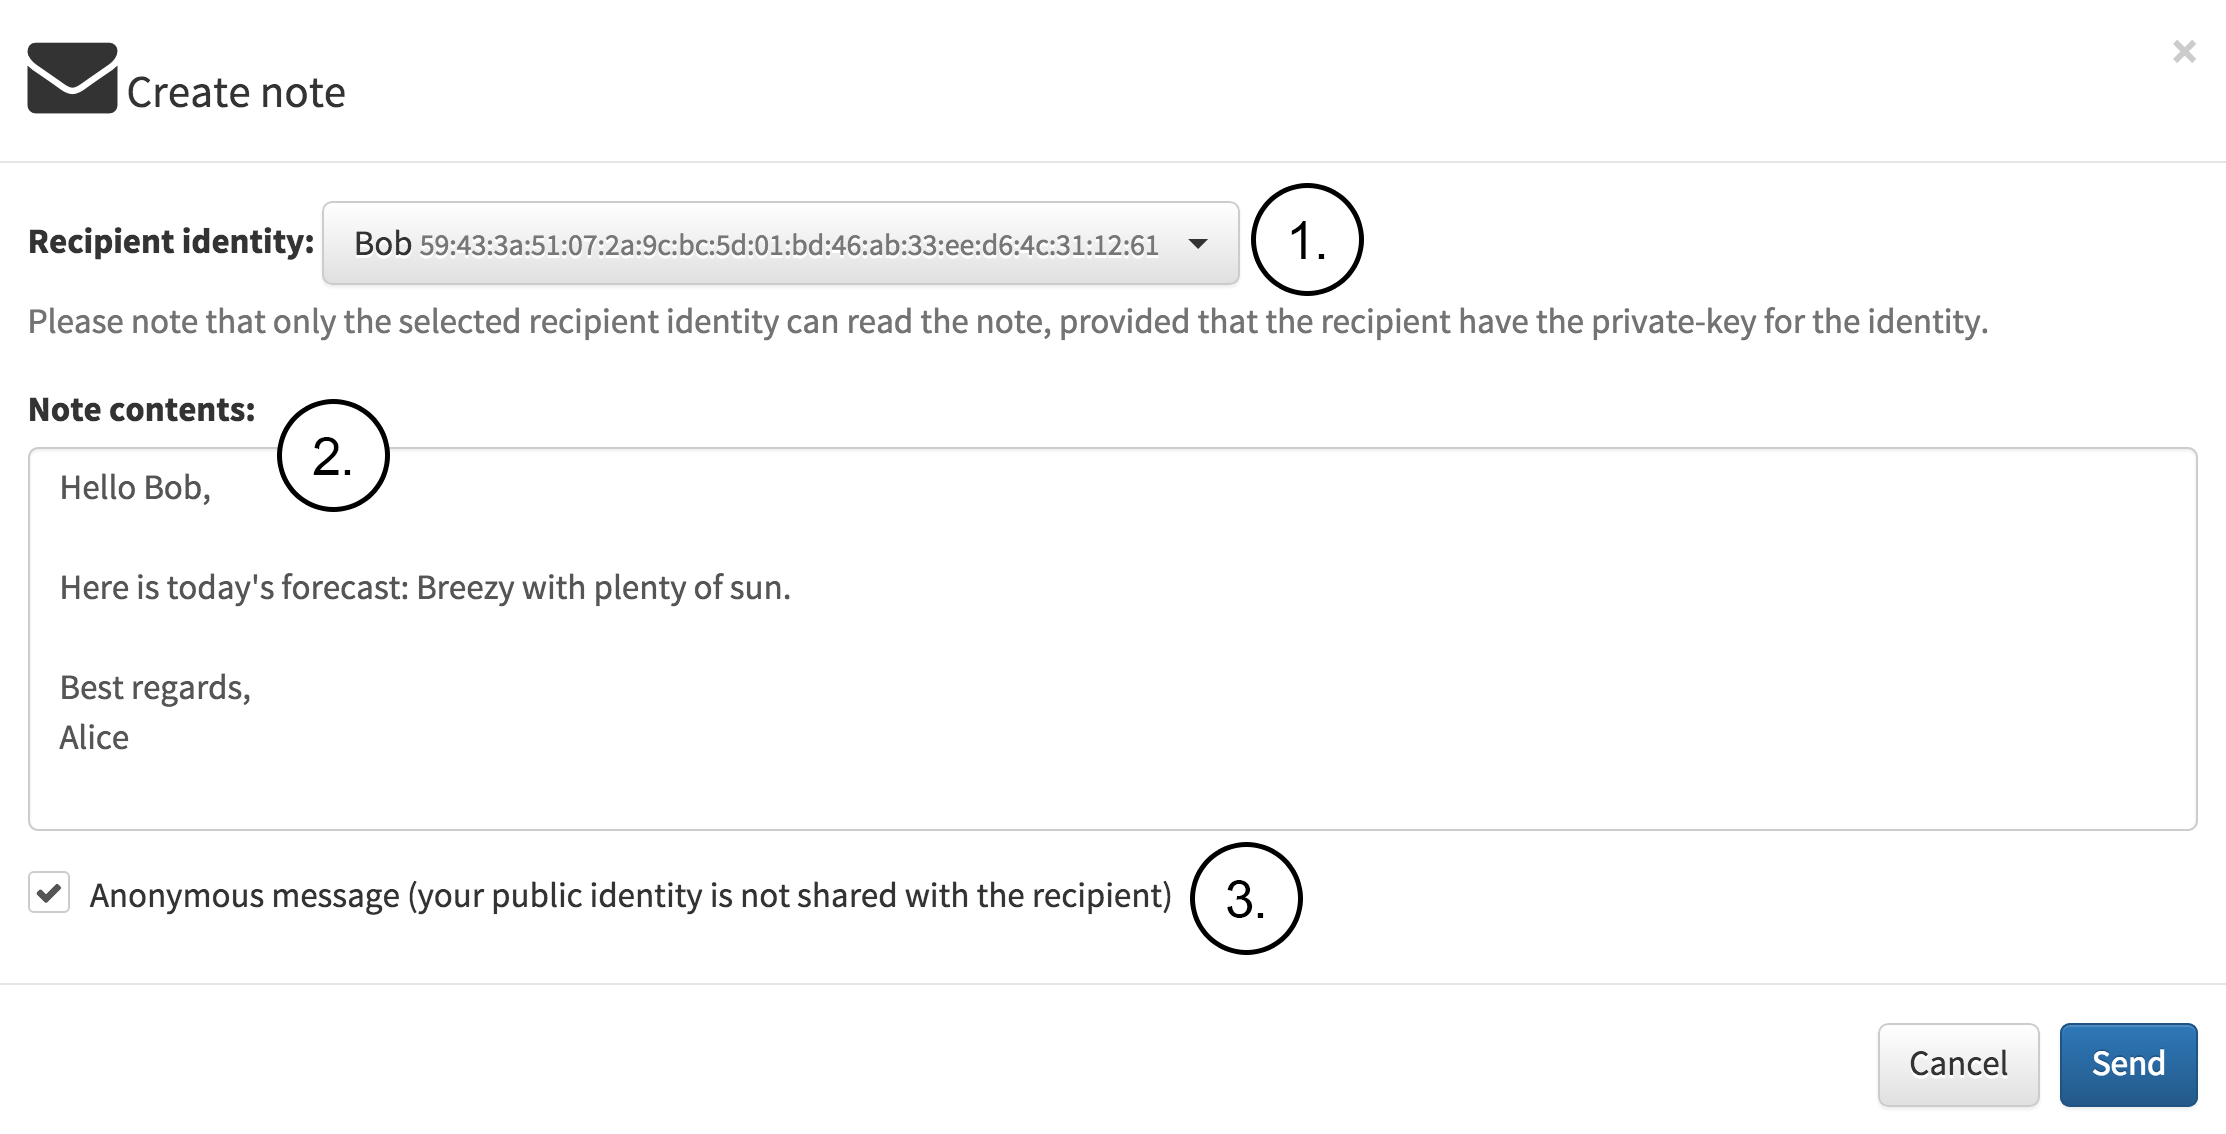
Next,Alice decides to write a note to Bob as seen in the following figure. The figure contains thefollowing notes:
-
Alice selects Bob as the target identity from the drop down list.
-
Alice writes the note to be sent.
-
Alice decides to remain anonymous. Thus she will not reveal her true identity to thereceiver.
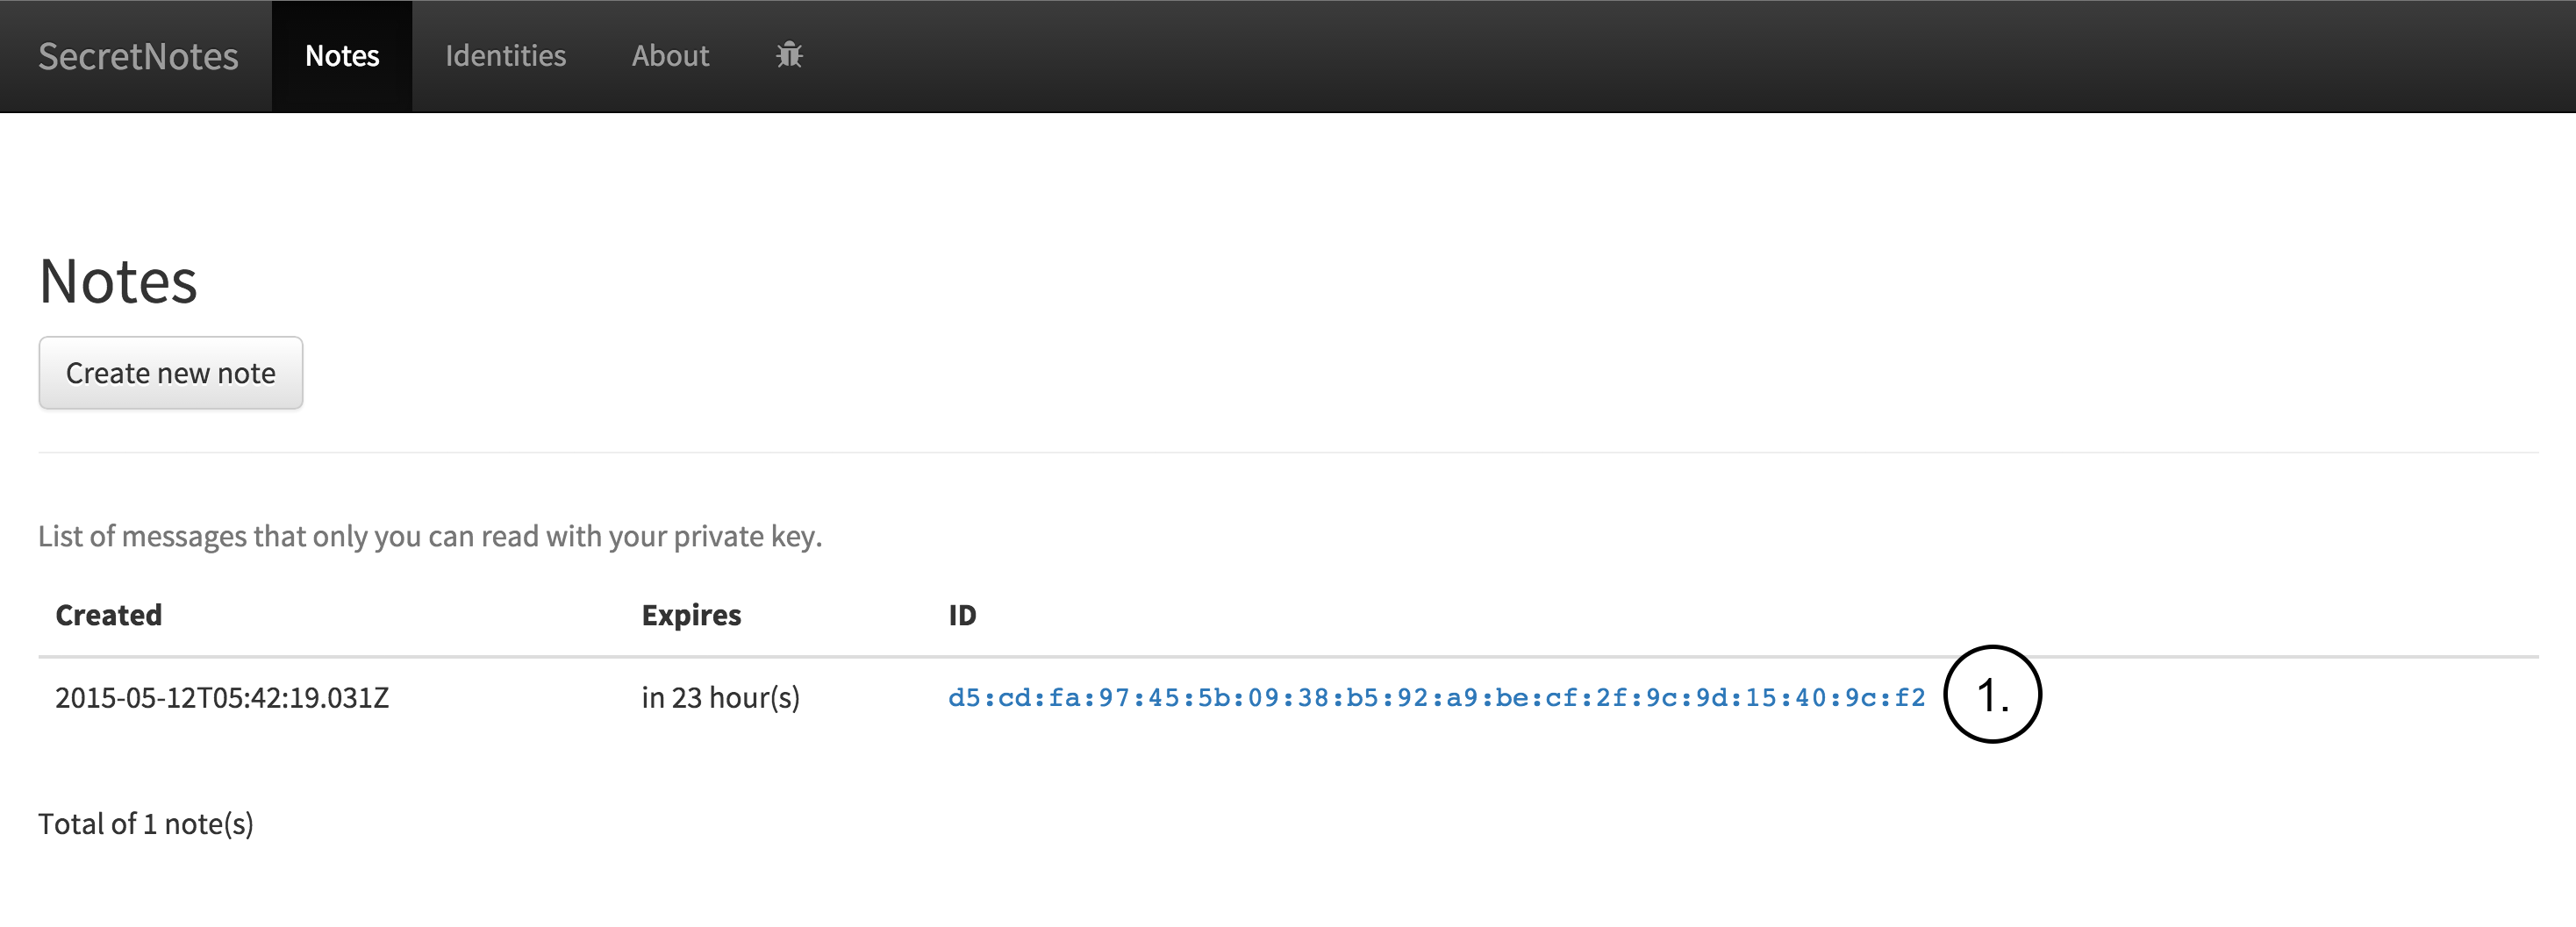
Bob receives the note as can be seen in the following figure. The figure contains the following note:
- The only info about the received note that Bob can see is the note creation time, when the note is going to expire and the ID which is message digest (hash) whichis calculated from the encrypted note.
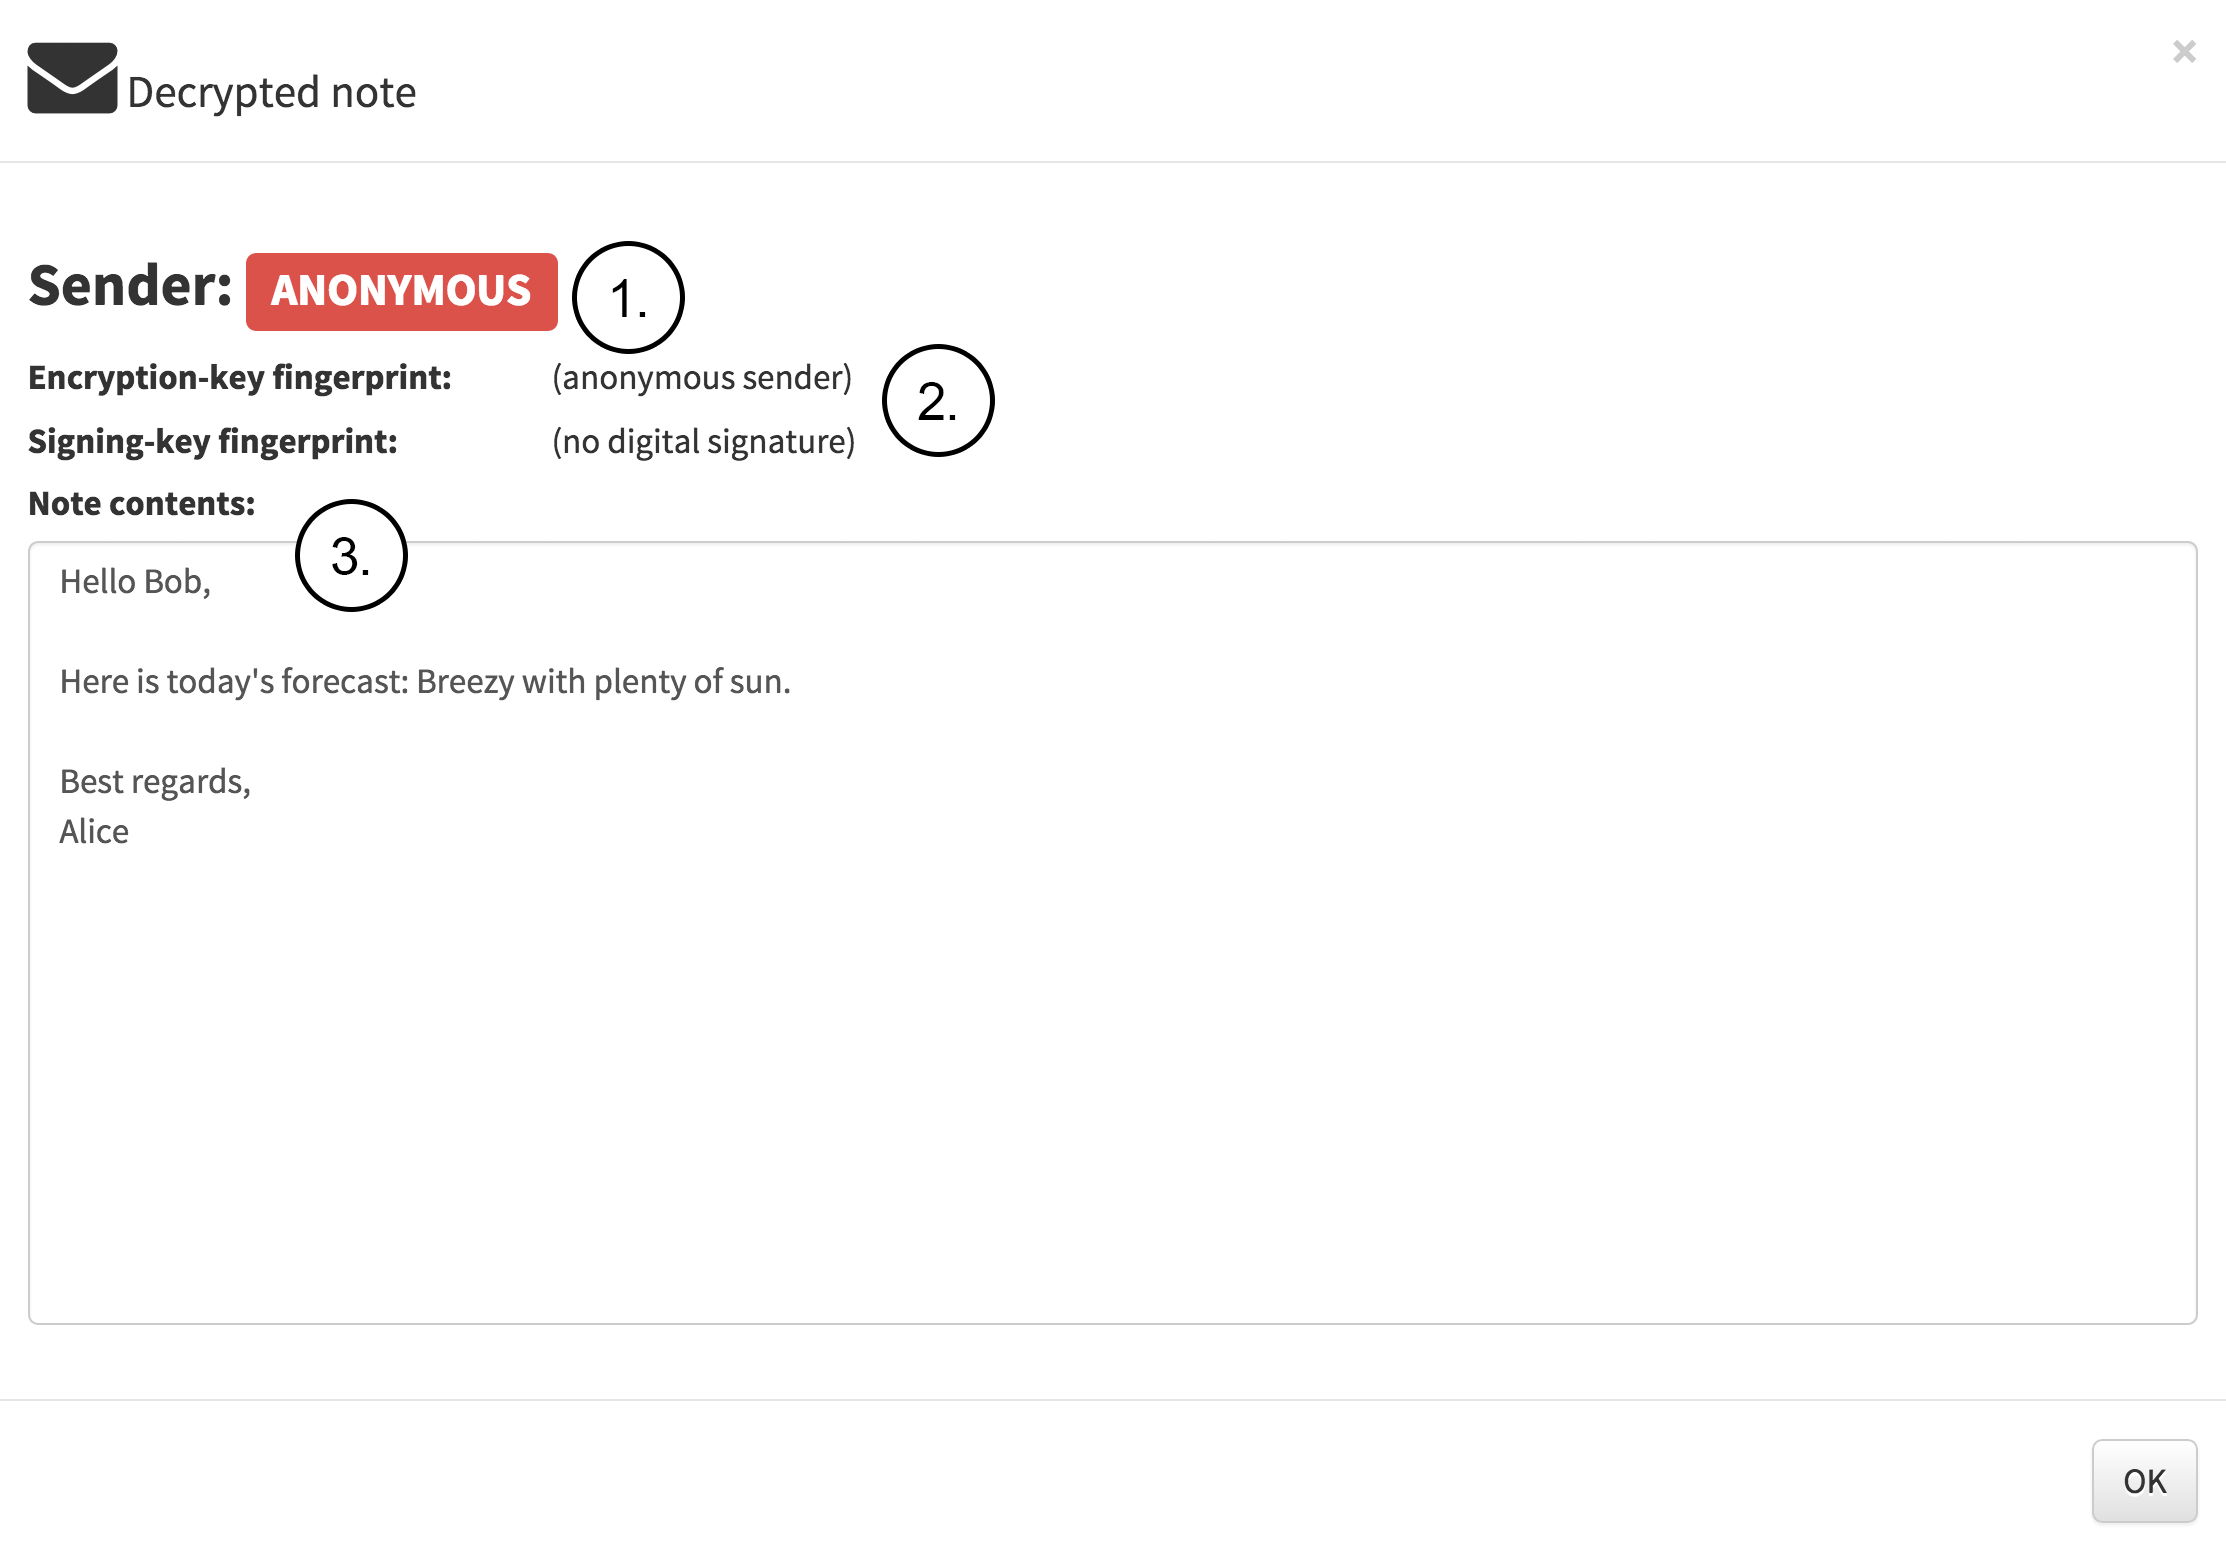
Next, Bob decrypts the note sent by Aliceas seen in the following figure. The figure contains the following notes:
-
Since the received note was sent as anonymous there is no way of really knowing who sent the message.
-
Encryption-key and Signing-key fingerprint values are empty since the note was anonymously sent.
3.The note content is visible since it was successfully decrypted using Bob’s private-key.
Bob can now call or meet Alice and ask if Alice really sent the note.
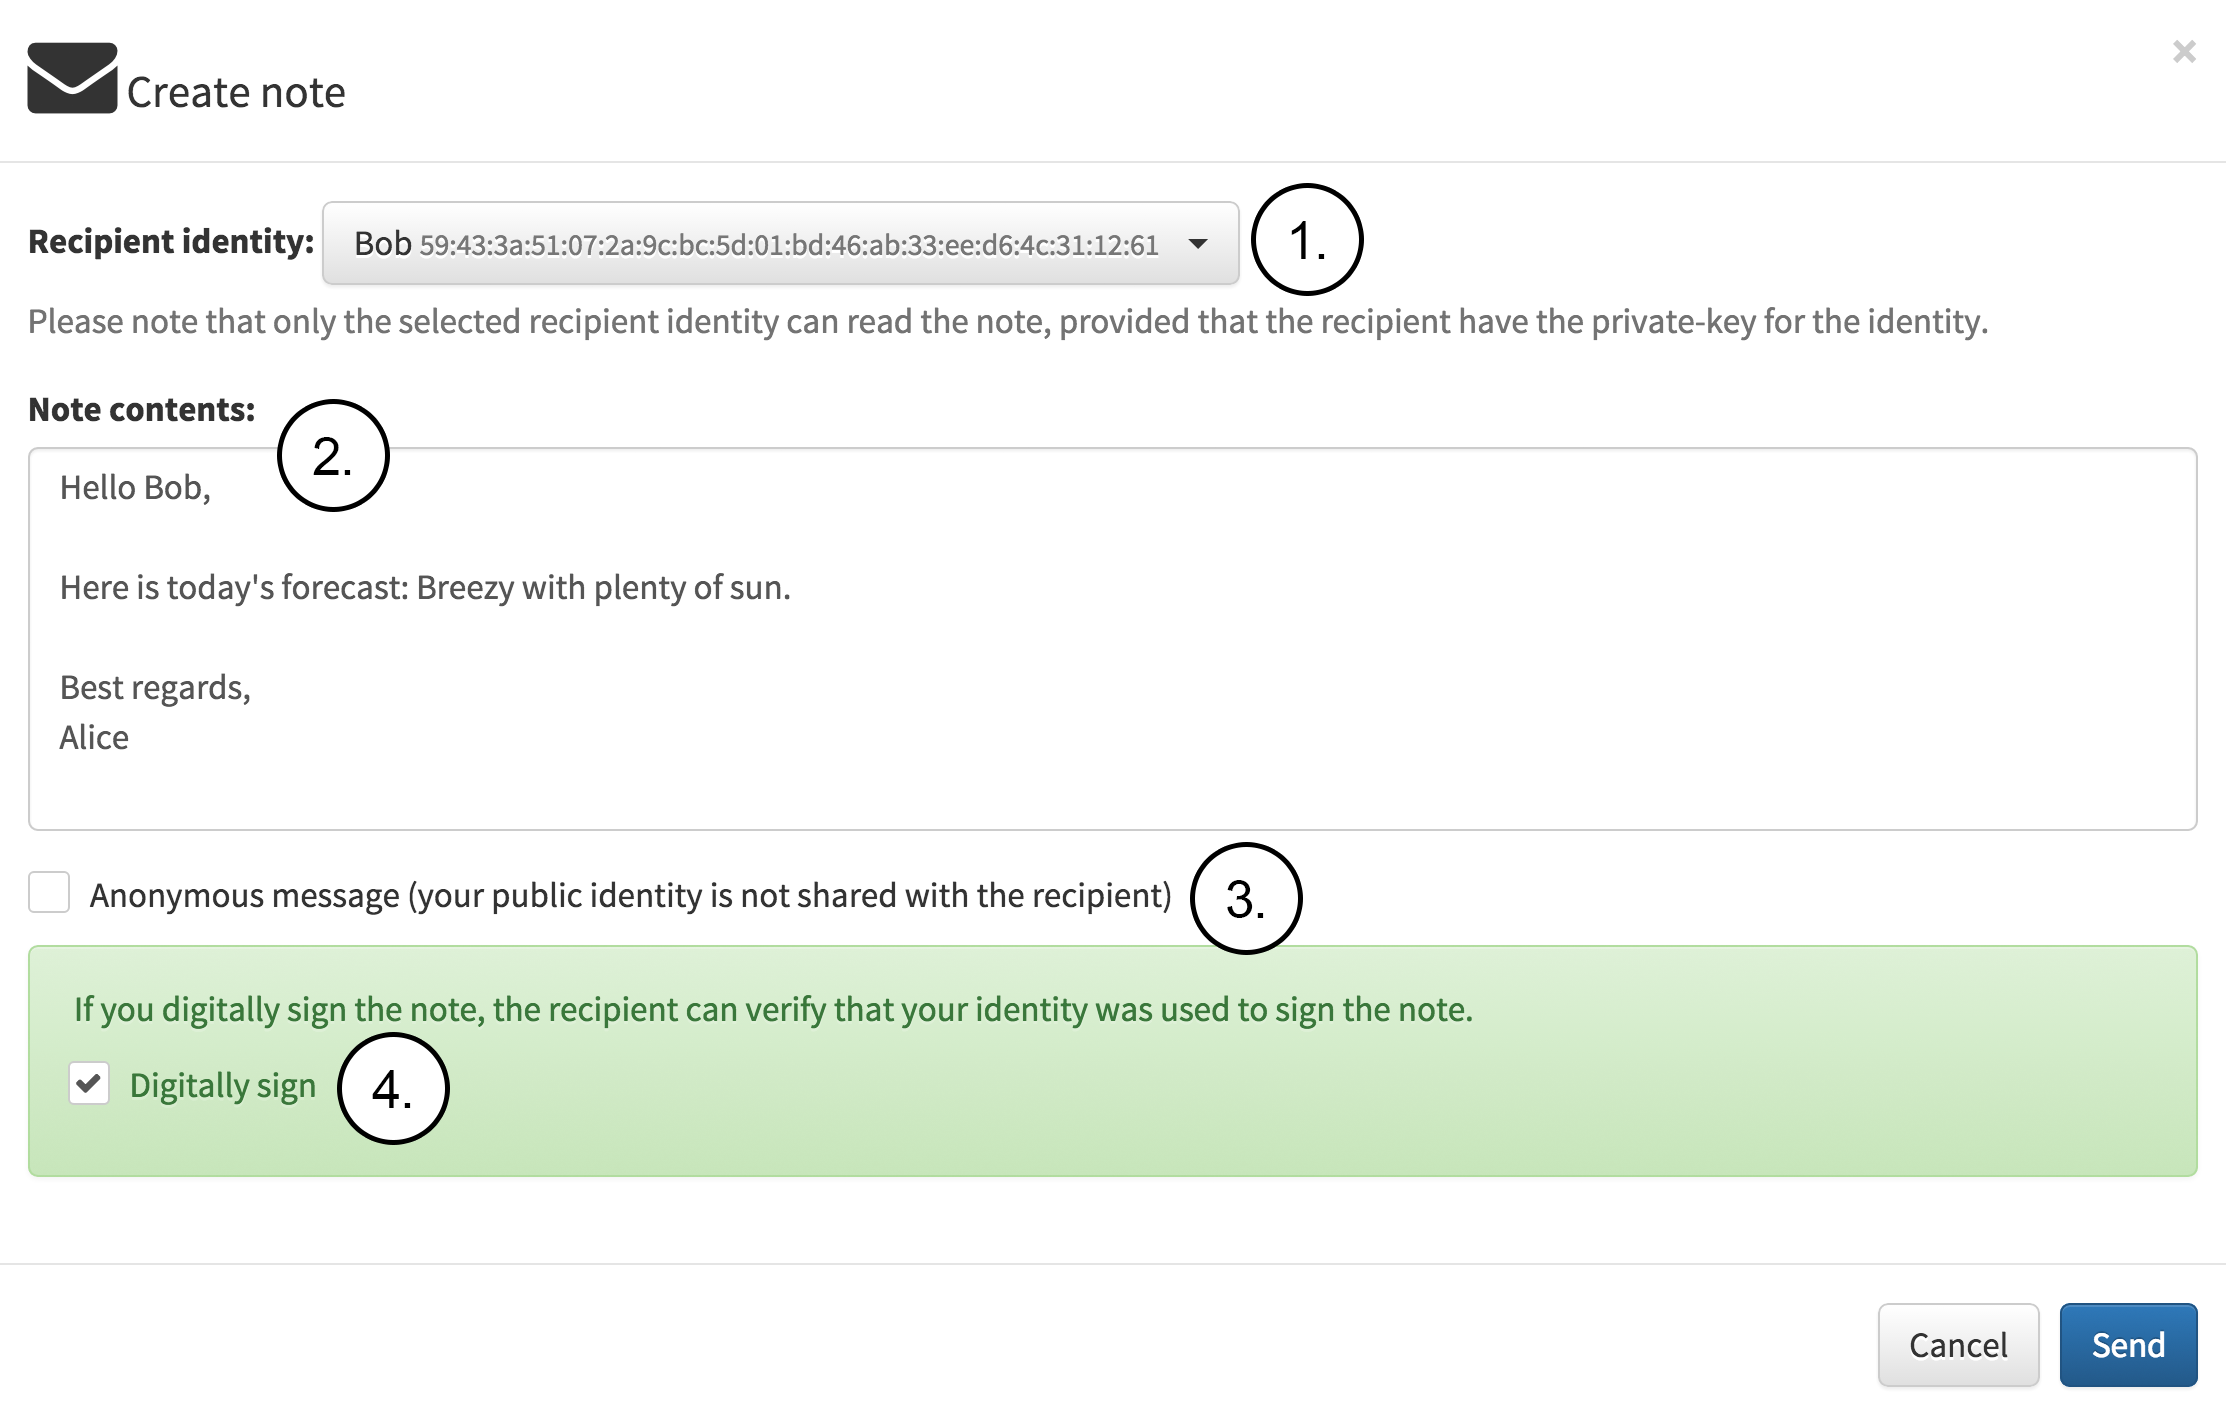
Next, Alice decides to write another note to Bob as seen in the following figure. This time Alice is going to include public identity and also sign the note with a digital signature so that Bob can verify that note really was sent by Alice. The figure contains the following notes:
-
Alice selects Bob as the target identity from the drop down list.
-
Alice writes the note to be sent.
-
Alice decides to share identity to the receiver.
-
Alice decides to sign the note with digital signature.
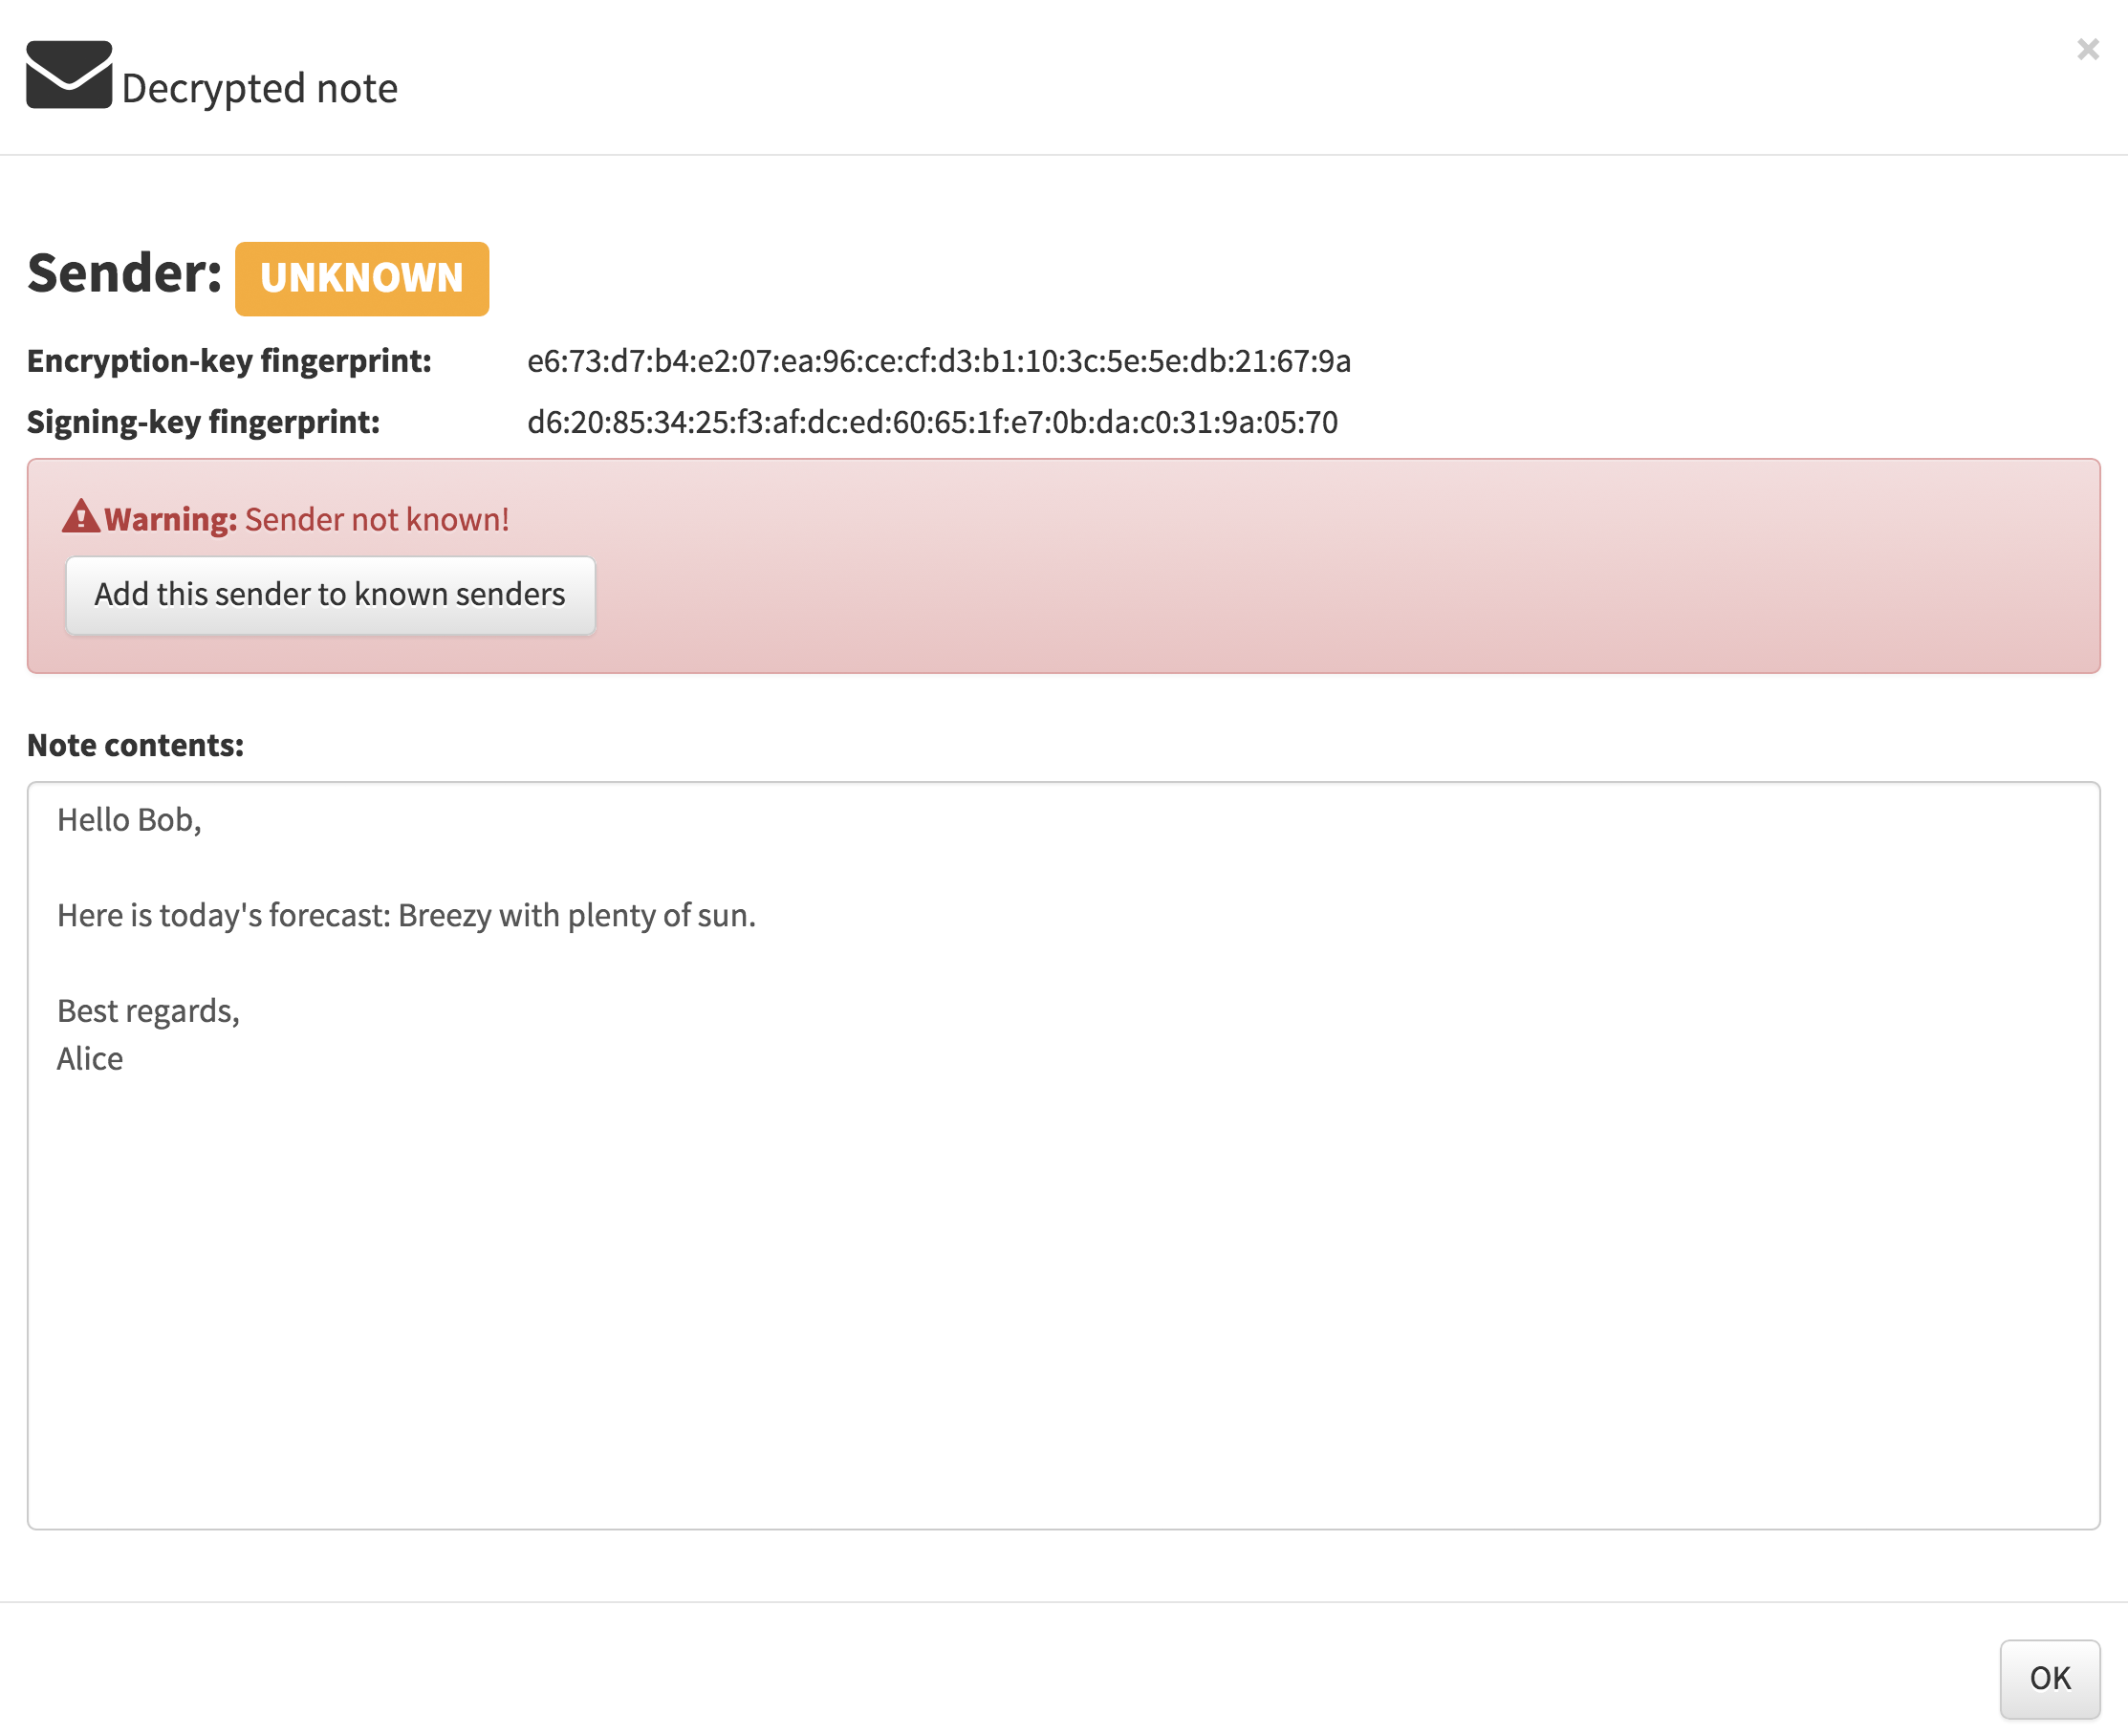
Bob receives another note, this time with Alice’s public identity and also Alice’s digitally signature as seen in the following figure but the sender is still shown as unknown because Bob do not have Alice’s identity. Bob should now verify that the encryption-key finger-print (e6:73:d7:b4:e2:07:ea:96:ce:cf:d3:b1:10:3c:5e:5e:db:21:67:9a) belongs to Alice.
After Bob have verified the fingerprint Bob can import the identity which was included with the note.
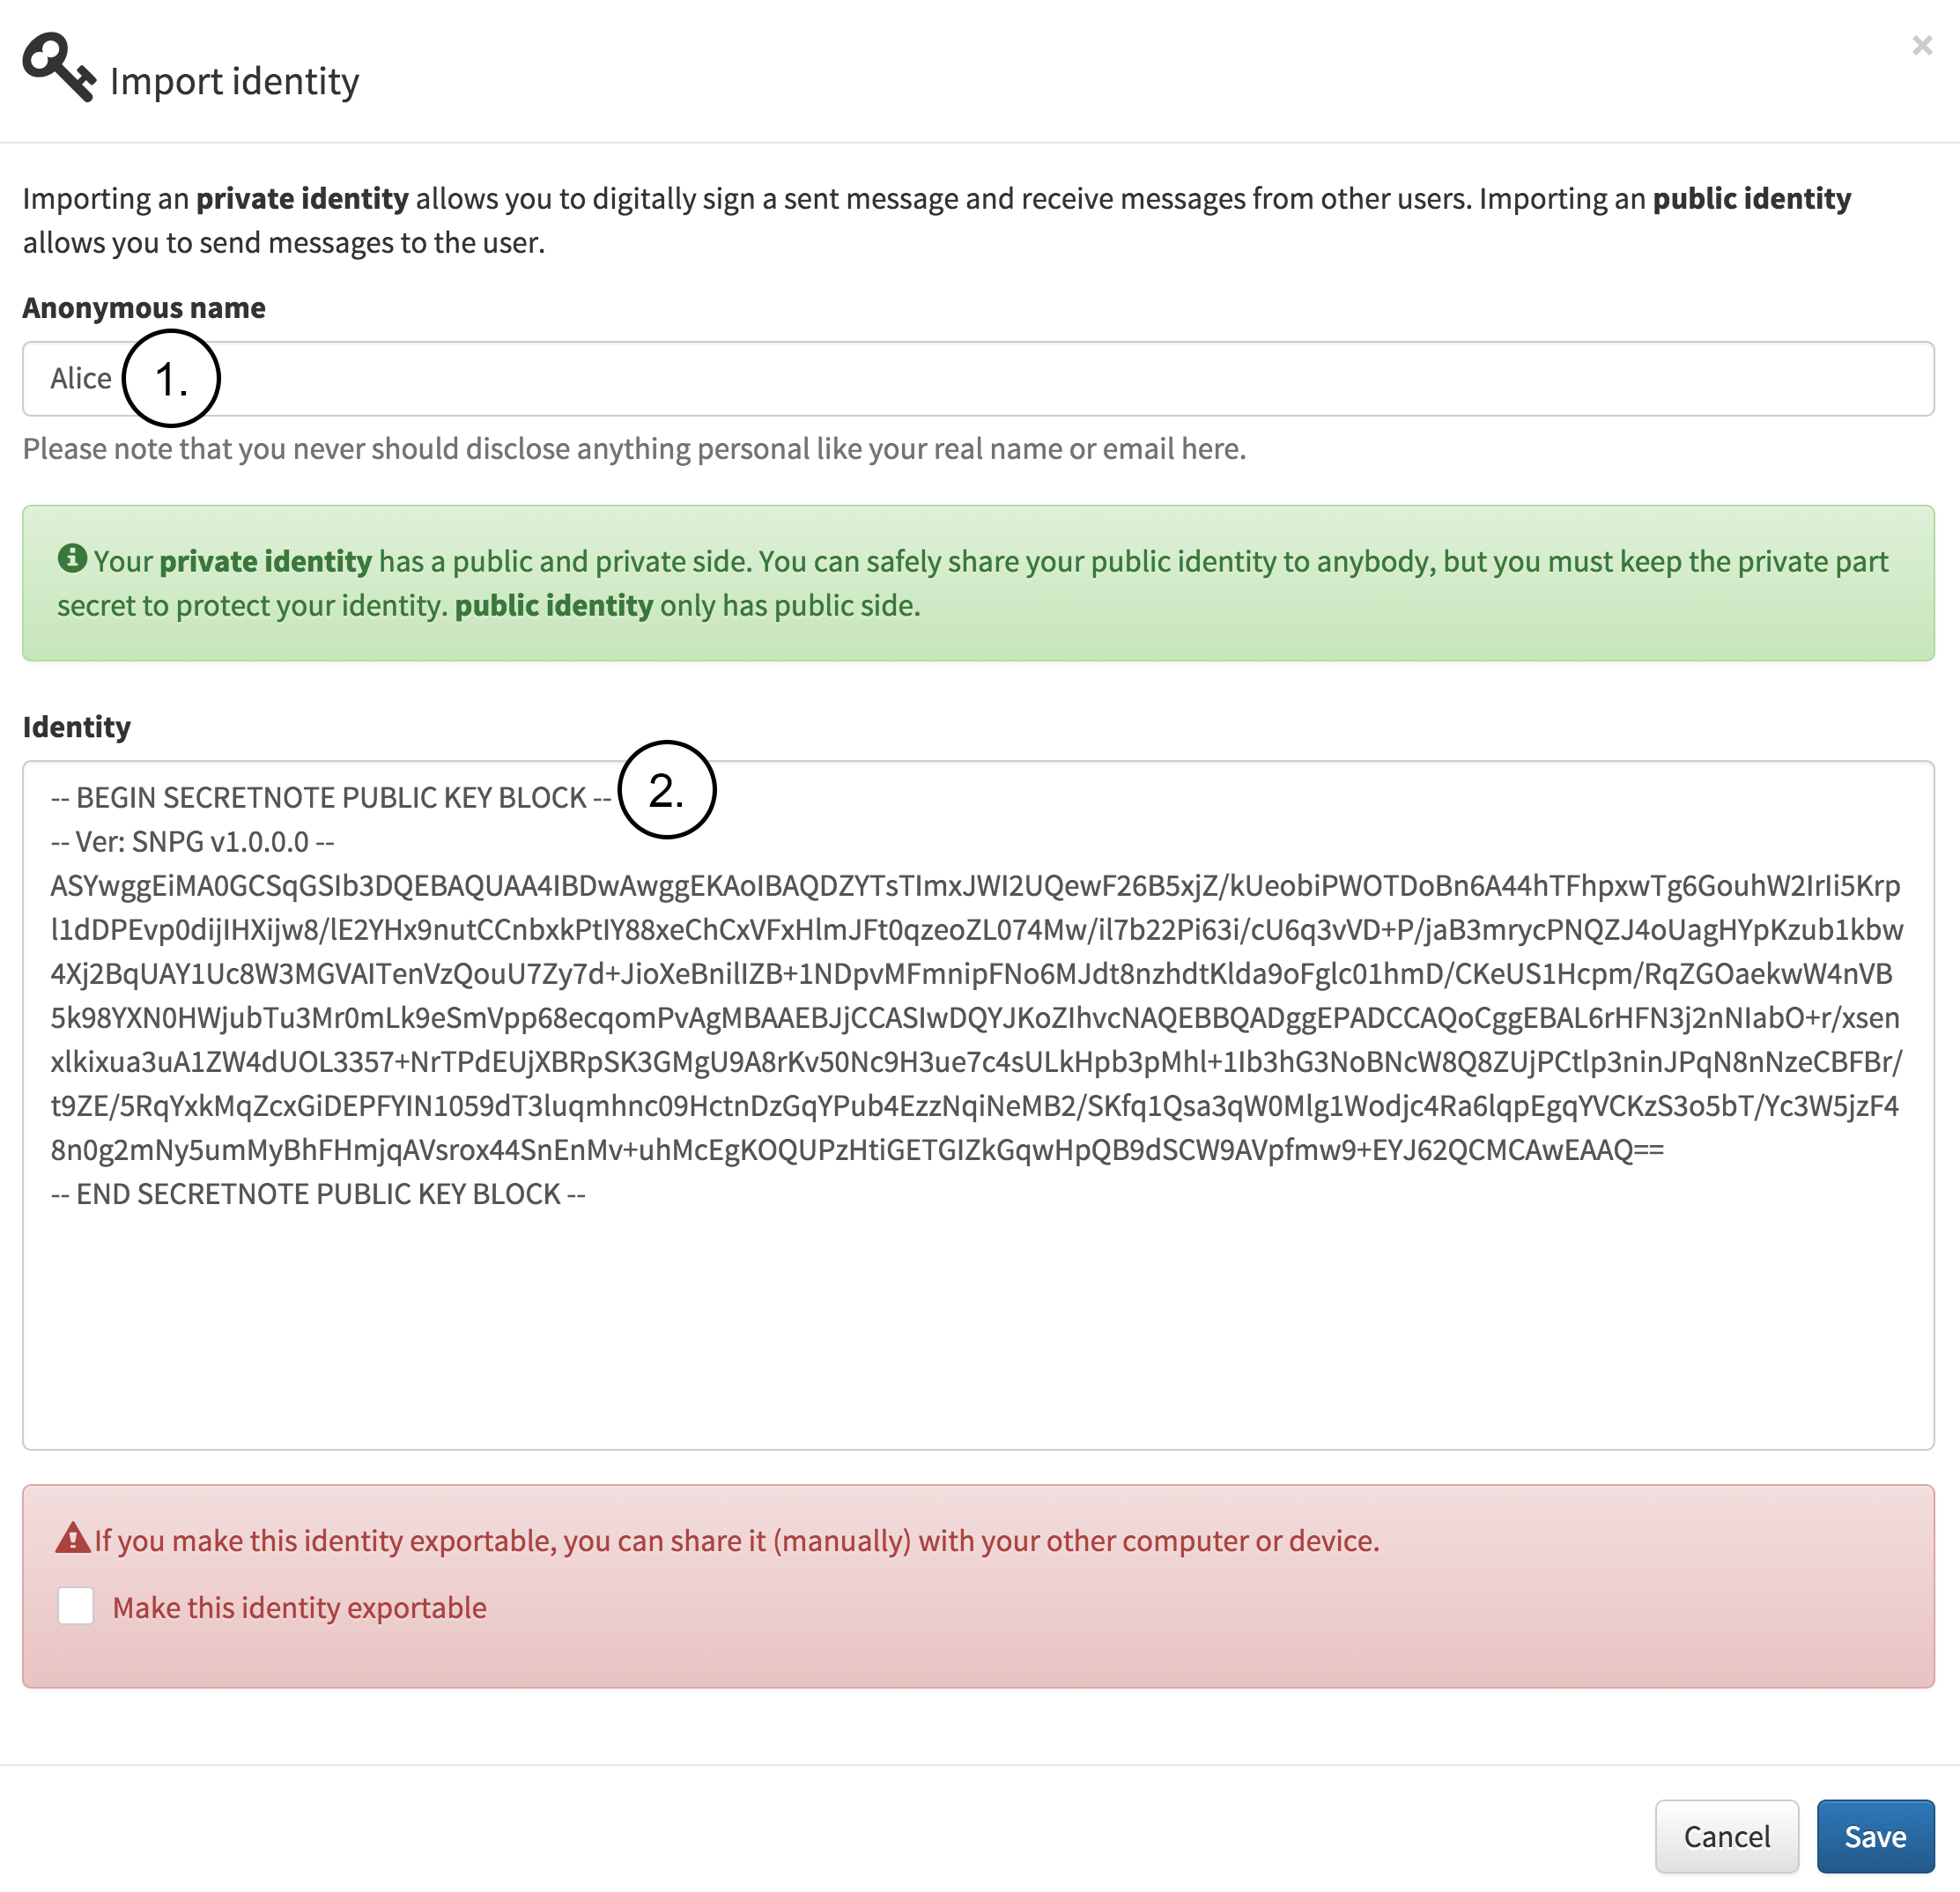
Bob imports Alice’s identity that he received with the previous note as seen in the following figure. The figure contains the following notes:
-
Bob fills in the name which will be used internally for this known public identity. The name is not shared and is only used for identifying this identity stored locally.
-
The public identity is automatically filled in from the received message.
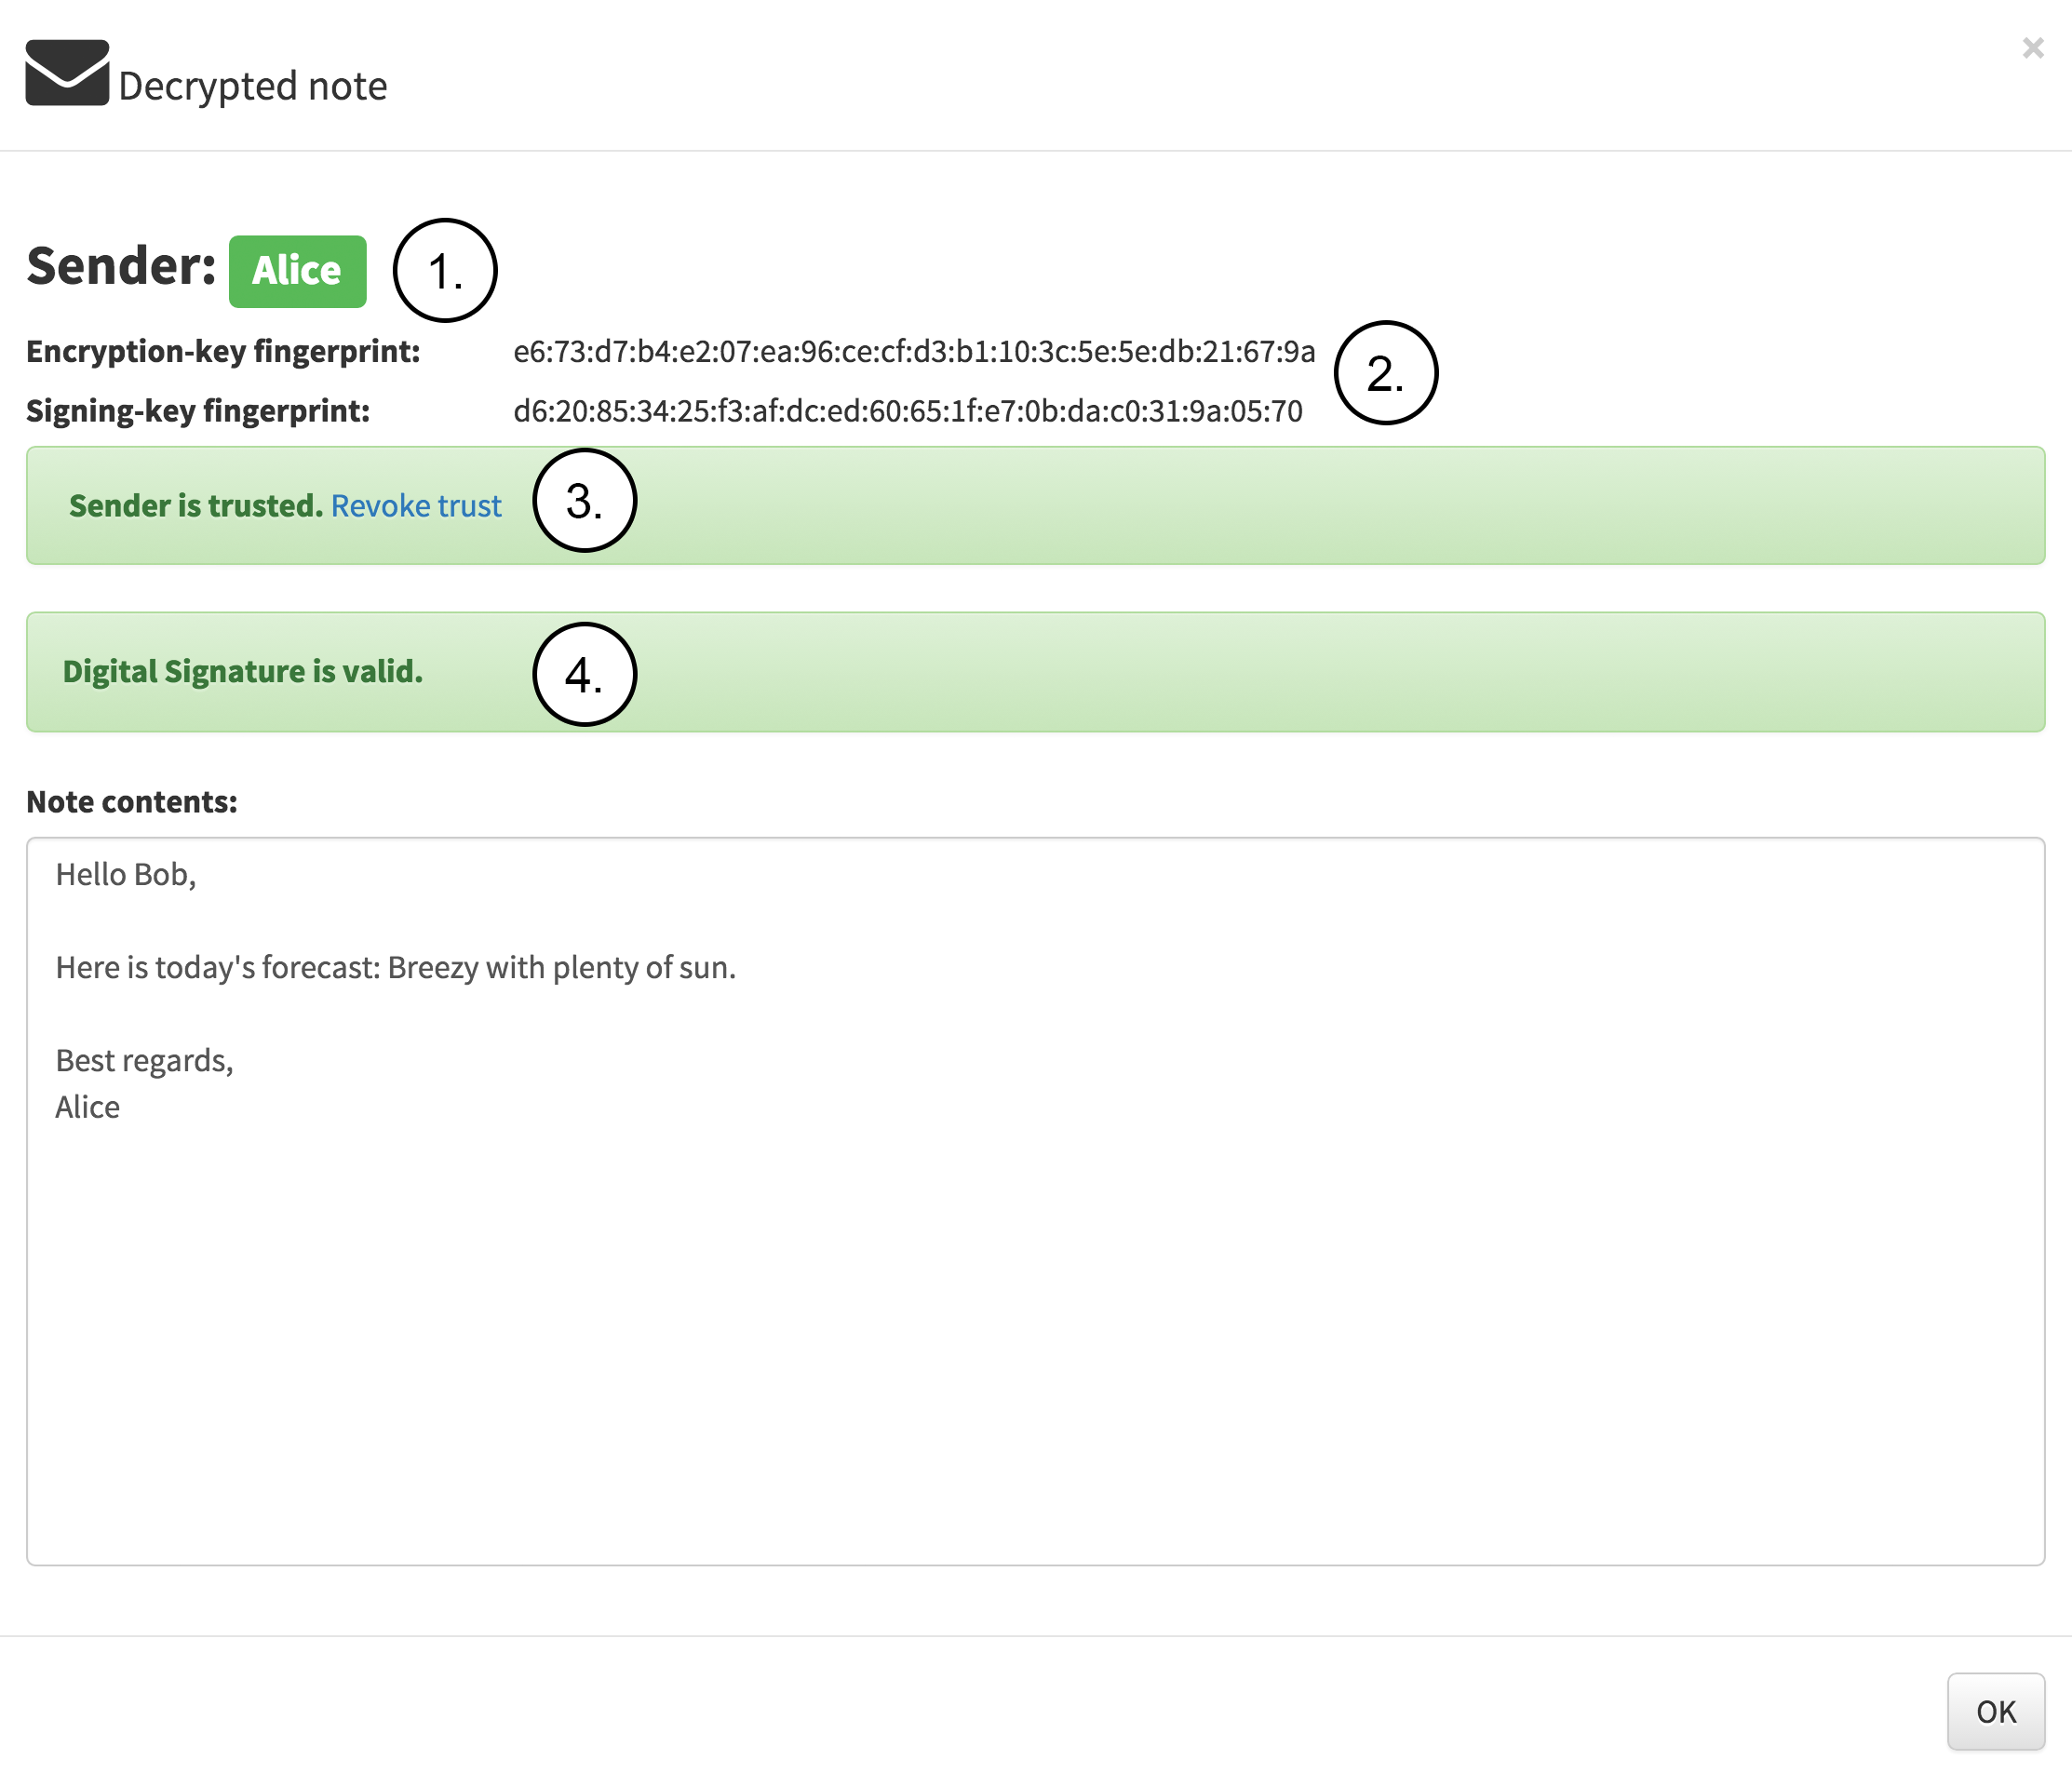
Now Bob can be sure that the sender really is Alice and that the message has not been tampered with since the digital signature also validates the message integrity as seen in the following figure. The figure contains the following notes:
-
The message was received from identity locally called Alice.
-
The encryption-key and the signing-key fingerprint is displayed.
-
The note sender is trusted.
-
The note is digitally signed and the signature is valid.
For advanced developers the example applications also contain a debug section as seen in the following figure. The debug section can be used to inspect cryptography keys, the received notes, and perform different cryptographic operations manually. The figure contains the following notes:
-
The debug section is accessible from the main navigator.
-
The key storage contains the CryptoKey objects that have been stored in the local indexed database.
-
The note storage contains the messages that are found with the actived identity (2.).
-
The input panel displays the input data for cryptographic operation. The input panel can also be used to input data manually.
-
The output panel displays the output data from cryptograhical operation.
-
The actions contain the following operations that can be performed: encrypt, de-crypt, sign, verify, digest, generateIdentity, importIdentity, exportKey and export Identity.
-
The console view shows the output from the operations.
