| Area | TOCTitle | PageTitle |
|---|---|---|
Tutorial |
Sigfox Arduino Shield Demo |
Working with Cytron Sigfox Arduino Shield |
Cytron Sigfox Arduino Shield Setup
Controller: Maker UNO (Arduino UNO compatible)
IDE: Arduino IDE
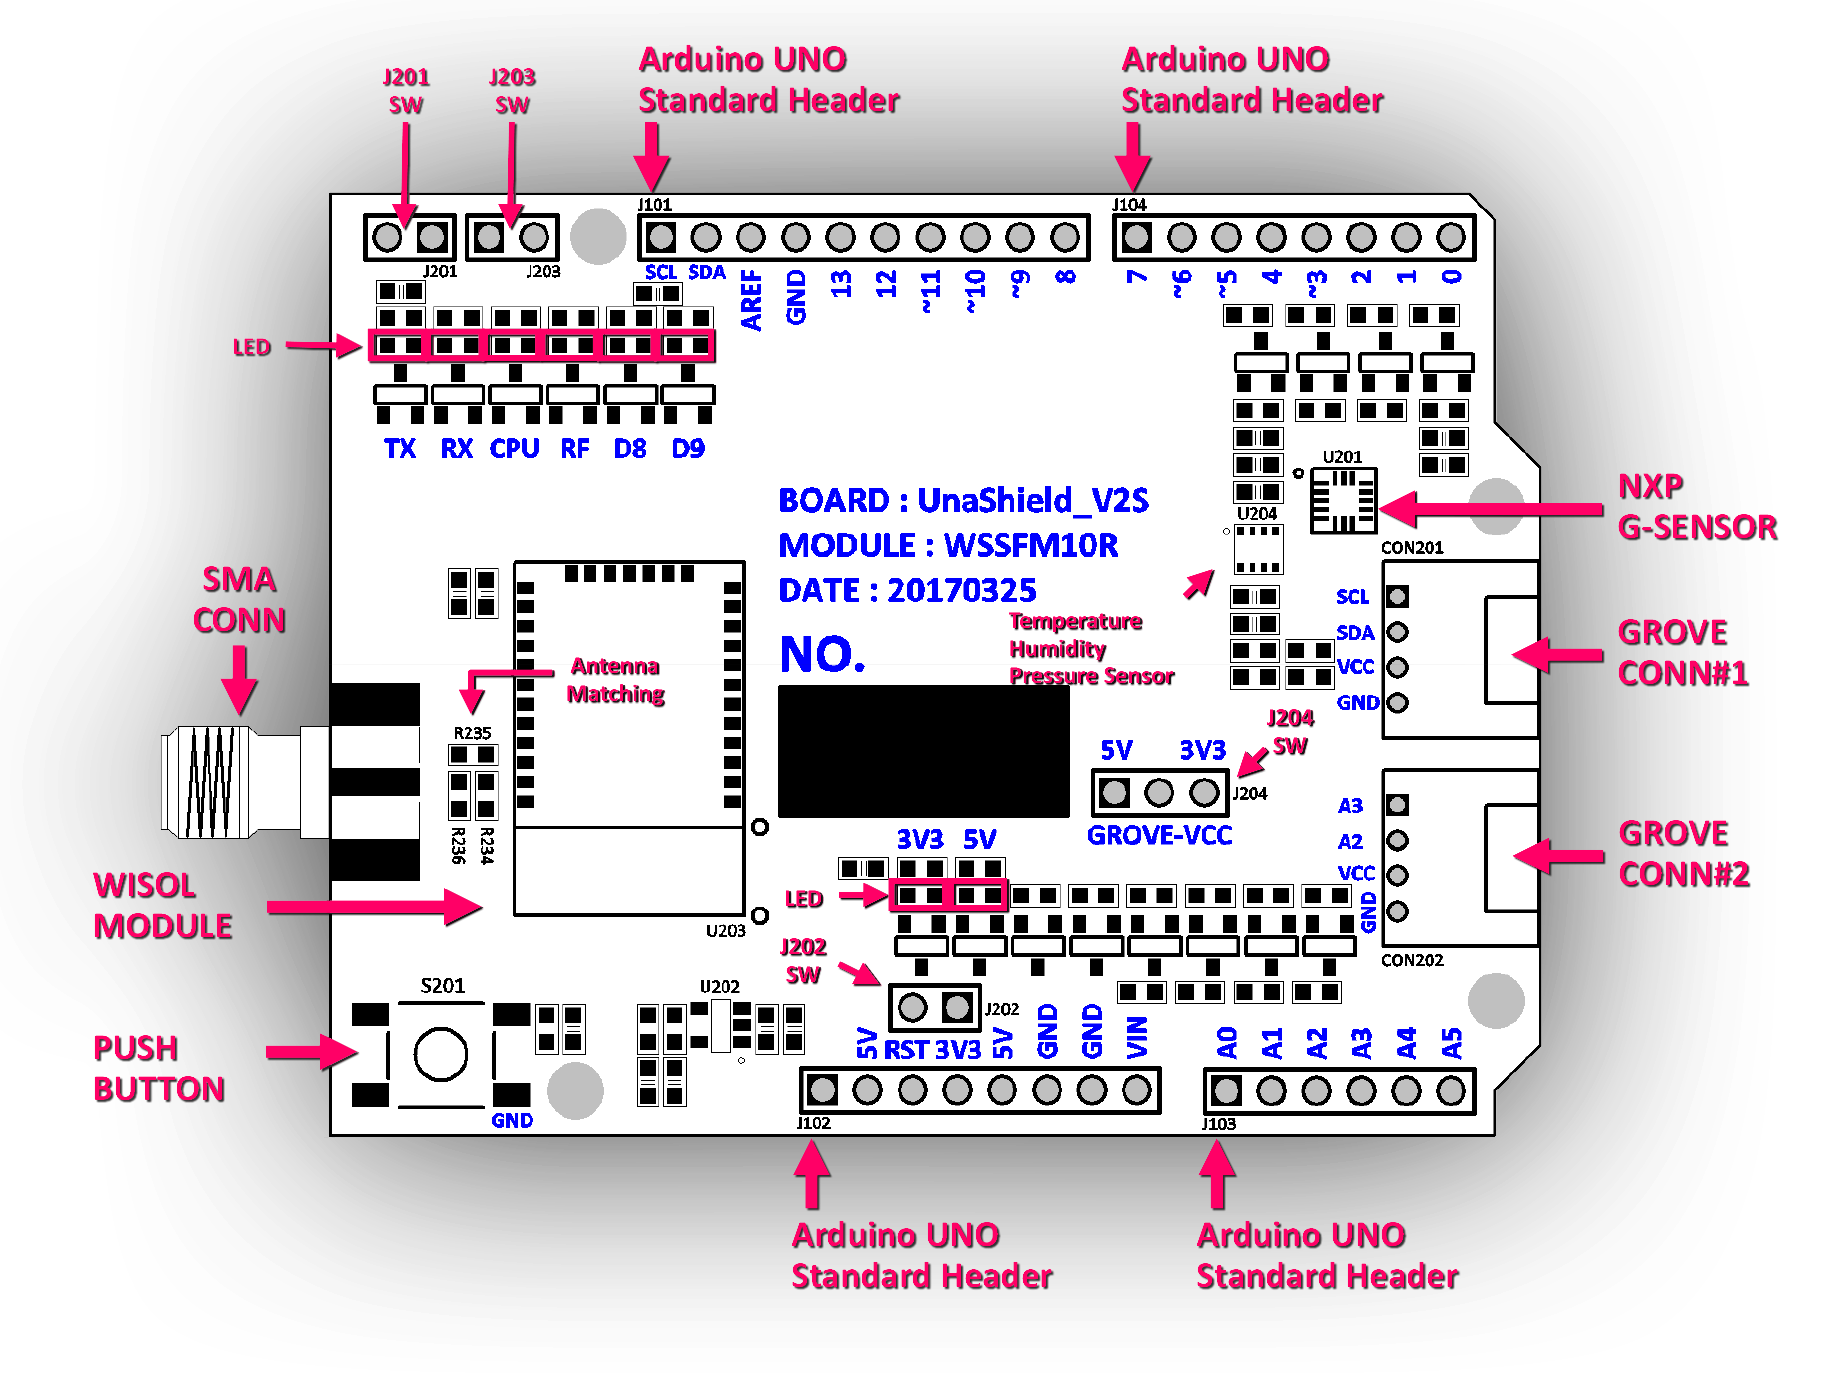
| Arduino Pin | Sigfox Shield | Description |
|---|---|---|
| IOREF | 5V | 5V Power Source from Arduino |
| RESET | RESET | Reset MCU, Low Active |
| 3V3 | 3V3 | 3V3 Power Source from Arduino |
| 5V | 5V | 5V Power Source from Arduino |
| GND | GND | GND |
| VIN | NC | NC |
| A0 | NC | Analog Pin-0 |
| A1 | NC | Analog Pin-1 |
| A2 | A2 | Analog Pin-2; Grove #2 |
| A3 | A3 | Analog Pin-3; Grove #2 |
| A4 | I2C-SDA | Analog Pin-4; Grove #1 |
| A5 | I2C-SCL | Analog Pin-5; Grove #1 |
| D13 | NC | Digital Pin-13 |
| D12 | NC | Digital Pin-12 |
| D11 | NC | Digital Pin-11 |
| D10 | NC | Digital Pin-10 |
| D9 | Red LED | User Programmable LED |
| D8 | Green LED | User Programmable LED |
| D7 | Wakeup | Wakeup Pin from deep sleep mode |
| D6 | Button | Push button, Trigger to low |
| D5 | UART-RX | UART Receiving Pin |
| D4 | UART-TX | UART Transmitting Pin |
| D3 | INT2 | Interrupt#2 for Accelerometer |
| D2 | INT1 | Interrupt#1 for Accelerometer |
| D1 | NC | Digital Pin-1 |
| D0 | NC | Digital Pin-0 |
I2C Sensor Address
- SM303AGR Accelerometer
0x32 - SM303AGR Magnet
0x3C - BOSCH Temperature / Humidity / Pressure Sensor – BME280
0x76
Arduino Library: Sigfox Library
THIS LIBRARY IS KEPT FOR REFERENCE. THE OFFICIAL LIBRARY IS HOSTED AT : https://github.com/UnaBiz/unabiz-arduino
- Download the library from GitHub : https://raw.githubusercontent.com/wemakerspace/Cytron_Sigfox_Demo/master/unabiz-arduino-master.zip
- Open the Arduino IDE, select
Sketch->Include Library->Add.ZIP Library. - Select the zip file you just download.
- Open the Arduino IDE, select
Sketch->Include Library->Manage libraries.... - Search for
Adafruit BME280 LibraryandAdafruit Unified Sensor - Click
Installto install the library. - Restart the Arduino IDE.
- Examples can be opened in Arduino IDE from
File->Examples->Unabiz-arduino->Cytron Sigfox BME280.
- Go to Sigfox Activation Platform
- Compile and run the
Cytron Sigfox BME280example in your arduino + Shield - Click
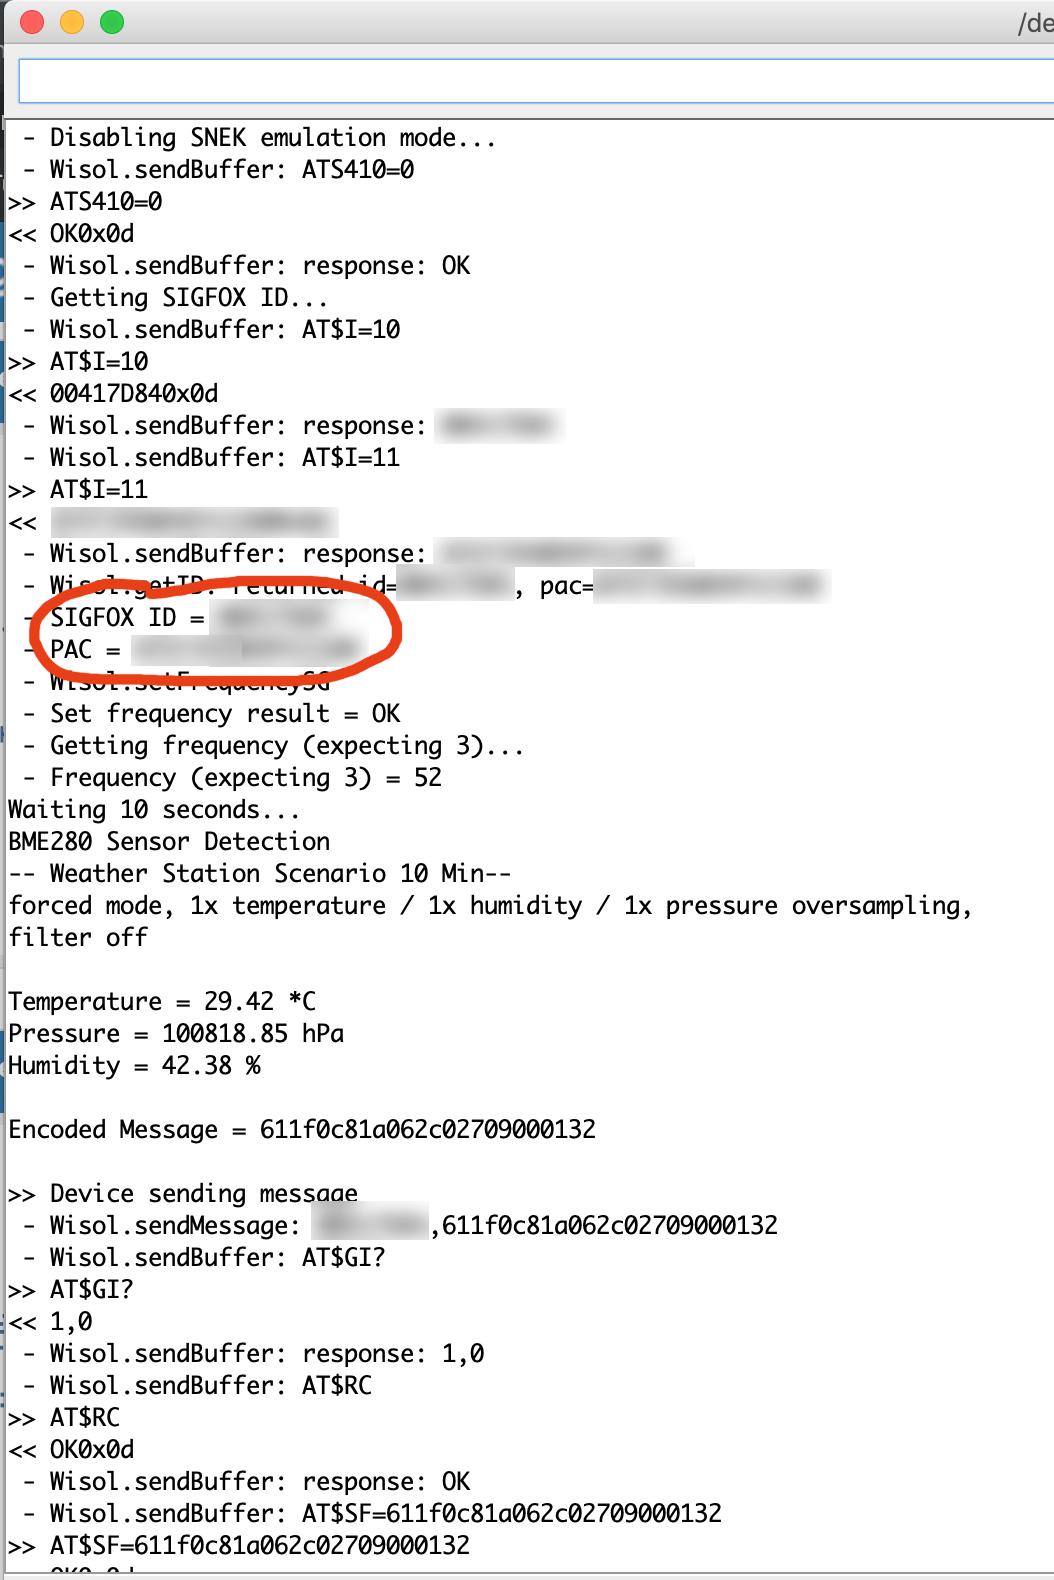
Serial Monitorto see the serial output. - Copy the
SIGFOX ID = XXXXXXXX&PAC = XXXXXXXXXXXXXXXinformation - Register the device to your Sigfox Account.
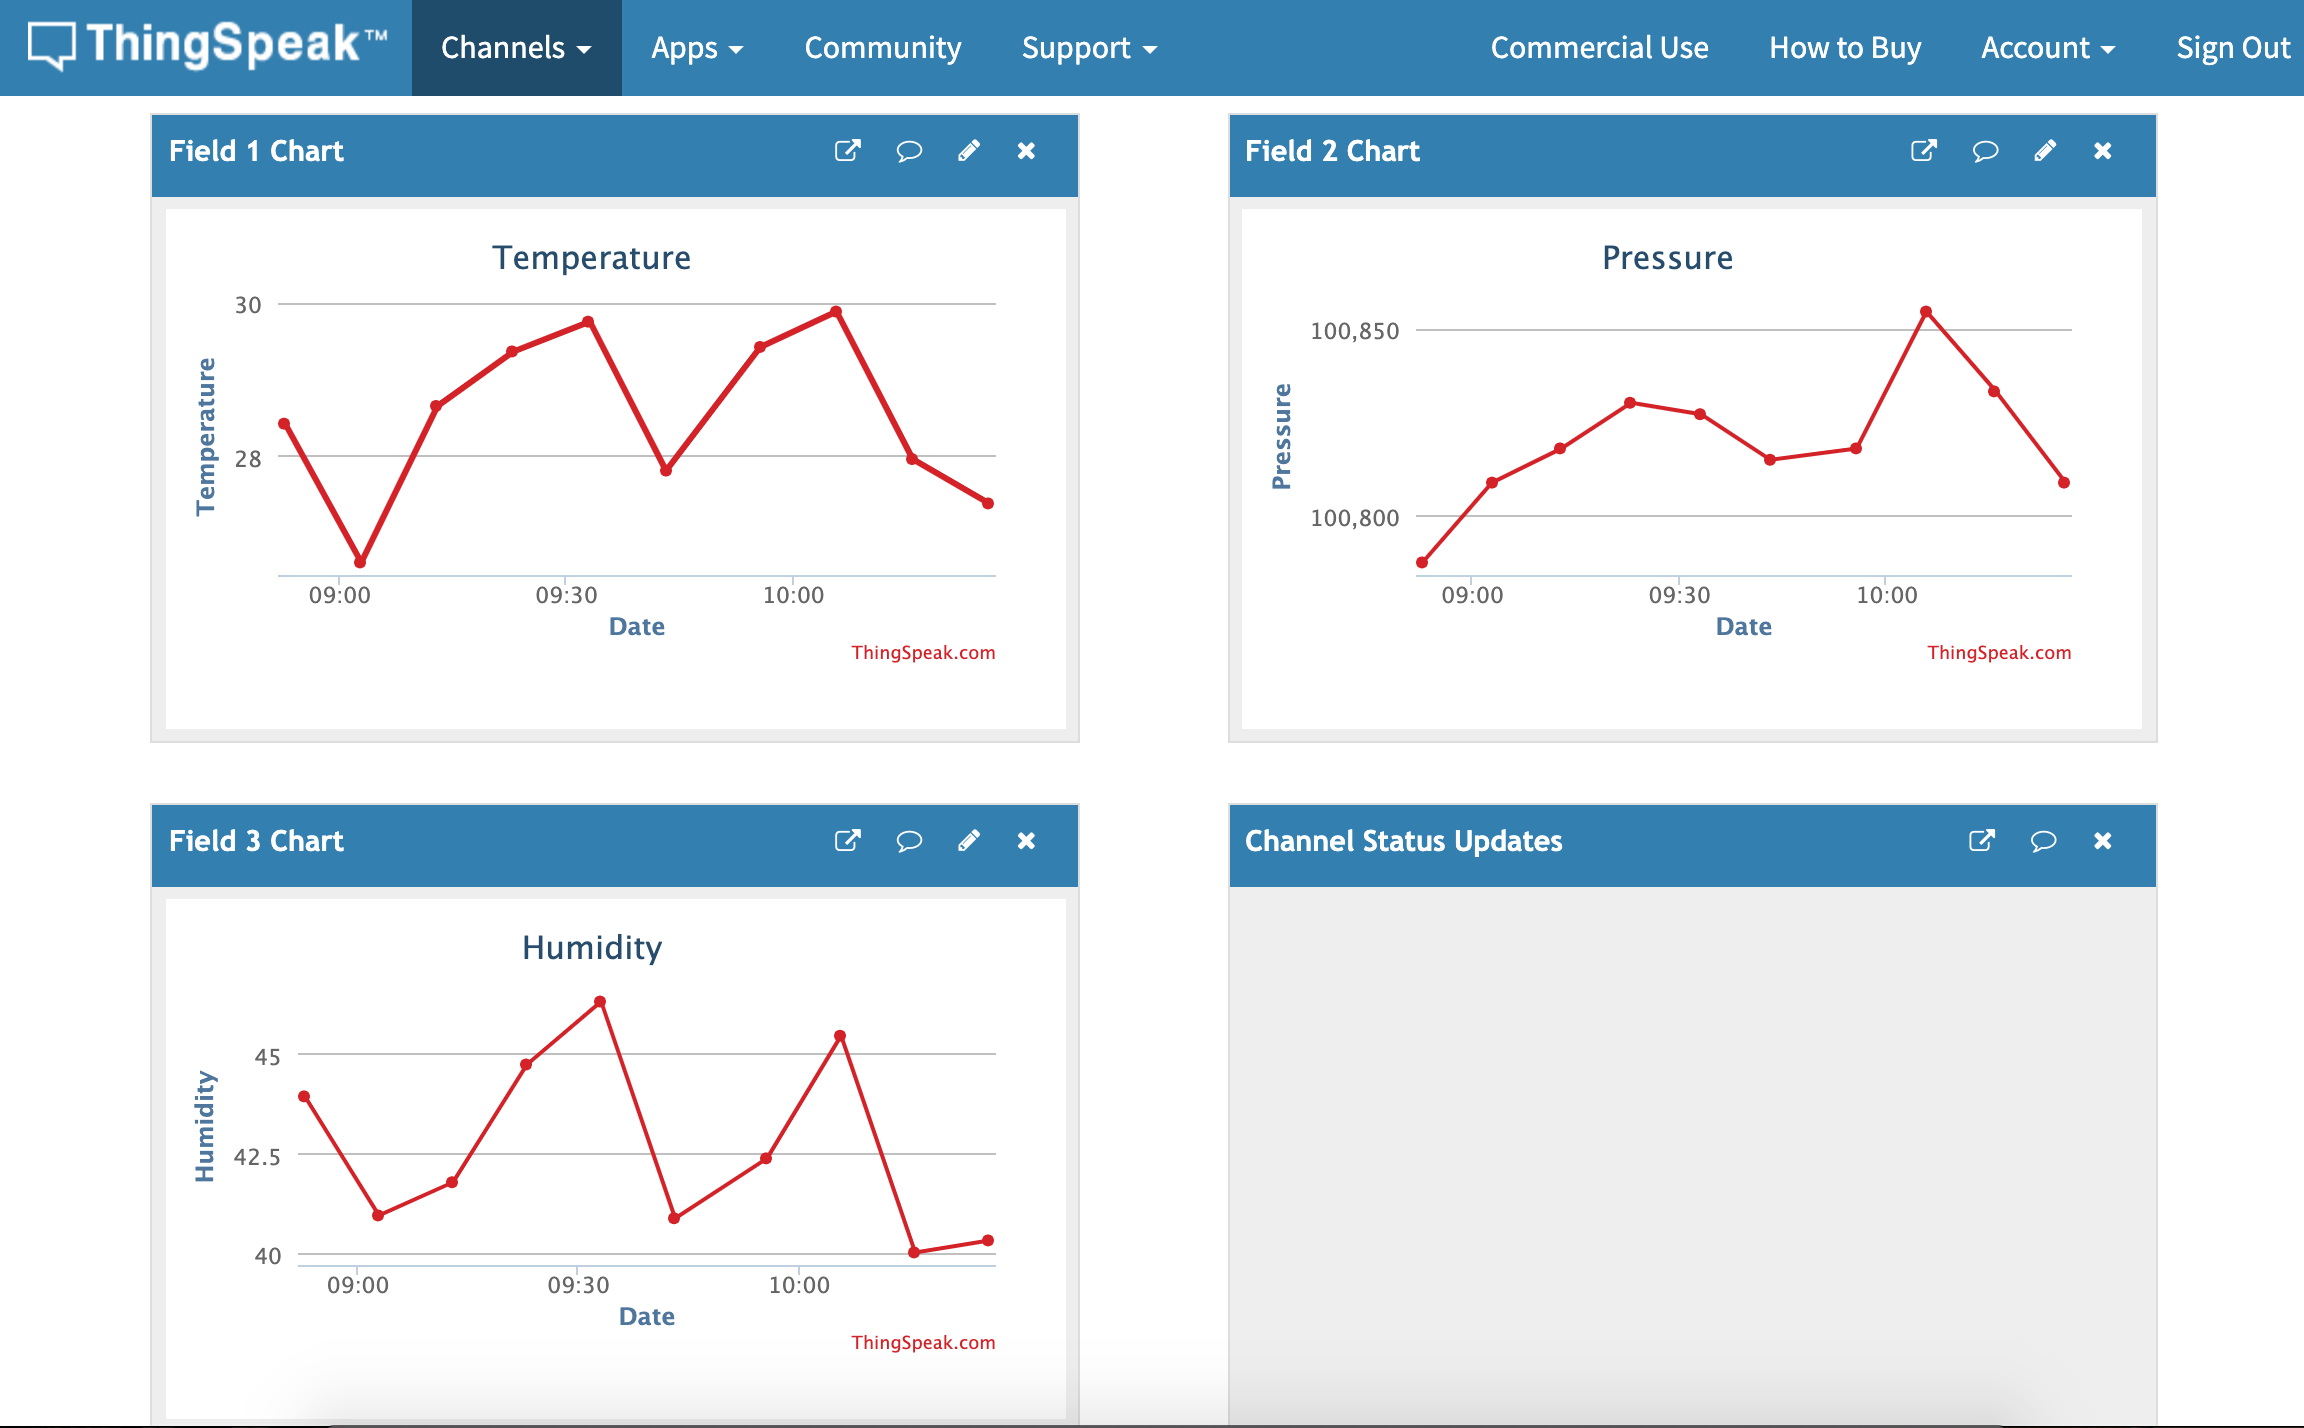
- Register a free account in ThingSpeak
- We need to create 2 Channels:
- 1st Channel for Sigfox backend to pipe encoded data
- 2nd Channel for ThingSpeak to process and display decoded data.
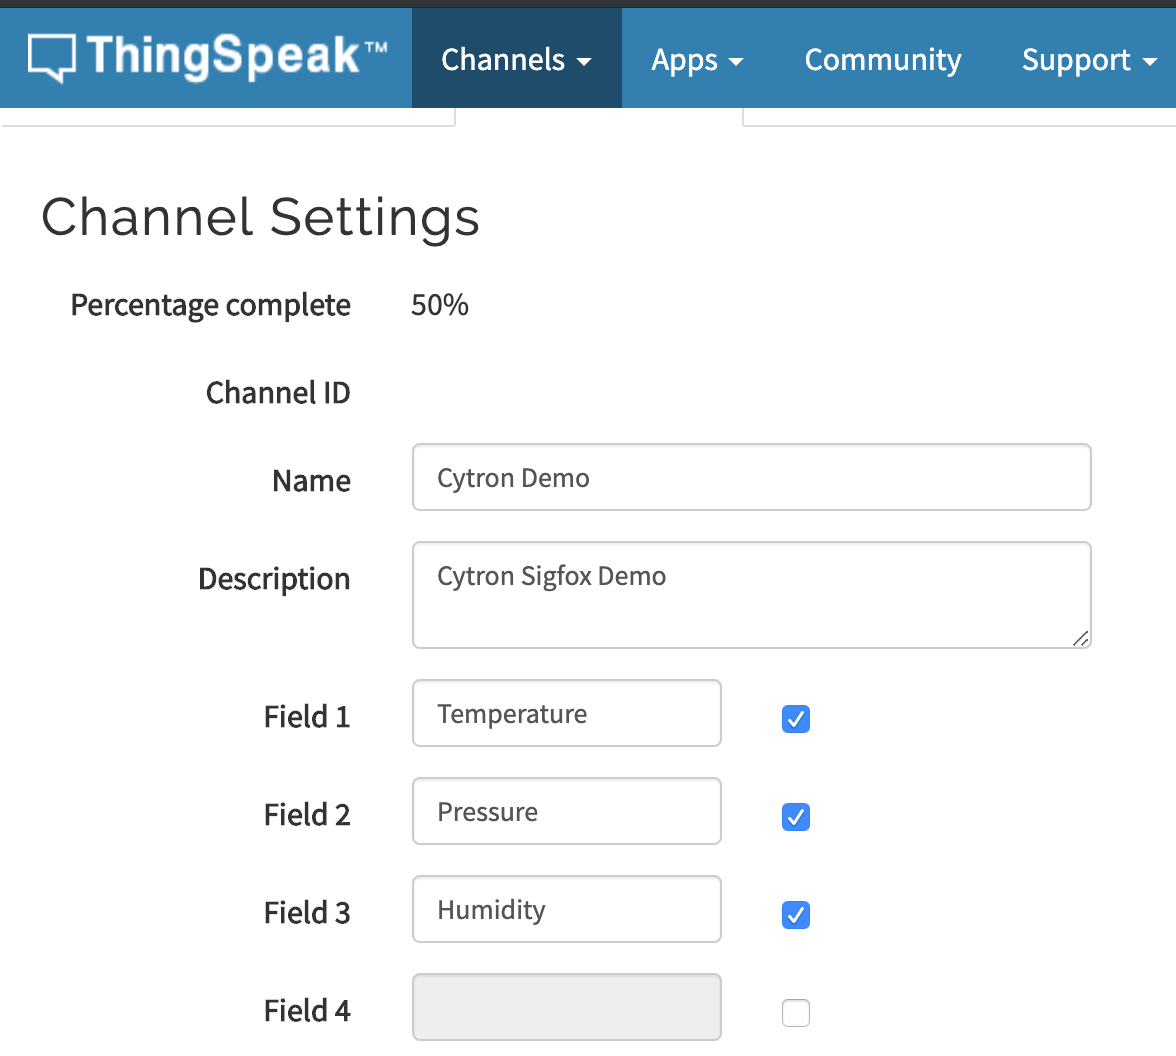
- Create both channel with detail as per below:
- Field1 :
Temperature - Field2 :
Pressure - Field3 :
Humidity
- Field1 :
- Once channel is created, copy both channel API key to be use later.
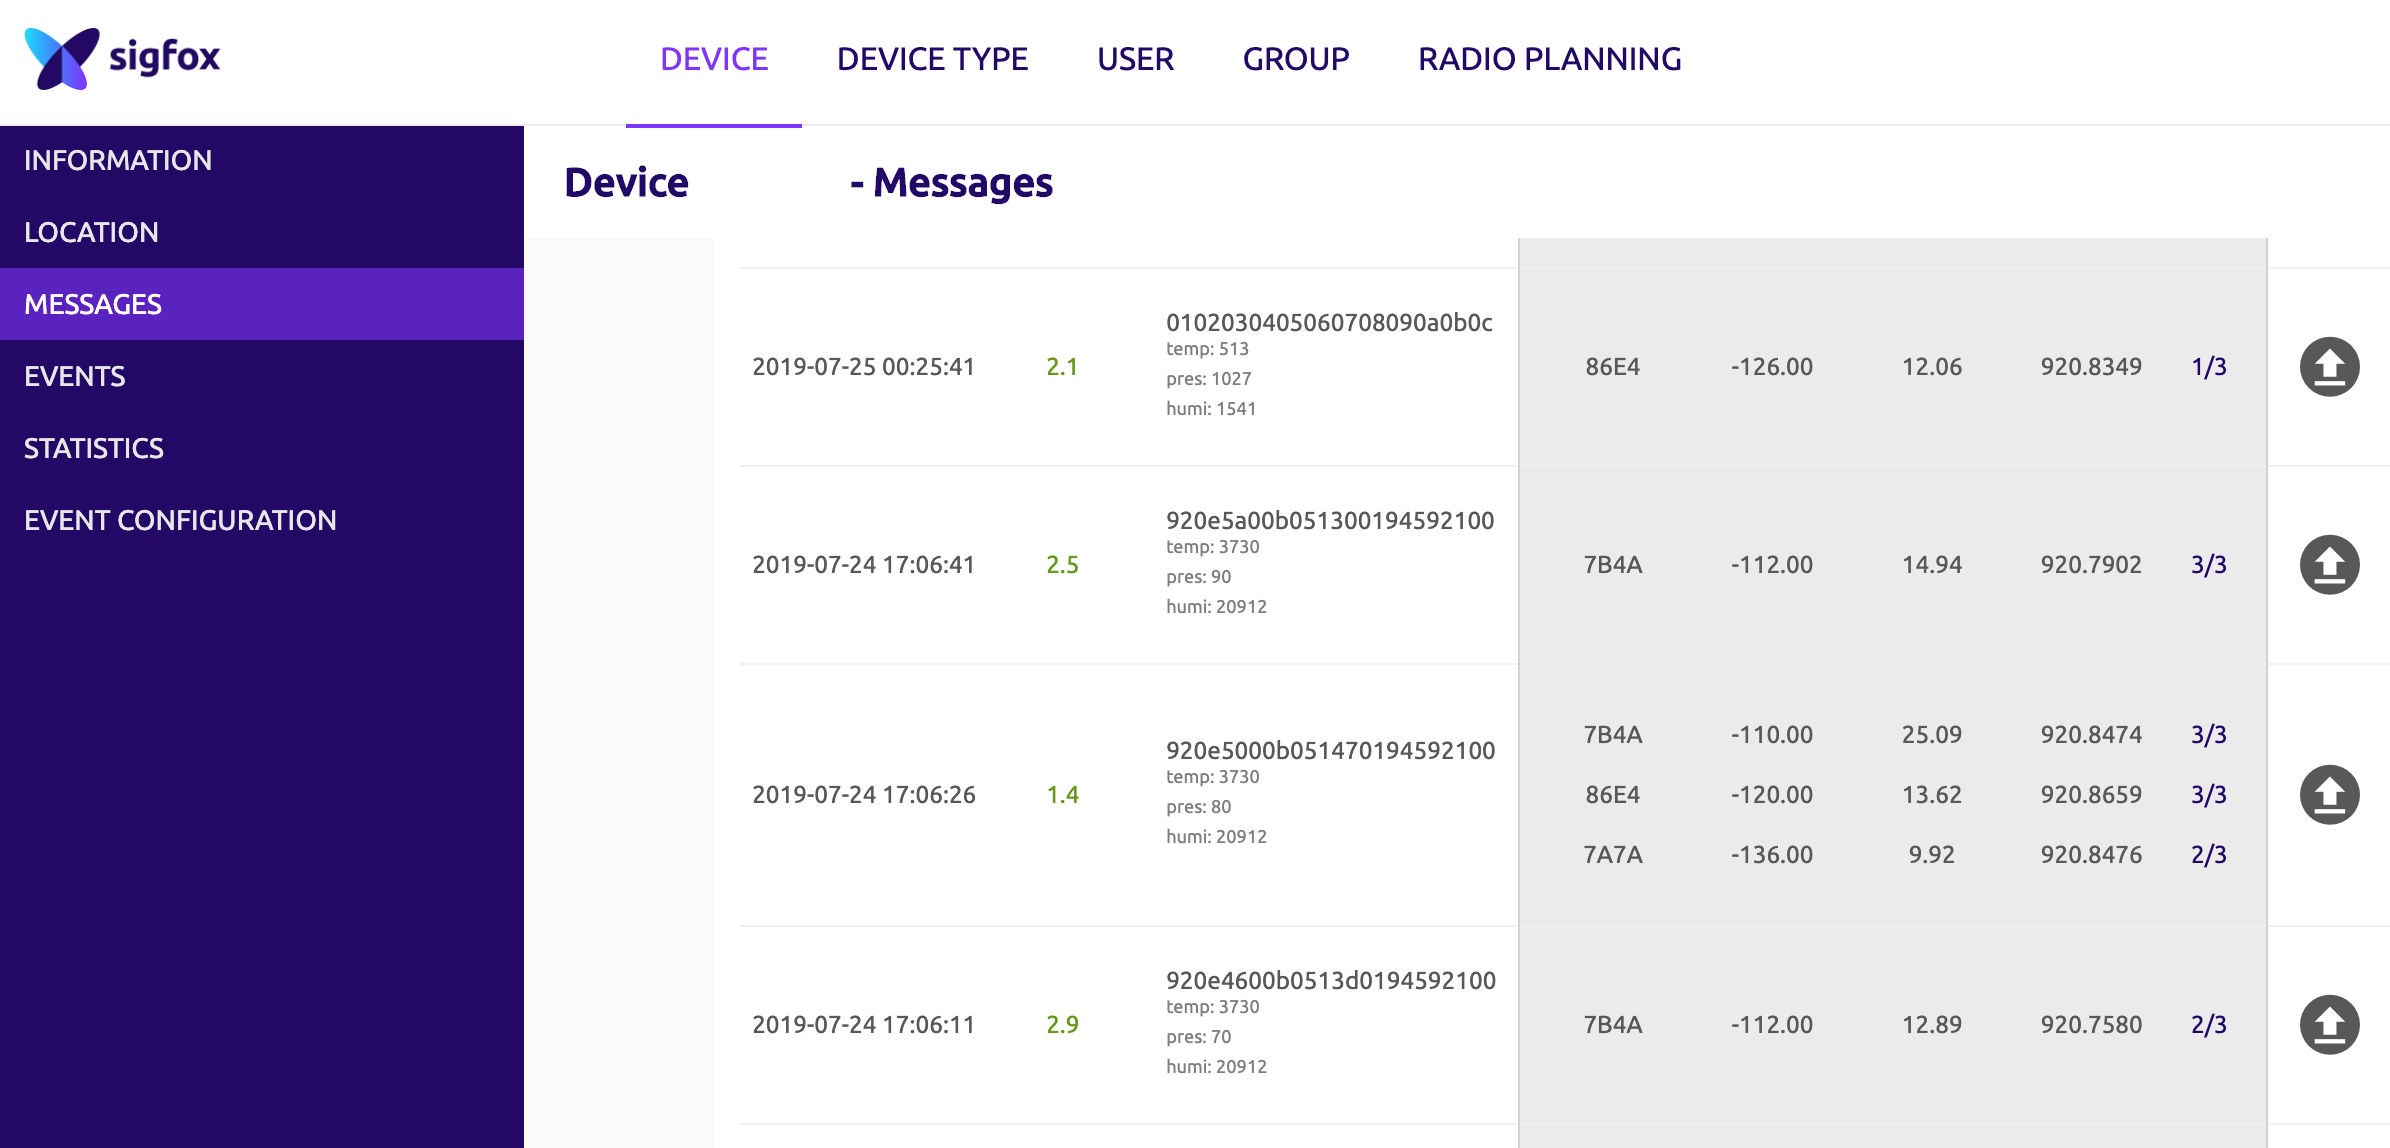
- Go to Sigfox Backend
DEVICE TYPE->LIST->right click on device and selectEDIT- Select
CALLBACKSat the left side bar - Select
Newon the top right - Select
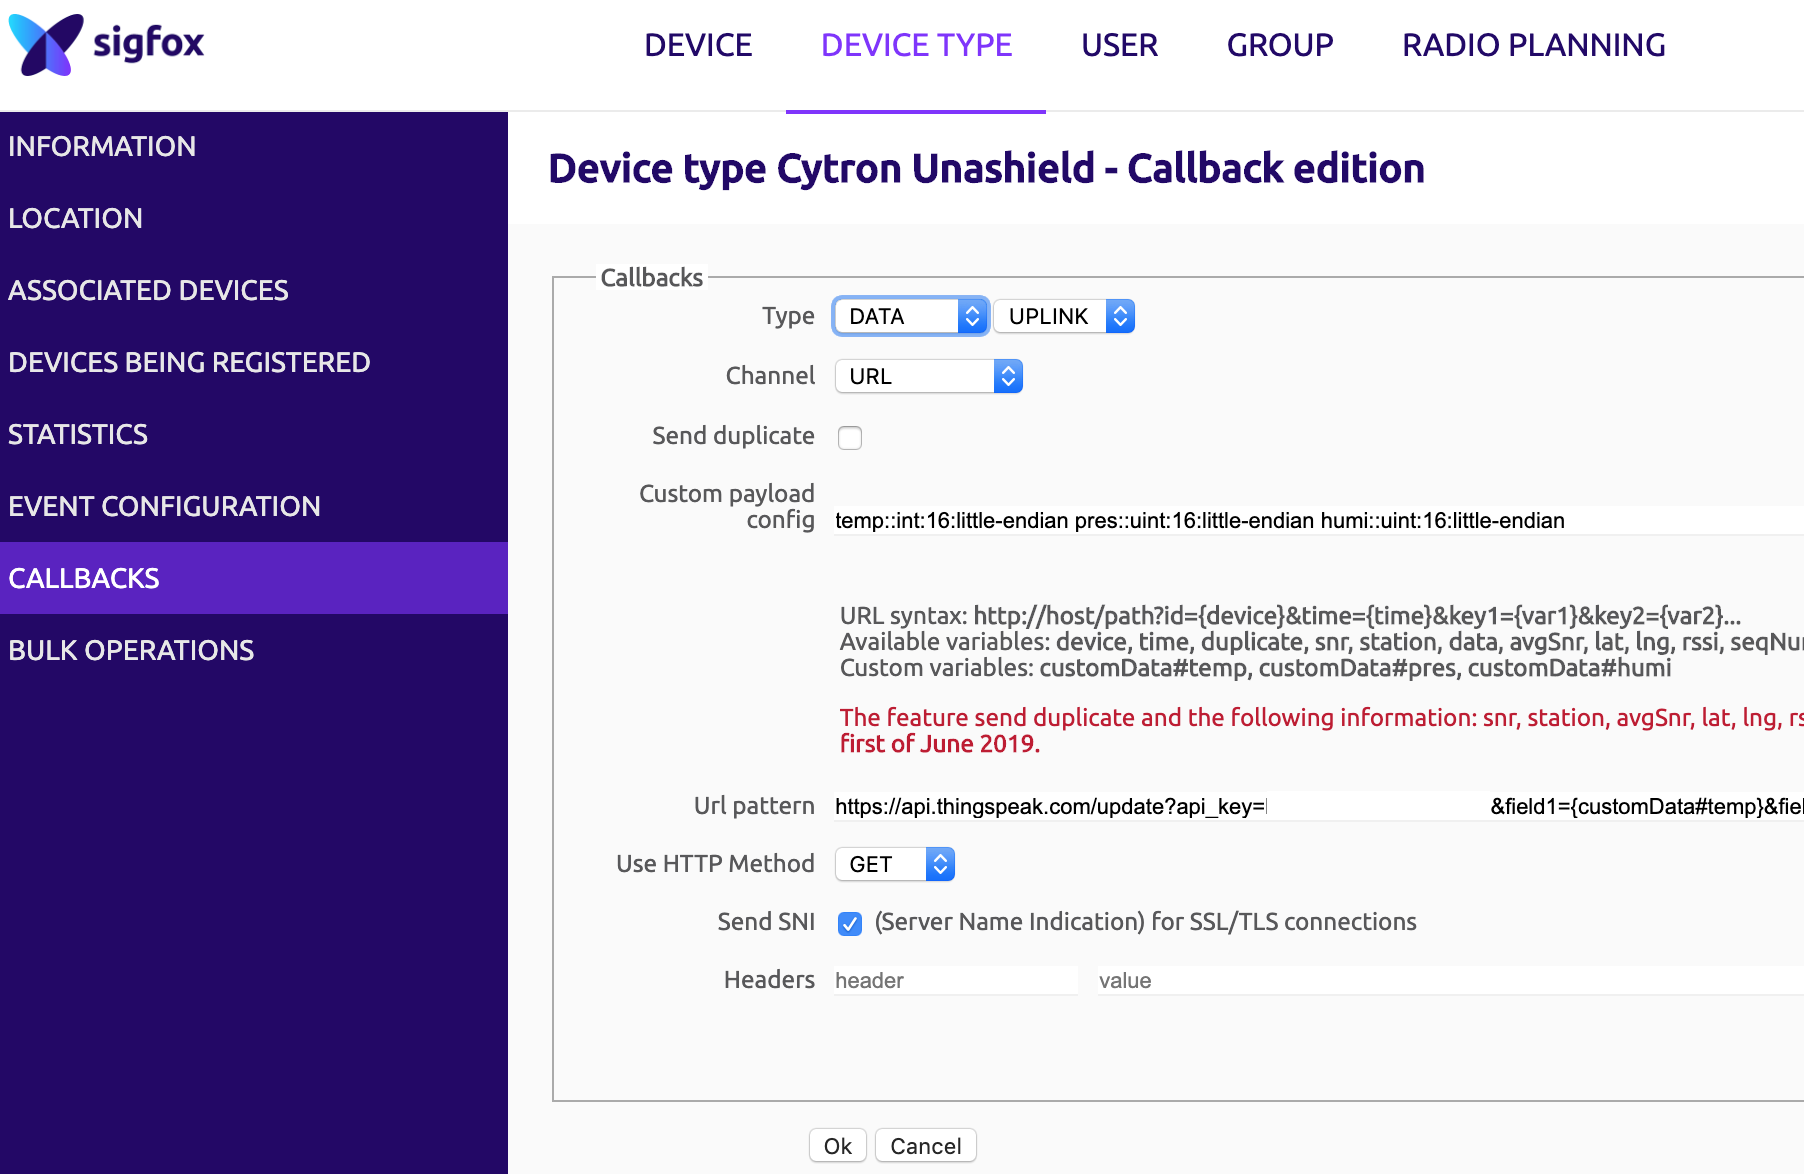
Custom CallBackPlease input the data as per below:- TYPE:
DATA/UPLINK - Channel:
URL - HTTP Method:
GET - Custom Payload:
- TYPE:
temp::int:16:little-endian pres::uint:16:little-endian humi::uint:16:little-endian- URL Pattern:
https://api.thingspeak.com/update?api_key=XXXXXXXXXXXXXXX&field1={customData#temp}&field2={customData#pres}&field3={customData#humi}The api_key will need to be replace by your thingspeak channel Write API key.(Channel 1 Write API Key)
Since the Sigfox network can send a maximum of 140 messages per day, we'll optimize the readings and send data in compact binary format.
Data packing is important because the maximum size of a message you can send is 12 bytes. A float occupies 4 bytes, so we'll need to pack our readings into some smaller representation.
The float format is very wide (you can represent numbers as big as 3.402823e+38 (!) ) and we don't need the whole data space; we can then decide safe limits (based on where we are going to deploy the station) and restore the original representation in the backend.
- Go to MATLAB Analysis
- Click
New - Enter the following code:
% TODO - Replace the [] with channel ID to read data from:
readChannelID = XXXXXX;
% TODO - Enter the Read API Key between the '' below:
readAPIKey = 'XXXXXXXX';
% TODO - Replace the [] with channel ID to write data to:
writeChannelID = XXXXXX;
% TODO - Enter the Write API Key between the '' below:
writeAPIKey = 'XXXXXXXXXX';
%% Read Data %%
data = thingSpeakRead(readChannelID, 'ReadKey', readAPIKey,'OutputFormat','table');
analyzedData = data;
%% Analyze Data %%
INT16_t_MAX = 32767;
UINT16_t_MAX = 65536;
analyzedData.('Temperature') = data.('Temperature') / INT16_t_MAX * 120 ;
analyzedData.('Pressure') = data.('Pressure') / UINT16_t_MAX * 200000 ;
analyzedData.('Humidity') = data.('Humidity') / UINT16_t_MAX * 110 ;
%% Write Data %%
thingSpeakWrite(writeChannelID, analyzedData, 'WriteKey', writeAPIKey);
%% Schedule action: React -> every 10 minutes- Press
SAVE - Scroll down the
Schedule Actions->React - Create a new
Reactwith setting below:- Condition Type :
No Data Check - Test Frequency :
Every 10 minutes - Condition :
if channel have no been updated for 1 minutes - Action :
MATLAB Analysis Code to Execute - Option :
Run action each time conditon is met
- Condition Type :
- Save.
Once you done all this, the data from the Arduino will be send over to Sigfox server and then forward to Thingspeak every 10 minute.
Welcome to our technical forum for futher inquiry.
