#Photon Mapping#
The objective of this project is to accelerate the ray tracing algorithm and get better results based on assignment 3. Although in assignment 3, we implemented a ray tracer that supports many materials as well as global illumintation, it can not render some special effects every well, such as caustic. Furthermore, the noise on the image is very annoying.
In order to solve these problems, I took the photon mapping method in the project 5. I referred to the lecture 15 and PBRT and implemented a basic Photon Mapping algorithm. As the photon mapping needs a structure tostore the photon map, so a KD-tree needs to be implemented firstly.
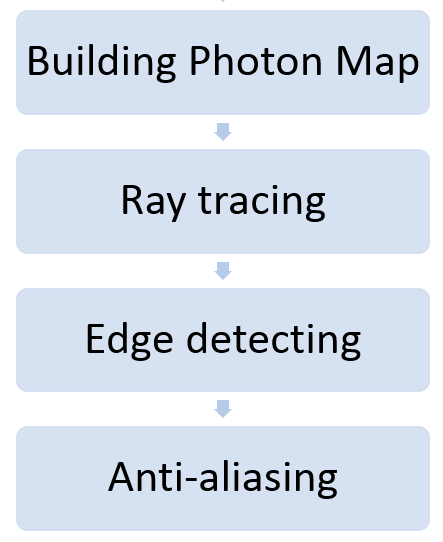
Another problem lies in the low performance when we take many samples per pixel. Taking many samples per pixel is meaningless for rendering the global illumination when using photon mapping; however, it is only meaningful for reducing aliasing. So I divide the whole rendering process into two stages. The first stage is just rendering every pixel using photon mapping while taking only one sample per pixel; then the program starts detecting the edges on the generated image and marks those pixels on the edges. In the second stage, the program only considers those pixels on the edges and takes much more samples to recompute the colors on these pixels. By doing this, we can accelerate the program a lot without bring too much aliasing; because for those pixels that are not on the edges, we don't need to take multiple samples at all.
The following flow chart shows the several stages of this program:
During the rendering, we can notice the different stages that are printed on the console, just like this:

##Build the project:
###Mac/Linux: You can just build this project in the same way as assignment 3. You can download the project 3 from the github: $ git clone https://github.com/462cmu/asst3_pathtracer.git Then copy all the source files in "asst5/src" to its "src" folder, replacing those files with the same name (including the "CMakefile.txt"). Then you can build and compile this project in the same way used in project 3.
###Windows: Just download the project and then open the project in Visual Studio 2013. The download link will be given in the txt file under the asst5 folder.
##Run the program:
Four addition command line options are provided:
- -p : the number of photons that would be generated in the program. If this value is set to 0 or missing, then the renderer will just use standard path tracing algorithm instead of photon mapping algorithm.
- -n: the number of photons that would be looked up for rendering each pixel. This value should be much smaller than the number of photons (-p).
- -r: the radius of the range in which photons would be searched for rendering each pixel. If the number of photons inside this radius is greater than the number set by '-n', then only the closest n photons would be considered.
- -a: the threshold value for laplace edge detection filter. The smaller this value, the more pixels would be regarded on the edges. The default value is 0.1.
For example, the command line to render in photon mapping algorithm:
./pathtracer -t 32 -l 100 -s 1 -m 4 -p 50000 -n 400 -r 0.01 -a 0.2 ../dae/sky/CBspheres.dae
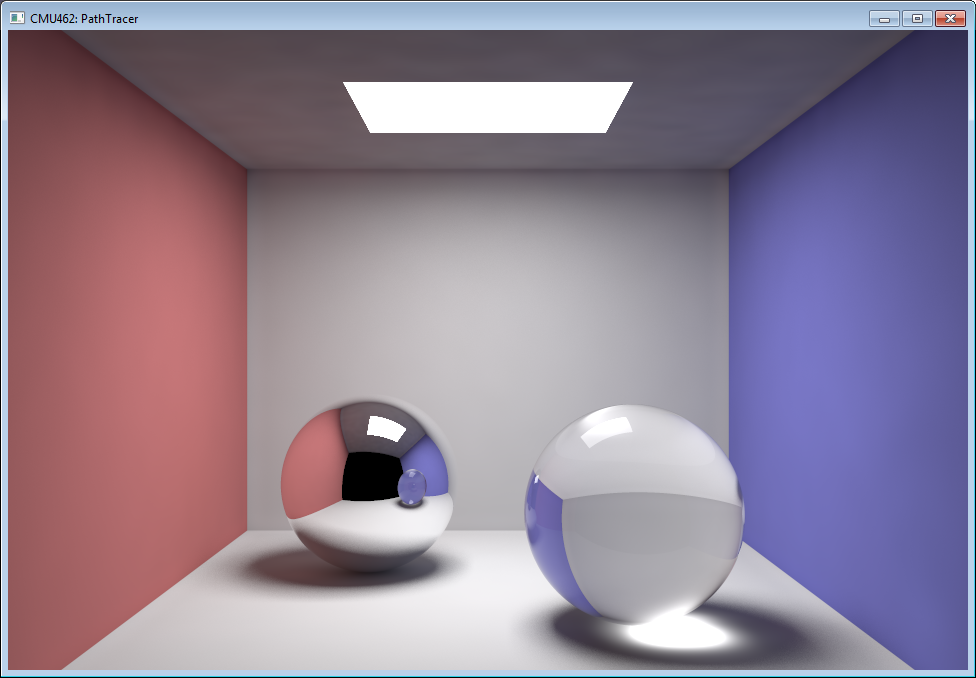
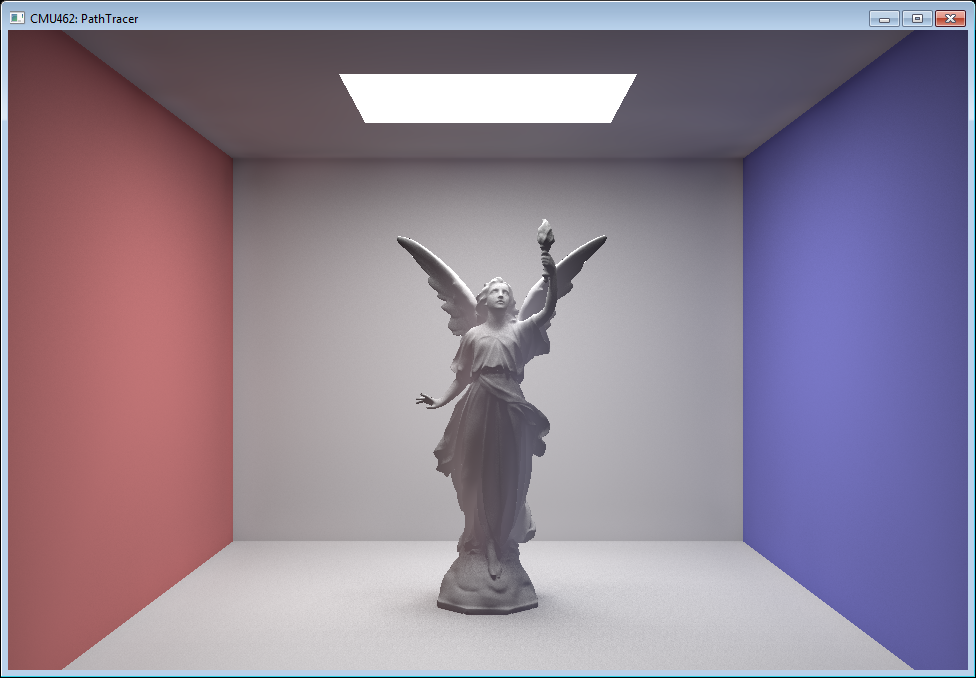
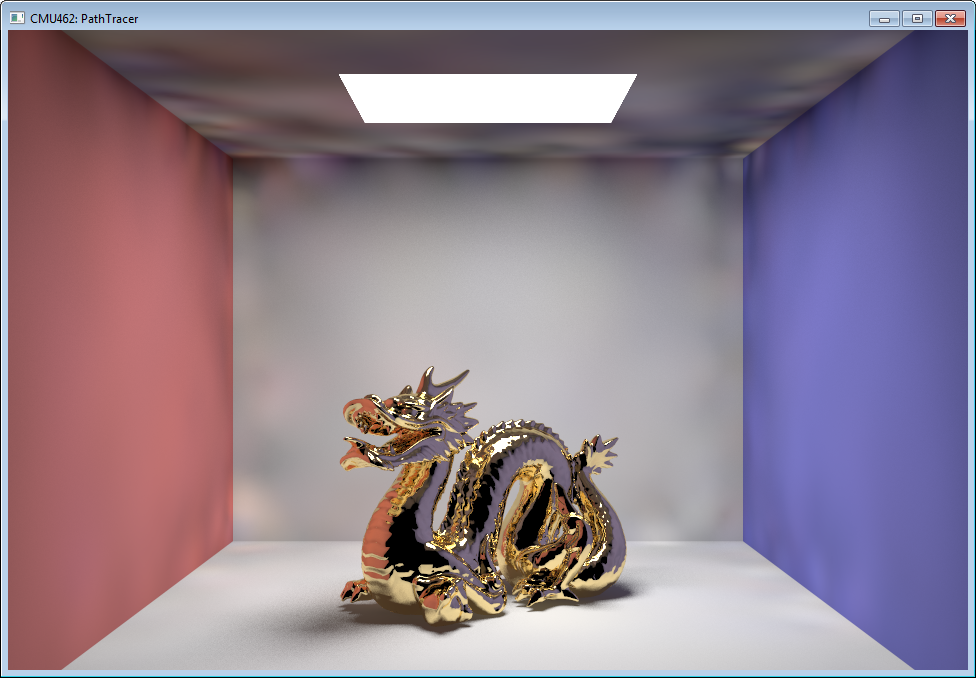
##Results: Here are some imaged rendered when setting different parameters:
1, -p 100000 -r 0.1 -n 1000 -m 4 -l 200 -s 1
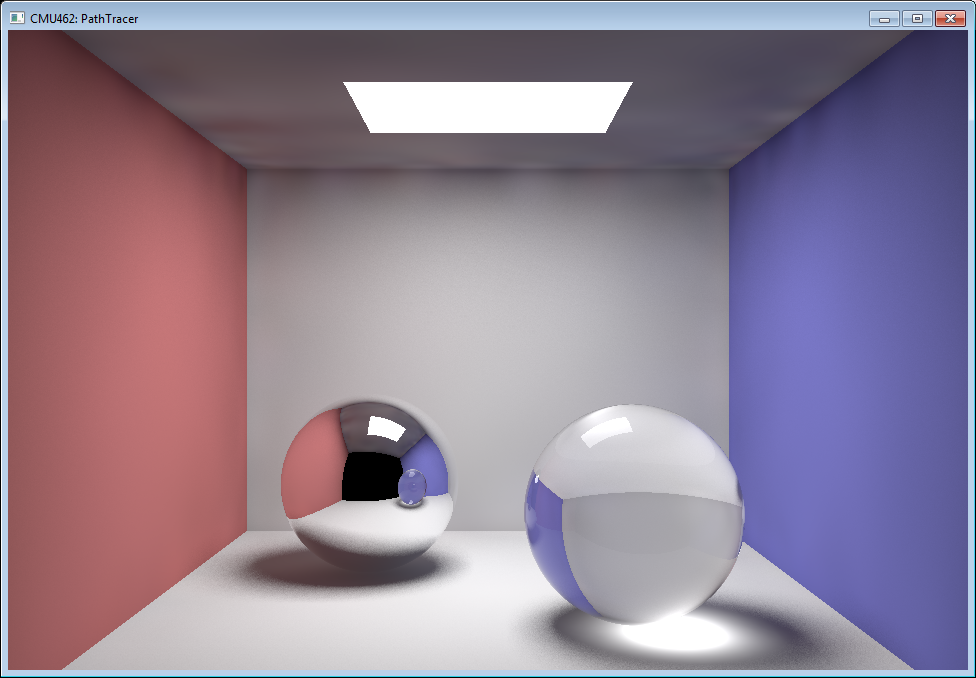
2, -p 1000000 -r 0.1 -n 10000 -m 4 -l 200 -s 1:
3, -p 10000 -r 0.1 -n 100 -m 4 -l 20 -s 16 -a 0.05 (It seems the number of photons is not sufficient, because the variance becomes large):
4, -p 5000000 -r 0.01 -n 40000 -m 4 -l 100 -s 16 -a 0.05: