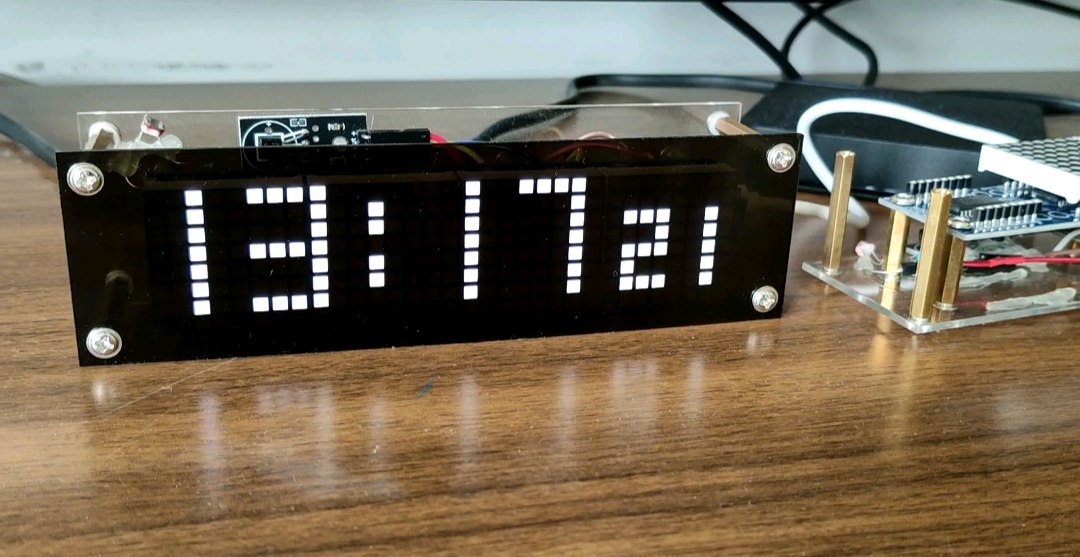
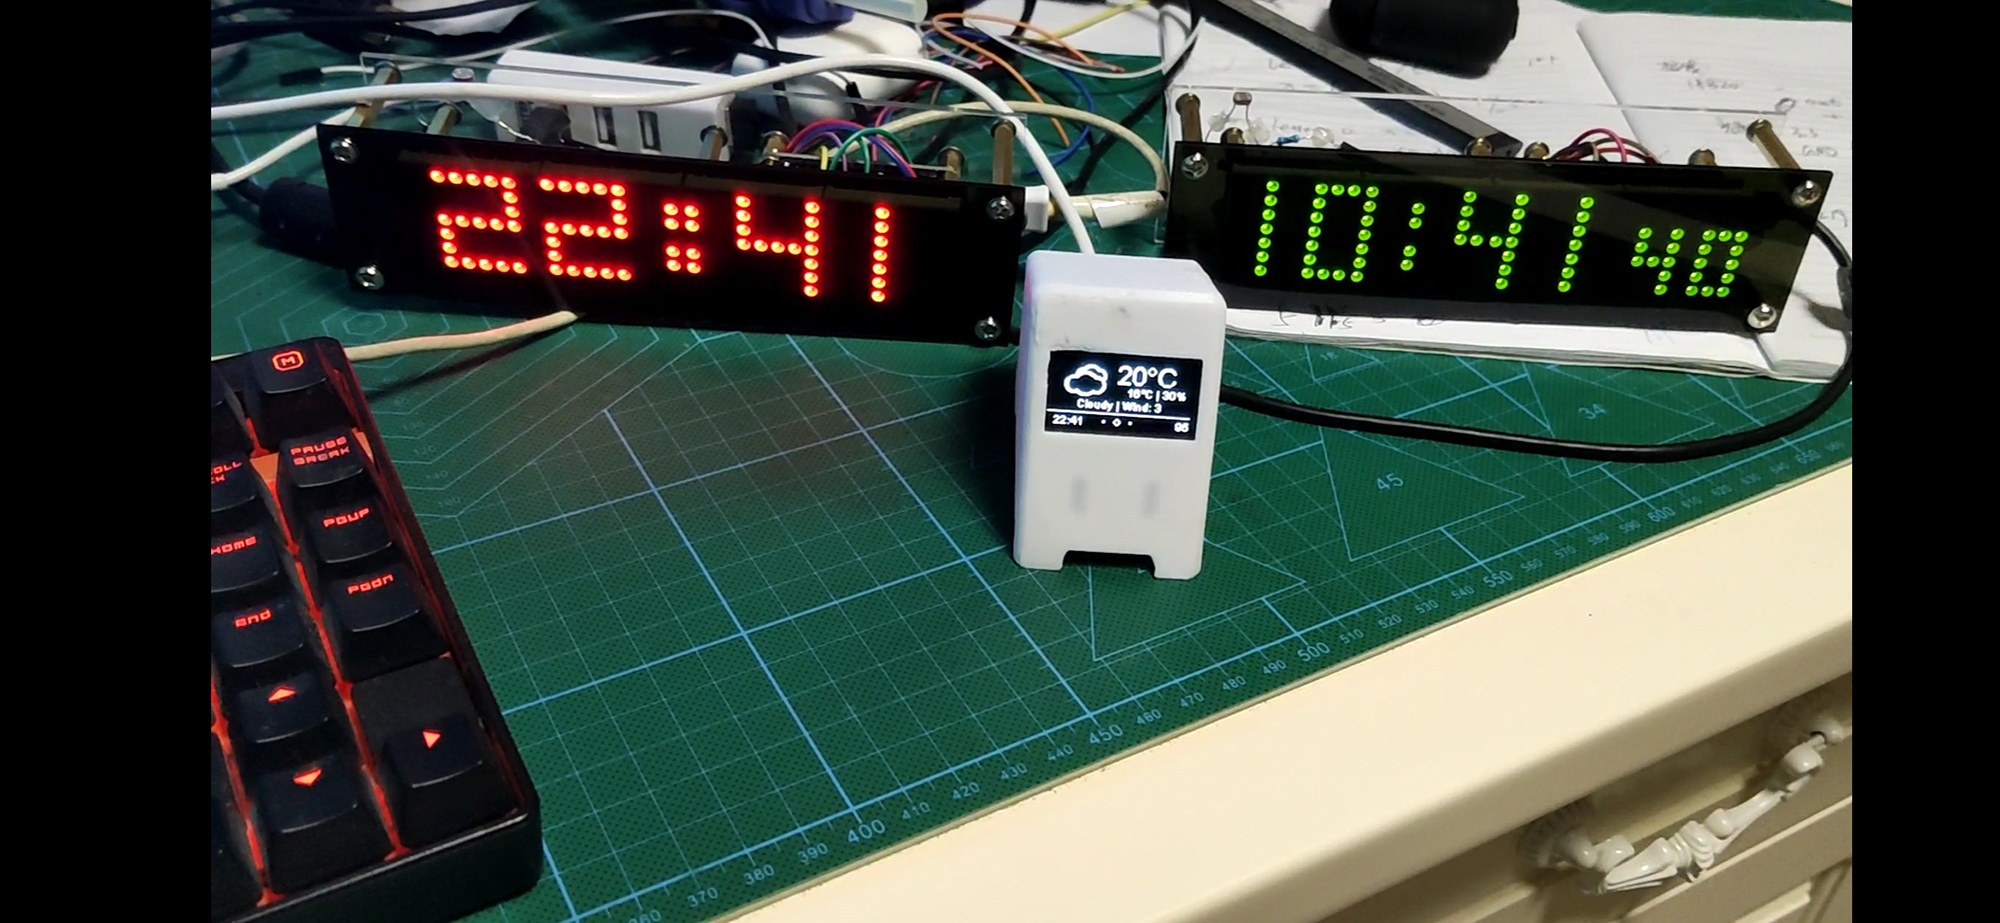
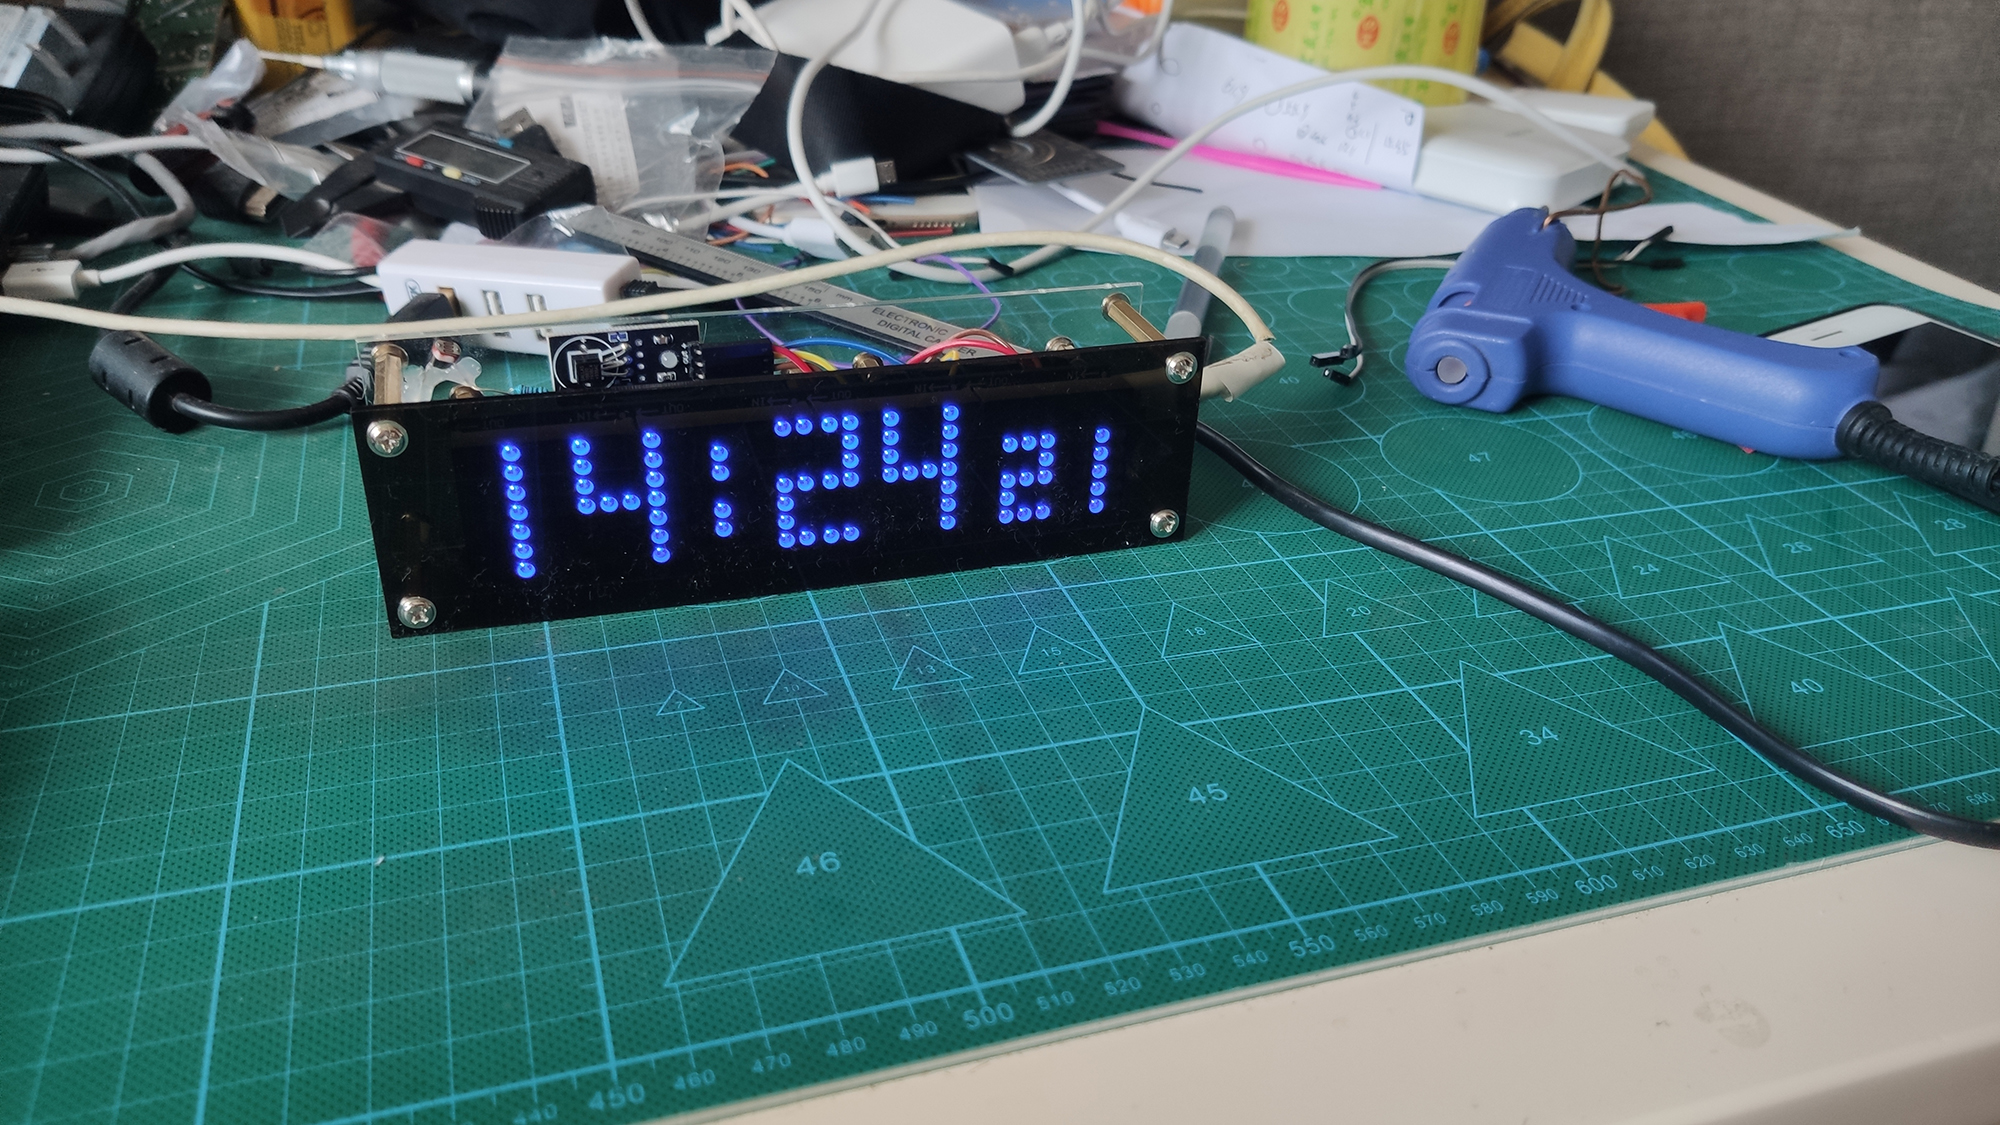
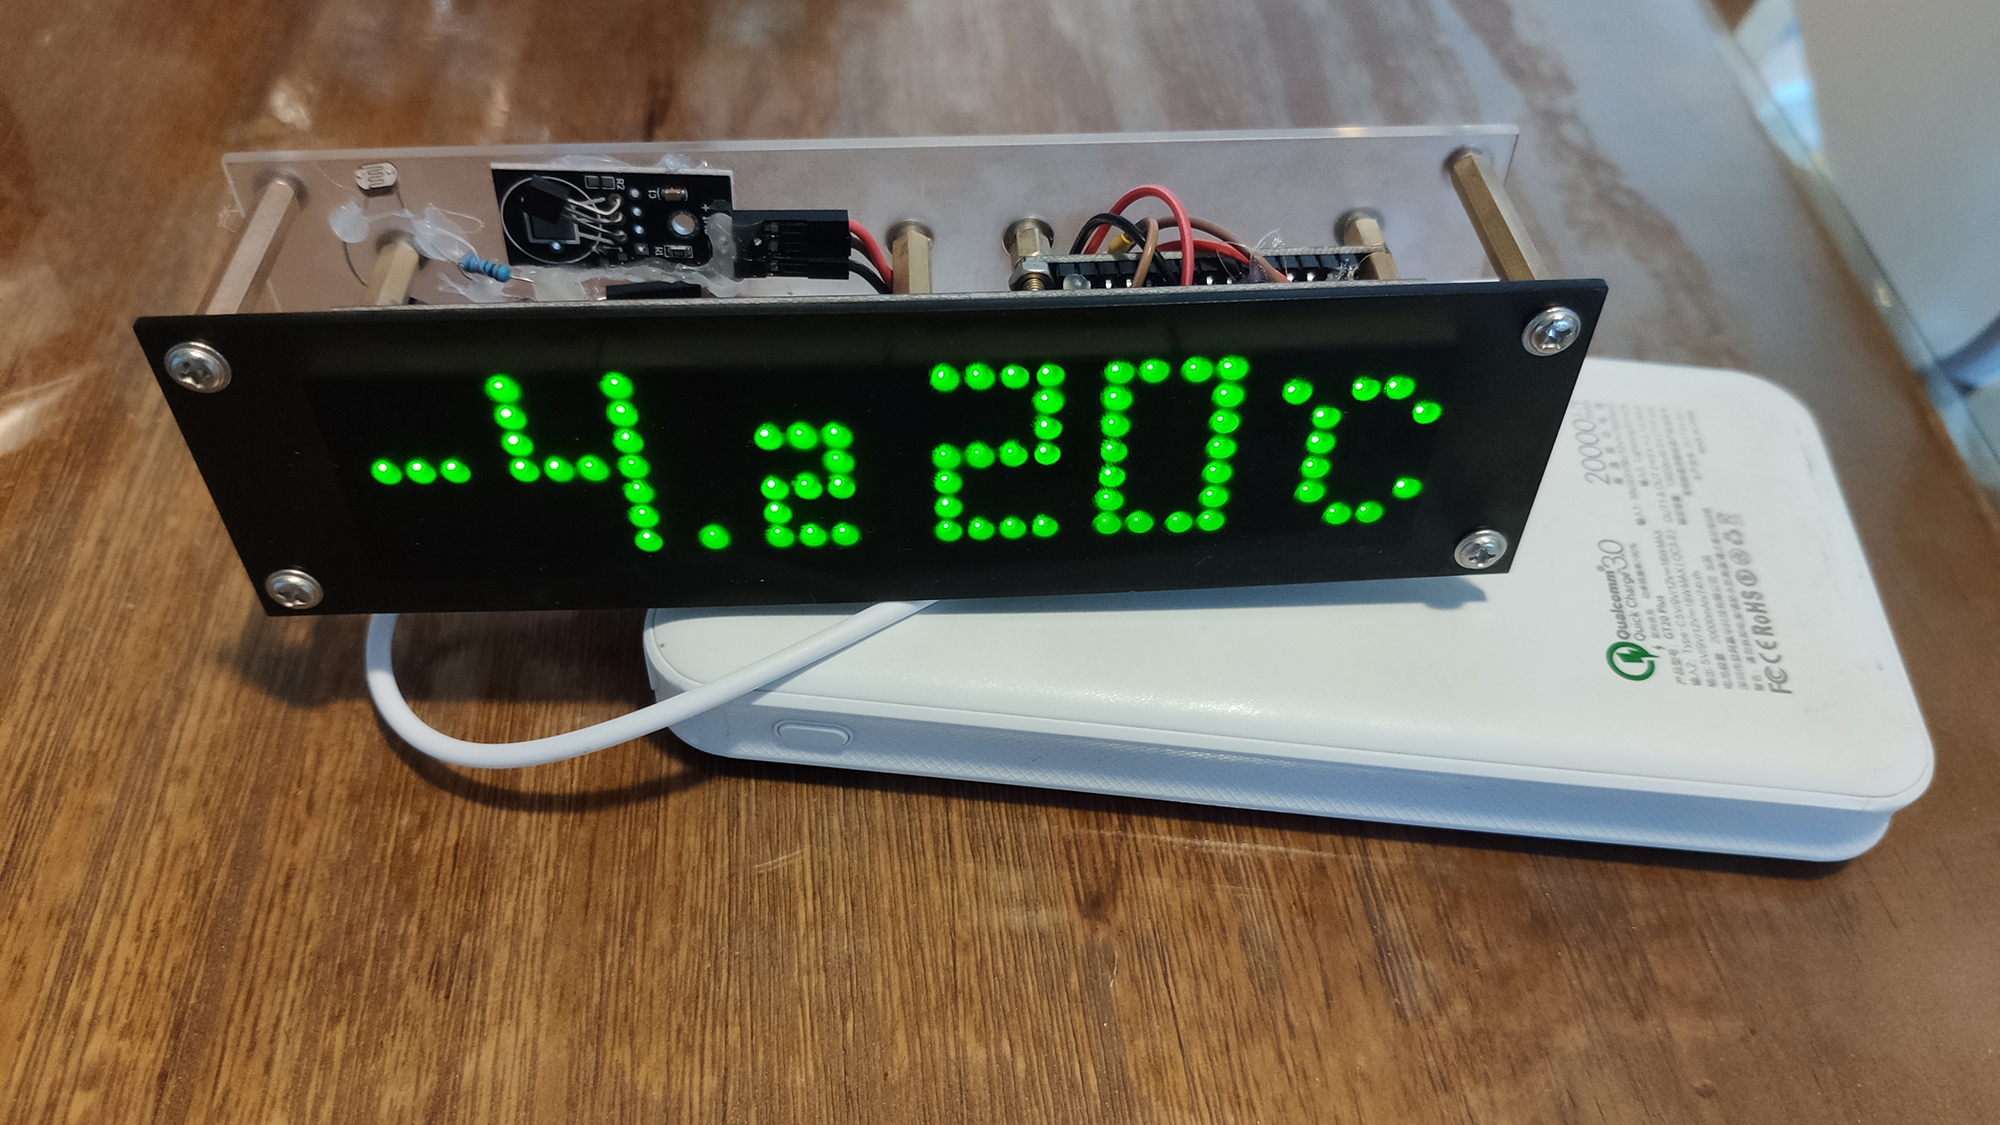
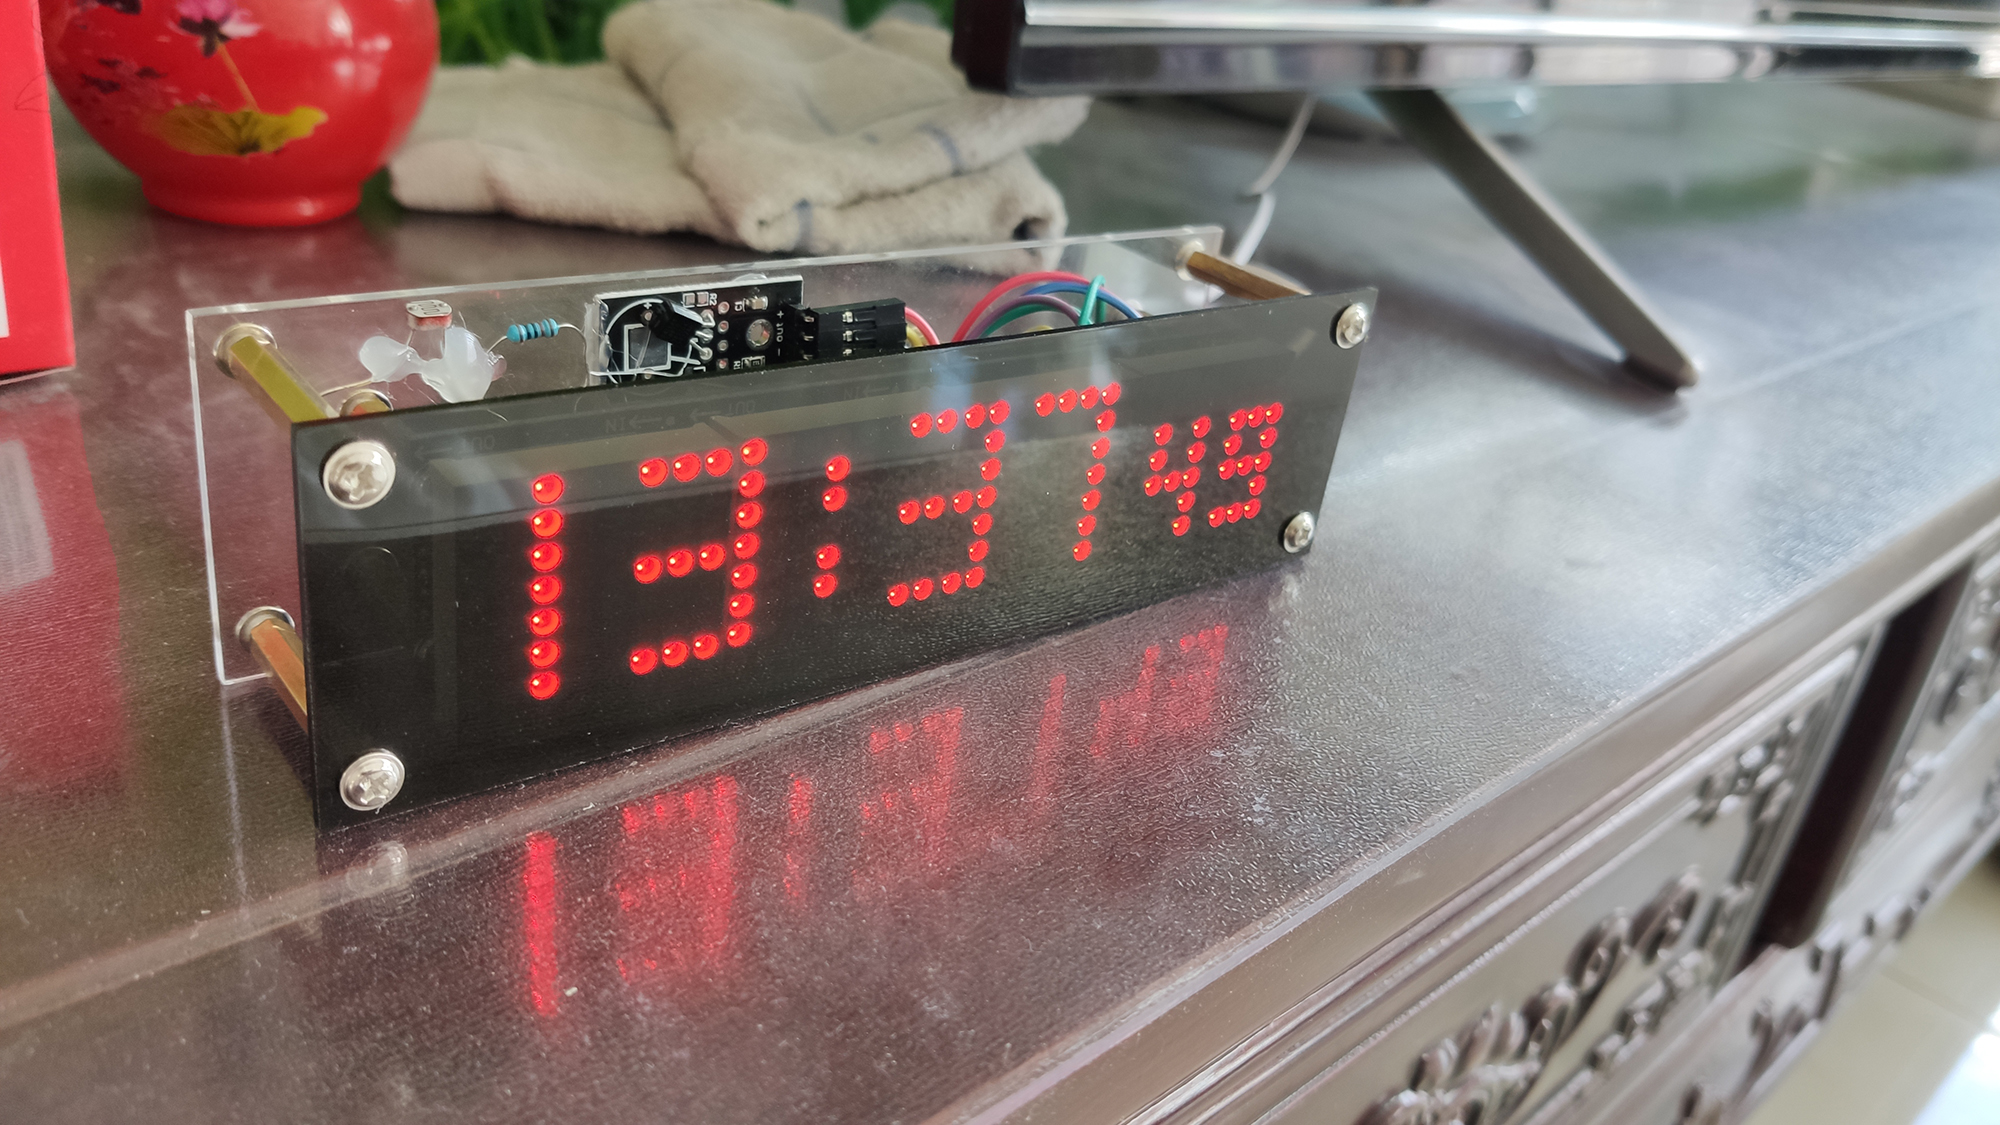
A Esp8266 wifi matrix clock
Telegram group https://t.me/wifi_matrix_clock
全球在线时钟列表(global online devices) http://www.topyuan.top/matrix/map/online
在线安装(online Installer) https://topyuan.top/matrix/installer
更新日志 Changelogs
- 修复因在线天气API返回值变更导致的温度显示异常问题
- 开机时,连接wifi失败后每5分钟重新尝试连接,而不是一直在配网模式等待(应对意外断电,路由器和时钟同时重启导致的无法连接网络问题)
- Fix temperature display anomalies caused by changes in online weather API return values
- When starting up, try connecting again every 5 minutes after failing to connect to WiFi, instead of waiting in network configuration mode all the time (to deal with unexpected power outages, router and clock restarts causing network connectivity issues)
- 新增总计运行天数
- Add Run time(Total)
- 新增室内温度小数显示开关(以便一屏显示温湿度).感谢Suresh Varma
- 新增DIY大号字体
- Add Room Temperature decimal switch(for incomplete display of temperature and humidity).Thanks for Suresh Varma
- Add DIY Big Font
- 毫秒级精度 (你可以制作多个时钟放在一起 会发现几乎分秒不差)
- 新增智能夏令时模式 (全球有大量国家在施行夏令时,并且每个国家的规则并不相同,想要做到自动切换是一个复杂的事情,本次已完成配置一次,自动切换,关于配置规则请查看https://github.com/yuan910715/Esp8266_Wifi_Matrix_Clock/blob/master/posix.md 我也编写了一个规则生成器http://www.topyuan.top/posix)
- 新增上次和NTP服务器同步时间提示
- 修复文字播放设置不能记忆问题
- 新增在线设备地图展示 (在配置页下方有链接 你可以查看全球实时在线设备了 或者你可以直接查看http://www.topyuan.top/matrix/map/online)
- 本次更新内容较多,如发现bug请联系我admin@topyuan.top
It’s been a long time since I’ve updated, mainly because the functions have stabilized and I’m busy at work (programmers you know), and I want to spend more time with my family in my spare time, so I haven’t updated for a long time. This seemingly small update has actually rewritten a lot of code and optimized it.
- Millisecond precision (You can make multiple clocks and put them together, and you will find that there is almost no difference between minutes and seconds)
- Add smart daylight saving time mode (There are a large number of countries around the world that implement daylight saving time, and the rules of each country are different. It is a complicated thing to achieve automatic switching. This time, once configuration, and automatic switching, About Posix rules please view https://github.com/yuan910715/Esp8266_Wifi_Matrix_Clock/blob/master/posix.md I also develop a generator http://www.topyuan.top/posix)
- Add last Sync time with NTP server
- Fix bug:Custom text mode cannot saved
- Add online map (There is a link at the bottom of the configuration page, you can view the global real-time online devices, or you can directly view http://www.topyuan.top/matrix/map/online)
- Please contact me admin@topyuan.top if you find bugs
2021.04.02
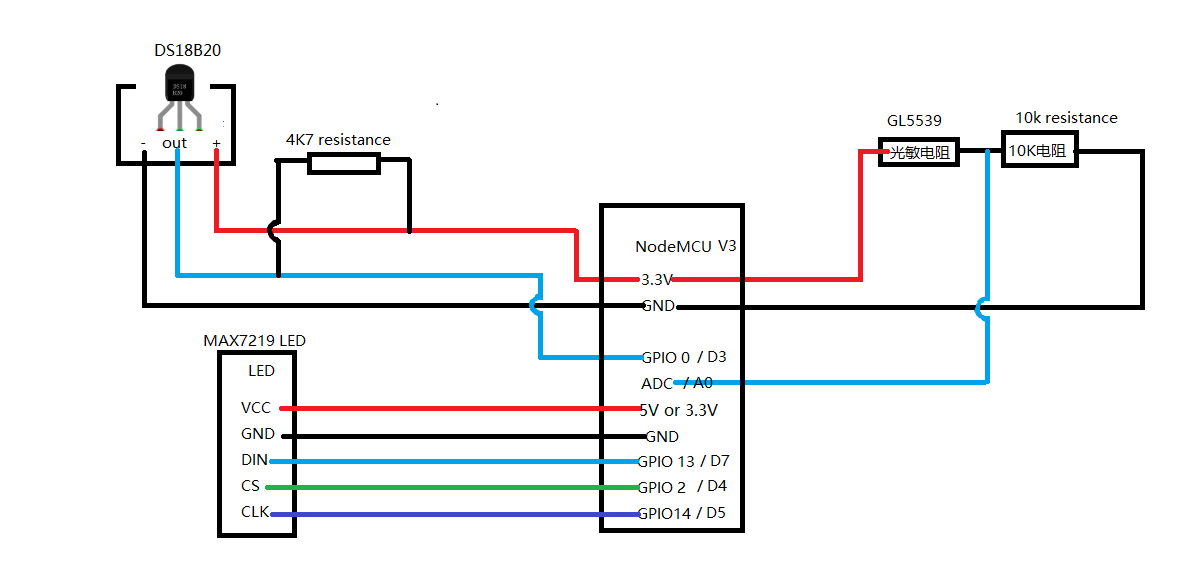
已更新3.3版本,现在已支持离线使用,若想离线使用,需连接DS3231,连线 正(3.3/5v) 负(GND) SDA(D2/GPIO4) SCL(D1/GPIO5)
Update version 3.3, can support DS3231 RTC now, if you want to use the clock without wifi , you can add a DS3231 ,wire: +(3.3/5v) -(GND) SDA(D2/GPIO4) SCL(D1/GPIO5)
2020.10.23 已查明上次事故的原因 是2.5版本的固件中 OTA部分出了问题 所以2.6更新后无法运行 现已将2.5 2.6固件删掉 修复后重新编译了2.7 增加了调速功能 显示更为流畅 修复了OTA的bug 请重新手动更新为2.7 以后会避免此类事件发生 对此深表歉意 出现问题可直接邮件联系我 admin@topyuan.top
2020.10.23 It has been found that the cause of the last accident is that the OTA part of the 2.5 version of the firmware has a problem, so it cannot run after the 2.6 update. Now the 2.5 2.6 firmware has been deleted and recompiled after repairing 2.7. The speed control function has been added. The display is more smooth and OTA bugs have been fixed . Please manually update to 2.7 again. This kind of incident will be avoided in the future. I apologize. If you have any problems, please email me admin@topyuan.top
2020.10.21推送的2.6版本有严重问题,自动更新后无法连wifi,led无显示。本想新加调速功能,上传服务器的.bin由于传输问题出现错误,已下线,但已影响了一些设备,请手动烧录固件 深表歉意。调速功能后续会再加。
The 2.6 version pushed on 2020.10.21 has serious problems. After the automatic update, the wifi cannot be connected and the LED is not displayed. I wanted to add a new speed control function. The upload server's .bin has been offline due to a transmission problem, but some devices have been affected. Please burn the firmware manually. I apologize. The speed control function will be added later.
看不到本页图片自行翻墙或查看Pics目录里的图
https://youtu.be/mZeVnjwp35k
https://space.bilibili.com/402654671
固件上传方法:
how to upload firmware:
https://topyuan.top/matrix/installer
过时的安装方法 Outdated installation method
如果你的开发板写入过其他程序(尤其是使用了EEPROM的),务必先烧录ResetChip.bin或使用第二种Arduino IDE上传方法,webUpdate.ino会清除之前的EEPROM值. 如果不将旧的EEPROM值清除,配置网页会出现无选项 乱码现象
If your ESP8266 board has been written other programs (especially those using EEPROM), be sure to flash ResetChip.bin first or use the second Arduino IDE to upload, webUpdate.ino will clean old EEPROM value. If the old EEPROM value is not cleared, there will be no option in the configuration page or display garbled code in the configuration page
Method 1 is suitable for novices who do not know how to use Arduino IDE, but some computers cannot run the tools, so they can only use method 2.
使用FlashESP8266.exe或者ESP8266Flasher直接选择COM口,先上传ResetChip.bin固件(如果你用的是全新的开发板 没有写入过其他程序 可以直接写入时钟固件),完成后再上传最新的时钟.bin固件(ESP8266Flasher请在config标签点击第一条齿轮图标)(若无COM口 检查microUSB数据线是否正常 不要使用无数据传输功能的2芯线 以及是否有CP2102/CH340驱动程序)
Open flashesp8266.exe or ESP8266Flasher, select COM port and upload ResetChip.bin first(if you are using a new development board without flash other programs before, you can flash the clock firmware directly), then upload the latest clock .Bin firmware(For ESP8266Flasher, please click the first gear icon in the config tab) (if there is no COM port, check whether microusb cable is ok(Do not use 2-core cables without data transmission function) and CP2102 / ch340 driver)
1.自行设置安装ESP8266开发板
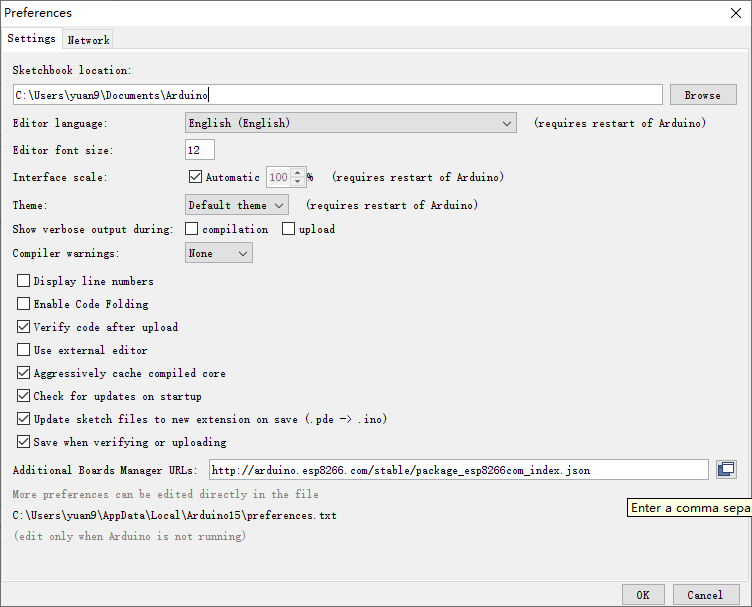
进入首选项(Preferences),找到附加开发板管理器地址(Additional Board Manager URLs),并在其后添加如下信息:
1.Install ESP8266 board
enter-(Preferences),find(Additional Board Manager URLs),add text:
http://arduino.esp8266.com/stable/package_esp8266com_index.json
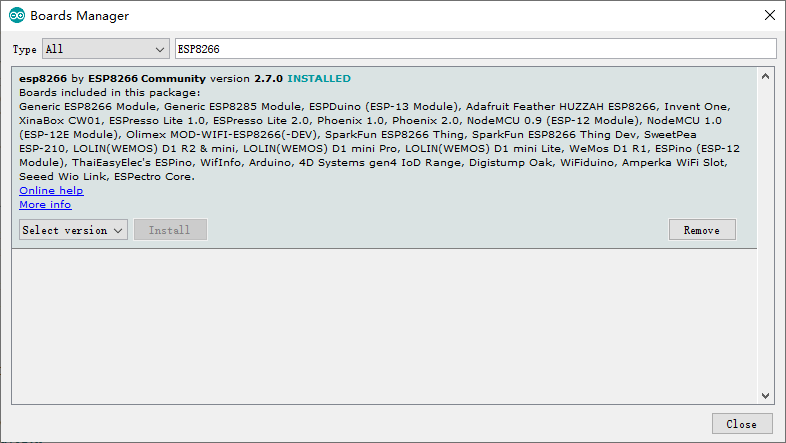
2.点击工具 - 开发板 - 开发板管理器
搜索ESP8266并安装
2.open tools - board - board manager
search ESP8266 and install
选择开发板为Nodemcu 1.0
select board : Nodemcu 1.0
3.打开webUpdate.ino 修改wifi名和密码 烧录进Nodemcu后 打开网页上传.bin文件
3.open webUpdate.ino modify wifi ssid and password, after upload to board, open webpage and upload .bin file.
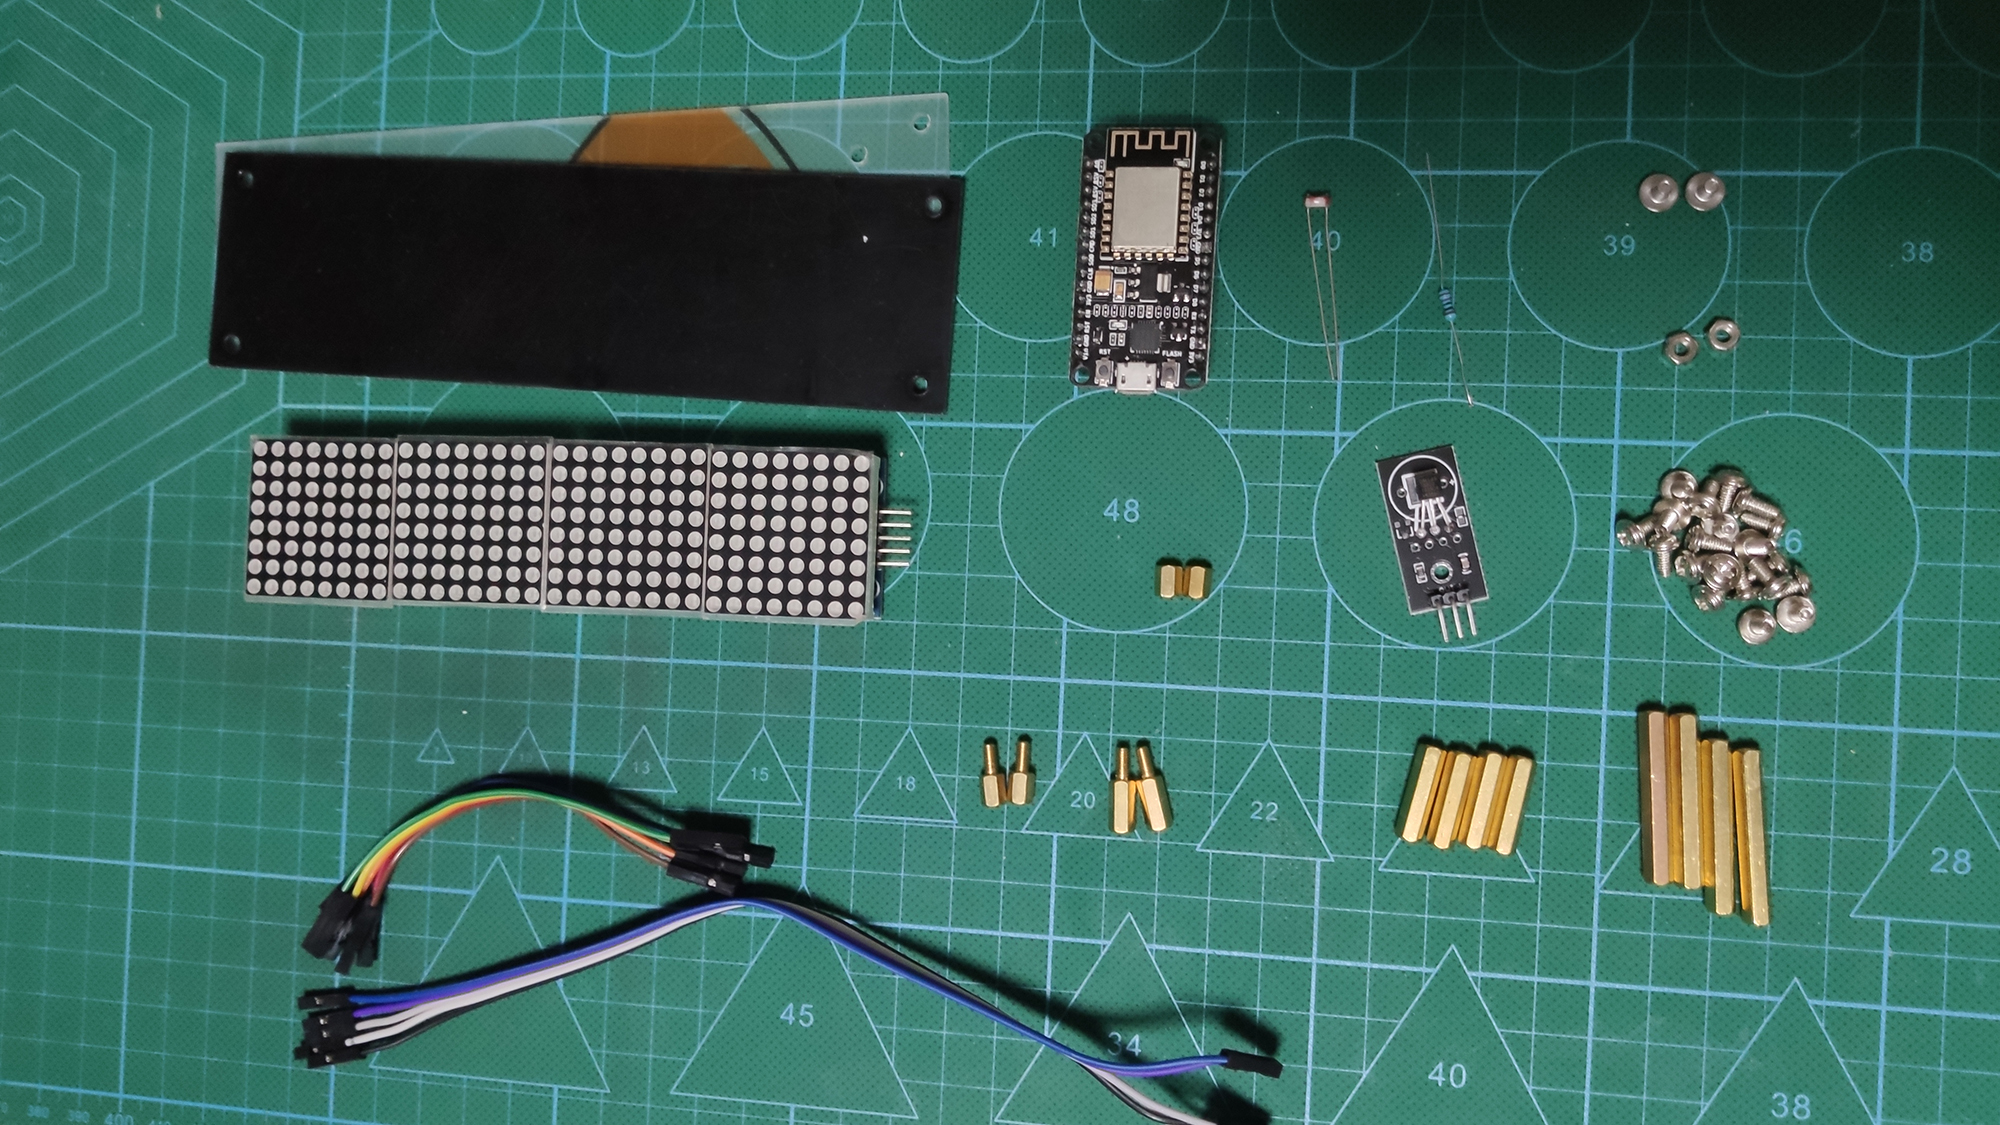
使用DS18B20模块(use DS18B20 module)
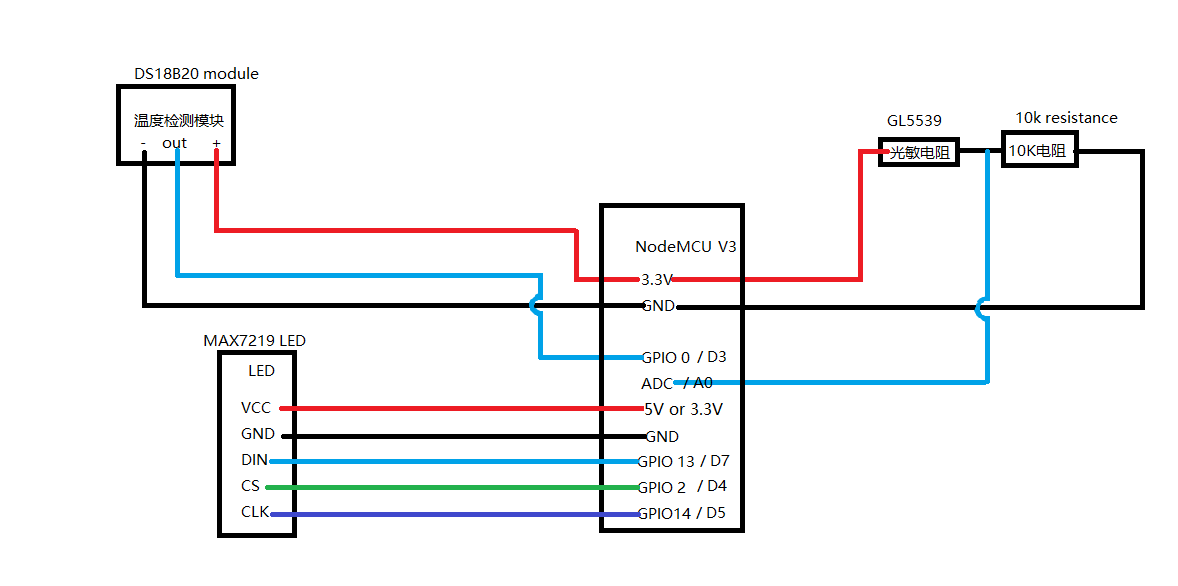

如果你没有DS18B20模块 只有DS18B20 可以自己接一个4k7上拉电阻(If you only have DS18B20(not module), you can add a 4k7 pull-up resistant)