Lovelace Card : Ile de France Mobilité @yyrkoon94

A new Home Assistant Lovelace Card to show all types of upcoming vehicles on the Ile de France Mobilite network.
This Card consume the PRIM (Plateforme Régionale d'Information pour la Mobilité) API provided by "Ile de France Mobilité".


The simplest way to install this card is to add this repository to HACS. If you wish to install it manually, you may follow the instructions below.
Download source code zip file file from the latest-release.
Put the contains of the 'dist' repository into your config/www in a folder named community/lovelace-idf-mobilite.
Add reference to idf-mobilite.js in Dashboard :
Settings → Dashboards → More Options icon → Resources → Add Resource → Set Url as /local/community/lovelace-idf-mobilite/idf-mobilite.js → Set Resource type as JavaScript Module.
Note: If you do not see the Resources menu, you will need to enable Advanced Mode in your User Profile
First, you need to create an account on the PRIM API website. Once your account is created, log in to the site and click on your name in the right corner then create an API key (and write it down somewhere!). The API key should be a series of numbers and letters, we will use it to configure the sensors.
Once your api key created, you can create your first sensor. To do this, edit your configuration.yaml and add the following lines (if you already have a sensor section, simply add the platform to it):
sensor:
  - platform: rest
    name: prim_the_name_you_want                            <-- for exemple prim_la_defense
    unique_id: bbbc536a-d580-4317-8669-87a590b0f55d         <-- a unique id to manage the state (you can generate one on https://www.uuidgenerator.net/version4)
    resource: https://prim.iledefrance-mobilites.fr/marketplace/stop-monitoring
    method: GET
    params:
      MonitoringRef: "STIF:StopArea:SP:71517:"              <-- mandatory : the StopArea or StopPoint you want to follow (cf next section)
      LineRef: "STIF:Line::C01221:"                         <-- optional : the line if you want to follow only one line on the StopArea
    headers:
      apiKey: "YourApiKey"                                  <-- the PRIM Api Key
    scan_interval: 60                                       <-- the time between update (in seconds)
    timeout: 30
    value_template: "OK"
    json_attributes:
      - Siri
The StopArea is a string encoded as STIF:StopArea:SP:XXXXX: where XXXXXX is your area. To find the value, navigate to the Referential of Area and Stops. You can see the following map:

Unselect Accès and Arrêts Transporteur on the right menu and search an adress (or move the map) to go where you want (use zoom to see the full area). You may have something like the following map with 3 kinds of assets :
- Correpondance Area (the bold red line)
- Stop Area (the thin red line)
- Stop (the mark icon)

Click on one of the three asset types to see the details and get the famous area code:

So, in this exemple, the area code is 71517 so the stop area code for the sensor is STIF:StopArea:SP:71517:
If you choose a stop point, you can use the StopArea syntax STIF:StopArea:SP:43032: or the StopPoint syntax STIF:StopPoint:Q:41442: (both works for now)
NOTE : at this point you can display the Lovelace Card, the LineRef is optional (and you can filter lines in the Lovelace Card also !)
To find the line ref (and filter the Lovelace Card on a specif line), got to the Referential of datas available for the PRIM API and clic on the "CARTE PERIMETRE TEMPS REEL" tab. You can see the following map (near the same than the previous one) :
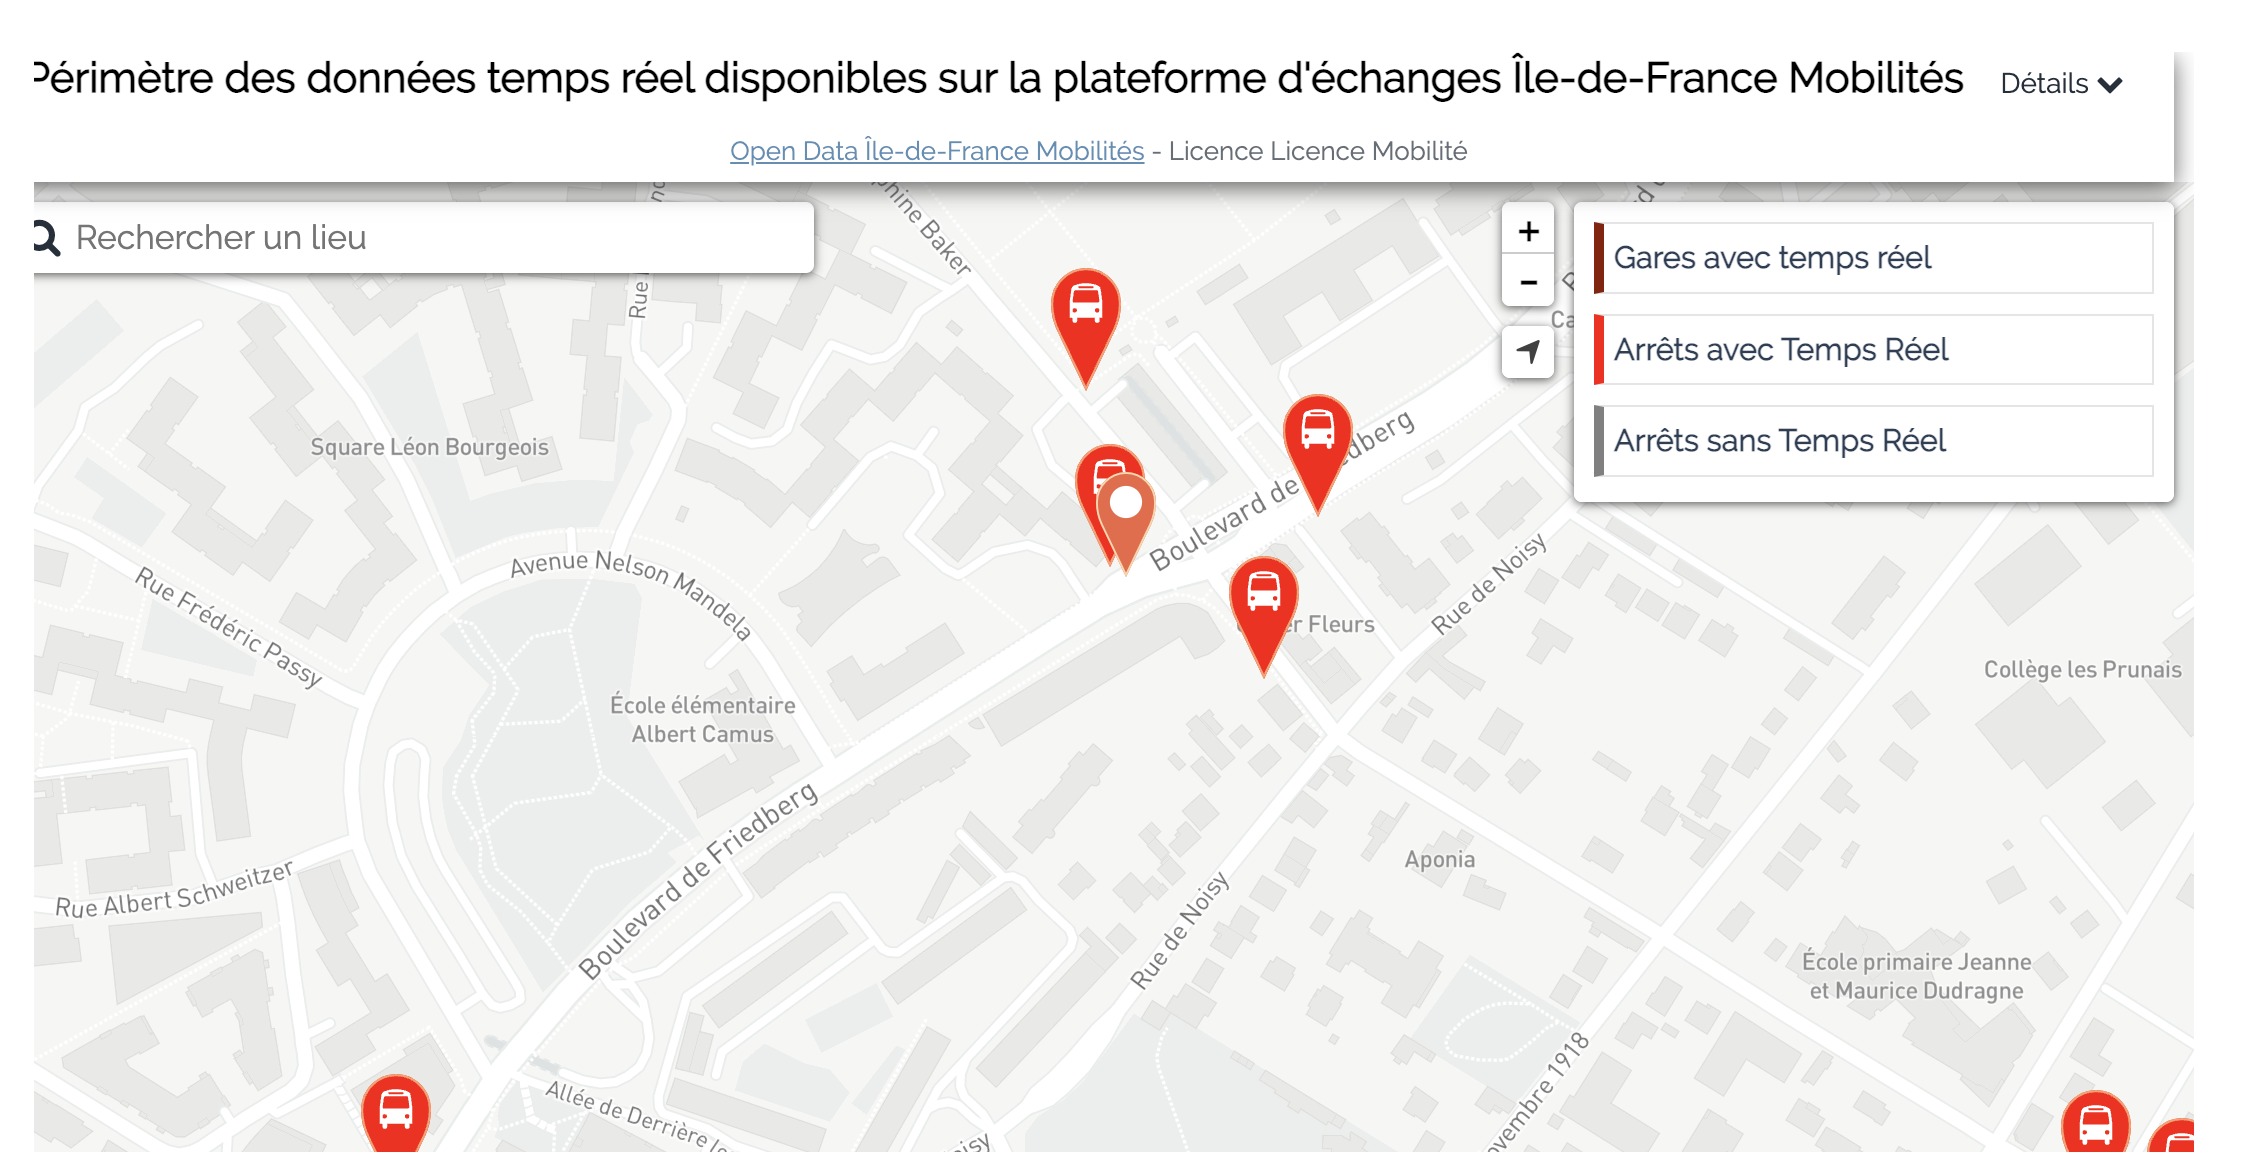
The difference is when you clic on a stop point, you will see the StopId and the lines at this point :
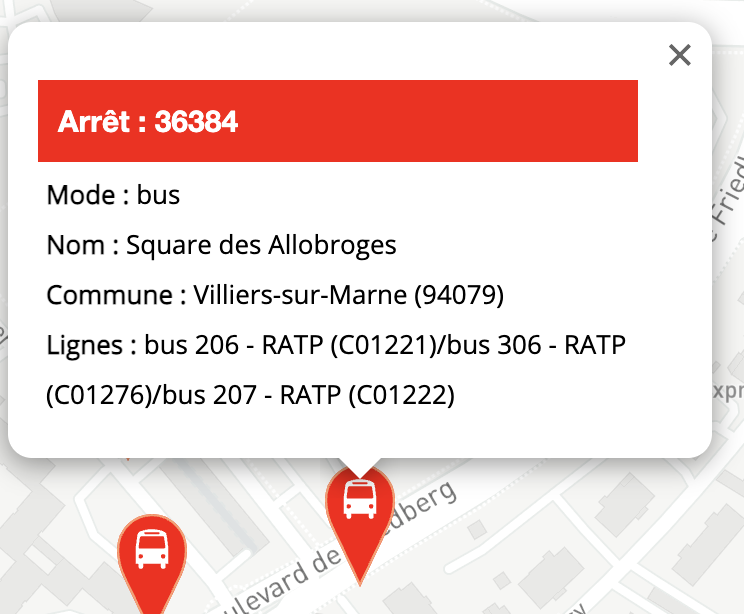
In this exemple, for the StopPoint STIF:StopPoint:Q:36384: (36384), there are the 3 bus lines C01221, C01276 and C01222. So, you have it (!), the LineRef to use is STIF:Line::C01221: for the first line.
Now you can create as many sensors as you want to monitor StopArea, StopPoint or specif Line. So, let's go to the Lovelace Card !
The Lovelace Card come with a custom Card Editor to configure the card. For now, you must create first a custom card to have the editor in the Add Card list (don't know why !). So just create a Custom Card and add the folowing code :
type: custom:idf-mobilite-card
Then clic on the code editor, you will see this page :

In the "Ligne" box, choose a PRIM sensor that you have created and that's all !
You can see more options :
- Messages : another sensor to display Information message at the StopArea (line problems, ...)
- Line Type : to display Bus/Tram/Métro or RER/SNCF lines
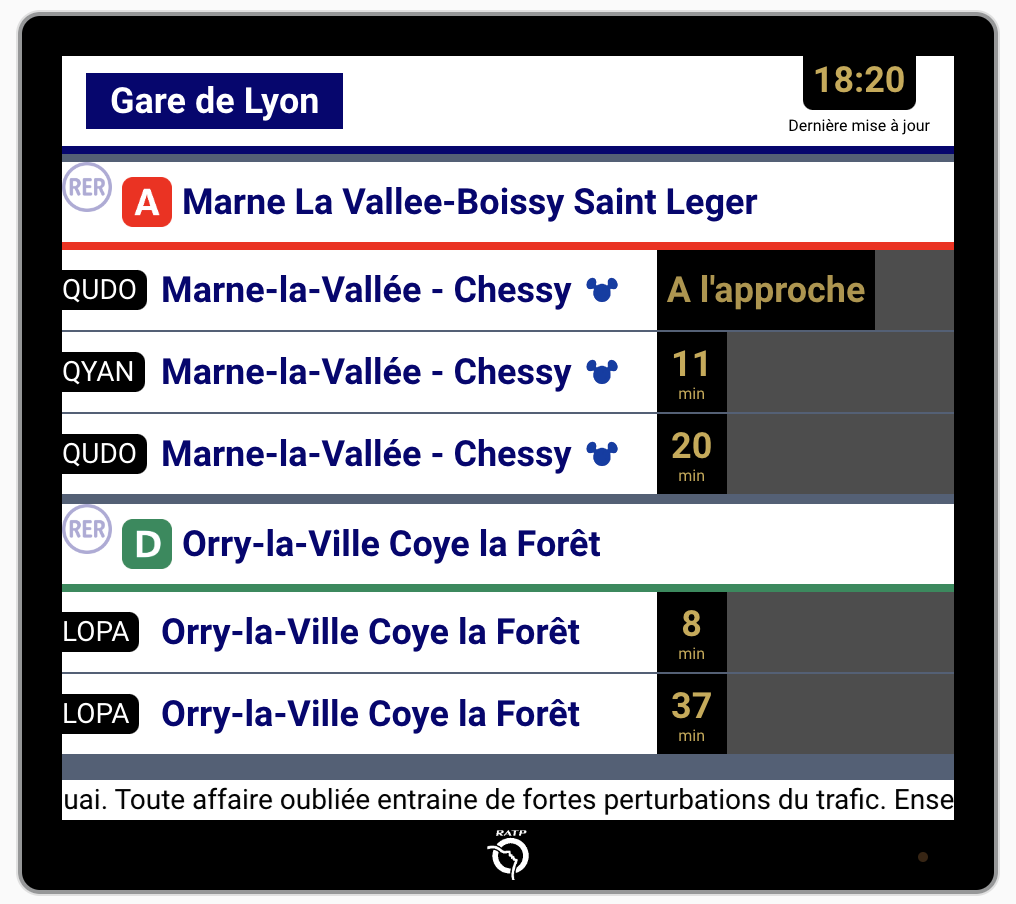
- Screen Mode : To display the Card like a RATP TV :)
- Display infomation messages : used for messages to display also Infomation message (and not only perturbations)
There are two kinds of filtering :
- Exclude Lines : a list of line to exclude to the display (for exemple, to exclude the bus 207, just type bus-207;)
- Exclude Destinations : this one is used for filtering specific destinations. For exemple if you want to display RER A but only on one way or only a specific destination, you can hide other lines. To know the line number to hide, just check the switch "Afficher les références des destinations" and you will see the destination number instead of train name. Just use these number for filtering.
You can add a second sensor for your StopArea to monitor Information and Perturbation messages. For that simply add a sensor like this exemple :
sensor:
  - platform: rest
    name: prim_the_name_you_want_messages                   <-- for exemple prim_la_defense_messages
    unique_id: bbbc536a-d580-4317-8669-87a94560f55d         <-- a unique id to manage the state (you can generate one on https://www.uuidgenerator.net/version4)
    resource: https://prim.iledefrance-mobilites.fr/marketplace/general-message
    method: GET
    params:
      StopPointRef: "STIF:StopArea:SP:71517:"               <-- optional (ONLY ONE of these params) : the StopArea or StopPoint you want to follow
      LineRef: "STIF:Line::C01221:"                         <-- optional (ONLY ONE of these params) : the line if you want to follow only one line
    headers:
      apiKey: "YourApiKey"                                  <-- the PRIM Api Key
    scan_interval: 60                                       <-- the time between update (in seconds)
    timeout: 30
    value_template: "OK"
    json_attributes:
      - Siri
And choose this new sensor for the "Messages" entity
To update manually the database you need to have Python3 and install all requirements:
python3 -m pip install -r scripts/requirements.txtThen run the update script:
scripts/update_database.py -m dist/images -o dist/referentiel-des-lignes-filtered.js
# or if you want to save the raw database json file from RATP
# scripts/update_database.py -m dist/images -o dist/referentiel-des-lignes-filtered.js -r dist/referentiel-des-lignes.jsonThe card is inspired by Lesensei’s work on idfm-card.