RateMe is a powerful system to get rates from users in Android applications.
RateMe takes cares to show pretty dialogs to collect rates from users so you don't have to. One thing you do is to define some rules and send events to RateMe library. RateMe watch the events you define and show the a pretty dialog to users on correct time.
- Gradle Dependency
- Quick Start
- How button works
- Arranging delay time
- Callbacks
- Custom Views
- Custom Buttons
- Changing colors and texts
- Adding Multiple Conditions
The minimum API level supported by this library is API 15.
Add the dependency to your build.gradle:
dependencies {
    implementation 'com.zingat:rateme:1.3.0'
} class App : Application() {
override fun onCreate() {
super.onCreate()
Rateme.getInstance(this@App)
// `addCondition(conditionName,repeatTime)`
.addCondition("touch_me_event", 3)
.reminderDuration(3)
}
}Now we are telling to RateMe that you can show a dialog when 3 times touch_me_event is sent.
    Rateme.getInstance(this)
                .addEvent("touch_me_event")
The event can be sent for each statement. For example when a user opens the app 4 times you can send app_opened event or user can like
a product in your app 2 times you can send product_liked event. For all statements you can send event seperately.
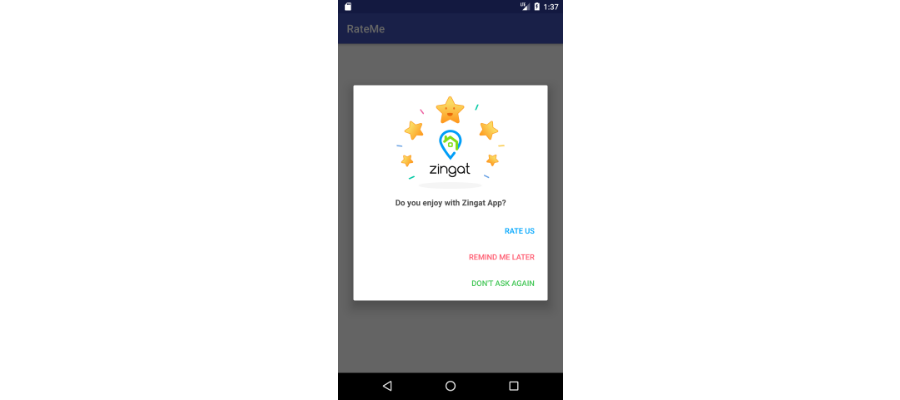
The default appearance is like picture below.

When dialog shown on screen, user have to choose one of these options to close the window. To touch background and back button don't close the window.
RateMe library detects your applicationId(for example com.zingat.rateme) and
When user clicks the Rate Us button, your app's Google Play page opens automaticly
and user can rate your app easily.
When user clicks the Remind Me Later button, the dialog disappears until the days finished
you defined in initialization code. reminderDuration(day:Int) is used define the necessary time.
The parameter is given in days.
When user clicks the Don't Ask Again button, the dialog disappears and never appear again.
RateMe supports to arrange the delay time
delay(time : Long) indicates the time to display dialog after all events completed.
Default value is 0.
    Rateme.getInstance(this@App)
                       .addCondition("touch_me_event", 3)
                       .reminderDuration(3)
.delay(1000)To know when the user selects an action button, you set callbacks:
    Rateme.getInstance(this@App)
                 .addCondition("touch_me_event", 3)
                 .delay(1000)
                 .onRateCallback( object : RMEventCallback{
                     override fun onEvent() {
                         // TODO
                     }
                 })
                 .onDontAskCallback(object : RMEventCallback{
                     override fun onEvent() {
                         // TODO
                     }
                 })
                 .onRemindLaterCallback(object : RMEventCallback{
                     override fun onEvent() {
                         // TODO
                     }
                 })
                 .onShowCallback(object : RMEventCallback{
                     override fun onEvent() {
                         // TODO
                     }
                 })
                 .onRMCallback(object : RMCallback{
                     override fun onEvent(eventName: String, count: Int, which: Int) {
                         // TODO
                     }
                 })
If you are listening for all three action buttons, you could just use onRMCallback().
eventName (String)parameter tells completed event name. In our case this istouch_me_eventcount (Int)parameter tells completed event count value. In our case this is3. The count value is defined by developer inaddCondition()method.which (Int)parameter tells which action is happening. Each number indicates different state.- STARTED = -1
- POSITIVE = 0
- NEUTRAL = 1
- NEGATIVE = 2
Custom views are very easy to implement.
    Rateme.getInstance(this@App)
                    .addCondition("touch_me_event", 3)
                    .reminderDuration(3)
                    .delay(1000)
                    .custom(R.layout.layout_dialog)
After custom view is added appearance is like picture below.
When custom() method is used, default title and content disappears. Only the you layout file will display on screen.
It is recommended not to use buttons and different type views in custom layout. Because you can not provide callbacks for buttons.
You can use customButton() and customButtonReverse() methods to provide pretty much colored buttons.
    Rateme.getInstance(this@App)
                 .addCondition("touch_me_event", 3)
                 .delay(1000)
                 .custom(R.layout.layout_dialog)
                 .customButton()
customButton() and customButtonReverse() methods shouldn't be used together.
They have different type interfaces.
After custombutton() is added appearance is like picture below.
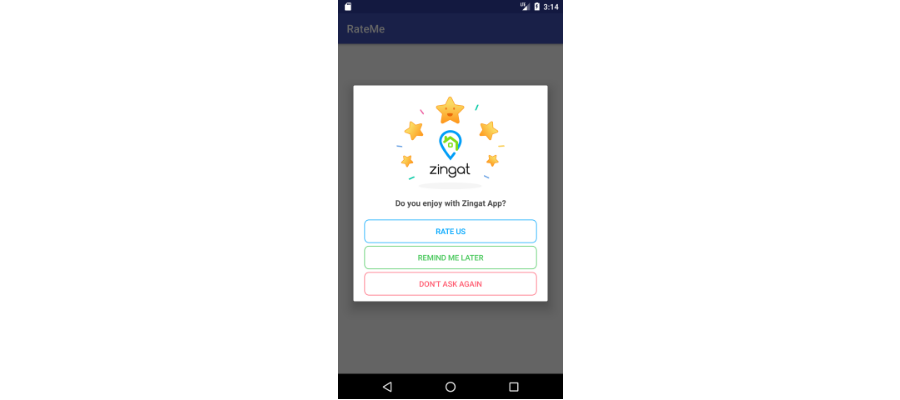
You can use the customButtonReverse() method with same way.
You can change all values by creating new color items with same name in your applications.
<resources>

    <!--Default background color for all buttons. It is active when customButton() is used.-->
    <color name="rm_defaultButtonBackground">#fff</color>

    <!--Default text color for buttons. It is become active when customButtonReverse() is used.-->
    <color name="rm_defaultTextColor">#fff</color>


    <!--Text, Border and Background color for Rate Us Button-->
    <color name="rm_BtnRateTextColor">#02a8fe</color>


    <!--Text, Border and Background color for Remind Me Later Button-->
    <color name="rm_BtnLaterTextColor">#4bca5e</color>

    <!--Text, Border and Background color for Don't Ask Again Button-->
    <color name="rm_BtnNeverTextColor">#ff6175</color>

</resources><resources>
<!--Default text for Rate Us button-->
<string name="rateme_btn_rate_text">Rate us</string>
<!--Default text for Remind Me Later button-->
<string name="rateme_btn_later_text">Remind Me Later</string>
<!--Default text for Don't Ask again button-->
<string name="rateme_btn_never_text">Don\'t ask again</string>
<!--Default dialog title. It is deactive when custom() method is used!-->
<string name="rateme_dialog_title">How was your experience?</string>
<!--Default dialog context. It is deactive when custom() method is used!-->
<string name="rateme_dialog_message">Recommend us to others by rating us on Play Store</string>
</resources>There are two different easy way to add multiple conditions to RateMe library.
You can add on by one all condition. You can add event how much you want with this way.
Rateme.getInstance(this@App)
                   // `addCondition(conditionName,repeatTime)`
                   .addCondition("touch_me_event", 3)
                   .addCondition("slide_me_event", 2)
                   .addCondition("rotate_me_event", 4)
.reminderDuration(3)Every condition represents with Condition object. Condition object has two variables.
count and type.
You can create own Condition object and you can add this Condition object in a ArrayList.
Finally you can use setConditionList( conditionList : ArrayList<Condition> ) method.
    package com.zingat.rateme.model

    val conditionList = ArrayList<Condition>
    conditionList.add( Condition( 3, "touch_me_event" ) )
    conditionList.add( Condition( 2, "slide_me_event" ) )
    conditionList.add( Condition( 4, "rotate_me_event" ) )

    Rateme.getInstance(this@App)
                       .setConditionList(conditionList)
.reminderDuration(3)When multiple events are added, RateMe shows dialog when one of conditions are completed and even other events completed, RateMe won't show a new dialog to user.
For exameple; if slide_me_event condition is completed , RateMe will show a new dialog and if user click Rate Us or Don't show again
buttons, even user complete the touch_me_event new dialog won't show. RateMe waits always the first completed condition rules.
In this way user won't be disturbed multiple times.