Install Homebridge on Windows 10 Using Hyper V
This guide provides step-by-step instructions to show you how to install Homebridge on Windows 10 / 11 Enterprise, Pro, or Education x64 using a Hyper-V virtual machine running Ubuntu Linux that will automatically start on boot.
- Prerequisites
- Enable the Hyper-V Role
- Create External Virtual Switch
- Create Homebridge Virtual Machine
- Manage Homebridge
- Hyper-V Manager
- How To Uninstall Homebridge
- Major Node.js Version Updates
- Configuration Reference
Before you get started, make sure you have the following ready:
- A computer running an update-to-date version of Windows 10 / 11 Enterprise, Pro, or Education 64 bit
⚠️ Windows 10 / 11 Home Edition is NOT supported as it cannot run Hyper-V- VT-x / AMD-V capability enabled in your system BIOS.
- An account with Administrator Privileges.
- A DHCP-enabled network.
- Right click on the Windows button and select 'Apps and Features'.
- Select Programs and Features on the right under related settings.
- Select Turn Windows Features on or off.
- Select Hyper-V and click OK.

When the installation has completed you are prompted to restart your computer.
You will need to create a new virtual switch that will allow the Homebridge virtual machine to connect to your local network.
- Open Hyper-V Manager. A quick way to do this is by hitting the Windows button or key then type "Hyper-V Manager".
- Select the server in the left pane, or click "Connect to Server..." in the right pane, then select Local Computer and click OK.
- In Hyper-V Manager, select Virtual Switch Manager... from the 'Actions' menu on the right.
- Under the 'Virtual Switches' section, select New virtual network switch.
- Under 'What type of virtual switch do you want to create?', select External.
- Select the Create Virtual Switch button.
- Under 'Virtual Switch Properties', give the new switch a name such as External VM Switch.
- Under 'Connection Type', ensure that "External Network" and "Allow management operating system to share this network addapter" has been selected.
- Select the physical network card to be paired with the new virtual switch. This is the network card that is physically connected to the network, such as your ethernet or WiFi adapter.

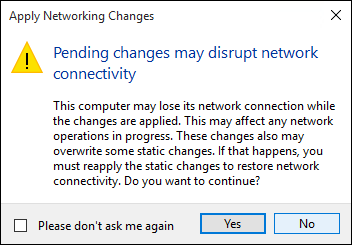
- Select Apply to create the virtual switch. At this point you will most likely see the following message. Click Yes to continue.
- Select OK to close the Virtual Switch Manager Window.
Download the latest Homebridge VM ISO file here:
Then follow the following steps to create your virtual machine:
- In Hyper-V Manager, select New then Virtual Machine... from the 'Actions' menu on the right.
- On the Before You Begin tab, click Next.
- On the Specify Name and Location tab, give your virtual machine a name, such as Homebridge.
- On the Specify Generation tab, choose Generation 1.
- On the Assign Memory tab, give the virtual machine at least 1024MB of RAM, and UNCHECK the "Use Dynamic Memory" checkbox.
- On the Configure Networking tab, set the Connection to External VM Switch (created in the previous step).
- On the Connect Virtual Hard Disk tab, set the hard disk size to 16GB or larger.
- On the Installation Options tab, select "Install an operating system from a bootable CD/DVD-ROM", then select "Image File" and choose the homebridge-vm-image.iso ISO file you downloaded earlier.
- On the Summary tab, click Finish.
Once created, click double click on the virtual machine in Hyper-V Manager, then click Start.
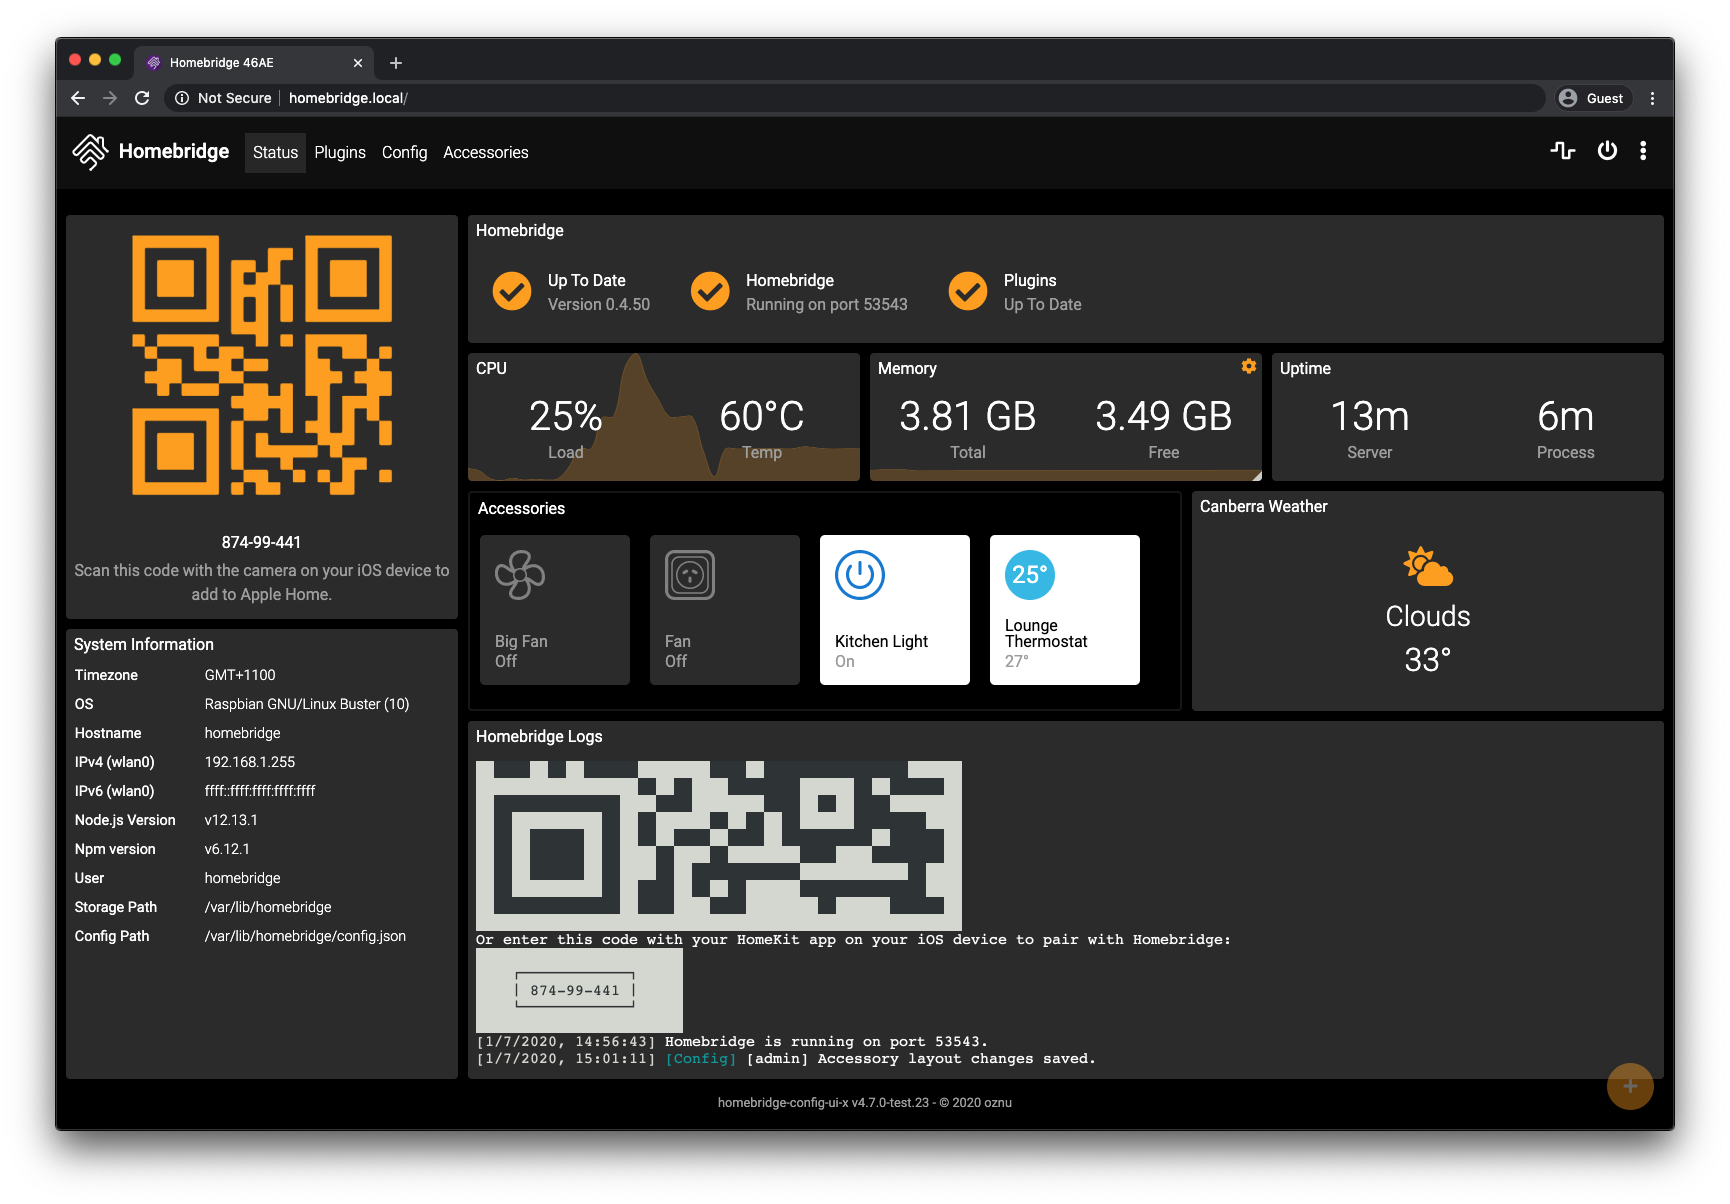
The VM will now boot and start Homebridge. You can manage Homebridge by going to the address displayed in the console.

The Homebridge Config UI X web interface will allow you to install, remove and update plugins, and modify the Homebridge config.json and manage other aspects of your Homebridge service.
Login to the web interface by going to http://<ip address of your server>:8581. You can access this site using any device on your local network.
To find the IP address of your server you can run:
hostname -I
Review the Configuration Reference at the bottom of this guide.
You can safely close the Hyper-V Manager and Virtual Machine windows. The Homebridge virtual machine will continue to run in the background, and will automatically start when your computer restarts.
You can access the console again at any time by opening the Hyper-V Manager app and double clicking on the Homebridge virtual machine.
You can remove the Homebridge Hyper-V Virtual Machine using the Hyper-V Manager program. You will need to stop the VM before you are able to delete it.
To update Node.js to the latest LTS version of Node.js run the following command in the Homebridge terminal:
sudo hb-service update-node
This table contains important information about your setup. You can use the information provided here as a reference when configuring or troubleshooting your environment after setting up Homebridge using the instructions below.
| File Location / Command | |
|---|---|
| Config File Path (inside container) | /homebridge/config.json |
| Storage Path (inside container) | /homebridge |
| Restart Command | docker restart homebridge |
| Stop Command | docker stop homebridge |
| Start Command | docker start homebridge |
| View Logs Command | docker logs -f homebridge |