Create a site or blog from your GitHub repositories with GitHub Pages.
With GitHub Pages, you can host project blogs, documentation, resumes, portfolios, or any other static content you'd like. Your GitHub repository can easily become its own website. In this course, we'll show you how to set up your own site or blog using GitHub Pages.
- Who is this for: Beginners, students, project maintainers, small businesses.
- What you'll learn: How to build a GitHub Pages site.
- What you'll build: We'll build a simple GitHub Pages site with a blog. We'll use Jekyll, a static site generator.
- Prerequisites: If you need to learn about branches, commits, and pull requests, take Introduction to GitHub first.
- How long: This course is five steps long and takes less than one hour to complete.
- Right-click Start course and open the link in a new tab.

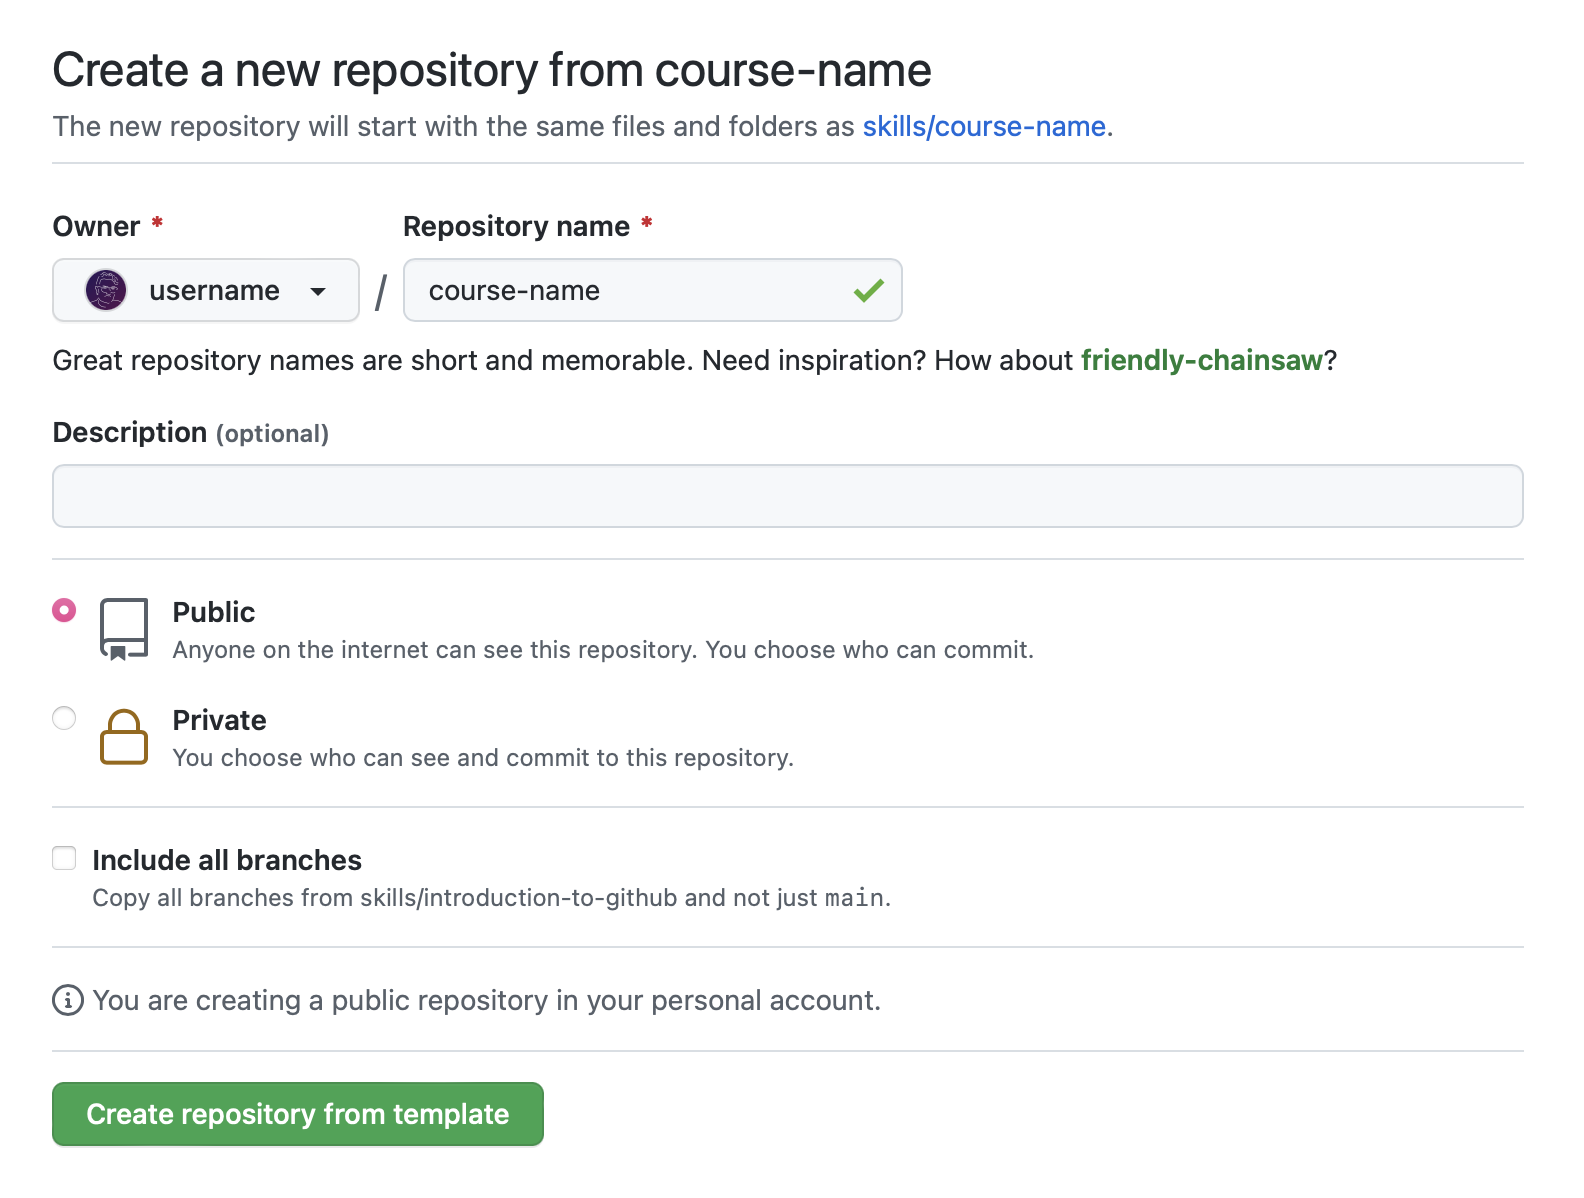
- In the new tab, follow the prompts to create a new repository.
- For owner, choose your personal account or an organization to host the repository.
- We recommend creating a public repository—private repositories will use Actions minutes.
- After your new repository is created, wait about 20 seconds, then refresh the page. Follow the step-by-step instructions in the new repository's README.
Welcome to GitHub Pages and Jekyll 🎉!
The first step is to enable GitHub Pages on this repository. When you enable GitHub Pages on a repository, GitHub takes the content that's on the main branch and publishes a website based on its contents.
- Open a new browser tab, and work on the steps in your second tab while you read the instructions in this tab.
- Under your repository name, click Settings.
- Click Pages in the Code and automation section.
- Ensure "Deploy from a branch" is selected from the Source drop-down menu, and then select
mainfrom the Branch drop-down menu. - Click the Save button.
- Wait about one minute, then refresh this page for the next step.
Turning on GitHub Pages creates a deployment of your repository. GitHub Actions may take up to a minute to respond while waiting for the deployment. Future steps will be about 20 seconds; this step is slower. Note: In the Pages of Settings, the Visit site button will appear at the top. Click the button to see your GitHub Pages site.
You turned on GitHub Pages! 🎉
We'll work in a branch, my-pages, that I created for you to get this site looking great. ❇️
Jekyll uses a file titled _config.yml to store settings for your site, your theme, and reusable content like your site title and GitHub handle. You can check out the _config.yml file on the Code tab of your repository.
We need to use a blog-ready theme. For this activity, we will use a theme named "minima".
- Browse to the
_config.ymlfile in themy-pagesbranch. - In the upper right corner, open the file editor.
- Add a
theme:set to minima so it shows in the_config.ymlfile as below:theme: minima
- (optional) You can modify the other configuration variables such as
title:,author:, anddescription:to further customize your site. - Commit your changes.
- (optional) Create a pull request to view all the changes you'll make throughout this course. Click the Pull Requests tab, click New pull request, set
base: mainandcompare:my-pages. - Wait about 20 seconds then refresh this page for the next step.
Nice work setting the theme! ✨
You can customize your homepage by adding content to either an index.md file or the README.md file. GitHub Pages first looks for an index.md file. Your repository has an index.md file so we can update it to include your personalized content.
- Browse to the
index.mdfile in themy-pagesbranch. - In the upper right corner, open the file editor.
- Type the content you want on your homepage. You can use Markdown formatting on this page.
- (optional) You can also modify
title:or just ignore it for now. We'll discuss it in the next step. - Commit your changes to the
my-pagesbranch. - Wait about 20 seconds then refresh this page for the next step.
Your home page is looking great! 🤠
GitHub Pages uses Jekyll. In Jekyll, we can create a blog by using specially named files and frontmatter. The files must be named _posts/YYYY-MM-DD-title.md. You must also include title and date in your frontmatter.
What is frontmatter?: The syntax Jekyll files use is called YAML frontmatter. It goes at the top of your file and looks something like this:
---
title: "Welcome to my blog"
date: 2019-01-20
---
For more information about configuring front matter, see the Jekyll frontmatter documentation.
- Browse to the
my-pagesbranch. - Click the
Add filedropdown menu and then onCreate new file. - Name the file
_posts/YYYY-MM-DD-title.md. - Replace the
YYYY-MM-DDwith today's date, and change thetitleof your first blog post if you'd like.If you do edit the title, make sure there are hyphens between your words. If your blog post date doesn't follow the correct date convention, you'll receive an error and your site won't build. For more information, see "Page build failed: Invalid post date".
- Type the following content at the top of your blog post:
---
title: "YOUR-TITLE"
date: YYYY-MM-DD
---
- Replace
YOUR-TITLEwith the title for your blog post. - Replace
YYYY-MM-DDwith today's date. - Type a quick draft of your blog post. Remember, you can always edit it later.
- Commit your changes to your branch.
- Wait about 20 seconds then refresh this page for the next step.
Nice work, friend ❤️! People will be reading your blog in no time!
You can now merge your pull request!
- Merge your changes from
my-pagesintomain. If you created the pull request in step 2, just open that PR and click on Merge pull request. If you did not create the pull request earlier, you can do it now by following the instructions in step 2. - (optional) Delete the branch
my-pages. - Wait about 20 seconds then refresh this page for the next step.
Congratulations friend, you've completed this course!

Your blog is now live and has been deployed!
Here's a recap of all the tasks you've accomplished in your repository:
- You enabled GitHub Pages.
- You selected a theme using the config file.
- You learned about proper directory format and file naming conventions in Jekyll.
- You created your first a blog post with Jekyll!
- Keep working on your GitHub Pages site... we love seeing what you come up with!
- We'd love to hear what you thought of this course in our discussion board.
- Take another GitHub Skills course.
- Read the GitHub Getting Started docs.
- To find projects to contribute to, check out GitHub Explore.
Get help: Post in our discussion board • Review the GitHub status page
© 2022 GitHub • Code of Conduct • CC-BY-4.0 License