Note: the following scripts are deprecated since version 0.2beta!
- check-coverage.pl
- gcov_script.sh
=== ###Jenkins Testing Integration
jenkins-automation is a toolbox for automated test coverage of iOS apps using the continuous integration server Jenkins.
#####Coverage
- Logic Testing via SenTestingKit (OCUnit)
- Application Testing via SenTestingKit (OCUnit)
- Integration (User Interface) Testing via UIAutomation
- Jenkins
- Xcode 4.x
- ios-sim
- OCUnit2JUnit
- GCOVR -> Have a look at this GUIDE for configuration instructions
First of all install the prerequisites listed above!
=== #####Jenkins Build Script
######build.sh
Automatically calls unit_testing.sh and integration_testing.sh You may modify some constants in this script:
- PROJECT_PREFIX
- APPNAME
- PLISTPATH
- XCODEPROJECTPATH
- INHOUSE_SCHEME
- ADHOC_SCHEME
- INHOUSE_IPA_NAME
- ADHOC_IPA_NAME
- UNITTESTNAME
- UIAUTOMATIONPREFIX
- UIAUTOMATIONTESTPATH
- SIMULATORSDK
=== #####Unit Testing Execution Script
######unit_testing.sh
Parameter:
- SDK name
- unit test target name
Example:
/bin/sh unit_testing.sh iphonesimulator MyAppTests
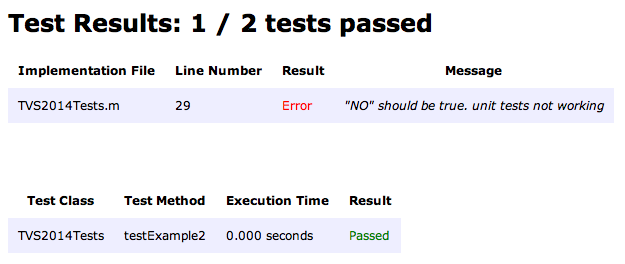
HTML result example:
Note: Jenkins is already pre-configured to support test results. But this support only covers JUnit test results (xml). After installing OCUnit2JUnit the build script will automatically convert OCUnit test results to JUnit test results and Jenkins will support some really nice charts! If you like to publish these results in Jenkins everything you have to do is to edit your job configuration. Search for "Publish JUnit Test Report" at the bottom of the page and enter:
test-results/*.xml
=== #####Integration Testing Execution Script
######integration_testing.sh
Parameter:
- SDK name
- app name
- UIAutomation prefix
- UIAutomation test path
Example:
/bin/sh integration_testing.sh iphonesimulator MyApp foo bar
=== #####Integration Testing Transformer Stylesheet
######integration_test_result_transform.xsl
Parameter:
- Title
- ScreenshotPathPrefix
- SmileyPathPrefix
Example:
xsltproc --stringparam Title "FooBar" --stringparam ScreenshotPathPrefix "test/" --stringparam SmileyPathPrefix "foo/" -output out.html transform.xsl Automation\ Results.plist
===
To be able to use all these scripts, you have to make some modifications in your Xcode project to support testing with OCUnit.
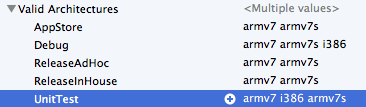
At first duplicate the Debug Build Configuration and call it "UnitTest".
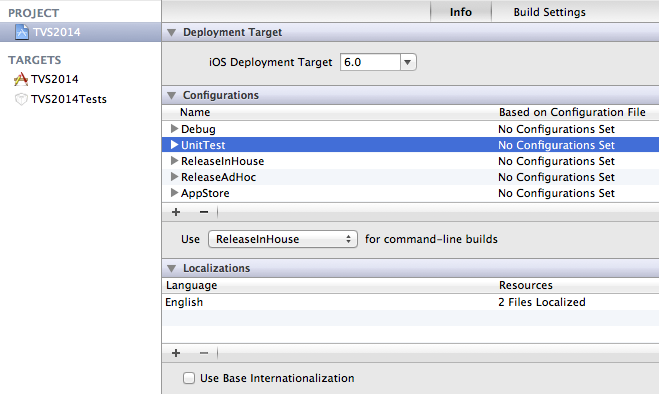
It's important to enable i386 as valid architecture for these new Build Settings.
Search for "Test After Build" and set the value to "YES".
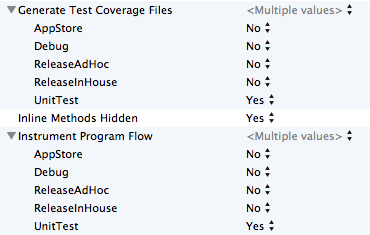
Last but not least set "Generate Test Coverage Files" and "Instrument Program Flow" to "YES".
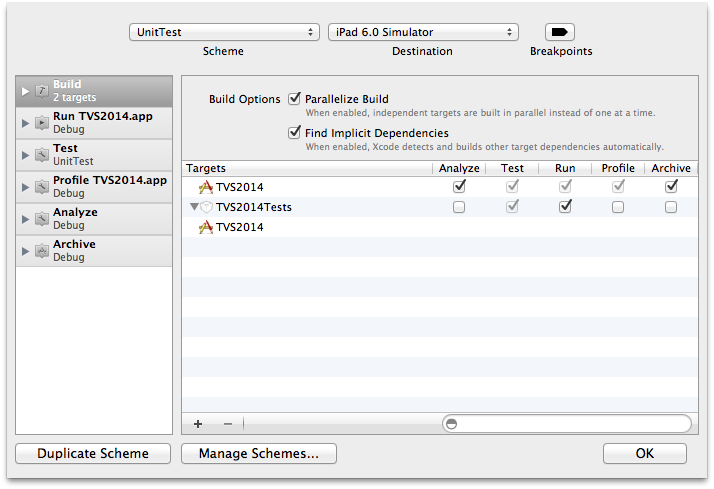
You have to create a scheme called "UnitTest". This could be a duplicate of the Debug-Scheme.
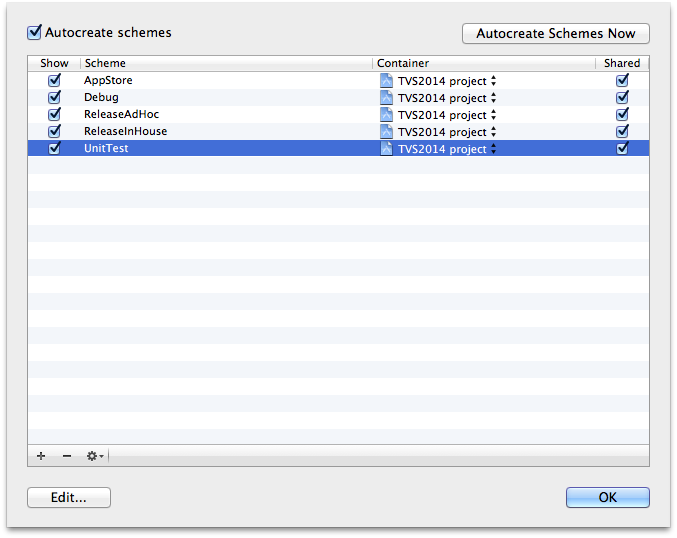
Make sure to have enabled the test bundle to run in "Build" category (list on the left) and use your Build Configuration "UnitTest" in "Test" category.
NOTE: if you just like to run Logic Tests, you can skip reading this chapter.
Disclaimer: changig your Xcode configuration file may prevent you from using Xcode! Be careful while making the following changes!
Open this file in some text editor with root previleges: /Developer/Platforms/iPhoneSimulator.platform/Developer/Tools/RunPlatformUnitTests
Go to line 95 and search for:
Warning ${LINENO} "Skipping tests; the iPhoneSimulator platform does not currently support application-hosted tests (TEST_HOST set)."
Put some "#" in front of these lines to disable execution. Now you don't get a warning if you try to run Application Tests from command line.
Click on your project file in Xcode and choose the Application Test Target in list to edit the Build Phases.
Expand "Run Script" and put in the following code snipplet ( unit_testing_build_phase.sh ):
echo "<<UNIT_TEST_MARKER>>"
test_bundle_path="$BUILT_PRODUCTS_DIR/$PRODUCT_NAME.$WRAPPER_EXTENSION"
environment_args="--setenv DYLD_INSERT_LIBRARIES=/../../Library/PrivateFrameworks/IDEBundleInjection.framework/IDEBundleInjection --setenv XCInjectBundle=$test_bundle_path --setenv XCInjectBundleInto=$TEST_HOST"
ios-sim launch $(dirname $TEST_HOST) $environment_args --args -SenTest All $test_bundle_path
echo "Finished running tests with ios-sim"
echo "<<UNIT_TEST_MARKER>>"
This allows you to run Application Test with xcodebuild.
===
===
- folders required to support test result files (html, xml) aren't created automatically. So your build will fail until you have created folders called "coverage" and "TestResults" in your workspace directory. Note that these folders will be deleted if you clean the workspace in Jenkins! For now it's recommended to create these folders right in your Xcode project so they will be pushed over git to be available in Jenkins everytime.