This is a standalone <1MB image intended for the 1MB "factory" slot on ESP32.
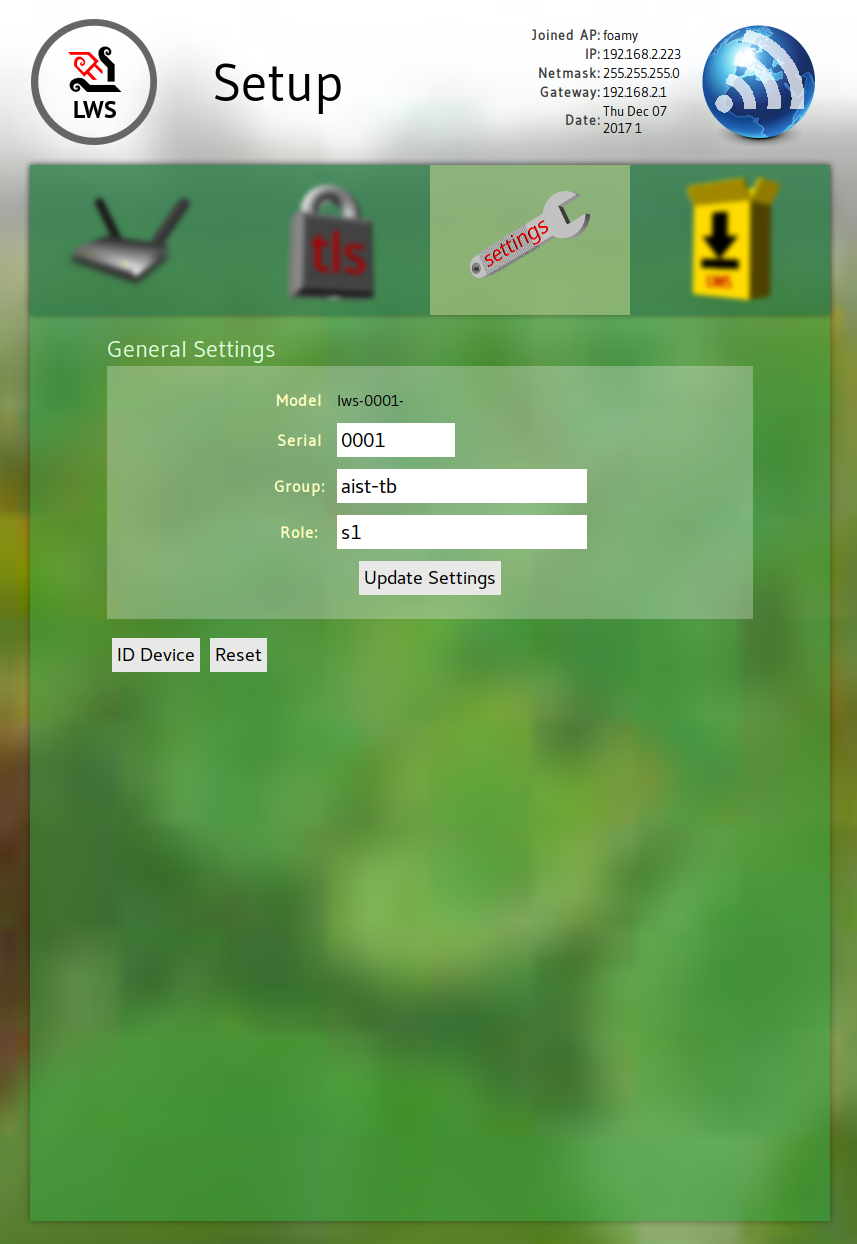
This image is designed to look after "generic device configuration"... it means:
-
Automated generation of 2048-bit selfsigned certs on the device at first boot
-
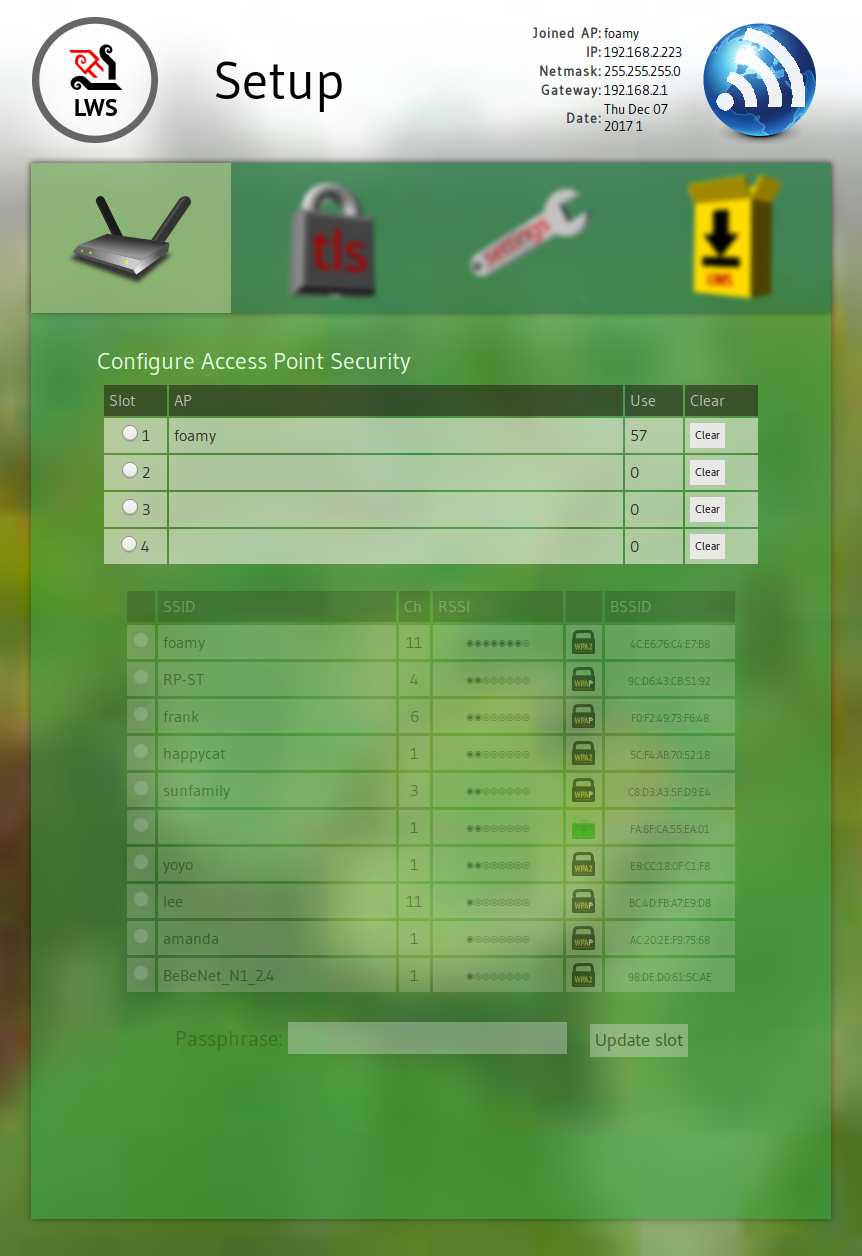
Selecting up to 4 APs the device can connect to along with necessary passphrases
-
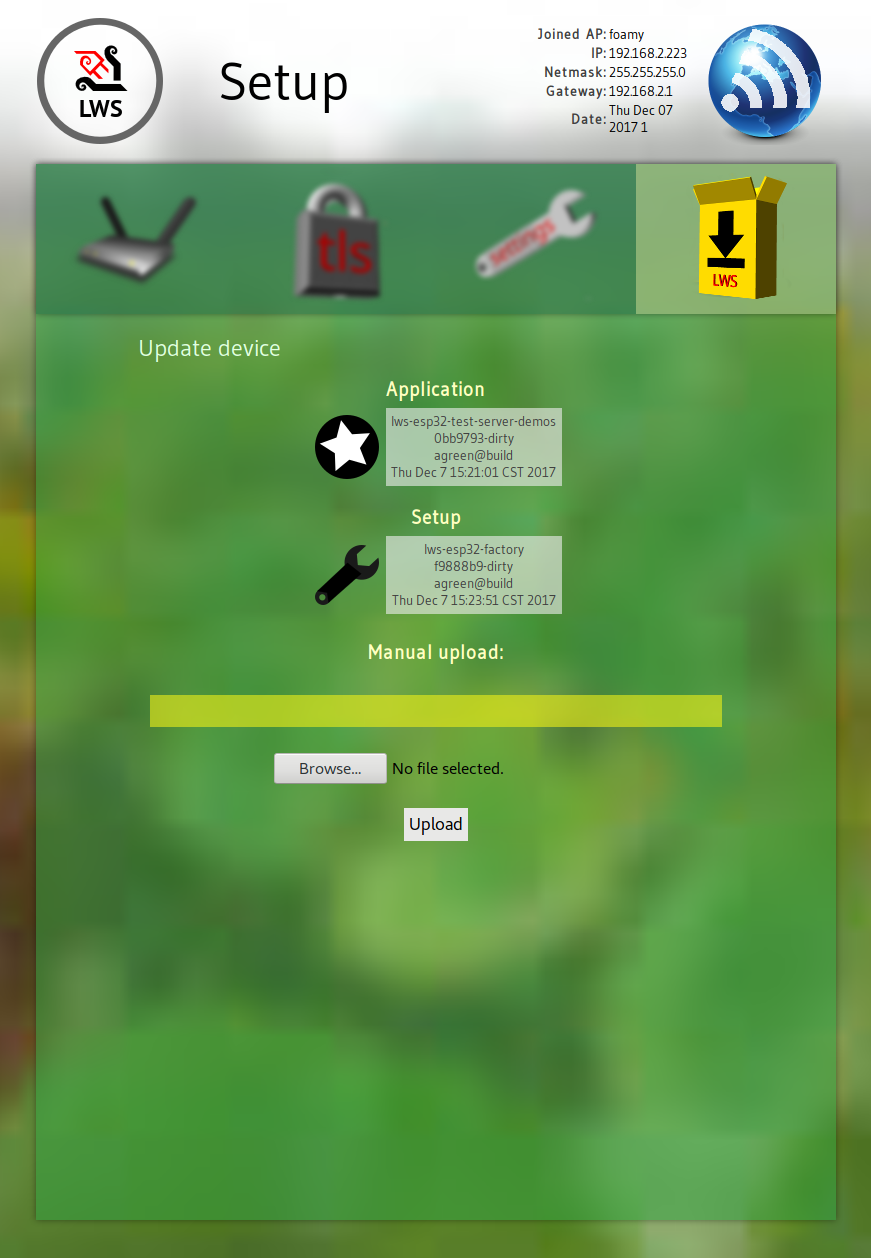
Updating the user application OTA
-
Automated Let's Encrypt certificate acquisition (requires external :443 forwarded to the device :443)
Your actual "OTA" application is something completely different, and has its own 2.9MB flash area. This -factory app is designed to take care of all common setup stuff and put it in nvs to be shared with the OTA app.
This now uses HTTP/2 serving from libwebsockets :-)
It also now supports ws-over-http2 tunelling, meaning all the ws connections and the http actions share the same tls tunnel. This makes a massive improvement in speed and reduced memory consumption.
As of 2018-03-14 only Chrome Canary 67 supports this new mode, but support in other browsers is coming.

It has the following capabilities:
The first boot after flashing, the device will create its own selfsigned certificate and key.
After generating the cert, if there is no AP information yet, the server up automatically at https://192.168.4.1 in AP mode.
The user can reach -factory subsequently programmatically or by grounding a GPIO (ie, by a button), the default GPIO is IO14.
-factory allows you to select an AP from a scan list and give a passphrase. It supports four AP slots, for, eg, home and work environments, and it handles the scan and acquire of the APs.
Once it connects, the DHCP information is shown, and it autonomously connects to a configurable server over https to check for updates. The user can select to have it autonomously download the update and restart.
The user can also upload images by hand. The factory image understands how to update both the 1MB factory slot itself and the single 2.9MB OTA slot using autonomous upload from a server or the browser based file upload.
It's not required, but the default code expects
- pushbutton to 0V connected on IO14, with pullup to 3.3V
If the pushbutton is held down at boot, the user is forced into the factory / Setup mode rather than the OTA application.
Note: Default selection of GPIO14 should be changed to another value when debugging with JTAG. Pins reserved for ESP32 JTAG: GPIO12, GPIO13, GPIO14 and GPIO15.
- LED connected via, eg, 330R 3.3V ---|>|-----/\/\/\---- IO23
While in factory / OTA mode, the LED flashes dows a PWM sine cycle at about 1Hz. When you press "ID Device" button in the UI, the LED does the since cycle rapidly for 10s, so you can be sure which physical device you are talking to.
- This was built and tested against esp-idf at 17ac4bad7381e579e5a7775755cc25480da47d97
from Sept 11, 2018. You can force esp-idf to that commit by cloning / pulling / fetching
the latest esp-idf and then doing
git reset --hard 17ac4bad7381e579e5a7775755cc25480da47d97in the esp-idf directory.
Esp-idf is in constant flux you may be able to use the latest without problems but if not, revert it to the above commit that has been tested before complaining.
- Esp-idf also has dependencies on toolchain, at the time of writing it recommends this toolchain version (for 64-bit linux)
-
Don't forget to do
git submodule init ; git submodule update --recursiveafter fetching projects like esp-idf with submodules. -
After updating esp-idf, or this project or components, remove your old build dir with
rm -rf buildbefore rebuilding.
For Ubuntu / Debian and Fedora at least, the distro package is called "genromfs"
Under Windows on MSYS2 environment you will need to separately build genromfs and add it to the path:
git clone https://github.com/chexum/genromfs.git
make
cp genromfs /mingw32/bin/
CMake v2.8 is too old... v3.7+ are known to work OK and probably other intermediate versions are OK.
Under Windows on MSYS2 environment you will need to install cmake: pacman -S mingw-w64-i686-cmake
$ brew install coreutils
     $ git clone git@github.com:warmcat/lws-esp32-factory.git
     $ git submodule update --init --recursive
Clear down the partitioning since we write a custom table and the bootloader will choke if the OTA parts are not initialized like this one time
$ make erase_flash
First one time each session set an env var in your shell to override the tty port
$ export ESPPORT=/dev/ttyUSB0
Then you can just do
$ make flash monitor
During the first boot, there will be a pause of a minute or so while the selfsigned TLS certificate is generated.
Afterwards it continues boot normally.
-
connect your wifi to the ap "ESP_...."
-
In a browser, go to https://192.168.4.1
-
Click on the radio button for AP slot 1
-
Select your normal AP from the list
-
Give the AP password and click the button
-
Your ESP32 should associate with the AP without resetting
This application is just the factory / setup application.
The end-user applications are separate projects, see eg
https://github.com/warmcat/lws-esp32-test-server-demos
These are built and loaded slightly differently, ie
$ make lws_flash_ota monitor
This is because they target the 2.9MB OTA flash area.
The build/*.bin file from the application build may also be uploaded in the setup page upload UI.
NOTE: the first time you flash the OTA application, you need to do it using the upload file button or the autonomous update facility in the Factory App. The bootloader requires it to not only be flashed, but marked as bootable.
Subsequently you can just reflash the OTA partition with make lws_flash_ota or use the upload or autonomous update stuff in the -factory app.
Firefox has a longstanding, unfixed bug dealing with selfsigned certs. As you add more exceptions for them, firefox bogs down processing the validity of the certs. Symptoms are slow (eventually very slow) browser performance sending data on the accepted SSL connection.
https://bugzilla.mozilla.org/show_bug.cgi?id=1056341
Symptom is your browser box's cpu burns while it sits there. Workaround is to delete the cert8.db file in
your firefox user config, on my box it was ~/.mozilla/firefox/blah.default/cert8.db.
This isn't related to lws but affects all firefox usage with selfsigned certs...