Transforming Virtual Machine Deployment Template for Test Drive
Now let's look to the following virtual machine template:
https://github.com/Azure/AzureTestDrive/raw/master/samples/winvm/template.json
This template creates virtual machine using one of the preconfigured virtual machine images. This template accepts seven parameters and you use it for manual deployment on Azure Portal.
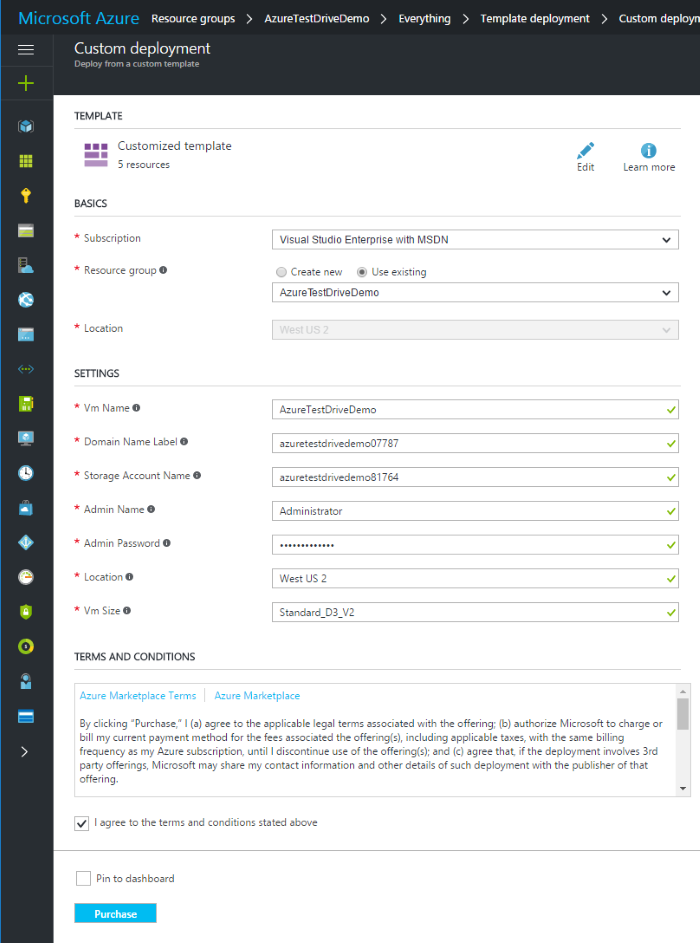
But this template is not suitable for Test Drive as well as a website template from the previous section. If you want to user this template for Test Drive, you have to transform it to enable multiple automated deployments.
Let's see how to transform this virtual machine deployment template for a Test Drive. You can find the final version here:
https://github.com/Azure/AzureTestDrive/raw/master/samples/winvm/main-template.json
As for the website, the first thing you must do for a virtual machine is to instruct Test Drive how to populate template parameters, or turn these parameters into constant values. Also, you need to make sure that all names which must be globally unique, are globally unique. For example, storage account name should be unique across all Azure data centers.
Let's walk through the virtual machine deployment template parameters one by one and update them.
This parameter defines virtual machine resource name and resulting virtual machine name (not DNS name):
"parameters": {
  ...
  "vmName": {
    "type": "string",
    "metadata": {
      "description": "VM name (non-unique)."
    }
  },
  ...
}
When you deploy this template manually, you can just pick any valid value. This value doesn't need to be globally unique, so for Test Drive you can just replace this parameter with a variable and assign a constant value to this variable:
"variables": {
  "vmName": "w2k12",
  ...
}
This parameter is used to build a fully-qualified domain name for the virtual machine, so it should be unique within an Azure region:
"parameters": {
  ...
  "domainNameLabel": {
    "type": "string",
    "metadata": {
      "description": "Unique DNS name label."
    }
  },
  ...
}
When you deploy this template manually, you can pick any available name. For the Test Drive, you must use a variable instead of parameter, and assign a unique [value for this variable].
"variables": {
  "domainNameLabel": "[concat('contosovm',uniquestring(resourceGroup().id))]",
  ...
}
This parameter specifies a storage account name which is used for a virtual machine disks, and as any other storage account name it should be globally unique:
"parameters": {
  ...
  "storageAccountName": {
    "type": "string",
    "metadata": {
      "description": "Name of the storage account for VM disks."
    }
  },
  ...
}
When you deploy this template manually, you can pick any available name. But for the Test Drive, you must use a variable instead of parameter, and assign a [unique value for this variable] – as well as for domain name label:
"variables": {
  ...
  "storageAccountName": "[concat('contosodisk',uniquestring(resourceGroup().id))]",
}
These two parameters specify virtual machine Administrator user name and password:
"parameters": {
  ...
  "adminName": {
    "type": "string",
    "metadata": {
      "description": "VM admin user name."
    }
  },
  "adminPassword": {
    "type": "securestring",
    "metadata": {
      "description": "VM admin password."
    }
  },
  ...
}
When you deploy this template manually, you can pick any valid name and password. For the Test Drive, you can use constant values or instruct Test Drive to generate a random user name and password:
"parameters": {
  "adminName": {
    "type": "string",
    "metadata": {
      "type": "username",
      "description": "Admin user name."
    }
  },
  "adminPassword": {
    "type": "securestring",
    "metadata": {
      "type": "password",
      "description": "Admin password."
    }
  }
}
Now Test Drive will populate these parameters with random values:
| Parameter | Sample Value |
|---|---|
| adminName | admin68876 |
| adminPassword | Lp!ACS^2kh |
This parameter specifies Azure region where we want to deploy your virtual machine:
"parameters": {
  ...
  "location": {
    "type": "string",
    "metadata": {
      "description": "Deployment location."
    }
  },
  ...
}
For the Test Drive, you can pick one or more Azure region for your lab when publishing your template. Because your template should work correctly in every region, you need to replace this parameter with a variable and initialize it using resource group location:
"variables": {
  ...
  "location": "[resourceGroup().location]",
  ...
}
This parameter specifies virtual machine size:
"parameters": {
  ...
  "vmSize": {
    "type": "string",
    "metadata": {
      "description": "VM size."
    }
  }
  ...
}
When you deploy this template manually, you can choose any virtual machine size which satisfy your needs. For the Test Drive, you need to find a balance between Lab requirements and service cost, pick and appropriate virtual machine size and use is as a contact value:
"variables": {
  ...
  "vmSize": "Standard_D2_V2",
  ...
}
Another thing you need to do to transform virtual machine template into a Test Drive template is to define deployment template outputs, as well as for website templates. When you deploy this template manually, you know your DNS name (or you can find it on Azure Portal), administrator user name, and password.
But for your virtual machine, you need to send the automatically generated virtual machine DNS name, administrator user name, and password back to the Test Drive and then to a user. The following code shows how to do send this information back:
"outputs": {
  "Host Name": {
    "type": "string",
    "value": "[reference(variables('pubIpId')).dnsSettings.fqdn]"
  },
  "User Name": {
    "type": "string",
    "value": "[parameters('adminName')]"
  },
  "Password": {
    "type": "string",
    "value": "[parameters('adminPassword')]"
  }
}
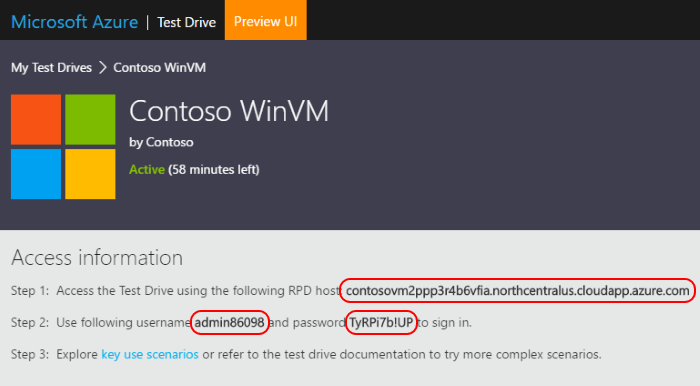
While configuring the lab, you can refer output variables in access information template:
Access the Test Drive using the following RPD host: **{{Host Name}}**
Use following username **{{User Name}}** and password **{{Password}}** to sign in.
So a user will see customized access information on the Lab page:
Although I recommend including all resource required for a deployment, like scripts, nested templates, installers and so on into a Test Drive deployment package, for virtual machine images it's not possible due to their size. So, you need to publish virtual machine images separately.