Outline
The package comes with a lightweight outline effect.
It is based on the old technique of drawing objects twice. While the first time it is rendered as usual, during the second pass the shader inflates the mesh along the direction of normals. In addition, only the back faces are drawn.
| Outline | No Outline |
|---|---|
 |
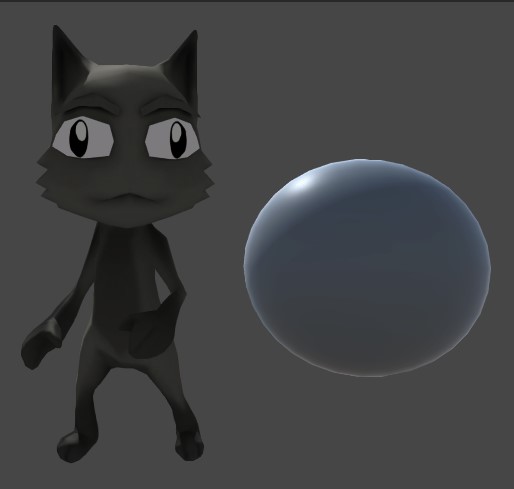 |
Create a new material using DELTation/Inverted Hull Outline shader:

Here you can configure the color and the scale (i.e., thickness) of the outline.
In addition, you can toggle the Clip Space option.
Generally, it should be enabled to account for perspective distortion.
If you want only specific objects to be outlined, it is necessary for them to be on a separate layer. For example, you can create a dedicated layer for objects with outlines. It is sufficient to only mark renderers with this layer.

Locate your renderer asset.
By default, it should be named something like UniversalRenderPipelineAsset_Renderer.
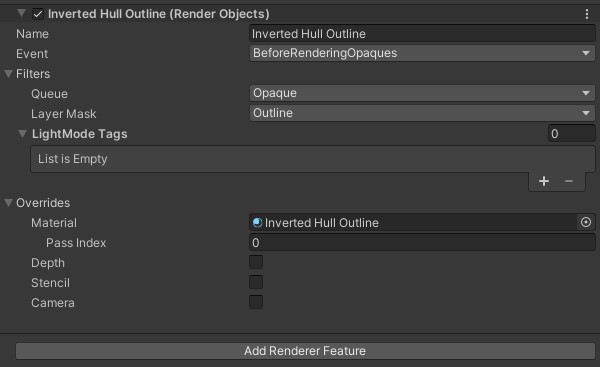
In the Inspector of the renderer, click Add Renderer Feature/Render Objects
Configure your pass as in the following picture. Note:
- Name of the pass can be any
- Material should be the one you created in
Step 1
If everything was done correctly, you should now see the outline in the Game View. If the effect is working but you have artifacts, consider reading through the following sections to find a solution.
Unfortunately, this can only be fixed by smoothing normals. The simplest way to do so is to go to model import settings, set Normals to Calculate, and choose a high enough Smoothing Angle. This, however, impacts how objects react to lighting, thus it might not be appropriate for some use cases.
Alternatively, one can use the tool bundled with the package to fix sharp normals. There are two modes:
- Add
SmoothedNormalsto the name of the imported model. The asset post-processor will pick up the model and compute smoothed normals. Note that the smoothed normals are written to theUV2vertex attribute, therefore the appearance of the object will not change. You can specify the smoothing angle by appending a number to the suffix (e.g., useSmoothedNormals90for 90 degrees). - Go to
Window/URP Toon Shader/Normals Smoothing Utilityand follow the instructions. It will create a new mesh asset.
After the smoothed normals are computed, enable the Custom Normals option on the outline material.
Since it will apply to all objects with outlines (even those without custom normals), you may have to create another outline pass. That is, you will have one for usual objects and another for the ones with custom normals.

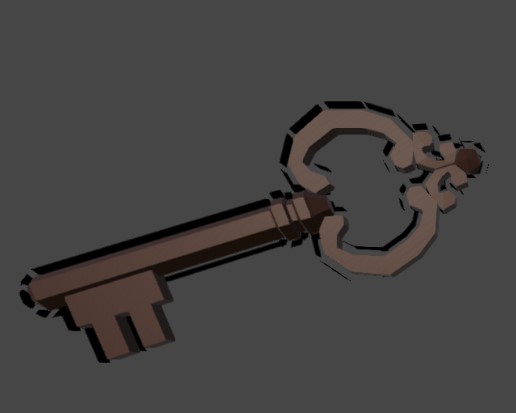
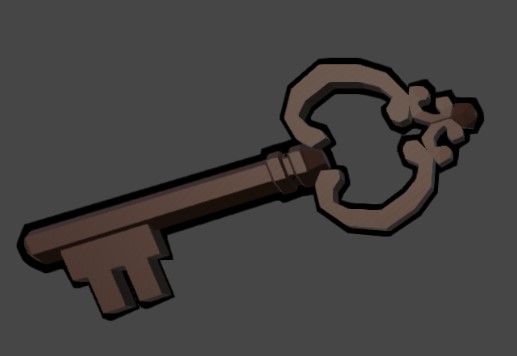
Depending on the geometry of the objects, this can happen quite frequently. If it is especially noticeable in your scenario, consider these workarounds:
- Tweak
Offset Factorproperty of the outline material. Note, however, that increasing it too high may introduce other artifacts. - Ensure objects are always on top of the outlines. The required settings are presented in the following picture (see the settings under the
Depthcheckbox):

The second option, however, will make outlines disappear if they are rendered right on top of a skybox. Skybox is rendered after opaque geometry and will overwrite the outlines since, in this case, they do not write to the depth buffer.