This project implements attitude estimation by using Madgwick filter, which is a low computational cost and high accuracy data fusion algorithm, based on a 9 degree of freedom MARG(magnetic angular rate and gravity, i.e., IMU + magnetometer). In this project, the algorithm is implemented in two type of MARG: MPU9250 and Adafruit LSM6DSOX + LIS3MDL. MPU9250 can also be replaced by MPU9255 since they use same library in Arduino. A Teensy4.0, which is an Arduino like microcontroller, is used to receive and process the data from MARG, and sent results of attitude estimation as Euler angle to PC.
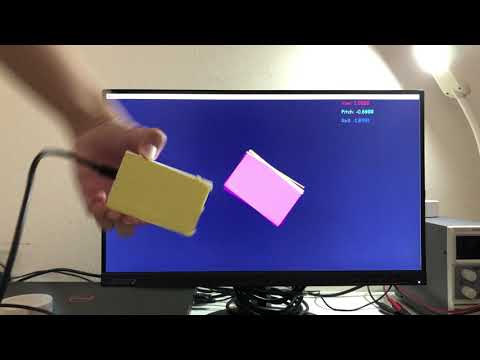
To view the performance, please click the following image.
or Click here if you cannot use Youtube
To set a simple attitude estimation system, only two units are needed: a microcontroller and a 9 DoF MARG. In this project, Teensy4.0 is used as microcontroller to receive and process data from MARG.
Connection between Teensy4.0 and MPU9250 or Adafruit LSM6DSOX + LIS3MDL is as follows. Teensy connects PC through micro-USB port to transfer data.
 TEENSY4.0 <--> MARG

 3.3V      <--> VCC
 GND       <--> GND
 SCL       <--> SCL
 SDA       <--> SDA
MARG is powered by Teensy from its 3.3V and GND pins. The MARG used in this project uses I2C interface to send data. I2C is a stable and relatively high-speed interface with only 2 wire. To check the pins of Teensy4.0, a pinout diagram can be found on official website.


Teensy is a complete USB-based microcontroller development system. It is compatible with Arduino Software & Libraries. To use it, Arduino software and Teensyduino package is required. The official installation instruction is here. Teensy is a powerful and small size microcontroller. It features an ARM Cortex-M7 processor at 600 MHz, with a NXP iMXRT1062 chip, one of the fastest microcontrollers available today.
MARG(magnetic angular rate and gravity), also called 9 Degree of Freedom IMU, can sense 3 types data: acceleration, rotation speed and magnetic field. 9 Dof means it provides these 3 types data along X/Y/Z axis of IMU, which are 9 numbers. Different IMU has different coordinate. Producers always paint that on the board, or can be found on official datasheet.
Madgwick filter is a data fusion algorithm for altitude estimation. To estimation the rotation angle along each axis of base coordinate, only use one type of data is not enough. For example, a simple way to calculate rotation angle is doing integration of rotation speed provided by the gyroscope in IMU. However, the raw data is not stable, and the worst is the bias. When doing integration, bias will also be included in integration result. As a result, the rotation angle will keep rotating even the user does not touch it. This phenomenon is so called "drift".
Data fusion algorithm is a good way to handle drift and improving the estimation accuracy. It fuse all the data from IMU, each data provides useful information of IMU, and reduce the error produced by other type of data.
At present, many data fusion algorithms are able to estimate accurate attitude, e.g. Mahony filter, Extended Kalman filter and Madgwick filter. In these algorithms, EFK provides high accuracy, but it consumes a lot computing power. Madgwick filter is accurate enough for most usage and it needs less computing resources.
To understand Madgwick filter, It is highly recommended to read the original paper.
Take MPU9250 as example to explain how to set up software. Adafruit IMU setting up is similar.
MPU9250 is a 9 DoF MARG. Accelerometer, gyroscope and magnetometer are implemented on MPU9250 to sense acceleration, rotation speed and magnetic field along the three axes of the coordinate on itself. To successfully estimate the euler angle, calibration of all 9 data is required.
- Calibrate accelerometer and gyroscope
When MARG is still on a flat stable, ideally, acceleration along x/y/z axis should be 0.0/0.0/-g (g is the gravity of that area) and rotation speed should be 0.0/0.0/0.0. However, in practice, these data not only has bias but also keep fluctuating. By using calibration, bias can be reduced.
The basic idea of calibrating accelerometer and gyroscope is putting MARG on a flat table, then open file 9DoF_MARG_Madgwick_Filter/MPU9250/Accelerometer & Gyroscope Calibration/MPU9250_Acc_Gyro_Calibration.ino, compile and upload it to Teensy. Then open serial monitor by clicking the icon on upper-right corner of the Arduino software window. After that, keep receiving acceleration and rotation speed data for around 20 seconds. Then, taking average of each data, we can get the calibration number.
#define GYRO_X_OFFSET 0.0000820
#define GYRO_Y_OFFSET -0.0002375
#define GYRO_Z_OFFSET -0.0000904

#define ACCEL_X_OFFSET 0.1405817
#define ACCEL_Y_OFFSET -0.1235667
#define ACCEL_Z_OFFSET -10.2402658
Open file 9DoF_MARG_Madgwick_Filter/MPU9250/MPU9250_Madwick_Filter/MPU9250_Madgwick.ino. Find this part and replace the number.
- Calibrate magnetometer
The calibration of magnetometer is more complex. It also has some restriction. If IMU works in a certain workspace, then magnetometer calibration is required to be performed in that place. The reason is that, ideally, we only want to receive geomagnetic field. But geomagnetic field is easily influenced by Ferromagnetic material, like iron or nickel. This is so called soft-iron distortion. Also, some cable with current or magnet produce magnetic field, which also influence the geomagnetic field we want. This is hard-iron distortion. The reason of calibration is to remove the soft-iron and hard-iron distortion. However, if the working place is changed, the distortion changes as well. Then the calibration cannot compensate the distortion.
To do that, open 9DoF_MARG_Madgwick_Filter/MPU9250/Magnetometer Calibration/MPU9250_Magnetometer.ino, compile and upload it to Teensy. Then run 9DoF_MARG_Madgwick_Filter/Magnetometer Calibration/Collect_Data.py . This python program will run for 120 seconds. It collects raw magnetic field data and saves it into a csv file. During this process, MPU9250 should be keep rotated randomly so that it can face to each direction at once. After 120 seconds (this duration can be edited in program), data is collected in to "magnetometer.csv" file.
Copy this file into 9DoF_MARG_Madgwick_Filter/Magnetometer Calibration/Ellipsoid_Fit and run magnetometer_calibration.m (remember to change the read path in program). This program produces two images to show the result and two lists as shown below. Find this part in 9DoF_MARG_Madgwick_Filter/MPU9250/MPU9250_Madwick_Filter/MPU9250_Madgwick.ino and replace it.
const float magn_ellipsoid_center[3] = {-1.22362, -3.49591, -28.3068};
const float magn_ellipsoid_transform[3][3] = {{0.936683, -0.0120599, -0.00747369}, {-0.0120599, 0.997691, -5.88781e-05}, {-0.00747369, -5.88781e-05, 0.846255}};


In the above figures, red pints are raw data and bule points are calibrated data.
After calibration, it is time to run the filter and display the performance. Compile MPU9250_Madgwick.ino and upload it. Then running BoardDisplay.py in 9DoF_MARG_Madgwick_Filter/Attitude Estimation Display Estimation Display folder.
Keep MARG away from large current unit as far as possible, including cables and motors. The current in these units is changing so that the magnetic field produced by them is also unstable. These unstable magnetic field cannot be calibrated.
In MadgwickAHRS.cpp file, there is a parameter "beta" in function MadgwickQuaternionUpdate(). This parameter is explained in the original paper in detail. Generally, it is the step of regression. If beta increase, attitude estimation performs faster but more oscillation comes out. When beta is small, regression slows down but the data is more stable.
According to MPU9250_Madgwick.ino file, sensor and filter work in same loop. They both run once in each loop, that is, sensor sends new data to filter then filter processes it. However, they are not in same frequency. For a MARG, the frequency of sending data and update data is different. In our program, the sending data frequency can be up to 3000Hz while data update rate is only 50 Hz. That means in most loop, the data sent from sensor is same. A faster sending rate is positive for the filter. Since the core of Madgwick filter is a regression algorithm, sending same data is helpful for the estimated data regresses to wanted result.
[5] Madgwick Filter
[6] Extended Kalman Filter Attitude Determination
[7] IMU Data Fusing: Complementary, Kalman, and Mahony Filter