User Manual
When starting the application, you will be greeted with the following screen:
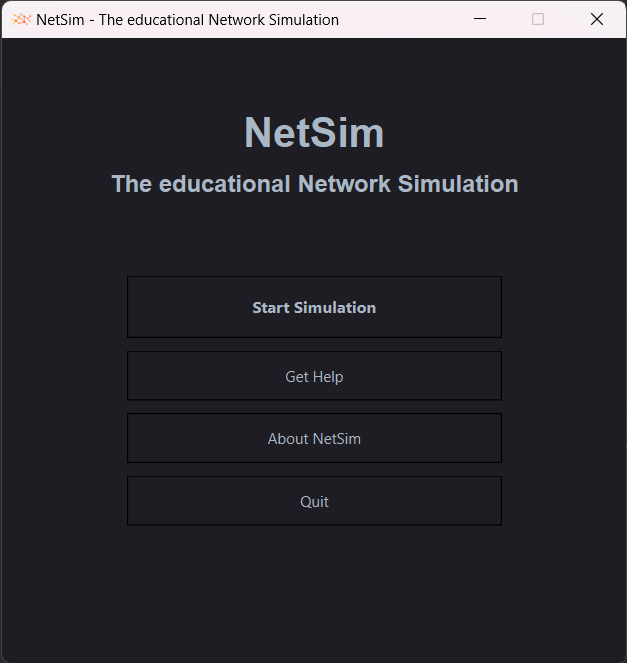
The Start Simulation button will open the Configuration Screen, which is described in the next section. The Get Help button will open this manual in your browser.The About NetSim will open a informative window with version number, license and more. The Quit button will close the application.
When clicking on the Start Simulation button, you can configure the simulation. You will see the following screen:
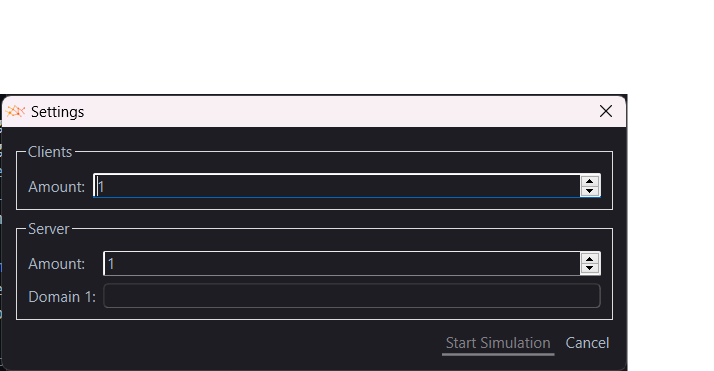
Here you can configure the simulation. You can choose the number of clients and servers and the domains of the servers. Pay attention to following rules:
- The number of clients and servers must be between 1 and 5.
- The domain of the servers must be a valid domain name.
- The domain of the servers must be unique.
- All domains have to be set.
After configuring the simulation, the application will swap to fullscreen. The network tab will be opened by default. You will see the following screen:

The network tab shows the network topology. The clients are shown at the right side, the servers on the left and the routers in the middle. The connections between the devices are shown as lines. All devices have a MAC Address. The client has a local IP Address. The router has a local and global IP Address. The clients and servers are placed in a way that the connections between the devices are as short as possible. The connections between the devices are always shown as straight lines.
When switching to the packages tab, you will see the following screen:
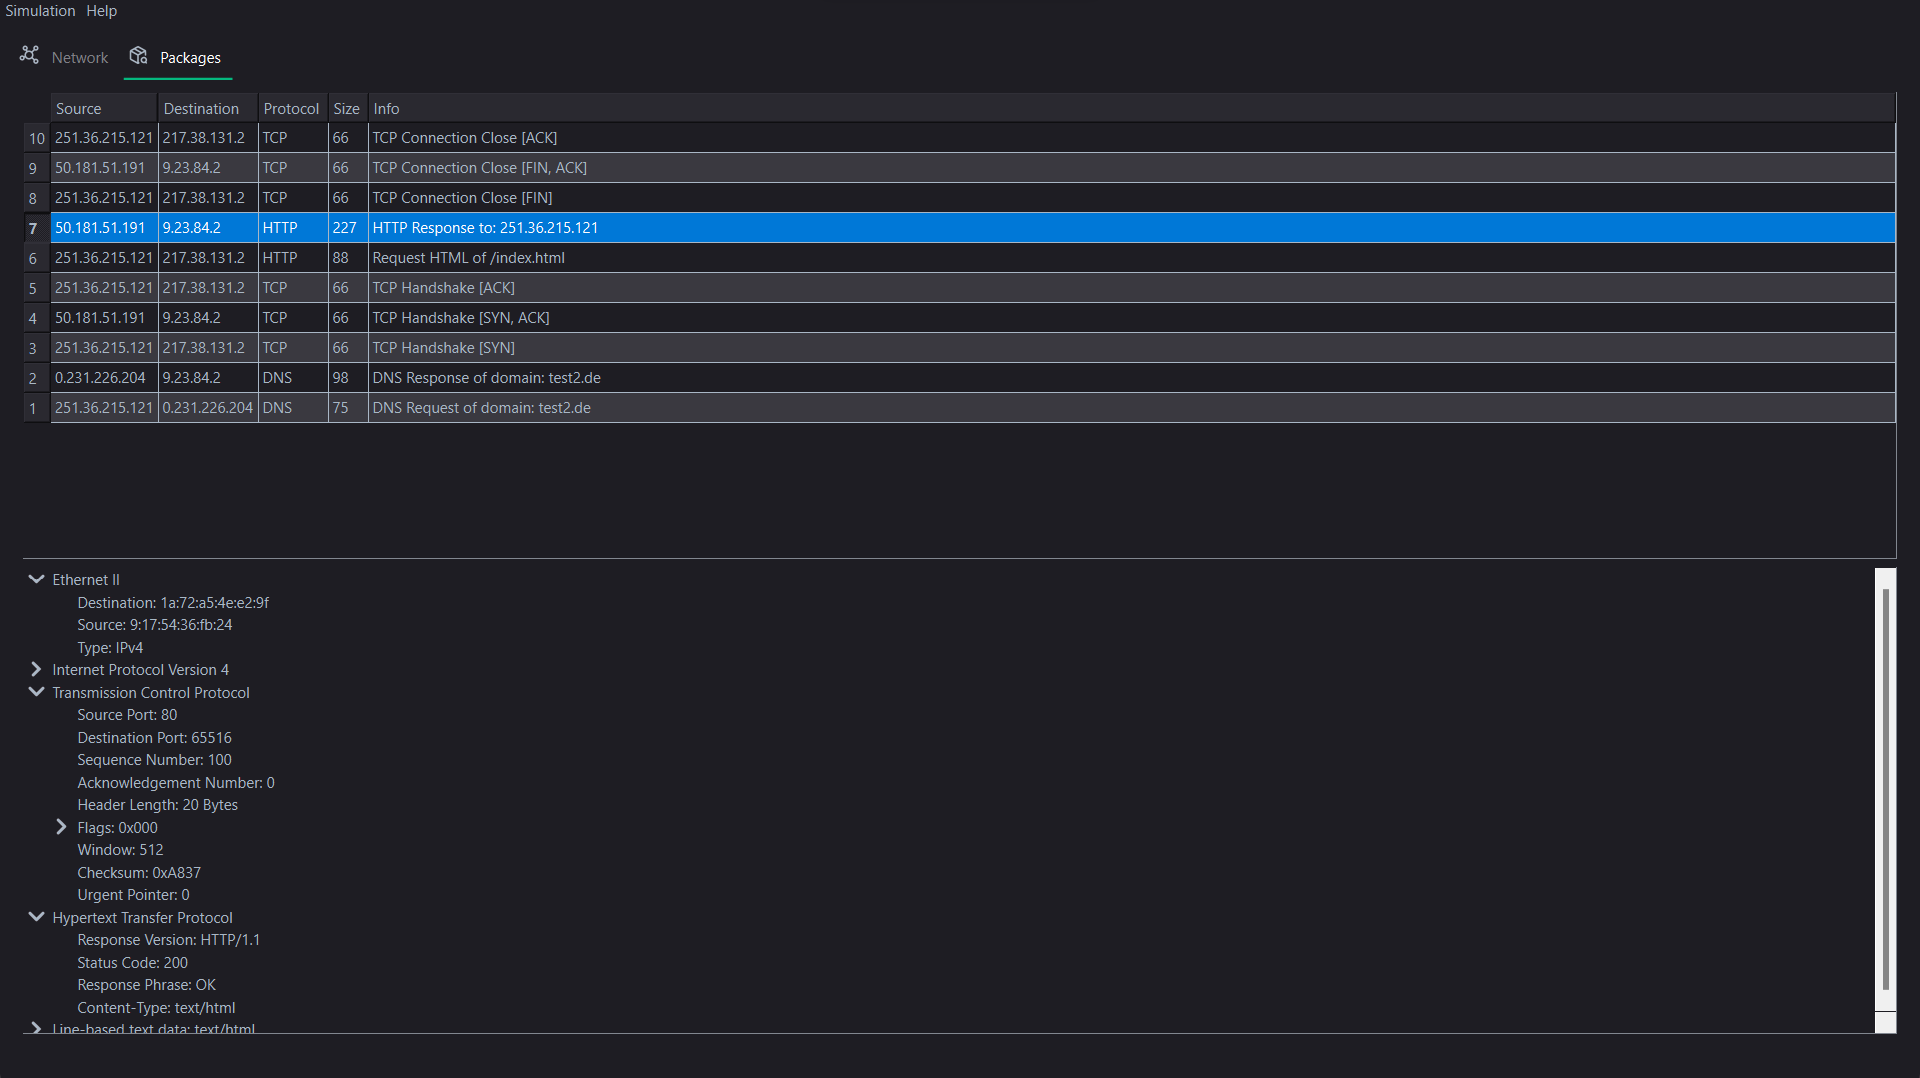
The packages tab has two sections. In the top list you can see all packages that are currently in the network. In the bottom tree you can see the different headers of the selected package. The headers are shown in the order of the network layers. You can select a package in the top list to see the headers in the bottom tree.
![]()