
The Tombolo Digital Connector is an open source tool that enables users to seamlessly combine different sources of datasets in an efficient, transparent and reproducible way.
There are three particularly important parts to the Tombolo Digital Connector:
- Importers
- Built-in importers harvest a range of data sources into the centralised data format. Examples include data from ONS, OpenStreetMap, NOMIS, the London Air Quality Network and the London Data Store. We welcome the creation of additional importers.
- Centralised data format
- All data imported into the Tombolo Digital Connector adopts the centralised data format. This makes it easier to combine and modify data from different sources.
- Recipes
- Users generate recipes with a declarative 'recipe language' to combine the data in different ways. This combination can generate new models, indexes and insights. For example, existing recipes can generate models of social isolation, calculate the proportion of an area covered by greenspace and even generate an active transport index. We welcome the creation of additional recipes.
For further information see the documentation.
- Contributing
- Requirements
- Quick start
- Local Deploy
- Run Tasks
- Start/Stop server
- Implementations
- License

Looking to get involved? Have a look at the Open Source Community milestone where we have selected low hanging fruit for you to easily get involved and contribute. Read our Guide to contribution for details.
To get started you will need to install the requirements to run the Digital Connector.
Note: you’ll need to have administrator rights on your machine to install these - make sure that you do before you proceed.
Install the following via the link through to their installation page:
After the successful installation of the requirements, you can use the Digital Connector by following the instructions in the quick start section or by going through the intro tutorial in the documentation.
This tutorial will guide you to a quick start on macOS.
The Terminal application can be found in the Applications -> Utilities folder or quickly accessed through Spotlight. It is pre-installed in macOS so there is no need to install it.
You will need this application to run some of the commands of this tutorial. When you enter a command and press return/enter, the terminal will execute it and complete the task.
Make sure to press return after typing a command before you enter the next one.
-
Open the Terminal. All the following steps will operate in it.
-
Get the Digital Connector code to your local machine by cloning its repository.
git clone https://github.com/FutureCitiesCatapult/TomboloDigitalConnector
If successful, you will see a log similar to the below.
$git clone https://github.com/FutureCitiesCatapult/TomboloDigitalConnector
Cloning into 'TomboloDigitalConnector'...
remote: Counting objects: 15761, done.
remote: Compressing objects: 100% (184/184), done.
remote: Total 15761 (delta 90), reused 193 (delta 49), pack-reused 15487
Receiving objects: 100% (15761/15761), 178.89 MiB | 3.04 MiB/s, done.
Resolving deltas: 100% (7647/7647), done.
-
Go to the Digital Connector root directory and run
./setup/setup_osx.sh
If successful the final output will be as the following.
$ gradle test
:compileJava UP-TO-DATE
:processResources UP-TO-DATE
:classes UP-TO-DATE
:compileTestJava UP-TO-DATE
:processTestResources UP-TO-DATE
:testClasses UP-TO-DATE
> Building 85% > :test > 50 tests completed
:test

BUILD SUCCESSFUL

Total time: 4 mins 50.919 secs
If the tests start to fail then check the PostgreSQL server is running and the requirements are properly installed by going through the previous steps.
About to be mentioned a couple of examples of what might have gone wrong in the process if the tests start failing.
uk.org.tombolo.core.AttributeTest > testUniqueLabel FAILED
    java.util.ServiceConfigurationError
        Caused by: org.hibernate.service.spi.ServiceException
            Caused by: org.hibernate.exception.JDBCConnectionException
                Caused by: org.postgresql.util.PSQLException
                    Caused by: java.net.ConnectException

uk.org.tombolo.core.AttributeTest > testWriteJSON FAILED
    java.util.ServiceConfigurationError
        Caused by: org.hibernate.service.spi.ServiceException
            Caused by: org.hibernate.exception.JDBCConnectionException
                Caused by: org.postgresql.util.PSQLException
                    Caused by: java.net.ConnectException

uk.org.tombolo.core.DatasourceTest > testWriteJSON FAILED
    java.util.ServiceConfigurationError
        Caused by: org.hibernate.service.spi.ServiceException
            Caused by: org.hibernate.exception.JDBCConnectionException
                Caused by: org.postgresql.util.PSQLException
                    Caused by: java.net.ConnectException
The former error log is launched if the server is not running and to solve it you need to run the command.
pg_ctl -D /usr/local/var/postgres -l /usr/local/var/postgres/server.log startOR if you did not set up the tombolo_test database.
In case you see this other error instead, it means that you did not rename the settings files successfully.
FAILURE: Build failed with an exception.

* Where:
Build file '/TomboloDigitalConnector/build.gradle' line: 159

* What went wrong:
Execution failed for task ':test'.
> Test environment not configured. See the README.
If you see other errors, try to go back and follow the steps again.
Now you are all set to run a task on the Digital Connector.
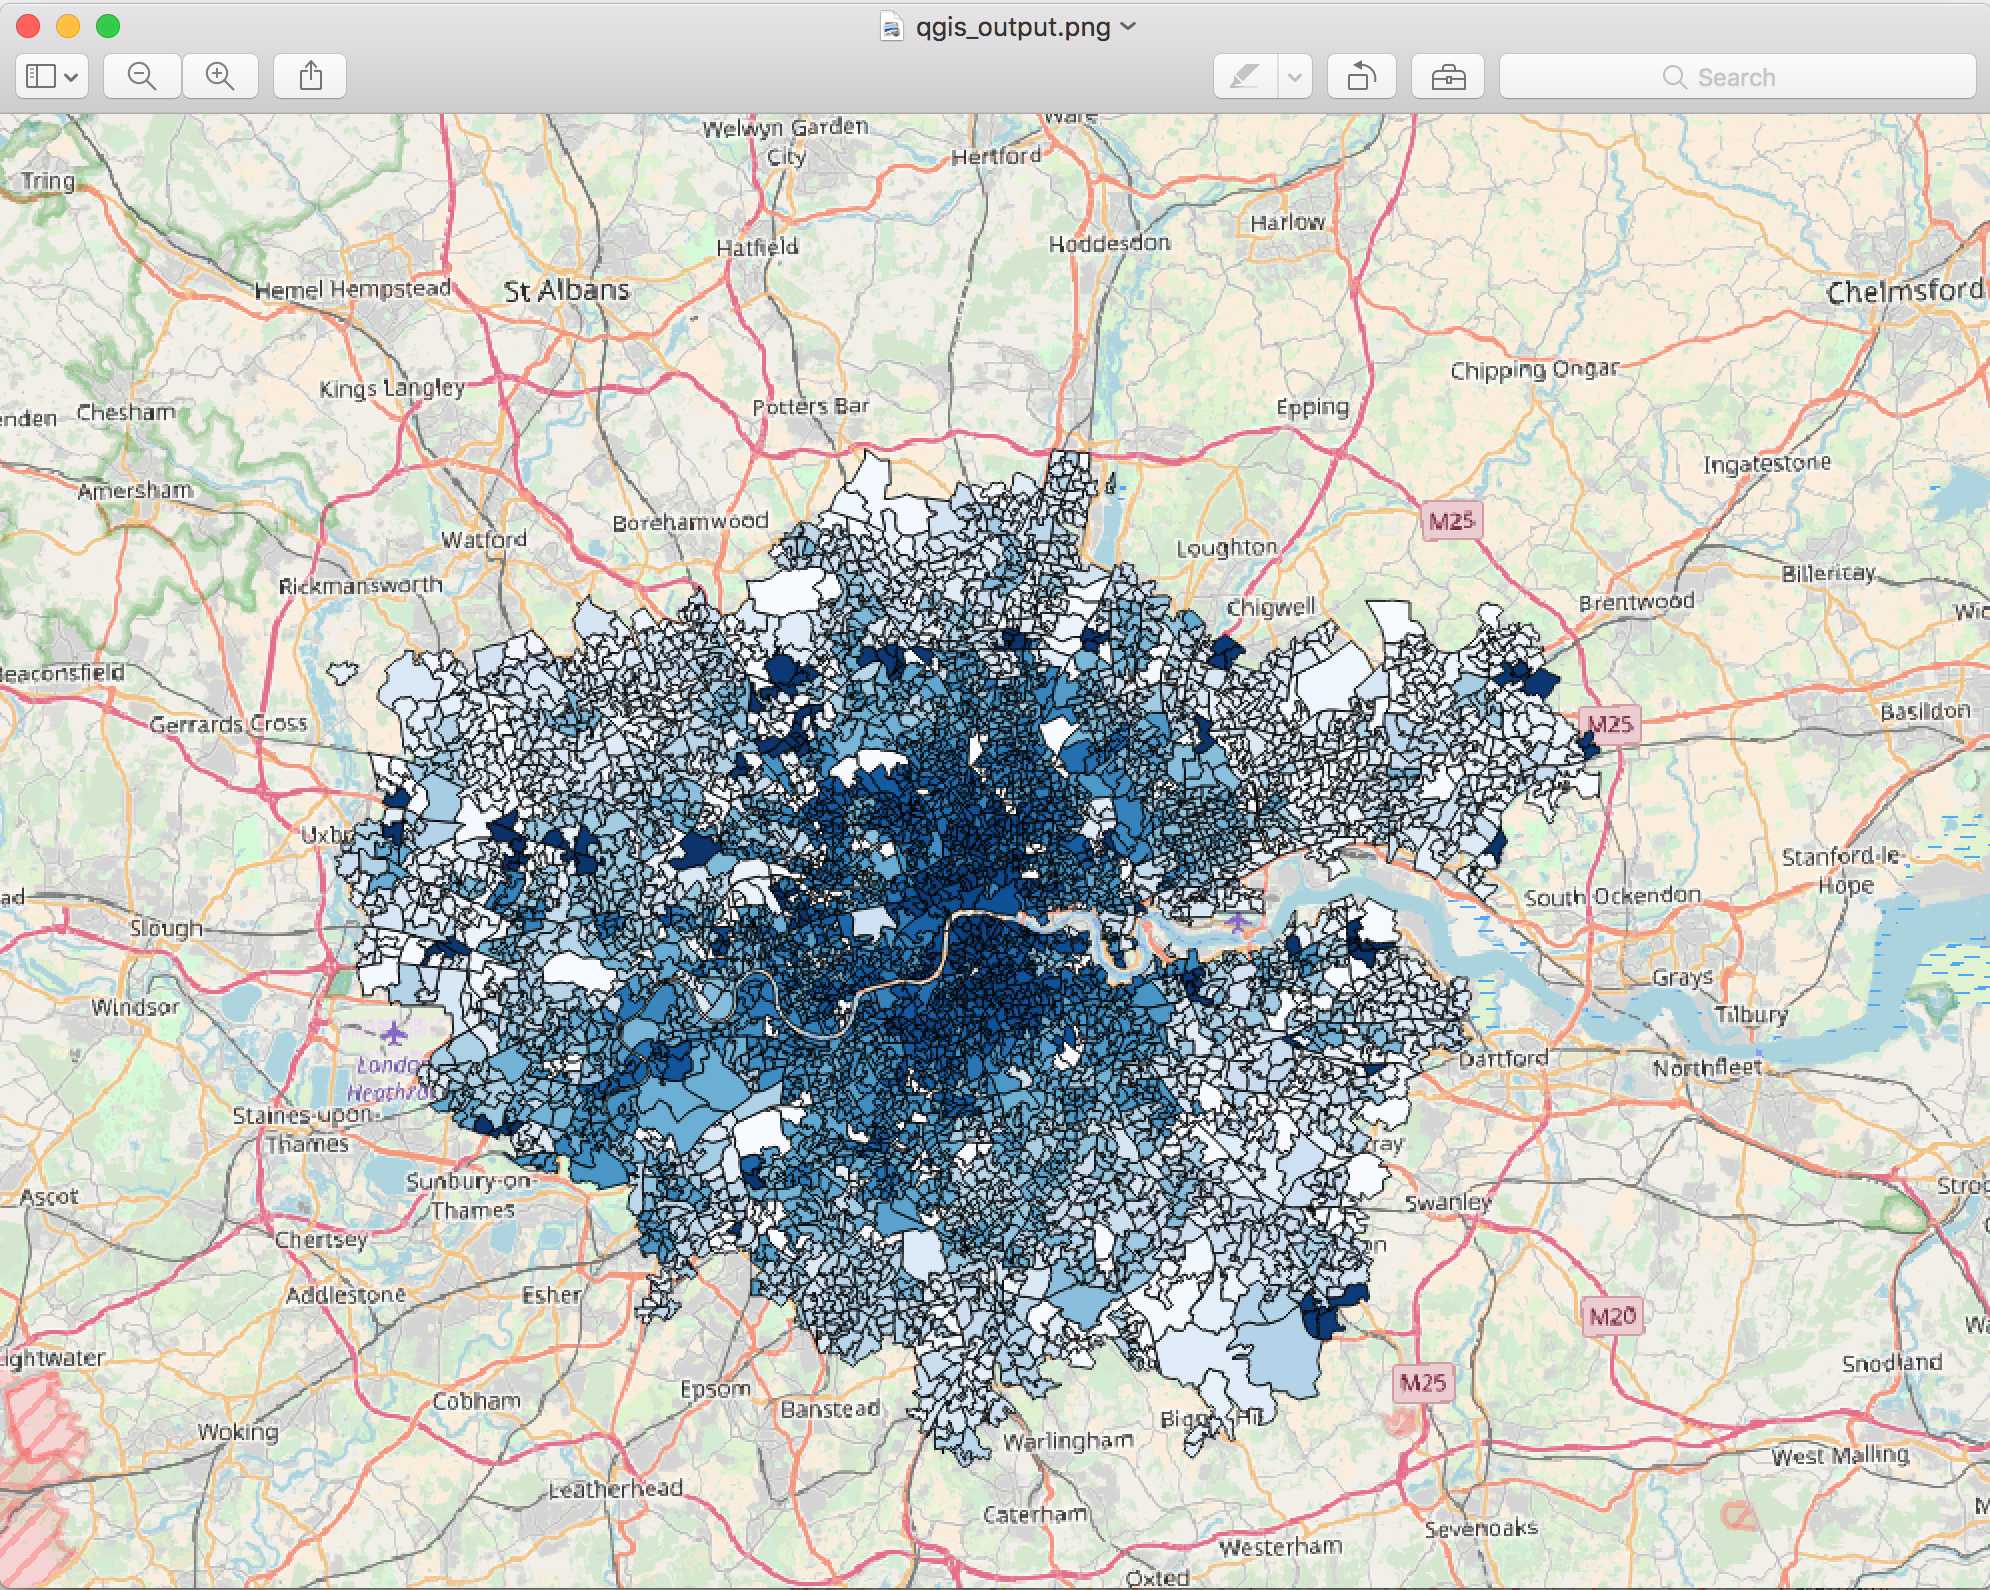
The next step is to run an example to show how the digital connector combines different data sets. We’re using an example that shows the relationship between air pollution (demonstrated in this example by NO2 levels), and car and bicycle traffic in every borough in London. You can read more about this example here.
When you’ve run this example, you can expect a map that looks like this:
-
Run the following command into the Terminal.
gradle runExport -Precipe='src/main/resources/executions/examples/london-cycle-traffic-air-quality-lsoa-backoff.json' -Poutput='london-cycle-traffic-air-quality-lsoa-backoff-output.json'
-
You can expect it to take around 1.5 minutes to generate the output, which will be saved in the current directory. Change the path in the command in case you want it saved elsewhere.
The output will look similar to the next content:
{ "type":"FeatureCollection", "features":[ { "type":"Feature", "geometry":{ "type":"Polygon", "coordinates":[[[-0.0802,51.5069],[-0.1092,51.5099],[-0.1114,51.5098], [-0.1116,51.5153],[-0.1053,51.5185],[-0.0852,51.5203], [-0.0784,51.5215],[-0.0802,51.5069]]] }, "properties":{ "label":"E09000001", "name":"City of London", "Nitrogen Dioxide":81.3333333333333, "Bicycle Fraction":0.25473695591455 } }, ... ... ] } -
Once you have your output, you can open with a geospatial visualisation tool. For this example, we recommend QGIS, and here you can find a guide on how to use it.
We need your feedback!
If you have any issues with setting up the tool, or running the tutorial, or if you have some advice about how we can
do this better, please contact us by creating an issue.
Our goal is for someone to get back to you within 24 hours.
gradle testIf you use the IntelliJ JUnit test runner, you will need to add the following to your VM Options in your JUnit configuration (Run -> Edit Configurations -> All under JUnit, and Defaults -> JUnit):
-enableassertions
-disableassertions:org.geotools...
-Denvironment=test
-DdatabaseURI=jdbc:postgresql://localhost:5432/tombolo_test
-DdatabaseUsername=tombolo_test
-DdatabasePassword=tombolo_test
To deploy to your local Maven installation (~/.m2 by default):
gradle installWe use the Gradle task runExport to run exports. The parameters are as follows:
gradle runExport -Precipe='path/to/spec/file.json' -Poutput='output_file.json' -Pforce='com.className' -Pclear=trueFor example, this calculates the proportion of cycle traffic received at a traffic counter relative to the total traffic
in a given borough and outputs the results to the file reaggregate-traffic-count-to-la.json:
gradle runExport -Precipe='src/main/resources/executions/examples/reaggregate-traffic-count-to-la.json' -Poutput='reaggregate-traffic-count-to-la_output.json'We use the Gradle task exportCatalogue to export a JSON file detailing the capabilities of the connector
and explore the data catalogue.
gradle exportCatalogue -Poutput=catalogue.jsonWe use the Gradle task info to get details about a specific importer
gradle infowould give you list of all the Importers available in Digital Connector
gradle info -Pi='uk.org.tombolo.importer.dft.TrafficCountImporter'Lists all the details of the Importer like Provider, SubjectTypes, Attributes, Datasourceids, Dataurl
gradle info -Pp -Pi='uk.org.tombolo.importer.dft.TrafficCountImporter'would give user Datasourceids, Dataurl and Provider. Other option like -Pa and -Ps will give Attributes and SubjectType respectively.
Note: Datasourceids and Dataurl will always be provided irrespective of the option given.
If you need to start or stop the server (on MacOS X), use the following commands.
# to start
pg_ctl -D /usr/local/var/postgres -l /usr/local/var/postgres/server.log start

# to stop
pg_ctl -D /usr/local/var/postgres -l /usr/local/var/postgres/server.log stopWhen using the Tombolo or other GitHub logos and artwork, be sure to follow the GitHub logo guidelines.