Learning by solving a conflict in GIT
This tutorial assumes that you have already set up your IDE and GIT tools.
First we need to create a scenario that might happen to you:
- Clone this repository
- Initialize Git-Flow
- You should now be in the
developbranch. - Create a new feature-branch
my-changes
In this scenario, you've checked out the repository and want to create a new feature while other people might commit something to the develop branch.
- Ensure you are on the
my-changesbranch. - Open the file test.txt
- The file contains some lorem-ipsum text with 2 markers, telling you how to change the file:
Add a new line of text after this one.Change this line of text.
- Do those changes.
- Commit the changes (no need to push).
For example, my test.txt now looks something like this:
...
/////////////////
Add a new line of text after this one.
This is a new Line!
///////////////
...
/////////////////
Change this line of text has been changed to something else.
///////////////
...
Now we want to make it look like someone else changed the file on develop and pushed it before we could push it.
- Switch to the
developbranch. - Open the file test.txt, it should be in its original/unmodified state.
- Apply Changes the same way as described in the section above, but this time choose different words!
- Commit the changes (no need to push).
Example:
...
/////////////////
Add a new line of text after this one.
Here is another line of text!
///////////////
...
/////////////////
This line has been completely changed!
///////////////
...
Now the Problem will occur, since you want to get your changes onto the develop branch:
- Switch to the
my-changesbranch. - Finish the feature
my-changeswith Git-Flow. This will start merging the feature branch ontodevelop. - You will be notified, that conflicts have appeared.
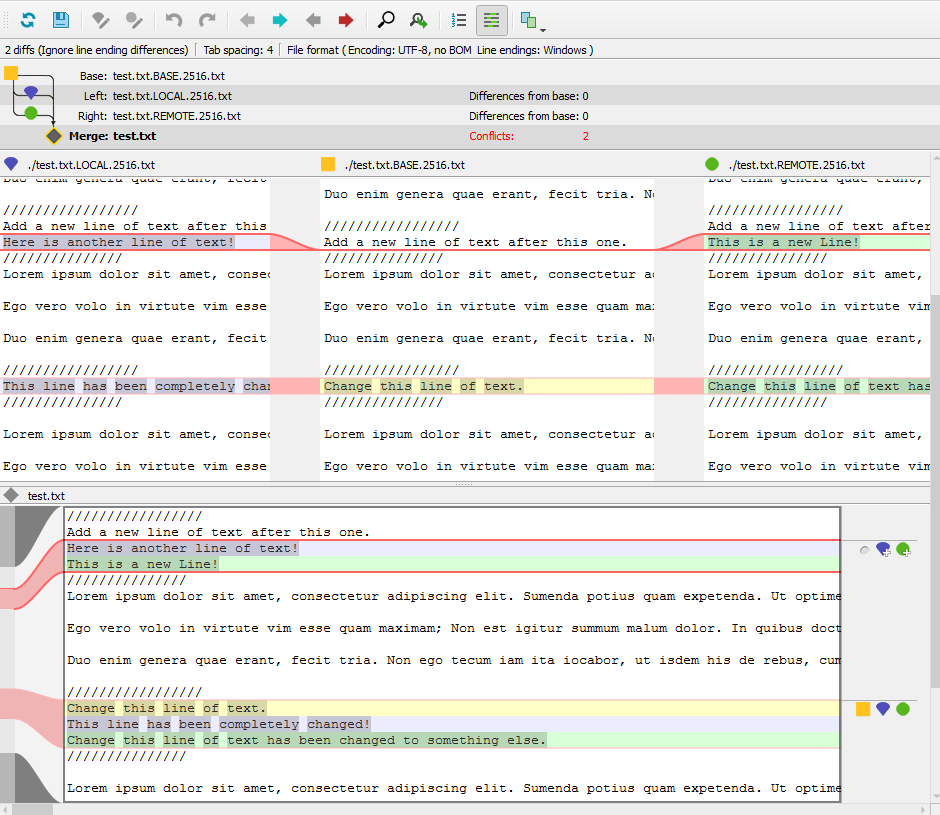
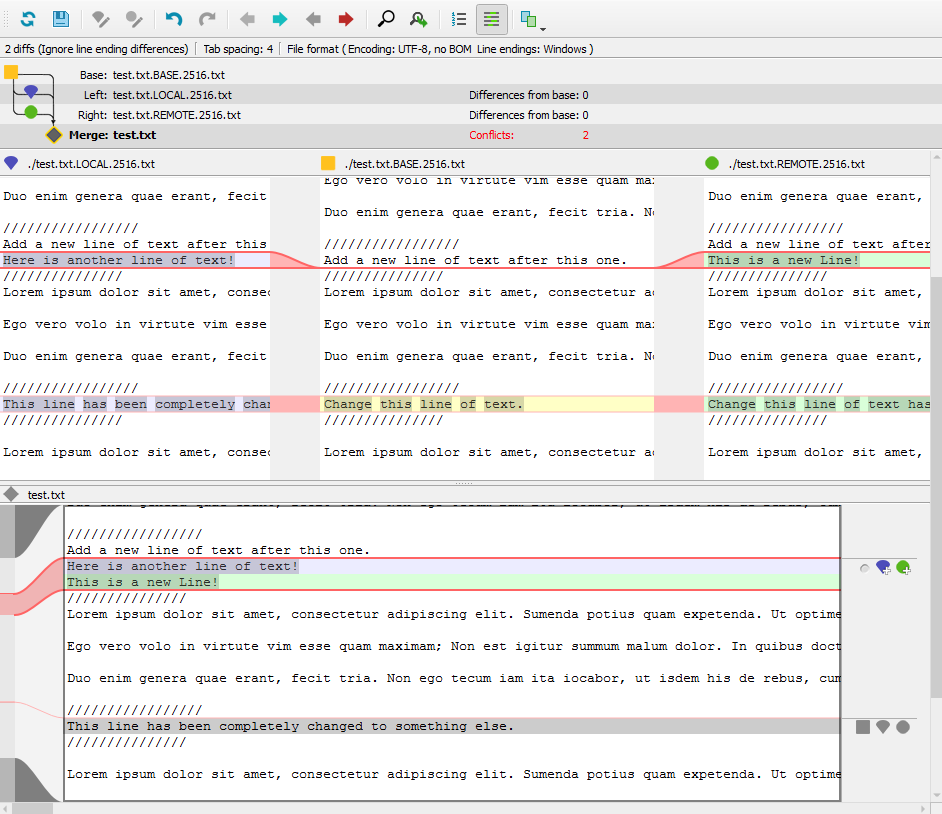
- In SourceTree you will see a yellow warning icon on the file test.txt (see screenshots below)
- Rightclick on the file, choose Resolve-Conflicts->Launch External Merge Tool. P4Merge will launch.
- Merge the files so that both new lines are added and both changed lines are merged to something meaningfull
- Save the file
- Commit the changes. (*.orig files can be deleted afterwards)
Always make sure that:
- You don't just replace the code someone else wrote without making sure your code will do the same thing or make it better.
- You always check that the code works BEFORE committing it.