Personality Settings
As of Tease AI Java version 1.1, custom personality settings pages are now easily possible.
Personality Settings menus are accessible by choosing the Personality tab in the settings panel and then selecting a personality's tab. If there is no tab for a personality, start the personality and stop it after 2-3 seconds as it probably does not have any variables defined.
By default, all personalities will get their own settings menu if they have supported variables. However, all of the settings will be put into one panel titled "General Settings" and the input types will only be text boxes and check-boxes.
Creating custom settings menus for personalities is easy. Here are some examples:
To get started, create a new file in the root of the personality called programstart.js. This is file will get executed when Tease AI Java loads. In this file, create however many settings panels you desire like so:
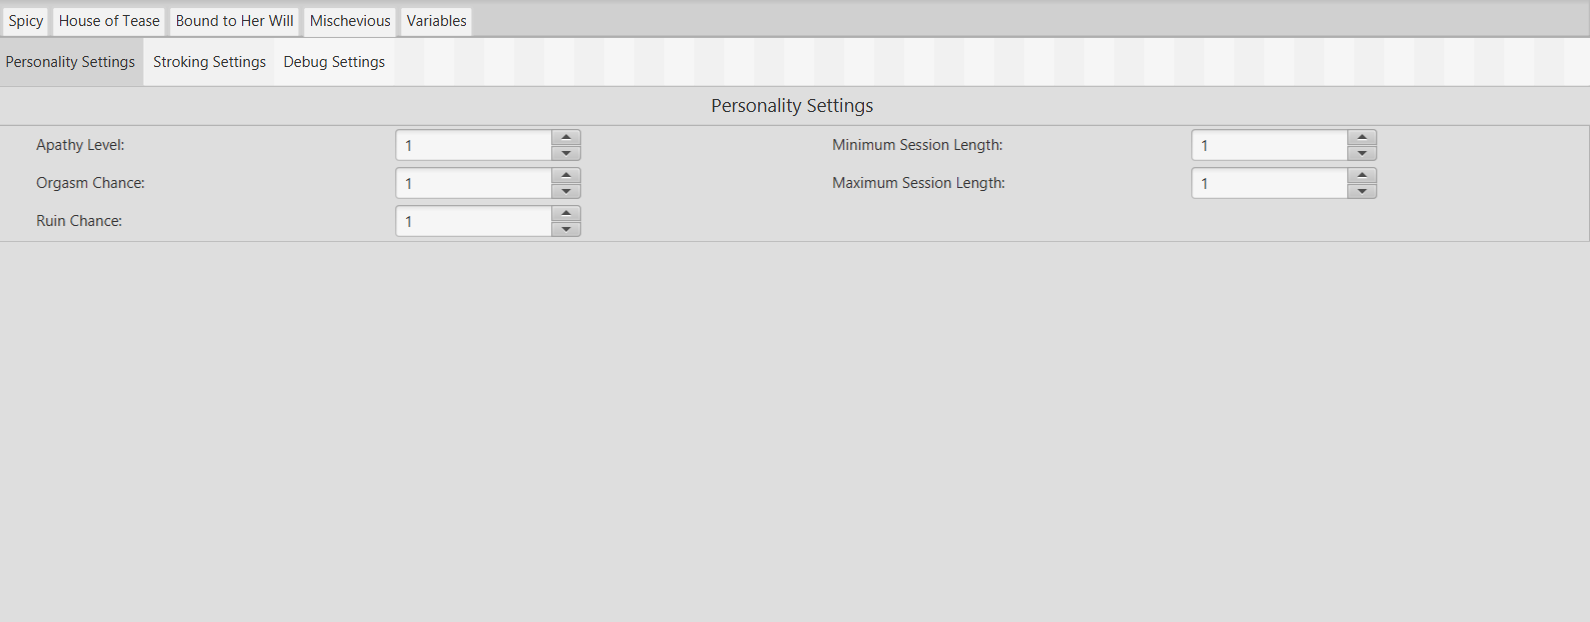
addSettingsPanel("Personality Settings"); addSettingsPanel("Stroking Settings"); addSettingsPanel("Debug Settings");
These settings panels are ways to organize settings into different tabs. This is especially useful for personalities with lots of variables so that a user doesn't have to scroll down through a long list of options on one page.
Here is an example of how the settings panels defined above will look:
Once several settings panels have been created, next gui options will need to be created. This can be done on a file by file basis. Here is an example from Mischevious:
programstart.js:
addSettingsPanel("Personality Settings"); addSettingsPanel("Stroking Settings"); addSettingsPanel("Debug Settings"); run("chatutils.js"); setUpChat(); run("personalityutils.js"); setUpGUI();
First, setUpChat, which is a function inside chatutils.js, is called:
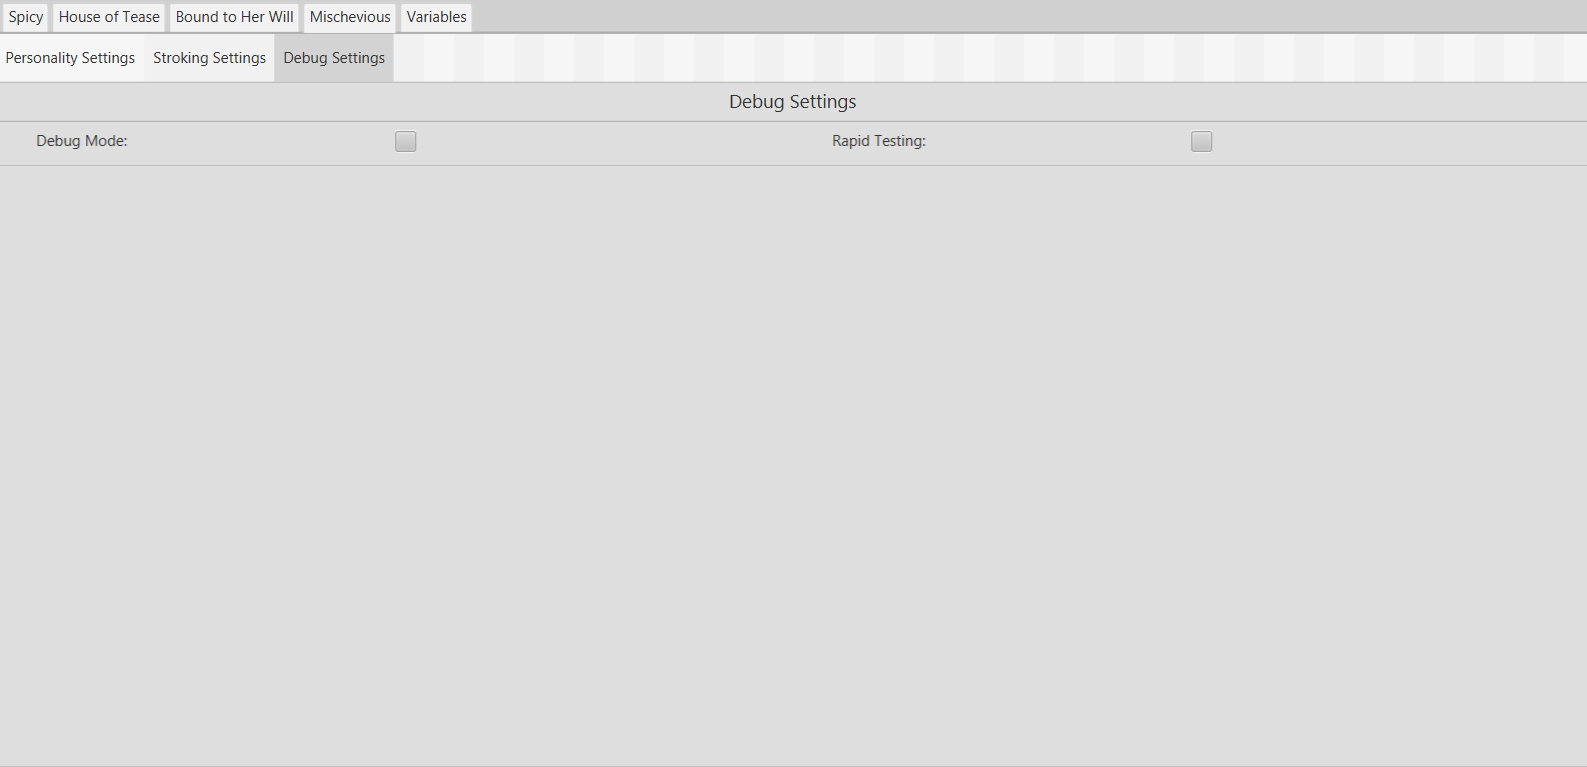
function setUpChat() { if (getVar("debug", null) == null) { setVar("debug", false); } else { debug = getVar("debug", null); } registerVariable("debug", "Debug Mode", "Set this to true to turn on debug mode for more info."); addCheckBox("Debug Settings", "debug"); if (getVar("responsesDisabled", null) == null) { setTempVar("responsesDisabled", false); } else { getVar("responsesDisabled", false); } if (getVar("rapidtesting", null) == null) { setVar("rapidtesting", false); } else { rapidTesting = getVar("rapidtesting", false); } registerVariable("rapidtesting", "Rapid Testing", "Set this to true to turn on rapid testing mode."); addCheckBox("Debug Settings", "rapidtesting"); }
Note that registerVariable is called before adding the checkbox. regiserVariable works the same as before and make sure to register any variables that will go into a settings panel. Then, the method addCheckBox(settingsPanelName, variableName) is called. The first argument of this function takes the name of the settings panel as was defined in the programstart.js file. The second argument is the name of the variable. The code above will generate to clickable check-boxes as seen here:
There are several other types of gui components as well that can be added to the settings panel just like the checkbox:
addTextBox(settingsPanelName, variableName)

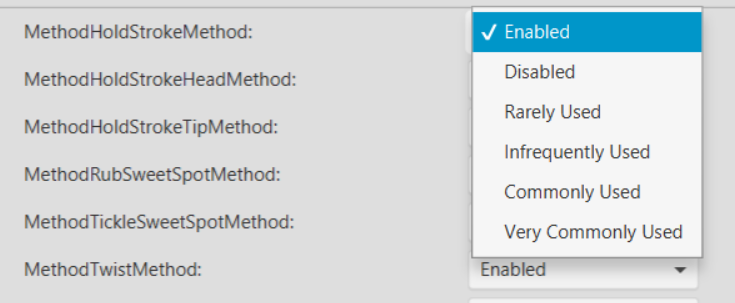
addSpinner(settingsPanelName, variableName, minValue, maxValue)

addOptionsList(settingsPanelName, variableName, option1, option2, etc...)