This repository is for the replication of our published paper FLUKES: Autonomous Log Forensics, Intelligence and Visualization Tool on Conference: International Conference on Future Networks and Distributed Systems ICFNDS '17 at Cambridge University, UK. For citation use ACM Digital Library.
@inproceedings{Aldwairi:2017:FAL:3102304.3102337, author = {Aldwairi, Monther and Alsaadi, Hesham H.}, title = {FLUKES: Autonomous Log Forensics, Intelligence and Visualization Tool}, booktitle = {Proceedings of the International Conference on Future Networks and Distributed Systems}, series = {ICFNDS '17}, year = {2017}, isbn = {978-1-4503-4844-7}, location = {Cambridge, United Kingdom}, pages = {33:1--33:6}, articleno = {33}, numpages = {6}, url = {http://doi.acm.org/10.1145/3102304.3102337}, doi = {10.1145/3102304.3102337}, acmid = {3102337}, publisher = {ACM}, address = {New York, NY, USA}, keywords = {D3, Intrusion detection, intrusion prevention, log forensics, visualization}, }
Our whole pipeline is listed as follows.
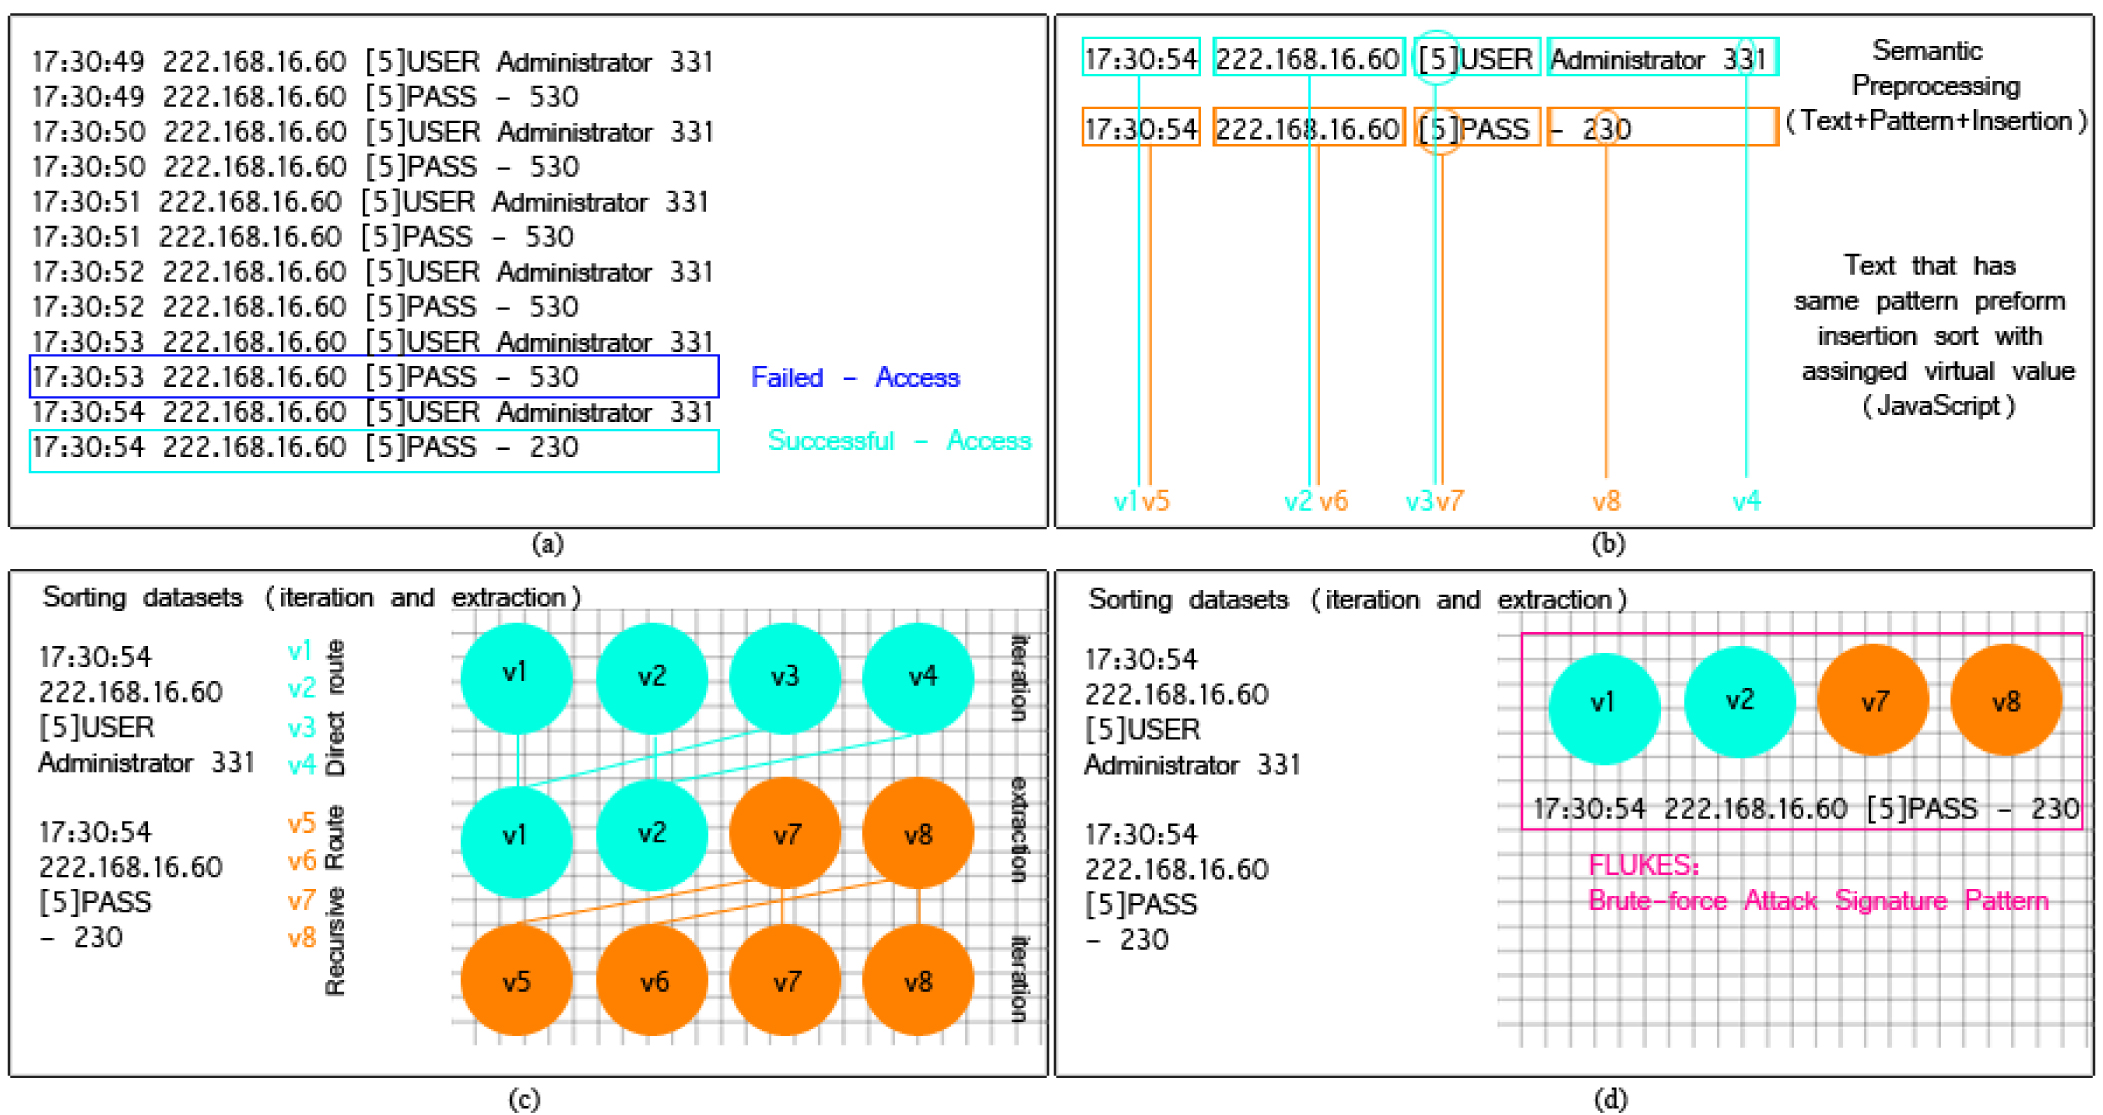
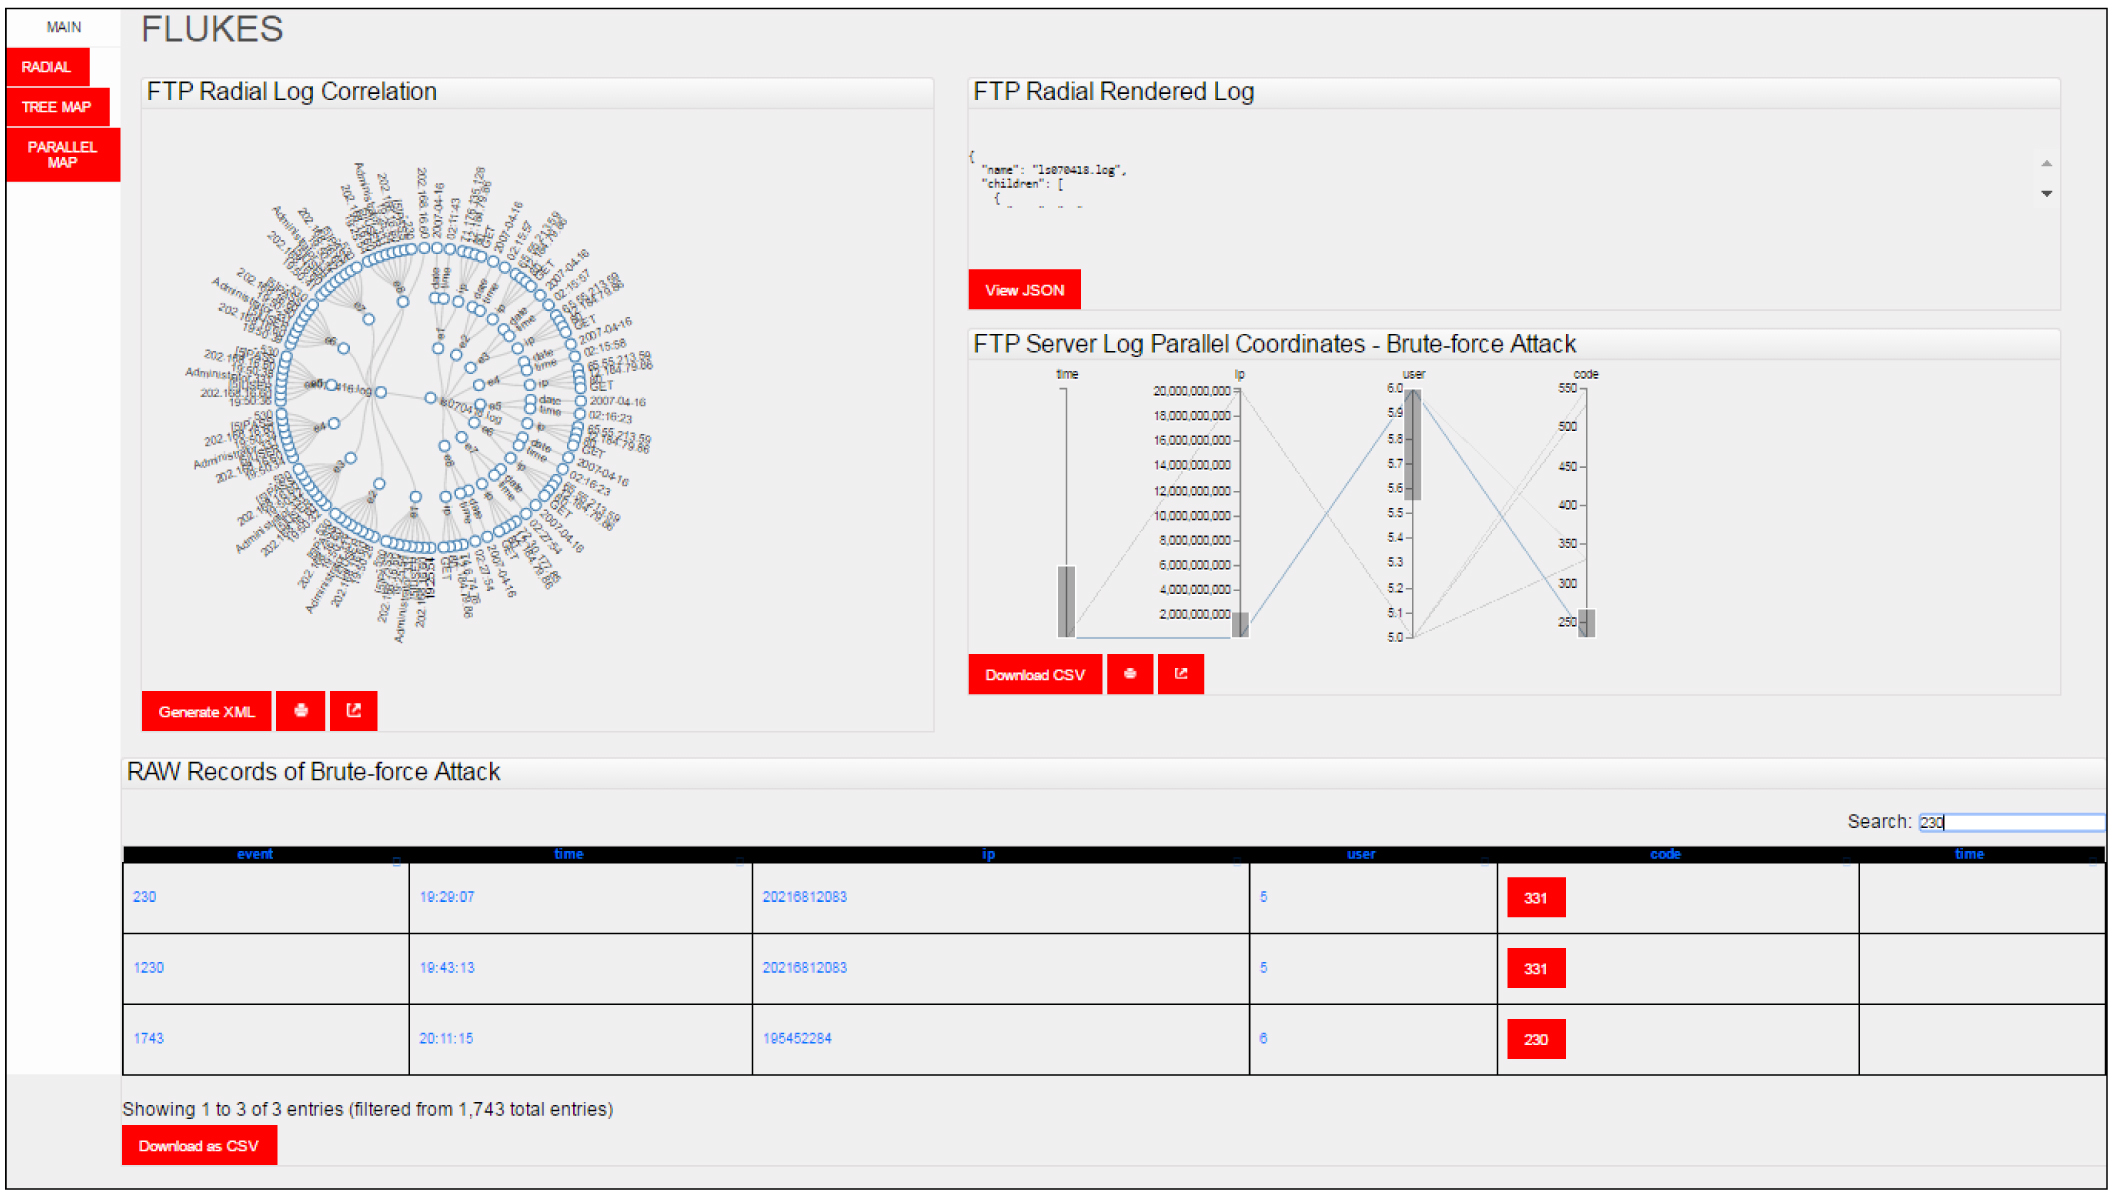
An automatic reserved engineering threats detection tool “FLUKS”. The tool optimizes and extracts intelligent threat modules using a special designed machine learning algorithm technique, which allows forensic experts to visualize and explore different threats monitored by firewall, IDS/IPS and anti-virus server attacks. When a content of a file is loaded into FLUKS, a representative summary is executed with least significant attacks. It distinguishes the trace changes found in different attacks arc and re-routes the trails of routes back to origin source of attack. Forensic investigators can then determine a set of certain fields relevant to the attack according to the corresponding target.
1. python 3.x
2. pip
3. Flask
We recommend using the latest version of Python 3. Flask supports Python 3.4 and newer, Python 2.7, and PyPy.
Use a virtual environment to manage the dependencies of the project. Python 3 comes bundled with the venv module to create virtual environments. If you’re using a modern version of Python, you can continue the installation process or read more here.
If you’re using Python 2, see Install virtualenv first. If you are using Anaconda make sure you donwload the latest version.
1. run cmd
2. cd C:\Users\User\Anaconda3
3. py -3 -m venv venv
4. venv\Scripts\activate
Your shell prompt will change to show the name of the activated environment.
Within the activated environment, use the following command to install Flask:
5. pip install Flask
6. Download and unzip the project download.
7. Project file directory should be located into C:\Users\User\Anaconda3\Scripts
Navigate to the extracted application folder in Scripts, your enviroment should look like:
8. (venv) C:\Users\User\Anaconda3\Scripts\FLUKES>
9.  set FLASK_APP=app.py
10. flask run
You should be able to see the following:
 * Serving Flask app "app.py"
 * Environment: production
   WARNING: Do not use the development server in a production environment.
   Use a production WSGI server instead.
 * Debug mode: off
 * Running on http://127.0.0.1:5000/ (Press CTRL+C to quit)
Navigate with your browser to
11. Navigate with your browser to http://127.0.0.1:5000/
If you wish to change the port from 5000 to 80, change this line in app.py .
from
app.run(debug=True)to
app.run(host='0.0.0.0', port=80)