Tutorial 3
###Using custom layers and callbacks
For this tutorial it is assumed the user has a basic understanding of how LOVE operates and how to structure LOVE game files.
To get Advanced Tiled Loader (ATL) up and running you first need to download the latest version from github as well as install LOVE and Tiled.
Goal
To learn how to build custom layers using object layers. We will also learn how to forward love
callbacks using Map.callback()
Step 1
If you don't have the files from Tutorial-2 then download them here.
Step 2
Before we start we need to have a clean ObjectLayer. Load up the desert.tmx file inside
Tiled and delete all of the object layers currently in the map. Then create a new empty layer
called "Objects".
Step 3
Select the "Insert Rectangle" tool. Hold down Ctrl and left click a tile in the top-left corner of
the map to create a single tile-sized object. Right click the newly created object and go to
"Object Properties". For the name, type in "Player". Hit OK and save the map.
Step 4
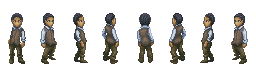
Now download the following image and place it into the tutorial folder. We're going to use it for
an image for our player. Name the image "guy.png".
Step 5
Now we are going to replace the ObjectLayer with a CustomLayer while converting the old
player object to a custom one. Objects in Advanced Tiled Loader are generic and are very
limited in their functionality. Typically you only read data from Objects and create your own
custom layer to replace it.
-- Shortcut to the layer
local layer = map("Objects")

-- Create an object conversion function that will convert the player object into a custom one.
local function convertPlayer(playerOld)
	local player = {x = playerOld.x, y = playerOld.y}
	player.name = "player"
	player.image = love.graphics.newImage("guy.png")
	player.height = player.image:getHeight()
	player.quad = love.graphics.newQuad(0,0,32,64,256,64)
	function player:draw()
		love.graphics.drawq(self.image, self.quad, self.x, self.y - self.height + 20)
	end
 	return player
end

-- Convert the object layer into a custom layer. Pass the conversion function.
layer:toCustomLayer(convertPlayer)
Converting an ObjectLayer to a custom layer will strip it of its metatable and all class fuctions but now we're able to customize it however we want. Notice how we created a conversion function for the player object. The passed conversion function should take regular ATL Objects and return your own custom objects. The layer will replace the old objects inside the layer.objects table. The conversion function is completely optional. If you choose to omit it then the old objects remain intact.
Step 5
Let's continue defining our custom layer.
-- Custom layer draw function
function layer:draw()
	for k,obj in pairs(self.objects) do
		obj:draw()
	end
end

-- Find the player object
local player
for i  = 1, #layer.objects do
	if layer.objects[i].name == "player" then
		player = layer.objects[i]
	end
end

-- Custom keypressed function. Move the player
function layer:keypressed(k)
	if k == "w" then player.y = player.y - map.tileHeight end
	if k == "a" then player.x =  player.x - map.tileWidth end
	if k == "d" then player.x = player.x + map.tileWidth end
	if k == "s" then player.y = player.y + map.tileHeight end
end
Now we've defined two new functions: layer.draw() and layer.keypressed(). At this point layer.draw() would be called automatically because when the map is drawn it will look for a function named "draw" in any contained layers and call it. layer.keypressed() would not be called but we're about to change that.
Step 6
Let's forward the love.keypressed callback to the map.
-- Forward the keypressed event
function love.keypressed(...)
	map:callback("keypressed", ...)
end
That's all there is too it! When you forward callbacks the map will try to find the function with that name in all of the contained layers and then call it. Sound familiar? That's because Map:draw() is just a shortcut for Map:callback("draw"). You can forward any love callback, any function, using this method.
Finished
You should now have the knowledge to be able to extend Advanced Tiled Loader to create any type of
game.
Previous: Tutorial 2 - Basic tile operations
Next: Tutorial 4 - Customizing further Not finished
Home