User Manuals
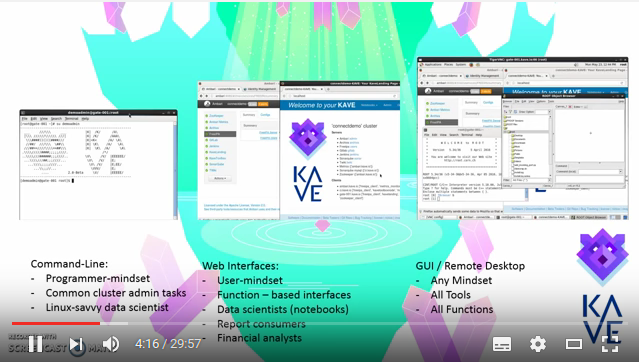
This manual describes a few of the various methods by which a data scientist connects to a KAVE. Which are in use for any given KAVE will differ a lot.
You can follow the tutorial here: https://www.youtube.com/watch?v=eBgr2wXjOZw
 (https://youtu.be/eBgr2wXjOZw "Connecting to KAVE")
There is also a text guide below.
To grant analysts access to the data is the same as granting analysts access to your KAVE. To access your KAVE the most basic requirement is:
- A ssh client locally installed (for example PuTTY for Windows, or the standard client for Mac/Linux (available by default))
- A port open through your firewall to connect to the gateway of your KAVE
- Knowledge of your local proxy setting (if any)
- You need an account on the KAVE in question, a login and password (or ssh private key)
- You need to know the static IP address of the gateway you want to connect to
- You need to know which port your gateway is listening to ssh on
- Create a new connection in putty.
- use the format username@ip.add.res.ss to save your username also for later (reduces typing)
- Configure your authentication to use an ssh key if you have one configured (ask whoever set up the gateway)
- Choose the correct port where your KAVE is listening for your ssh connection
- Type the correct IP address of your KAVE gateway
- Edit the proxy settings to match your local proxy (if there is one)
- Save the session with a name you will remember
You need:
- a working ssh connection from the command above
Install locally:
-
Firefox with the FoxyProxy plugin
-
Load your existing connection saved connection
-
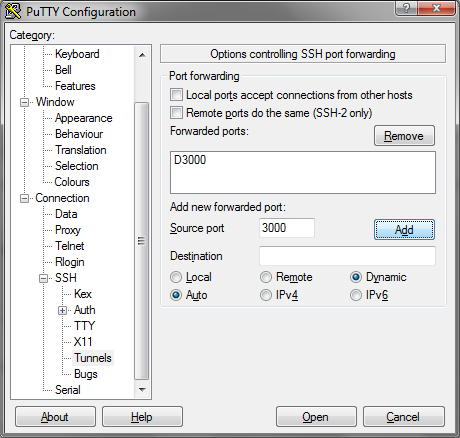
Configure a tunnel in dynamic mode in PuTTY, with localhost and on a port of your choosing, we use 3000. (don't forget to press "ADD" here)
- Save the session and open the connection
- Open firefox and configure FoxyProxy
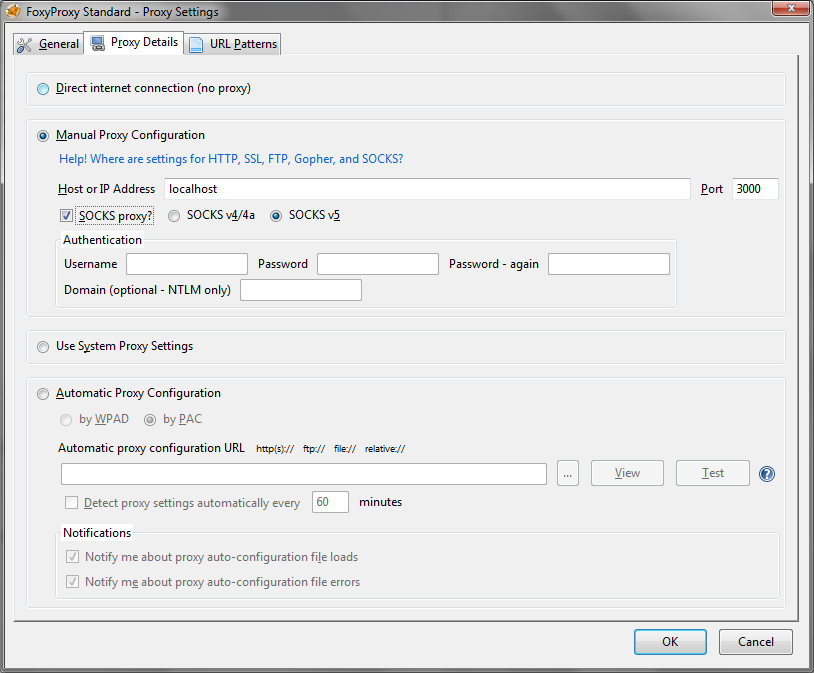
- Click "Add new proxy" and create a connection for localhost:3000 using SOCKS v5
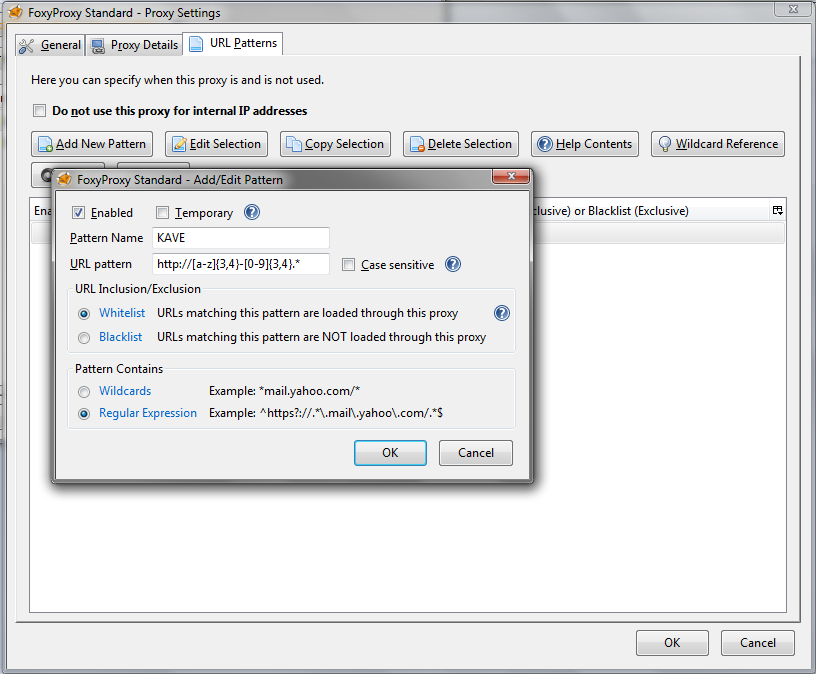
- Click tab "URL Patterns". Make a URL pattern with a reg.ex., the expression is !http://[a-z]{3,5}-[0-9]{3,4}.*
- Make sure you whitelist it and set it to Regular Expression .
- Use the mode "Use proxies based on their pre-defined patterns and priorities"
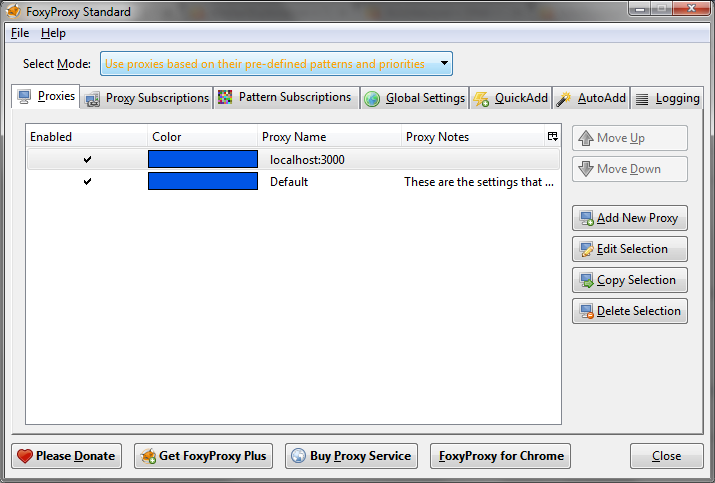
- Now everything that falls in the regular expression is routed to localhost:3000 (KAVE) and everything else is not on the proxy.
- Edit the Default proxy to use the system proxy settings. If you fail to do this then you will not be able to get anywhere when on your own internal network.
- Now everything that falls in the regular expression is routed to localhost:3000 (KAVE) and everything else uses the system default.
You can turn FoxyProxy on and off by right-clicking the fox icon. You can also choose what setting to use dynamically so that you always can control where you are getting your webpages from even if a page accidentally passes the whitelist or fails the whitelist regular expression you added earlier.
Given that you have a working ssh connection, you may wish the entire development of solutions and visualization of results to take place on your own dedicated KAVE without needing to copy data back to a developer/analyst laptop. In this case you will need a desktop experience on your gateway machine. In this case, you will need to install locally:
- A VNC client (i.e. TightVNC)
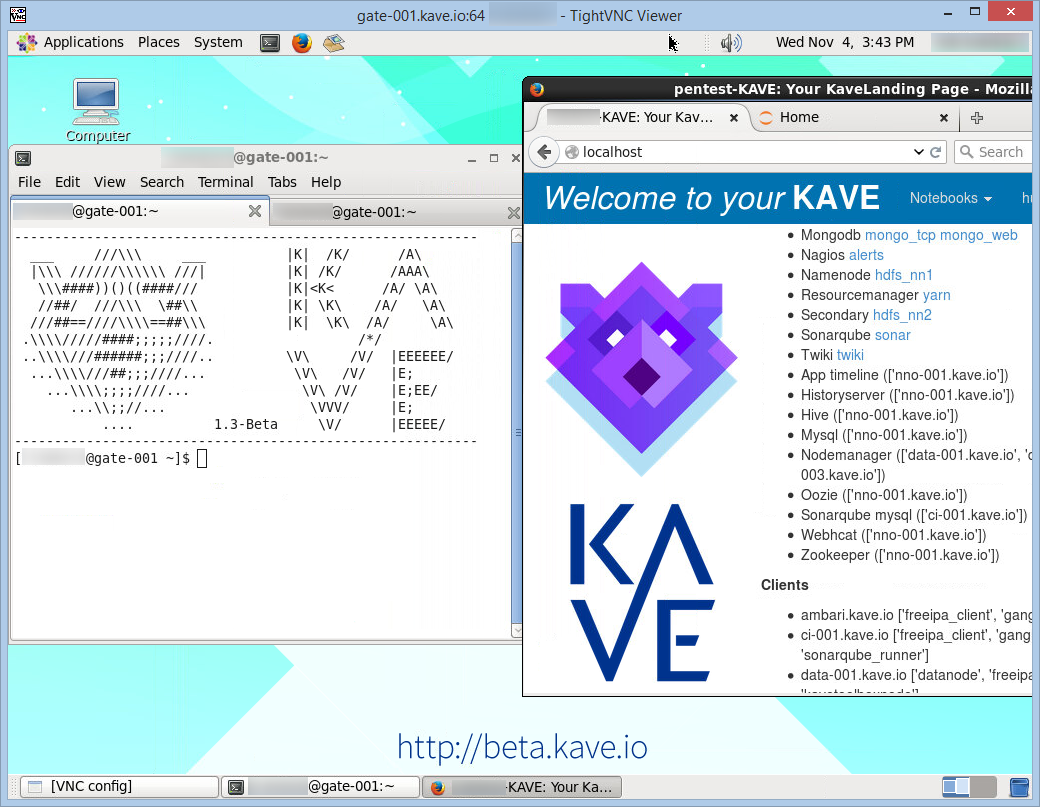
VNC stands for Virtual Network Computing and is a simple way of getting a linux remote desktop in the KAVE.
You can connect to vnc from your windows machine,and it's pretty fast and elegent. Also it's open-source and free.
Also, what's great about vnc is that your session doesn't die when your ssh gets disconnected. Everything you were working on will still be going on in the background. You can also have several vnc sessions open to several KAVEs at the same time, without the dynamic port-forwarding interferring with your work, since you can run your browser on the gateway itself!
We are trying to imagine a secure KAVE where data, analysis, even software never needs to be transferred to anywhere else.
Also, V in KAVE stands for Visualization, which is not possible without X, and some remote desktop system
You are going to edit your putty session and start a vnc server at your favourite KAVE.
- You need an existing tested ssh connection to an existing KAVE.
- A VNC client installed on your local system (TightVNC, for example)
- Choose a number between 00 and 99, this is especially for you, to choose your server on the gateway
- Find out your monitor resolution (say 1028x980) and remember what that is with 70 subtracted from the vertical (1028x910).
- You'll need the gateway on the linux end to have pre-installed X, gnome, and tigervnc (CentOs6). This is automatic with KaveToolbox installation
- Load your previous ssh connection and save it with a better name. Then edit the X11 Tunnels to include Source Port: 59XX, Destination port: 127.0.0.1:59XX, where XX is your "favourite number"

- Save the new configuration.
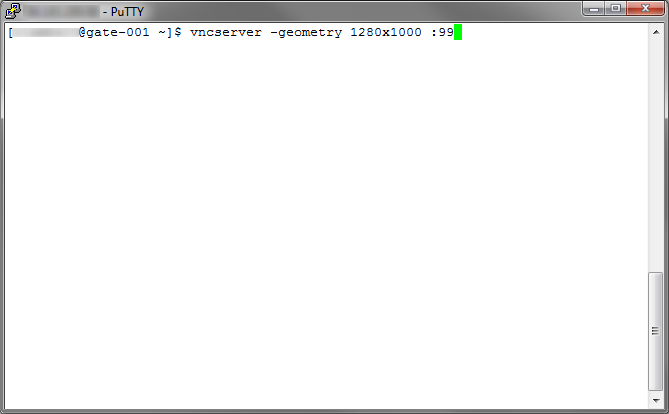
- Run a vncserver on the HOST machine
- In the opened session type something like type > =vncserver :XX= where XX is the display number you'd like to use, you can also specify your geometry here with -geometry 1028x980, for example.
- The first time you run it, it will ask you for a password, and maybe also set up your xauths file. Type in some password you can remember. This password is unique to your vnc session, and prevents other users of the same machine from connecting to your session, since the communication is encrypted over ssh anyway, your web traffic was already secure even without this password.
- Start tight vnc
- Run your client viewer to connect to localhost:XX where XX is the port that you forwarded to in the previous step
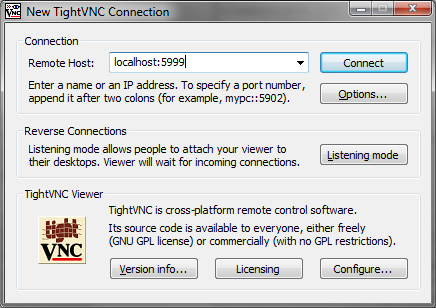
- enter the password you specified and... wooot!
 You need to start the xrdp service using the command;
 systemctl start xrdp