Tutorial for using CultURIze
CultURIze is a tool for administrators of a cultural heritage collections to gather and share information about their collection in a sustainable way. With CultURIze, museum administrators can identify each piece of their collection on the web. This way they can share information about objects with their community. This tool is useful for administrators of small or medium heritage collections.
- A CSV for your PIDs is created
- The CultURIze application is installed and configured
- A code repository is created
- You have a GitHub account
The CultURIze tool is a desktop application that will convert CSV files containing links between PIDs and URLs into server configuration files (.htaccess for Apache and nginx_redirect.conf for Nginx). The application will use the GitHub API to gather information about the repository and will publish the changes to GitHub with git.
The first time you use CultURIze, you must sign in with a GitHub access token. From then on, you can upload PIDs to your GitHub repository. As long as you do not log out or reset the app, you can continue to use CultURIze without having to log in; Even if you close the app and open it again.
You can skip step 1 and 2 if you already signed in once and didn’t log out.
You need a GitHub personal access token to sign into CultURIze.

- Go to the page to create a GitHub personal access token. It’s possible that you need to sign in.
- Enter CultURIze under note and tick repo as scope. This means that you give CultURIze the permission to upload data to the GitHub repositories to which you have write access.
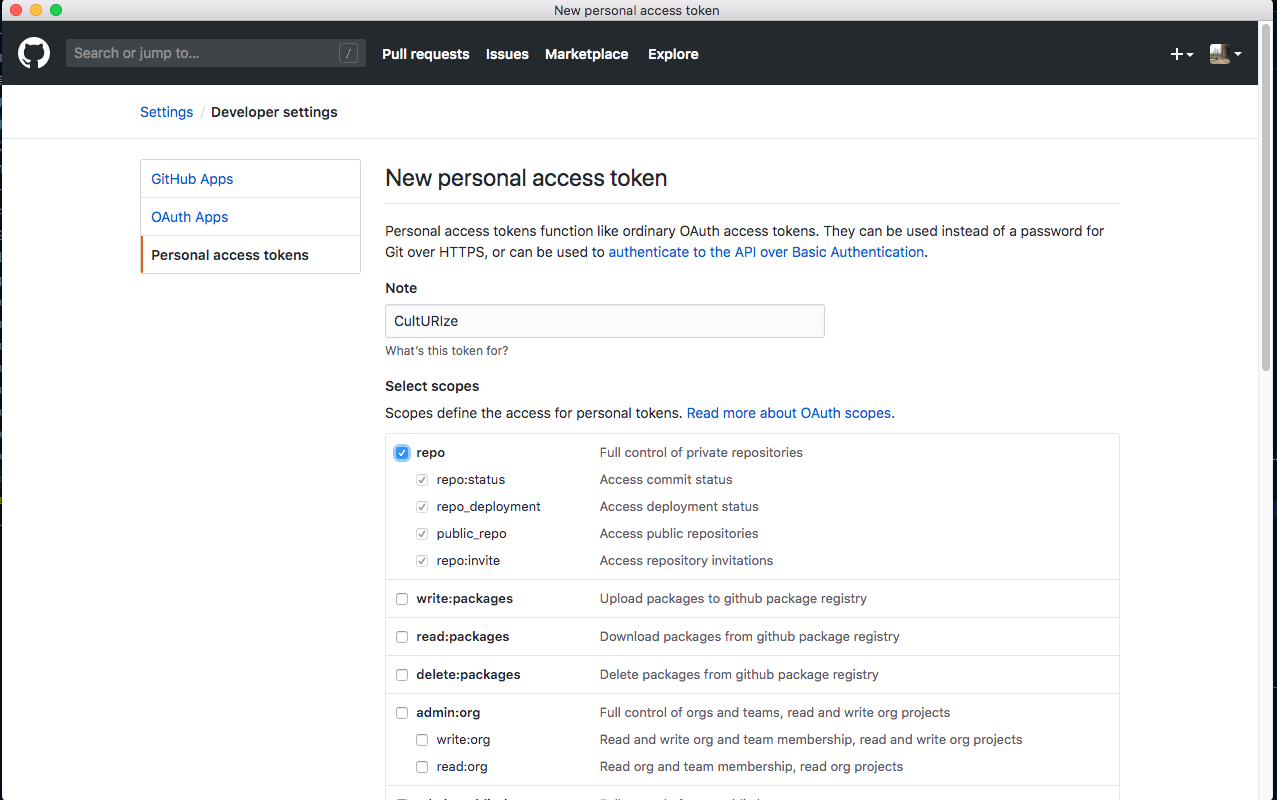
- Next, push the button to generate your token.
- Your token should be displayed. Copy it somewhere if you wish to reuse it (e.g. to sign in again after you’ve signed out or reset the app). You won’t be able to see the token again after closing the page.
Paste your token into the textfield saying Enter access token and sign in.

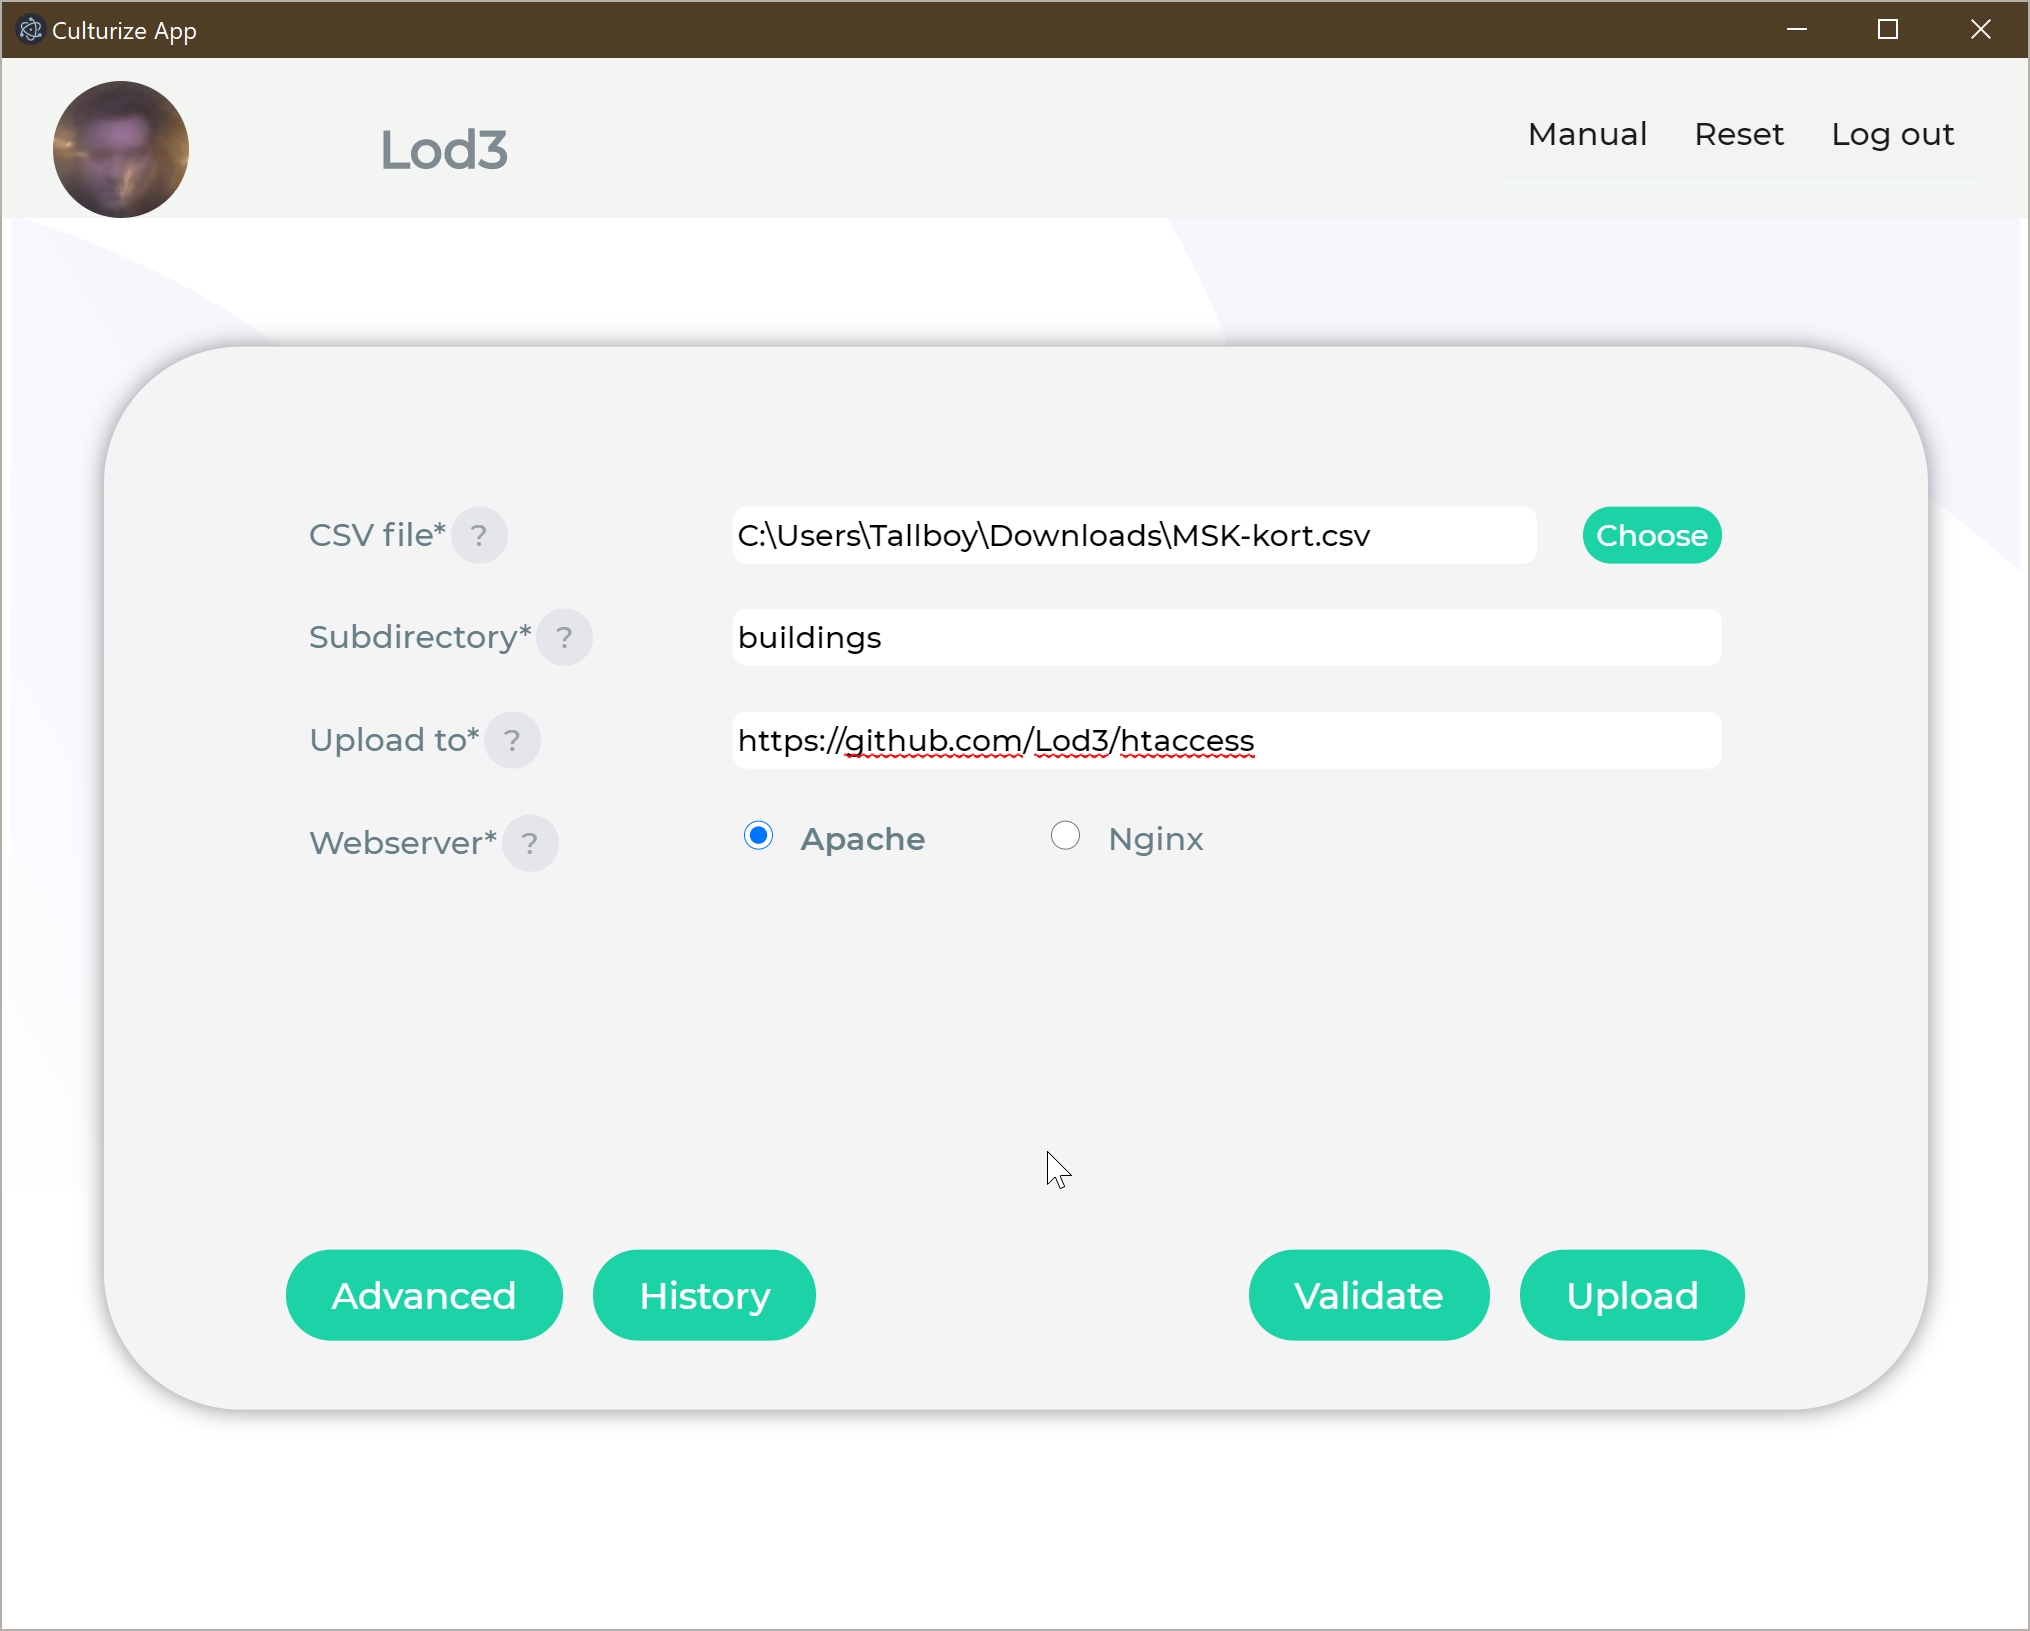
When you are signed in, you will see a form that you need to complete. Fill out the required fields.

Choose the CSV - or enter the path of the CSV - that should be converted into a server configuration file.
The subdirectory is the folder on the GitHub repository to which the server configuration file will be pushed. The subdirectory appears in the persistent URI like this: http://domainnameofserver/subdirectory/documenttype/PID. You can also create a sub-subdirectory by separating the two directories with a "/". The persistent URI will then look like the following: http://domainnameofserver/subdirectory/subsubdirectory/documenttype/PID.
CultURIze turns a CSV into a file with .htaccess or nginx_redirect.conf as filename. If you define persistent URI’s in different CSV-files, then it is important to enter a subdirectory. Otherwise, all your previously uploaded CSV files will be overwritten. Because this would overwrite information the field is mandatory by default, but in the advanced settings you can select to not work with a subdirectory.
Notation rules for a subdirectory:
- use normal language
- only letters (a-z), numbers (0-9), hyphens and underscores are allowed; no spaces
- use a "/" between your subdirectory and your sub-subdirectory (example: "museum/event")
- do not use "/" at the end
Enter in this field the URL of the GitHub repository to which the htaccess-file or nginx redirect configuration should be pushed. The URL of a GitHub repository has always following pattern: https://github.com/{name}/{repository}, e.g. https://github.com/PACKED-vzw/culturize_htaccess.
Read more about repositories in our tutorial about setting up a code repository.
Specify for which webserver, Apache or Nginx, you want CultURIze to create a configuration. If you use the CultURIze docker then always choose Apache here.
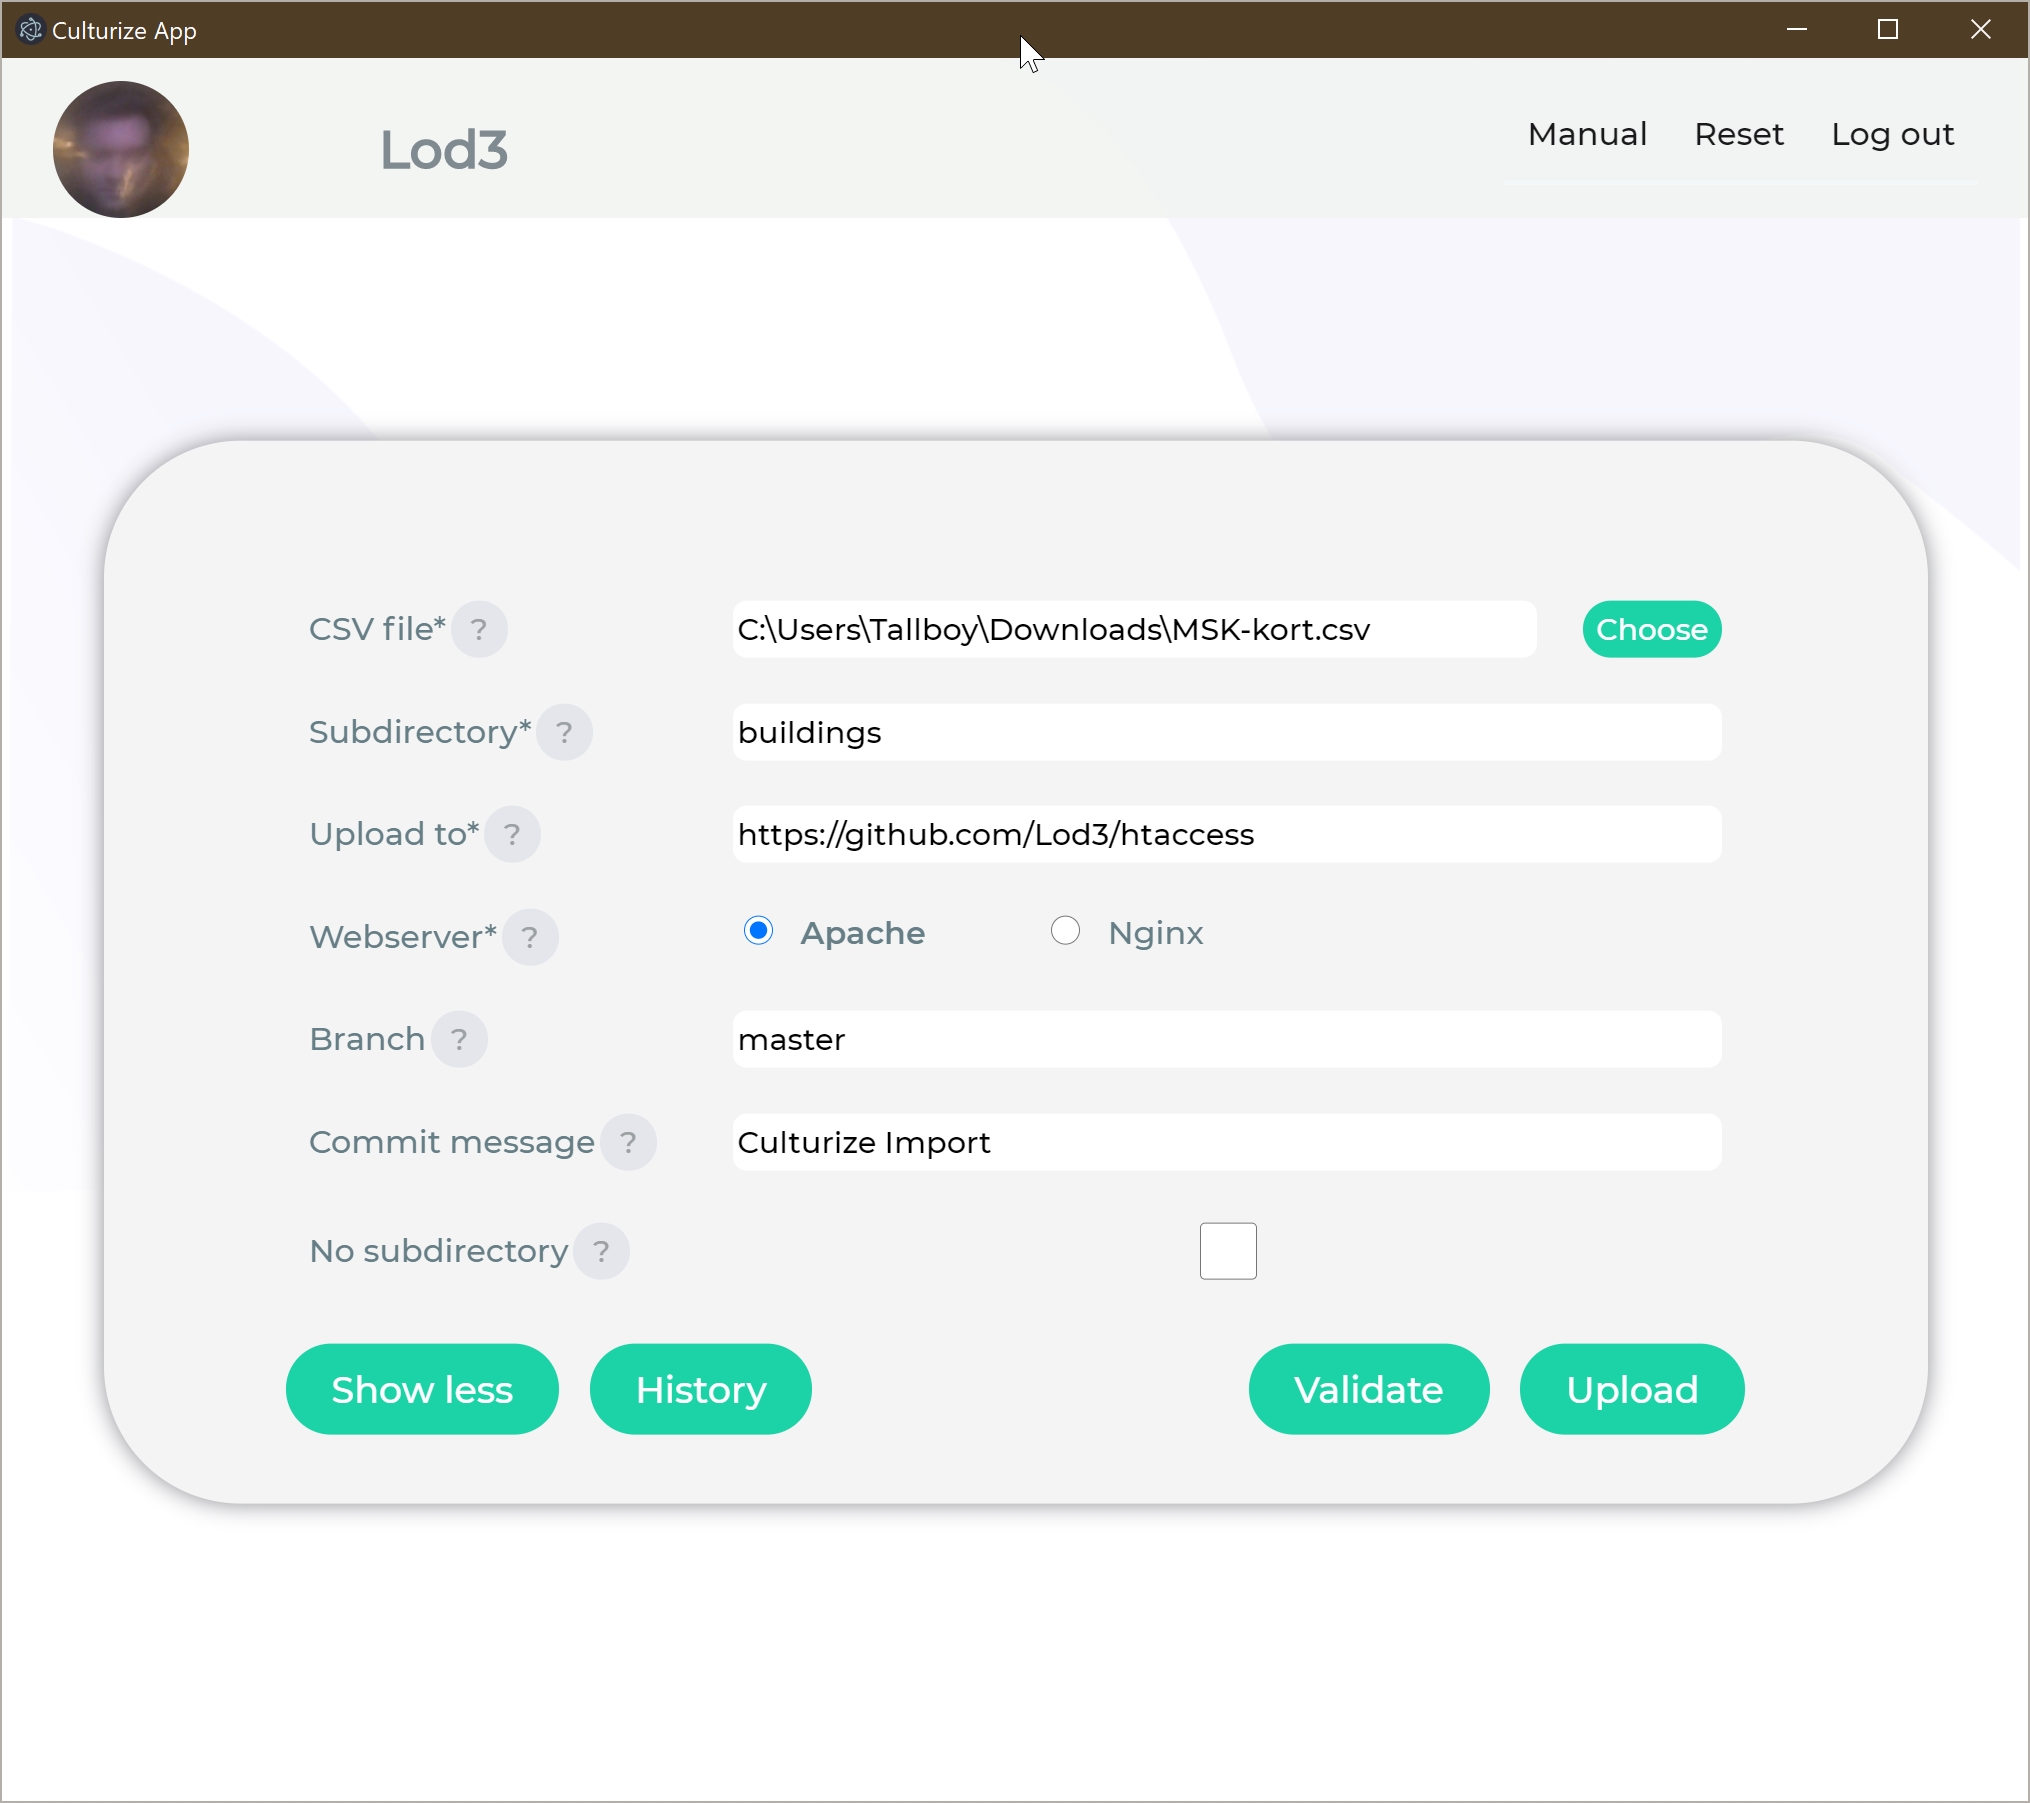
If you are familiar with GitHub you can use advanced options, e.g. for testing purposes. You can access the advanced options by pushing the Advanced-button.
You can validate the CSV file first before you publish the changes to GitHub. This will also check the accessibility of the specified URL's, as this will contact the corresponding servers to check if an URL is working this can take some time for long CSV files. During this check you can follow the process in a live report.
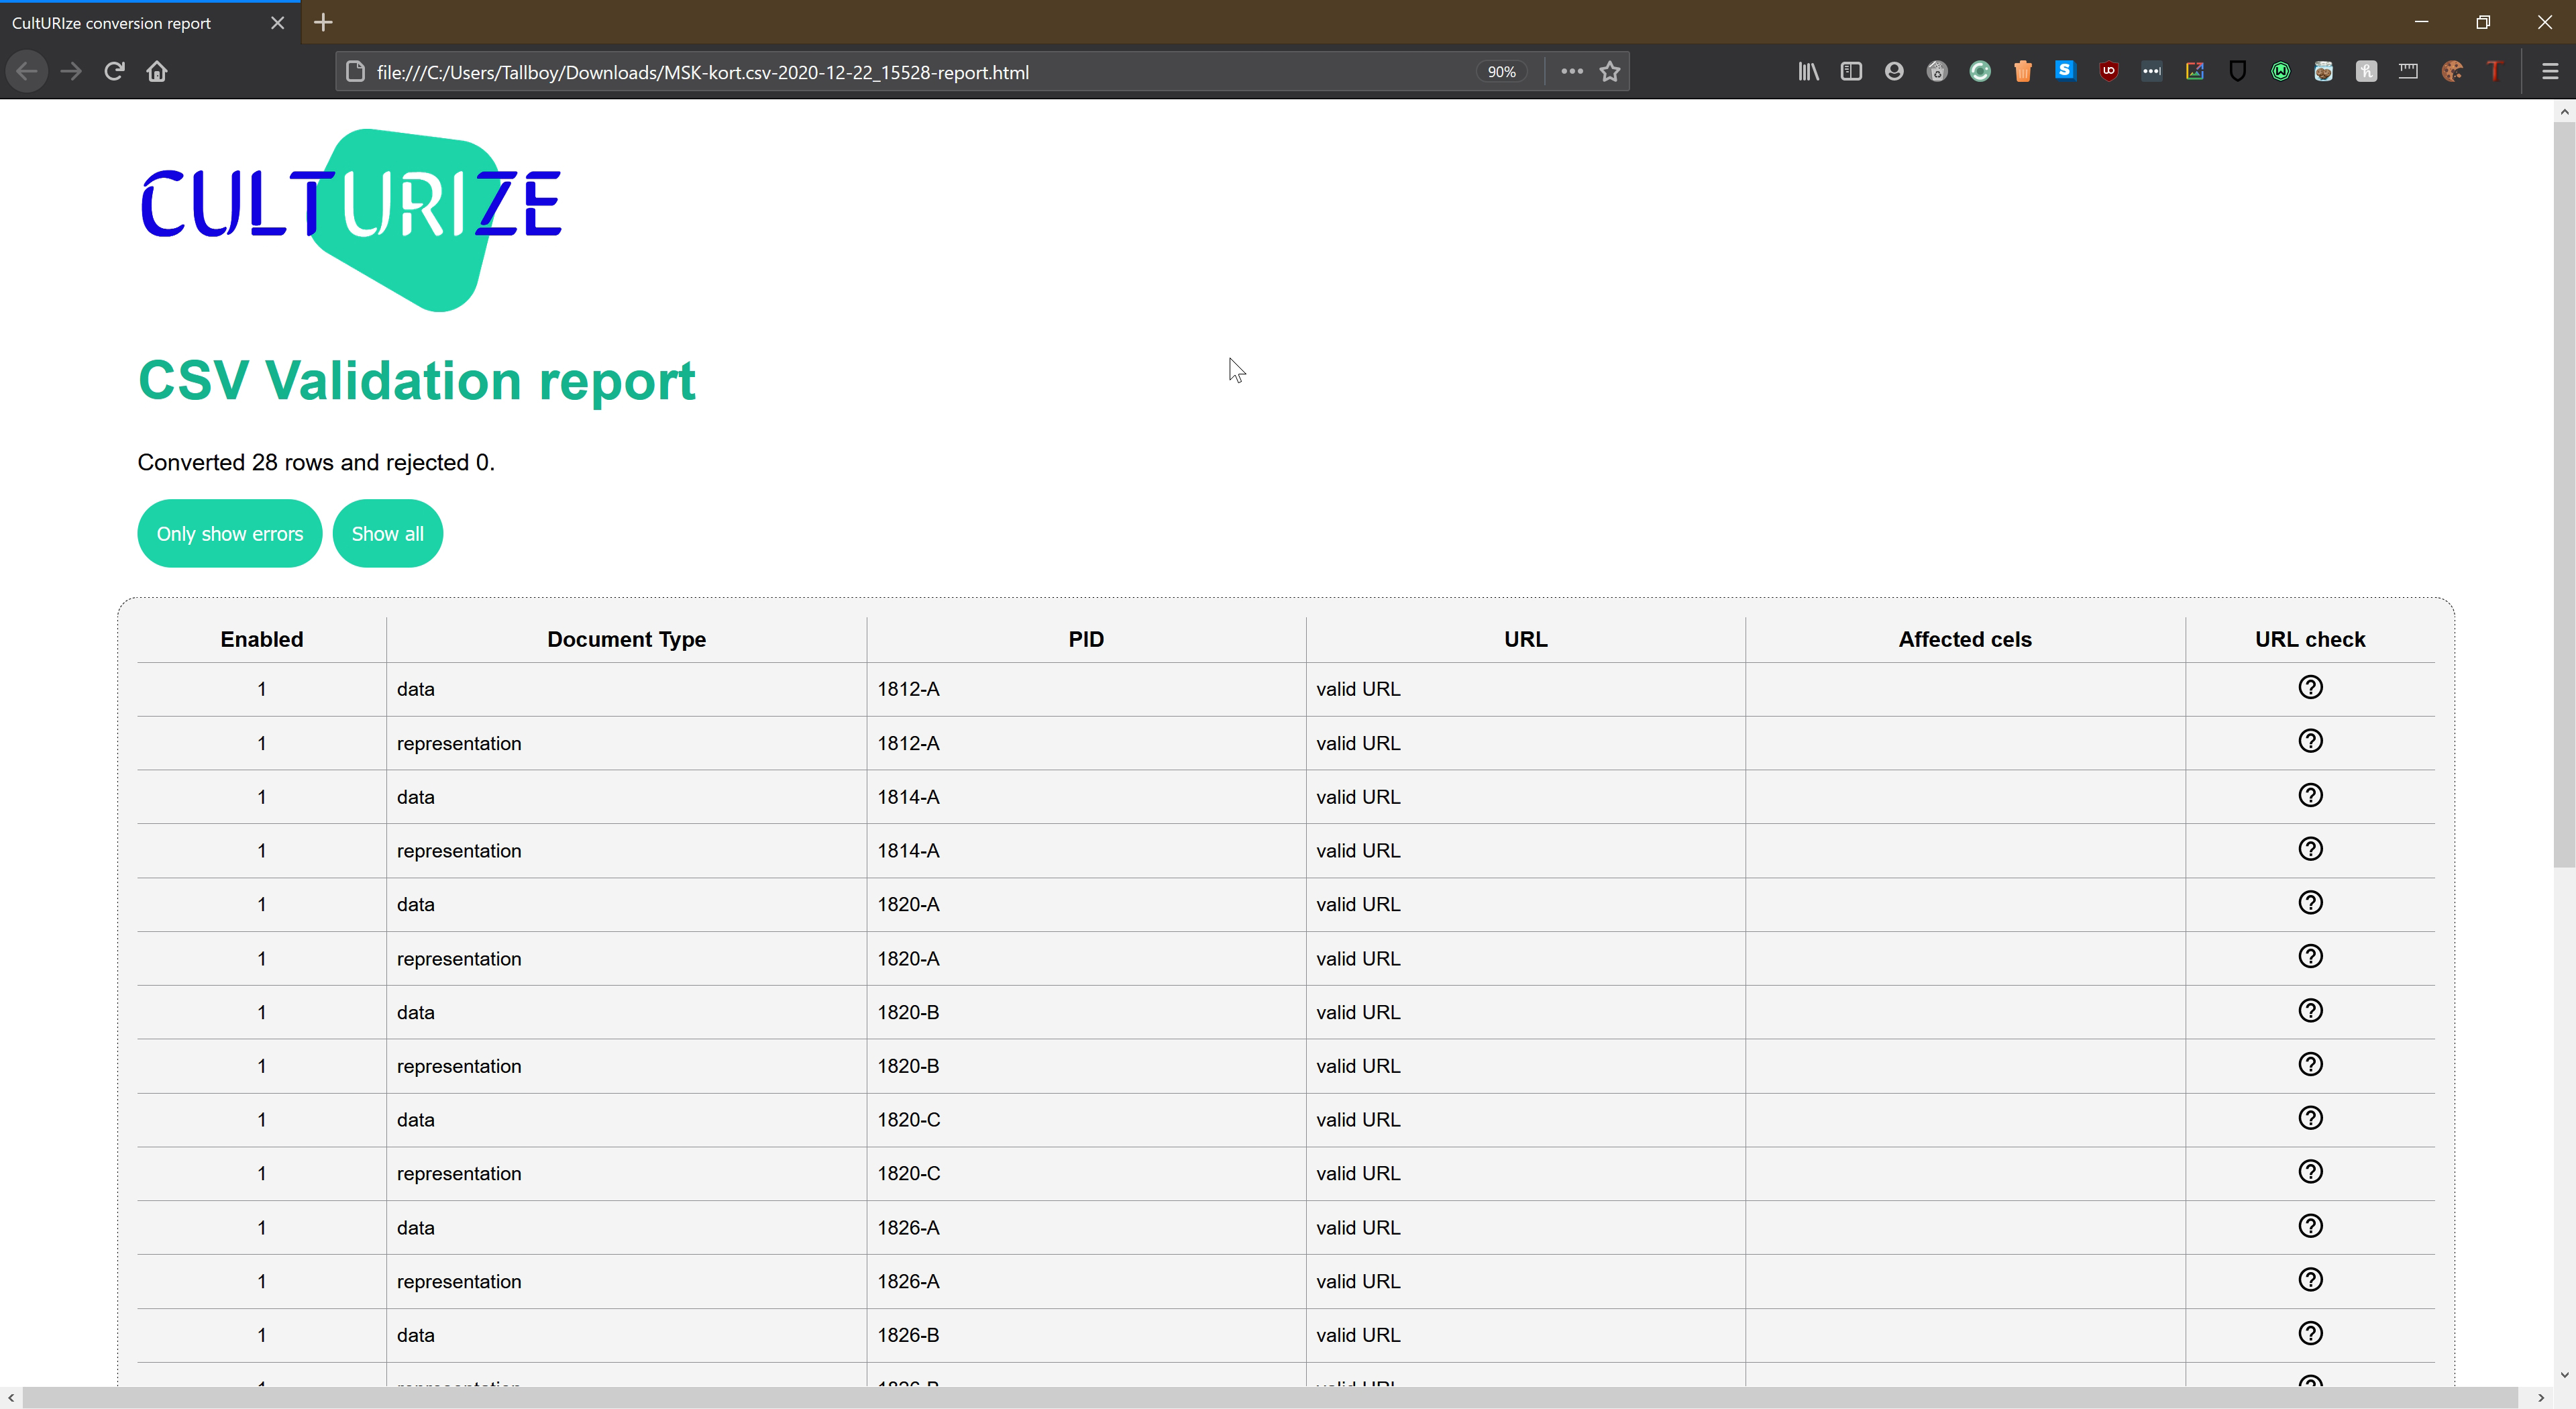
Rows with an error in them will be marked as red in the report. The specific field with the error will have an extra red border. The checks are:
- enabled: must be 1 or 0
- Document Type: can only contain lower letters, capitals, numbers, "-" and "_"
- PID: can only contain lower letters, capitals, numbers, "-" and "_"
- URL: must be a valid URL, no spaces allowed. This will be marked as invalid URL if the syntax is found to be wrong.
The Affected cells column will show the cells of the original data file that contain the error. The URL check column will show the status of the URL checking:
- A green check mark shows that the URL is reachable
- An explanation mark means that the URL is not tested because the URL syntax was wrong
- A disconnect symbol means that the URL is not reachable
The count values at the top of the report represent the number of rows in the input data and the number of rows that contain an error.
Once you click Upload, the conversion and upload process will start. A box will appear at the bottom describing what’s happening. When your .htaccess-file or nginx-redirect.conf file is published, a message will tell you how many records were uploaded. If an error occurs, an error message will be shown instead. A report of the conversion will also be written to the filesystem, in the same directory as the CSV file.
The used count shown at the end of the conversion (or at the top of the saved report) are the total number of rows for which we generated a persistent URL. This are all the rows that are both enabled and valid. For the rejected count the rows that are either disabled or have invalid syntax are used. These values differ from the validation report because a disabled row can have a perfectly valid syntax but these are not used for the conversion.

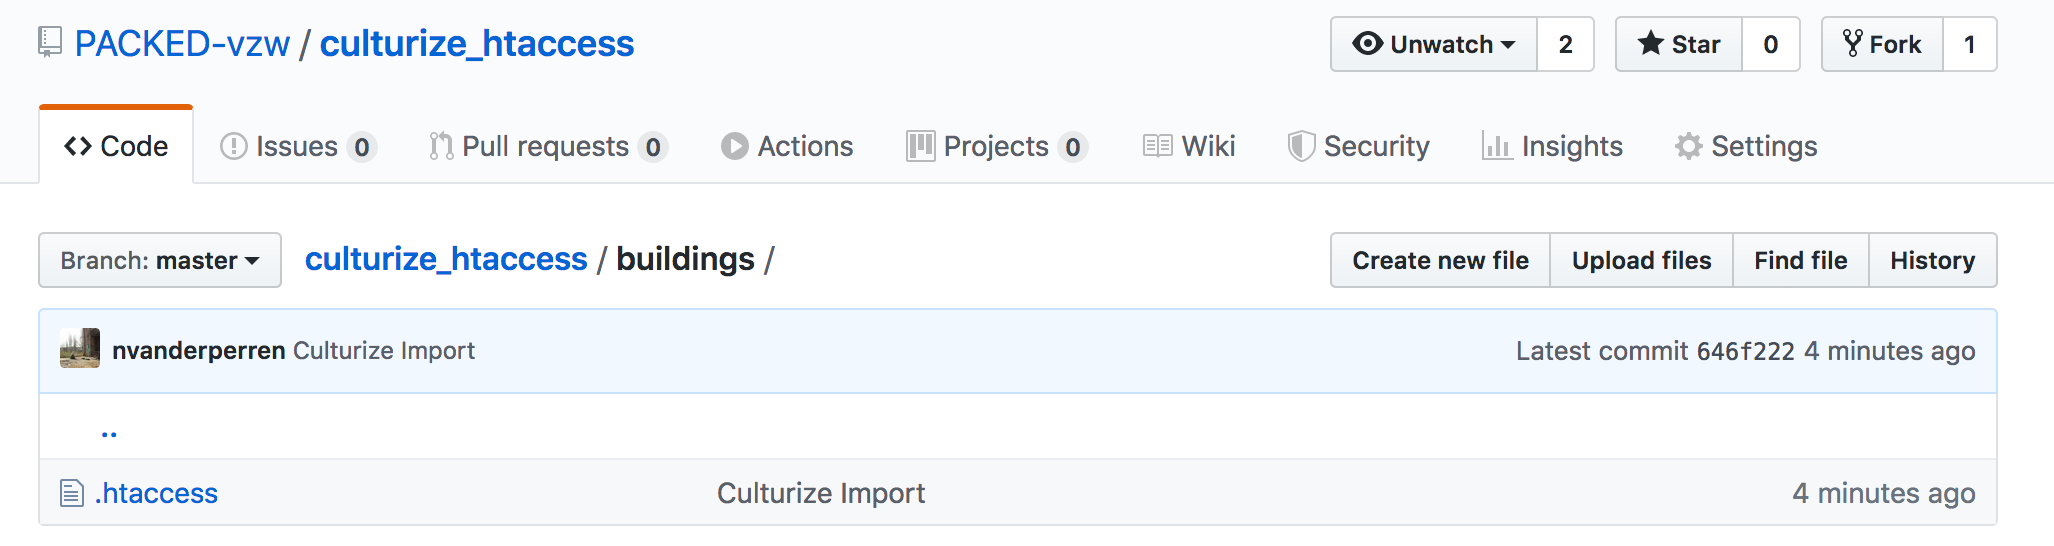
When the upload is finished, you should see in the GitHub repository a folder with the name of subdirectory and a .htaccess-file in the folder.
By default, uploading your server configuration without subdirectory is not allowed. This is to prevent overwriting your configuration files. However if you understand the risks involved of uploading your configuration file without a subdirectory to GitHub and subsequently your web-server you can find an override option to this rule in the advanced settings.
PACKED vzw (c) 2019 