Tutorial for The London Bioinformatics Frontiers Hackathon 2019.

In this tutorial you will learn:
- Nextflow - how to build parallelisable & scalable computational pipelines
- Docker - how to build & run containers to bundle dependencies
- FlowCraft - how to build & use modular, extensible and flexible components for Nextflow pipelines
- Deploit - how to scale your analyses over the cloud
The following are required for the hackathon:
- Java 8 or later
- Docker engine 1.10.x (or higher)
- Git
- Python3
If you have them installed that's great! Don't worry if not we will help you to install them & other software throughout the tutorial

What is Nextflow? Why use it? See about Nextflow slides
Main outcome: During the first session you will build a FastQC & MultiQC pipeline to learn the basics of Nextflow including:
- Parameters
- Processes (inputs, outputs & scripts)
- Channels
- Operators
- Configuration
You will need to have Java 8 or later installed for Nextflow to work. You can check your version of Java by entering the following command:
java -versionTo install Nextflow open a terminal & enter the following command:
curl -fsSL get.nextflow.io | bashThis will create a nextflow executable file in your current directory. To complete the installation so that you can run Nextflow run anywhere you may want to add it a directory in your $PATH, eg:
mv nextflow /usr/local/bin
You can then test your installation of Nextflow with:
nextflow run hello
To check if you have Docker installed you can type:
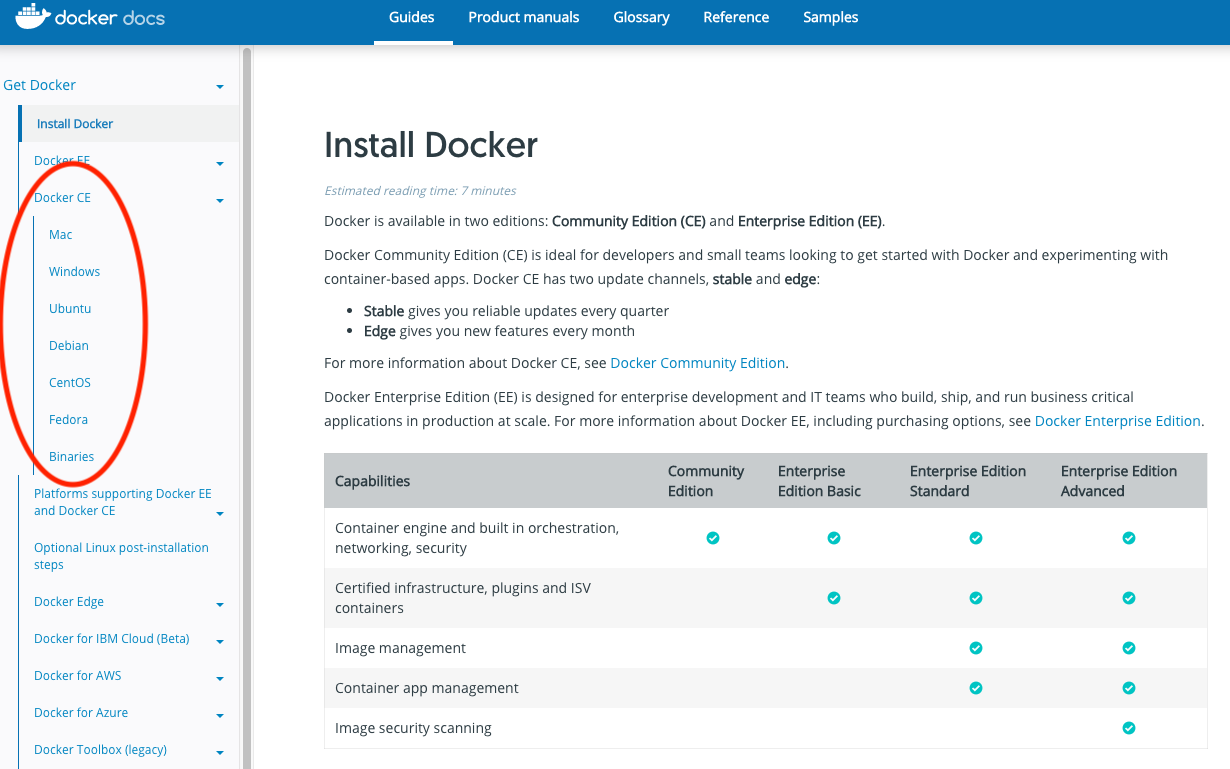
docker -vIf you need to install docker you can do so by following the instructions here. Be sure to select your correct OS:
Now that we have Nextflow & Docker installed we're ready to run our first script
- Create a file
main.nf& open this in your favourite code/text editor eg VSCode or vim - In this file write the following:
// main.nf
params.reads = false

println "My reads: ${params.reads}"
The first line initialises a new variable (params.reads) & sets it to false
The second line prints the value of this variable on execution of the pipeline.
We can now run this script & set the value of params.reads to one of our FASTQ files in the testdata folder with the following command:
nextflow run main.nf --reads testdata/test.20k_reads_1.fastq.gz
This should return the value you passed on the command line
Here we learnt how to define parameters & pass command line arguments to them in Nextflow
Nextflow allows the execution of any command or user script by using a process definition.
A process is defined by providing three main declarations: the process inputs, the process outputs and finally the command script.
In our main script we want to add the following:
//mainf.nf
reads = file(params.reads)

process fastqc {

    publishDir "results", mode: 'copy'

    input:
    file(reads) from reads

    output:
    file "*_fastqc.{zip,html}" into fastqc_results

    script:
    """
    fastqc $reads
    """
}
Here we created the variable reads which is a file from the command line input.
We can then create the process fastqc including:
- the directive
publishDirto specify which folder to copy the output files to - the inputs where we declare a
filereadsfrom our variablereads - the output which is anything ending in
_fastqc.zipor_fastqc.htmlwhich will go into afastqc_resultschannel - the script where we are running the
fastqccommand on ourreadsvariable
We can then run our script with the following command:
nextflow run main.nf --reads testdata/test.20k_reads_1.fastq.gz -with-docker flowcraft/fastqc:0.11.7-1By running Nextflow using the with-docker flag we can specify a Docker container to execute this command in. This is beneficial because it means we do not need to have fastqc installed locally on our laptop. We just need to specify a Docker container that has fastqc installed.
Channels are the preferred method of transferring data in Nextflow & can connect two processes or operators.
Here we will use the method fromFilePairs to create a channel to load paired-end FASTQ data, rather than just a single FASTQ file.
To do this we will replace the code from 1c with the following
//main.nf
reads = Channel.fromFilePairs(params.reads, size: 2)

process fastqc {

    tag "$name"
    publishDir "results", mode: 'copy'
    container 'flowcraft/fastqc:0.11.7-1'

    input:
    set val(name), file(reads) from reads

    output:
    file "*_fastqc.{zip,html}" into fastqc_results

    script:
    """
    fastqc $reads
    """
}
The reads variable is now equal to a channel which contains the reads prefix & paired-end FASTQ data. Therefore, the input declaration has also changed to reflect this by declaring the value name. This name can be used as a tag for when the pipeline is run. Also as we are now declaring two inputs the set keyword also has to be used. Finally, we can also specify the container name within the processes as a directive.
To run the pipeline:
nextflow run main.nf --reads "testdata/test.20k_reads_{1,2}.fastq.gz" -with-docker flowcraft/fastqc:0.11.7-1Here we learnt how to the fromFilePairs method to generate a channel for our input data.
Operators are methods that allow you to manipulate & connect channels.
Here we will add a new process multiqc & use the .collect() operator
Add the following process after fastqc:
//main.nf
process multiqc {

    publishDir "results", mode: 'copy'
    container 'ewels/multiqc:v1.7'

    input:
    file (fastqc:'fastqc/*') from fastqc_results.collect()

    output:
    file "*multiqc_report.html" into multiqc_report
    file "*_data"

    script:
    """
    multiqc . -m fastqc
    """
}
Here we have added another process multiqc. We have used the collect operator here so that if fastqc ran for more than two pairs of files multiqc would collect all of the files & run only once.
The pipeline can be run with the following:
nextflow run main.nf --reads "testdata/test.20k_reads_{1,2}.fastq.gz" -with-docker flowcraft/fastqc:0.11.7-1Here we learnt how to use operators such as collect & connect processes via channels
Configuration, such as parameters, containers & resources eg memory can be set in config files such as nextflow.config.
For example our nextflow.config file might look like this:
docker.enabled = true
params.reads = false

process {
  cpus = 2
  memory = "2.GB"

  withName: fastqc {
    container = "flowcraft/fastqc:0.11.7-1"
  }
  withName: multiqc {
    container = "ewels/multiqc:v1.7"
  }
}
Here we have enabled docker by default, initialised parameters, set resources & containers. It is best practice to keep these in the config file so that they can more easily be set or removed. Containers & params.reads can then be removed from main.nf.
Here we learnt how to use configuration files to set parameters, resources & containers
What is Docker? Why use it? See about Docker slides
Main outcome: During this session, you will learn how to build & run your own Docker container to bundle dependencies for FastQC & MultiQC
Running a container is as easy as using the following command:
docker run <container-name> For example:
docker run hello-world Launching a BASH shell in the container allows you to operate in an interactive mode in the containerised operating system. For example:
docker run -it flowcraft/fastqc:0.11.7-1 bash
Once the container is launched you will notice that's running as root (!). Use the usual commands to navigate in the file system.
To exit from the container, stop the BASH session with the exit command.
Docker images are created by using a so called Dockerfile i.e. a simple text file
containing a list of commands to be executed to assemble and configure the image
with the software packages required.
In this step, you will create a Docker image containing the FastQC & MultiQC tools.
Warning: the Docker build process automatically copies all files that are located in the
current directory to the Docker daemon in order to create the image. This can take
a lot of time when big/many files exist. For this reason, it's important to always work in
a directory containing only the files you really need to include in your Docker image.
Alternatively, you can use the .dockerignore file to select the path to exclude from the build.
Then use your favourite editor eg. vim to create a file named Dockerfile and copy the
following content:
FROM nfcore/base

LABEL authors="phil@lifebit.ai" \
      description="Docker image containing fastqc & multiqc for LBF hackathon tutorial"

RUN conda install -c bioconda fastqc=0.11.8 && \
    conda install -c bioconda multiqc=1.7
When done save the file.
Build the Docker image by using the following command:
docker build -t my-image .Note: don't miss the dot in the above command. When it completes, verify that the image has been created listing all available images:
docker imagesWith the Dockerfile from above you might want to run:
docker build -t lifebitai/lbf-hack .
And then you can enter inside the container to check everything is working:
docker run -it lifebitai/lbf-hack:latest bashThe container can be used in our Nextflow pipeline replacing the two different containers we currently have because it has both fastqc & multiqc installed
Publish your container in Docker Hub to share it with other people.
Create an account in the https://hub.docker.com web site. Then from your shell terminal run the following command, entering the user name and password you specified registering in the Hub:
docker login
Tag the image with your Docker user name account:
docker tag my-image <user-name>/my-image
Finally, push it to the Docker Hub:
docker push <user-name>/my-image
After that anyone will be able to download it by using the command:
docker pull <user-name>/my-image
Note how after a pull and push operation, Docker prints the container digest number e.g.
Digest: sha256:aeacbd7ea1154f263cda972a96920fb228b2033544c2641476350b9317dab266
Status: Downloaded newer image for nextflow/rnaseq-nf:latest
This is a unique and immutable identifier that can be used to reference container image in a univocally manner. For example:
docker pull nextflow/rnaseq-nf@sha256:aeacbd7ea1154f263cda972a96920fb228b2033544c2641476350b9317dab266

What is FlowCraft? Why use it? See FlowCraft slides
Main outcome: During this session, you will learn how to build your own Fastqc FlowCraft component & GATK pipeline
FlowCraft is available to install via both Conda & Pip. However, as we are going to building components we want to install the development version. This can be done with the following commands:
git clone https://github.com/assemblerflow/flowcraft.git
cd flowcraft
python3 setup.py installFlowCraft allows you to build pipelines from components. In order to create a new Component, two files are required. These are the template & the class.
Inside of the flowcraft directory, create & open a new file flowcraft/generator/templates/fastqc2.nf in your favourite code editor:
process fastqc2_{{ pid }} {

    {% include "post.txt" ignore missing %}

    tag { sample_id }
    publishDir "results/fastqc2_{{ pid }}", mode: 'copy'

    input:
    set sample_id, file(fastq_pair) from {{ input_channel }}

    output:
    file "*_fastqc.{zip,html}" into {{ output_channel }}
    {% with task_name="fastqc2" %}
    {%- include "compiler_channels.txt" ignore missing -%}
    {% endwith %}

    script:
    """
    fastqc $fastq_pair
    """
}

{{ forks }}
This is standard Nextflow code which is used as a template. Any code in the double curley brackets {{}} is FlowCraft code which will be replaced when building pipelines.
Inside of the flowcraft directory, open & add the following changes to the file flowcraft/generator/components/reads_quality_control.py in your favourite code editor:
class Fastqc2(Process):
    def __init__(self, **kwargs):
        super().__init__(**kwargs)

        self.input_type = "fastq"
        self.output_type = "fastq"

        self.directives = {"fastqc2": {
            "cpus": 2,
            "memory": "'4GB'",
            "container": "flowcraft/fastqc",
            "version": "0.11.7-1"
        }}

        self.status_channels = [
            "fastqc2"
        ]
Here we set the following:
- the inputs & outputs which allows processes to be connected
- the parameters required by the process (none in this case)
- the directives for the process, including the docker container we want to use. Here the
versionis thetagof the docker container - the status channels for the process to log its status
Now if we add the directory containing flowcraft.py to our path, we can then build a pipeline from any directory, eg:
export PATH=$PATH:/path/to/flowcraft/flowcraftNow we can test the component we have built with the command:
flowcraft.py build -t "fastqc2" -o fastqc.nfThis will create a Nextflow script fastqc.nf
More complex pipelines such as a GATK pipeline can be built with one command:
flowcraft.py build -t "bwa mark_duplicates haplotypecaller" -o main.nf --merge-paramsHere the merge-params flag is used to merges all parameters with the same name in a single parameter

Main outcome: During this session, you will learn how to scale the GATK pipeline you built in the previous session to run an analysis on the Cloud using the Deploit platform.
Deploit is a bioinformatics platform, developed by Lifebit, where you can run your analysis over the Cloud/AWS.
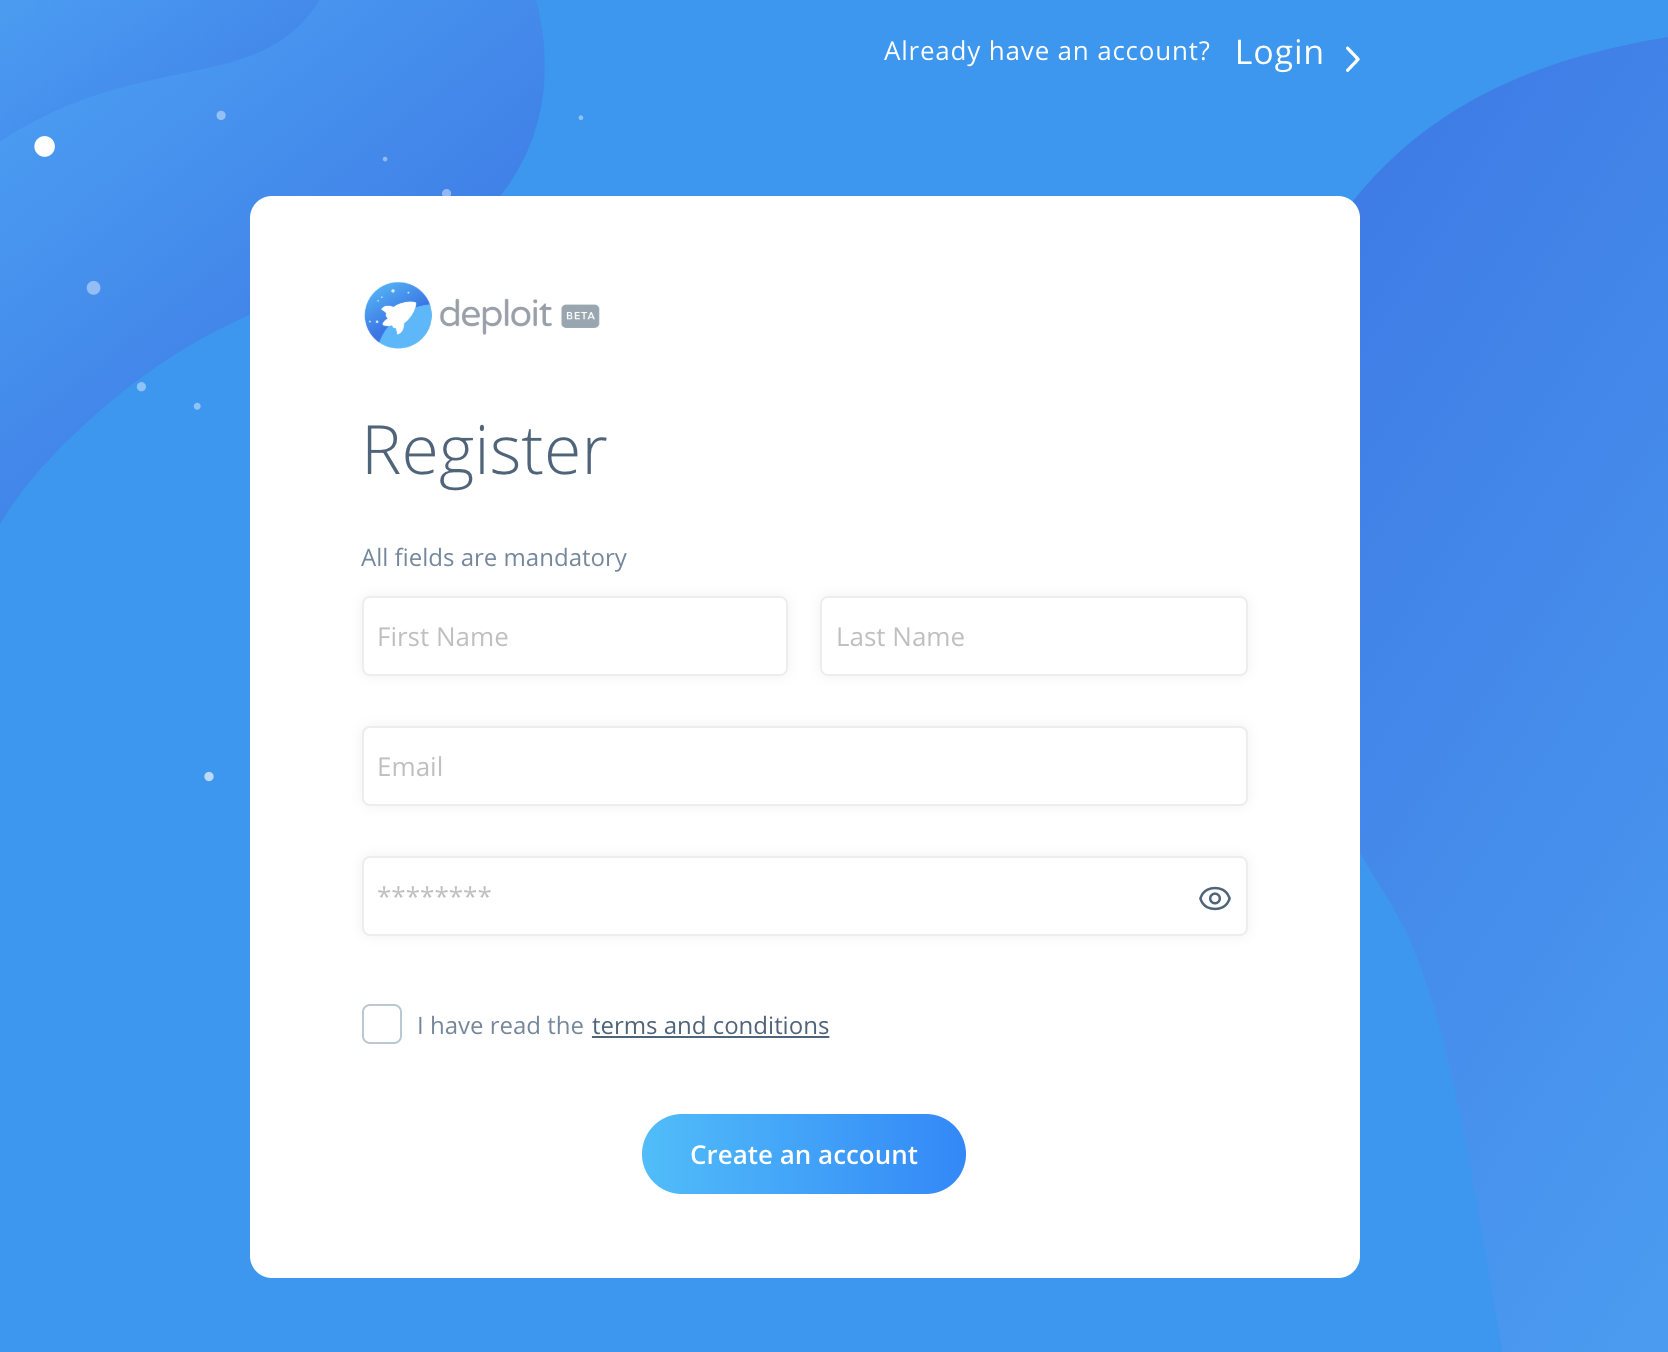
First, create an account/log in here. You will get $10 free credits. If you prefer you can connect & use your own AWS account/credentials.
We are able to import the GATK pipeline we created with FlowCraft from the previous section (Session 3) on Deploit. This will enable us to scale our analyses. All we need to import a pipeline is the URL from GitHub. For simplicity, we have already created a GitHub repository for the pipeline here: https://github.com/lifebit-ai/gatk-flowcraft
To import the pipeline we must first navigate to the pipelines page. This can be found in the navigation bar on the left-hand-side:
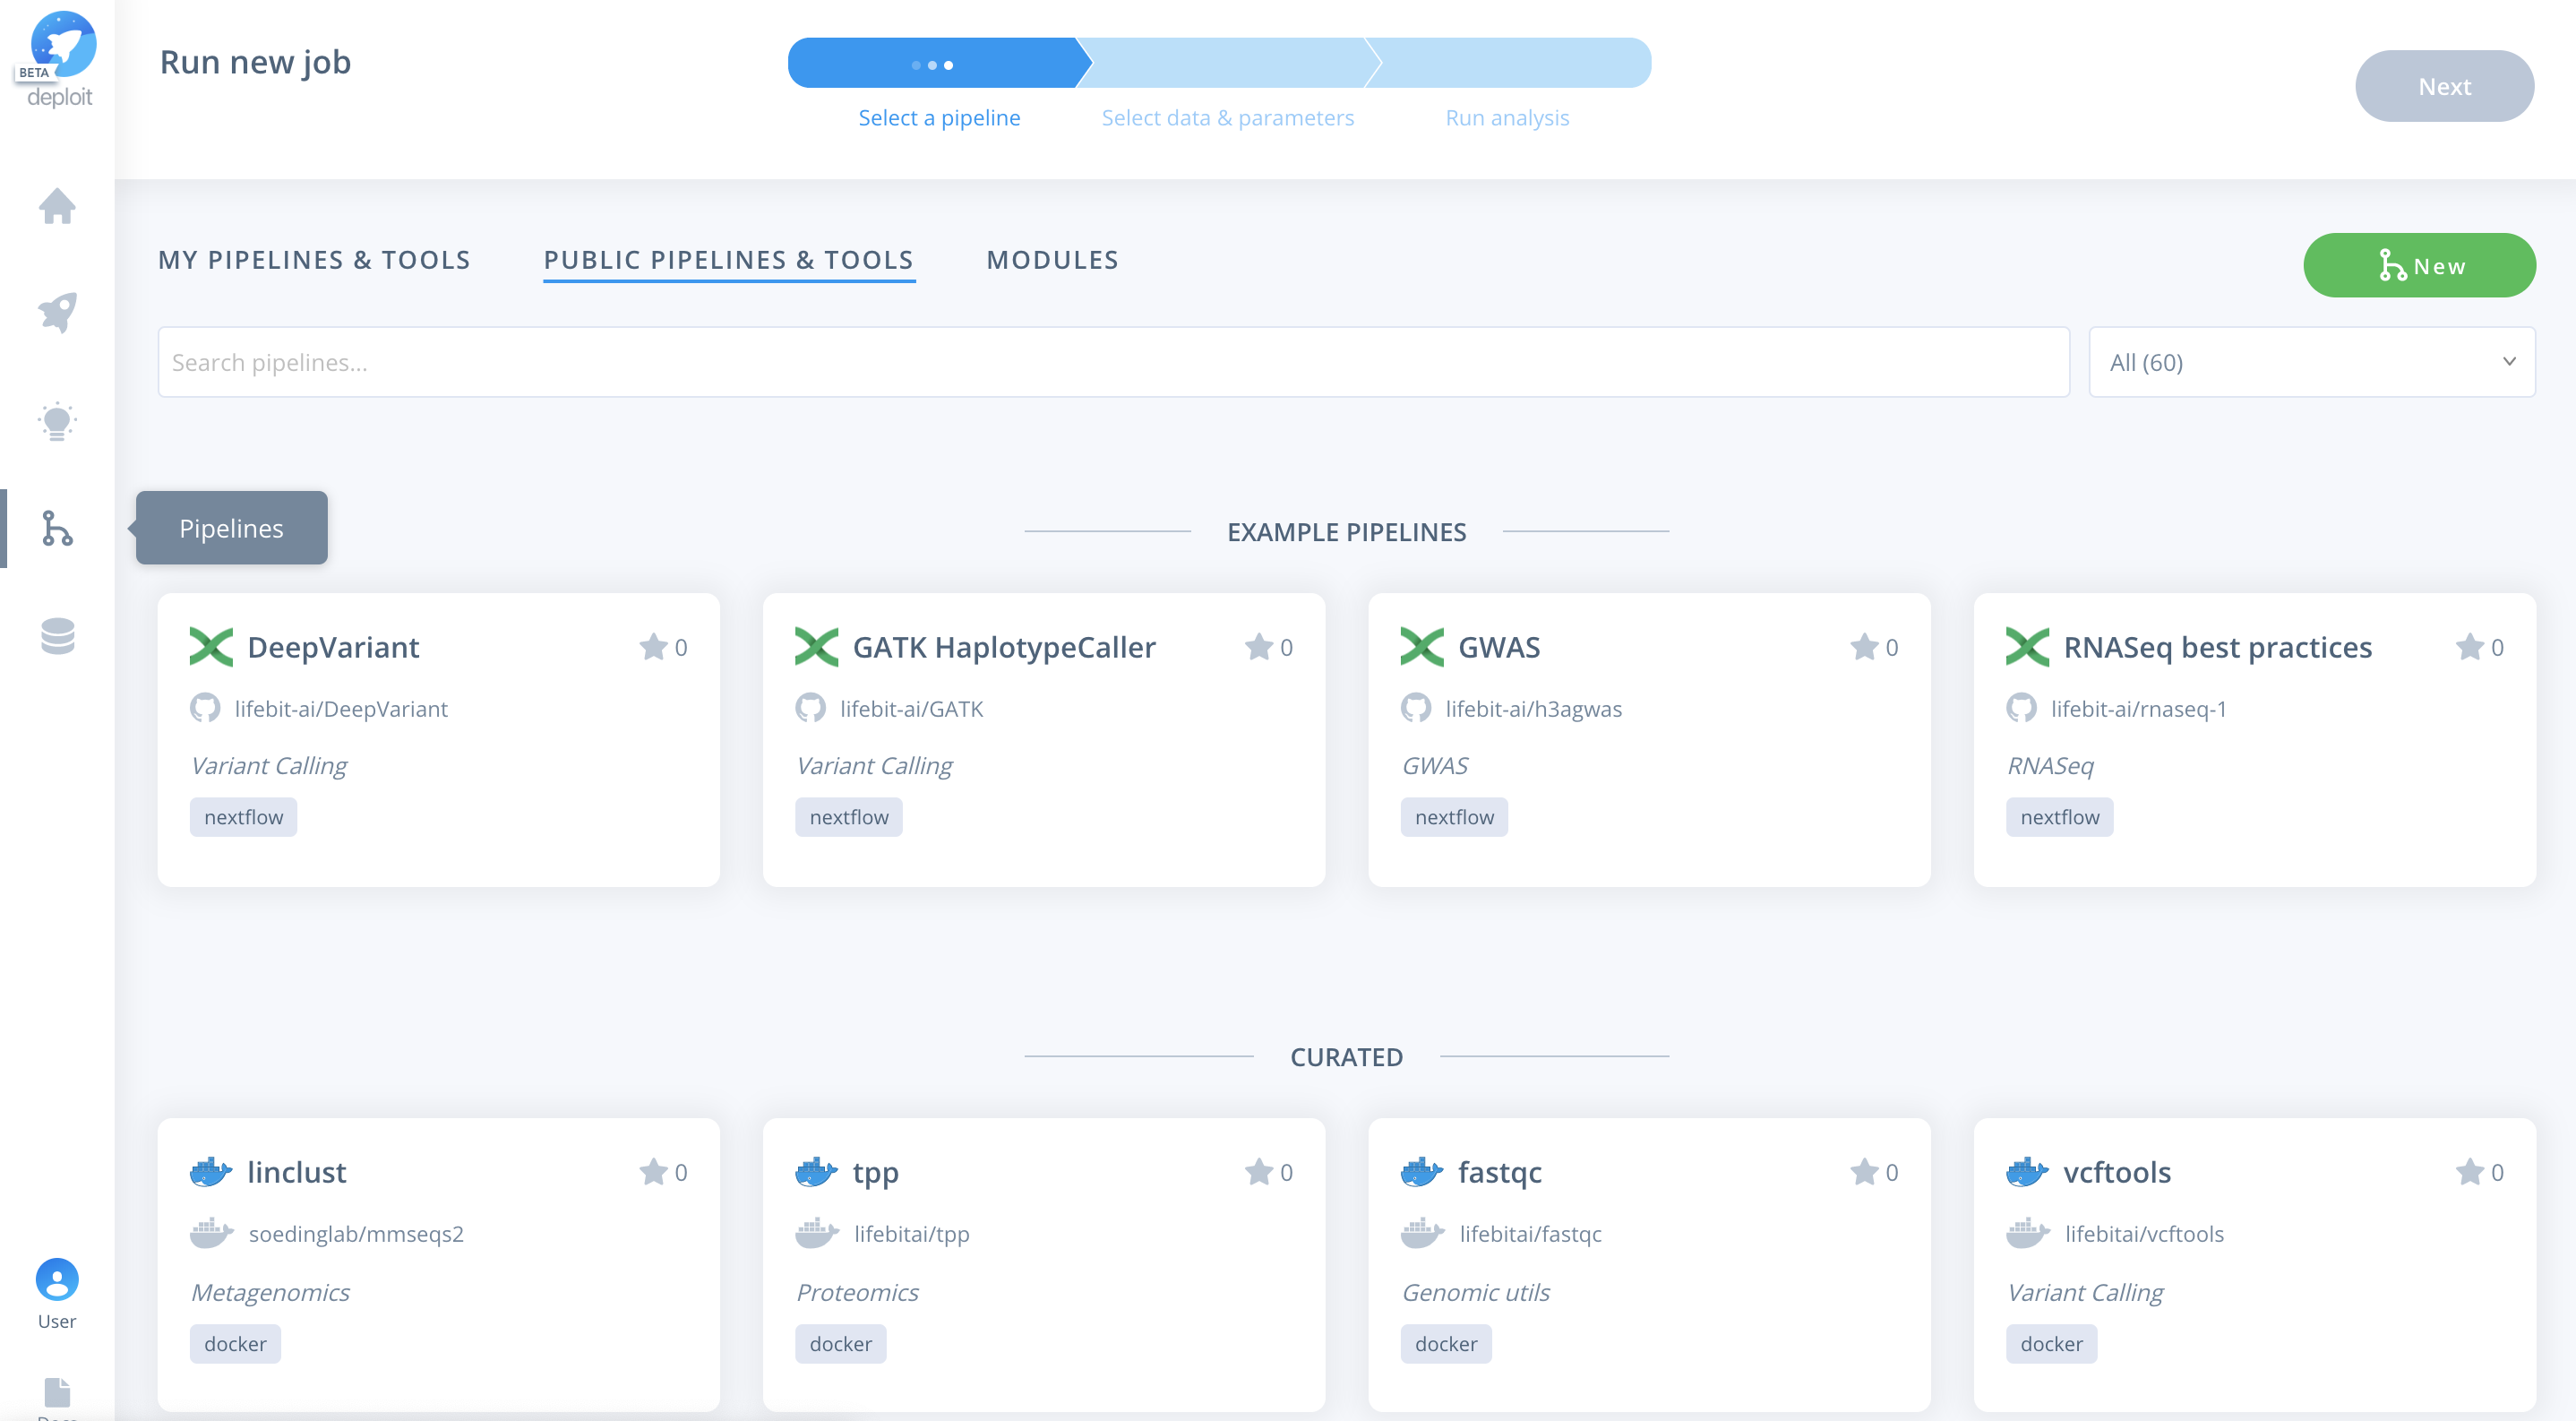
To then import the pipeline you need to:
- Click the green
Newbutton Selectthe GitHub icon to import the Nextflow pipeline from GitHub- Paste the URL of our pipeline
https://github.com/lifebit-ai/gatk-flowcraft - Name our pipeline, eg
gatk-flowcraft - (Optional:) enter a pipeline description
- Click
Next&Create pipeline🎉
Pipelines can be run in three simple steps:
- Select the pipeline
- Select data & parameters
- Run the analysis
Once the pipeline is imported it will automatically be selected.
Alternatively, you can navigate to the pipelines page. Where you can find the imported pipeline under MY PIPELINES & TOOLS. To select the pipeline you need to click the card for the pipeline.
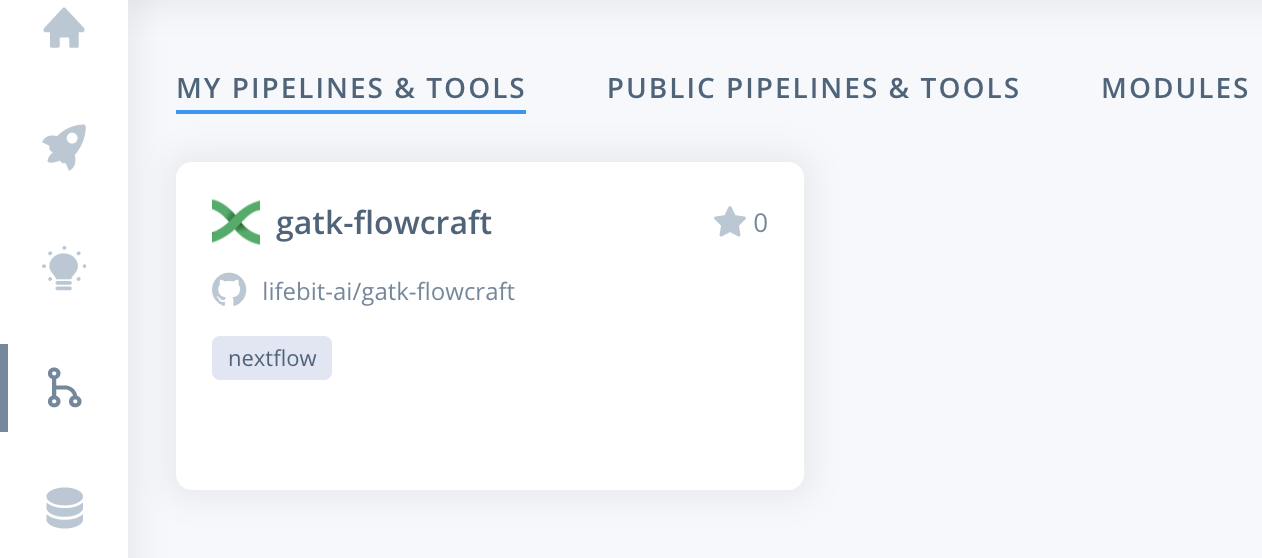
The pipeline requires three parameters to be set. These are:
fastq- paired-end reads to be analysed infastq.gzformatreference- name of reference genomefasta,fai&dictfilesintervals-interval_listfile to specify the regions to call variants in
To select the data & parameters you must:
- Click the green plus to add more lines to for two additional parameters
- Specify the parameter names for
fastq,reference&intervals - Import the testdata. This has already been added to the AWS S3 bucket
s3://lifebit-featured-datasets/hackathon/gatk-flowcraft(although you can also upload files from your local machine via the web interface) - Once the testdata has been imported you must specify the values for each parameter:
fastquse the blue plus button toChoosethe imported folder & click+Regex& type*{1,2}.fastq.gzreferenceyou can also use strings to specify the location. Set the reference tos3://ngi-igenomes/igenomes/Homo_sapiens/GATK/GRCh37/Sequence/WholeGenomeFasta/human_g1k_v37_decoy- For the intervals click the blue plus again & select the
GRCh37WholeGenome.interval_listfile within the imported folder
- Finally, click
Next
See below for all of the steps:
Select a project & instance:
Before running the job you must:
- Select the project (which is like a folder used to group multiple analyses/jobs). You can select the already created
Demoproject - Choose the instance to set the compute resources such as CPUs & memory. Here you can select
Dedicated Instances> 16 CPUs >c4.4xlarge - Finally, click
Run job
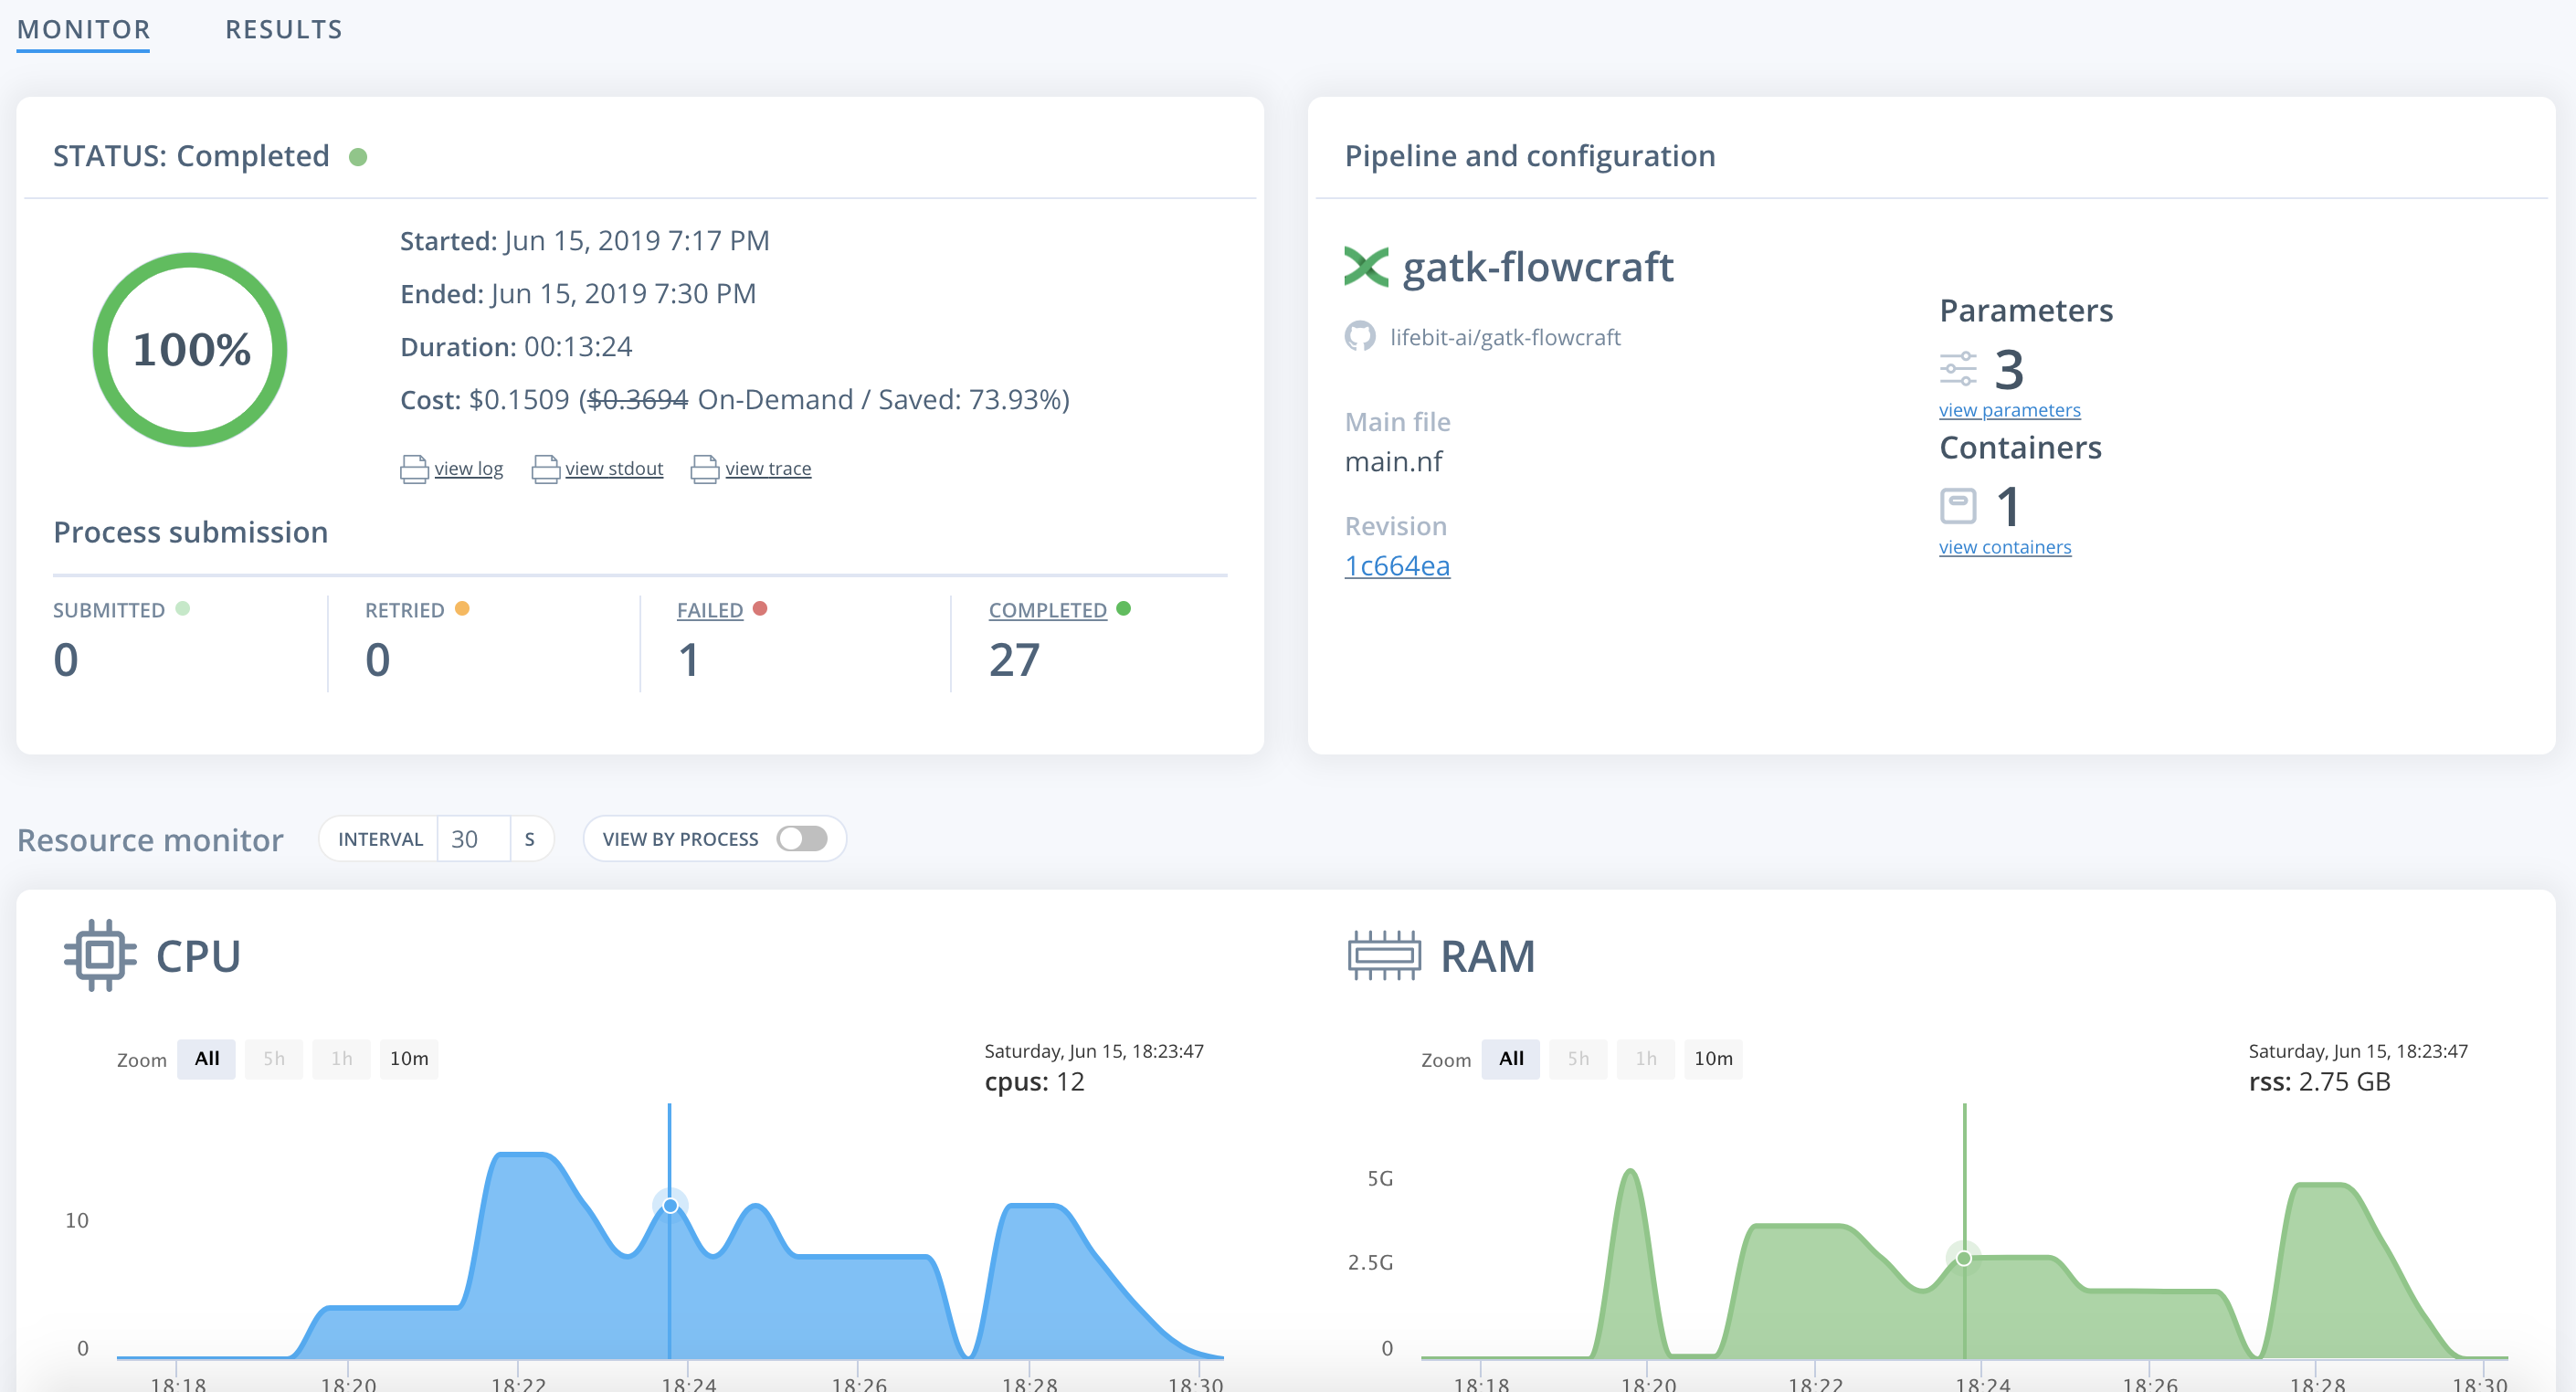
To monitor jobs you can click on the row for any given job. Immediately after running a job its status will be initialising. This is where AWS in launching the instance. This normally occurs for ~5mins before you are able to view the progress of the job.
Once on the job monitor page, you can see the progress of the job update in real time. Information such as the resources i.e. memory & CPUs is displayed. Once the job has finished the results can be found in the results tab as well as any reports for select pipelines.
You can view a successfully completed example job here:
Well done you survived! You’ve made it to the end of the hackathon tutorial. You’ve learned about the magic of Nextflow, Docker, Flowcraft & Deploit. You can now go out & analyse all the things.

Hope you enjoyed the conference & let us know if you have any feedback or questions.
Credit to Lifebit & The Francis Crick Institute for organising & hosting the event
Many thanks to everyone who helped out along the way, including (but not limited to): @ODiogoSilva, @cgpu, @clairealix, @cimendes & @pprieto
Thanks to everyone involved in the nf-hack17-tutorial which was heavily used as inspiration for this tutorial