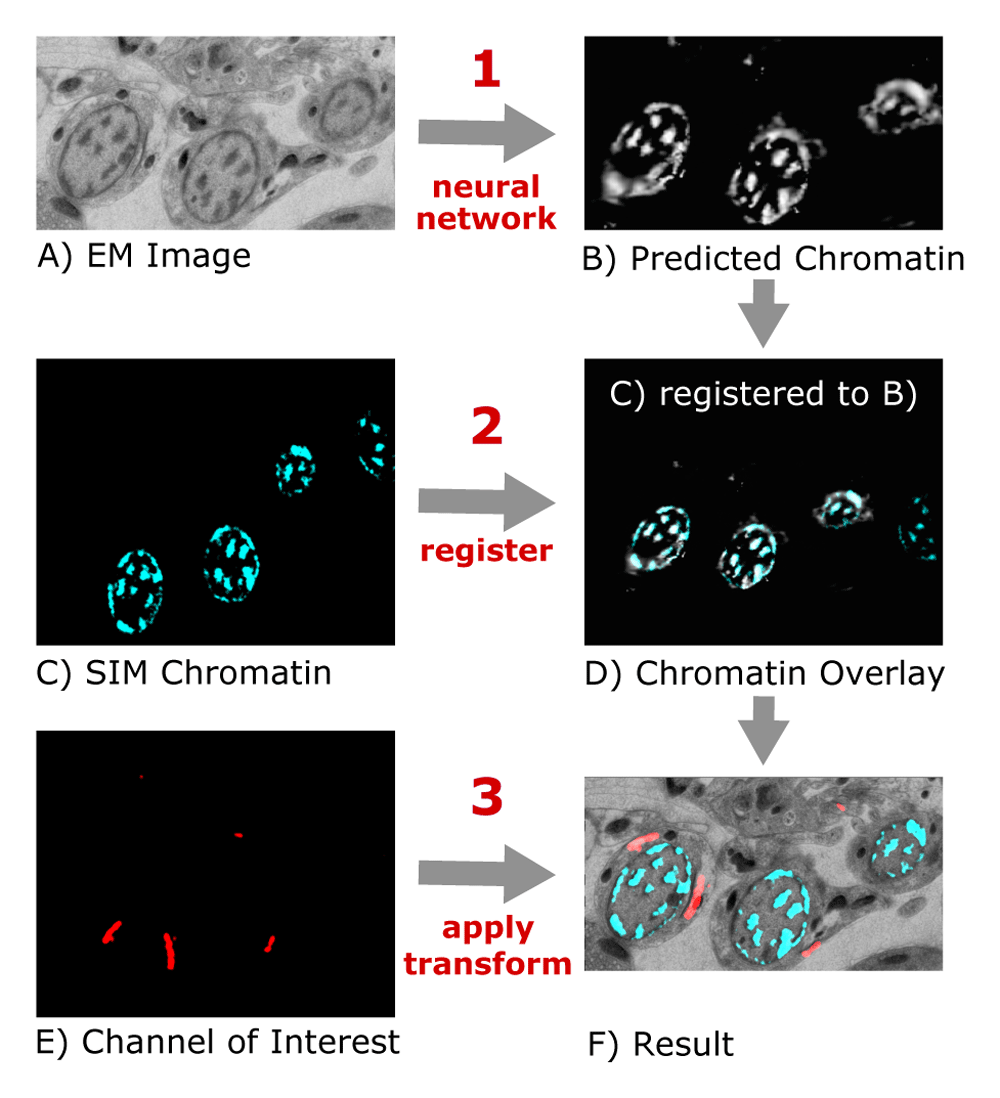
This repository contains the code and data for
Rick Seifert, Sebastian M. Markert, Sebastian Britz, Veronika Perschin, Christoph Erbacher, Christian Stigloher and Philip Kollmannsberger
F1000Research 9:1275 (2020), https://doi.org/10.12688/f1000research.27158.1
Below you find information how to install and run the Fiji plugin with the included pretrained network model, as well as instructions how to train a custom model on your own data. If you need help or have questions, feel free to open an issue or contact the corresponding author by email. For general questions related to Fiji or CSBDeep, we recommend the image.sc forum.
This work was part of the BSc thesis project of Rick Seifert in the Computational Image Analysis group at the Center for Computational and Theoretical Biology together with the Imaging Core Facility of the University of Würzburg, performed in 2019.
Please download and install Fiji following the instructions.
Please download and install the CSBDeep plugin following the instructions
git clone https://github.com/CIA-CCTB/Deep_CLEM.git
cd Deep_CLEM
- click the green button Clone or Download and then select Download ZIP
- save the ZIP file in a directory of your choice
- open the directory with an explorer and unzip the file
- open the unzipped directory
cp Deep_CLEM.py [path to Fiji]/Fiji.app/plugins/copy the file Deep_CLEM.py in your Fiji plugin folder (/Fiji.app/plugins/)
If Fiji was restarted, you should be able to find the plugin Deep_CLEM. (Plugins > Deep_CLEM)
- If you run the plugin Deep_CLEM, the following window should be visible:
- Select an electron microscopic image and corresponding light microscopic image as well as one or more light microscopic channels of interest, a working directory and a trained model. The working directory should be an empty, already existing directory and as trained network you can use the file Trained_Network.zip. After that, select Run.
- It is recommended to test at first the correlation with example images. Use as electron microscopic image EM.png, as light microscopic image Chromatin.png and as channel of interest the image Channel_of_interest.png. These images were taken by Sebastian Markert (Image Core Facility University of Wuerzburg).
-
If you use your own input images, they must fulfill the following criteria:
- The electron microscopic image should have similar contrast and resolution as the test image EM.png if you use the pretrained network included with DeepCLEM. If your EM images look very different, you can train your own model as described below.
- All image files should be either in .png or .tif format.
- The chromatin channel and the electron microscopic image need to have at least three matching nuclei for the automated registration to work. Alternatively, other stains than chromatin can be used for prediction and correlation if you train your own network model.
- As chromatin channel, a RGB image with the chromatin information in the blue channel is required. If your chromatin image is in greyscale format, you can convert it to RGB using Fiji.
- All light microscopic channels should have the same dimensions.
- Select at least one image as Channel of interest, otherwise you will be asked to select one during running the plugin.
- If you have selected show process dialog, the process window of CSBDeep will be visible.
- After a short time, (depending on your CPU/GPU), a new window will appear. This window shows you the electron microscopic and the predicted light microscopic image. Check if the predicted light microscopic image shows roughly the shape of the chromatin in the electron microscopic image and proceed with OK.
- If the plugin is ready you can see Command finished: Deep CLEM in the Status Bar.
-
Deep CLEM created several images and one xml file:

- The file transformation_LM_image.xml contains all transformations that were applied to the light microscopic images to align them to the electron microscopic images. You can use the .xml file for example with the Fiji plugin Transform Virtual Stack Slices to repeat the transformation with another image.
- Furthermore, one correlated electron microscopic image (SEM.tif) was created.
- The image Chromatin.tif contains the correlated image of the chromatin channel.
- overlay_EM_Chromatin.tif shows the chromatin image in the blue channel and the electron microscopic image in the greyscale channel.
- In addition, all selected images that present a channel of interest were correlated and saved in the working directory.
- The color channels of all created images can be split and merged with Fiji using the splitting multi channel images and merging images option.
- Install Anaconda
- Clone this repository if you haven't done this yet.
- Navigate into the directory Deep_CLEM
cd Deep_CLEM
- Install Mamba for fast dependency solving:
conda activate
conda install mamba -n base -c conda-forge
- Create a new conda environment with all requirements for the two python notebooks:
mamba env create --file DeepCLEM.yml
conda activate DeepCLEM
This environment file will install recent versions of Tensorflow, CUDA and CSBDeep and thus should work with the newest GPU hardware. The notebooks were tested under Windows 10, Linux and Mac M1 with Tensorflow 2.3.0, CUDA 11.3 and CSBDeep 0.7.4. If you encounter problems, you may have to specify these versions explicitly in the .yml file.
- For training, 60-100 correlated images are neccessary. It is possible to use images from Z-stacks.
- Electron and fluorescent microscopic images should be stored in two different folders.
- The electron and fluorescent microscopic images could be greyscale or RGB images.
- Each pair of electron and fluorescent microscopic images should be named with the same filename.
For preprocessing you have to start jupyter notebook and preprocess your images for training with the jupyter notebook load_data.ipynb. This jupyter notebook script is based on this script.
Train your network with the jupyter notebook train_network.ipynb , based on this script.


