ImageINe is an image-based sampler synthesiser that I've programmed for my bachelor's thesis. Its topic was "Exploration of a novel method of image-based sound synthesis".
(Click the following image for a short demo video on YouTube.)
The program was written in C++ using the JUCE library. While the UI could certainly use a face-lift (not my area of expertise), I'm pretty happy with the code and architecture behind it given how complex the audio modulations can be. It's available as an executable or a VST3 file for a DAW.
While I'm currently not planning on maintaining and expanding ImageINe due to lack of time and external interest, I wouldn't rule it out long-term. I still have a huge backlog of interesting, unusual and/or creative ideas lying around that would be loads of fun to implement.
First of all, if you're ever uncertain what to do in a certain mode or what certain key bindings might be, there's a help button in the top-right corner of the window that'll display a window with information on ImageINe and the mode you're currently in.
-
After starting up the program, you'll be told to load an image by clicking on the button in the center of the window. When an image has been loaded, it will be displayed in the window.
-
While in the "Drawing Regions" Mode, left-click on any point in the image to create a series of points that outline any interesting shapes in the image. Press 'o' (represents closed outline) to connect the last point to the first, finishing the outline and rendering the Region. Of course, you can also outline shapes that aren't in the image - it's up to you and whatever your creativity deems approriate.
-
Switch to the "Edit Regions" mode. You can now left-click on any of your outlined Regions, which opens up their settings window. Try not to get overwhelmed by the multitude of options - most of it is just the basic VST instrument stuff, don't worry. You can load in any audio file (e.g. wav or MP3) that you believe would fit the Region. This file will be modulated by the LFO line - that's the line running from the focus point (a point within the Region that you can set in the menu) to the outline of the Region, and whose (absolute) length determines the strength of the modulation. Each Region can modulate itself and/or any other Region, but your limited to one modulated parameter for each such modulation. There's common parameters like volume or pitch, but also more experimental ones like playback position.
-
Switch to "Play Regions". You can play a Region by left-clicking it or by sending the MIDI note associated with it (settable in the Region's menu).
-
Switch to "Draw Play Paths". As with the Regions, this allows you to mark a sequence of points in the image using left-clicks. Click 'o' to connect the last point to the first. These paths could be additional storytelling elements that you see in the image, for instance.
-
In "Edit Play Paths", you can click on a Play Path as you would on a region to open its settings menu. There's a little less going on here.
-
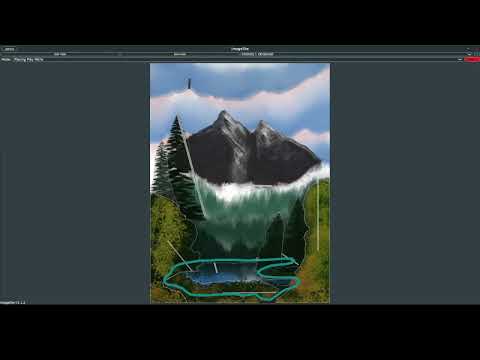
To let a Play Path play, switch to "Play Play Paths" and left-click on one. The Courier - that's the point along the path - will then complete a loop around the path over the course of the duration set in the Play Path's settings. When the Courier enters a Region, that Region will be interacted with just as it would with a mouse click or MIDI signal.
ImageINe allows you to create melodies and rhythms from Regions' outlines. (This is showcased in the first preset of the demo video.) Here's a simple walkthrough on how to do it:
-
Open ImageINe and set up at least one Region on an image of your choice. I recommend choosing something with a somewhat complex outline.
-
Open the Region's settings and add a sound to the Region. A constant tone or pluck works best in this case.
-
Set Pitch Quantisation to anything other than
Continuous. This will make it so that the Region's modulated pitch can only take on values of the selected musical scale. I recommend using a pentatonic scale, e.g. thePentatonic Majorscale, so that dissonances are less likely to occur in general use-cases. -
If you have a certain BPM in mind, you apply it by setting the Region's update rate to 60/BPM seconds. For example, 100 BPM are equal to an update rate of 0.6s (600ms). A slower update rate makes it so that the LFO line - and thus, any modulation - is updated less frequently.
-
Optional: If you want to modulate the Region's update rate for more interesting rhythms, set the Update Rate Quantisation parameter to anything other than
Continuous. Now, the modulated update rate can only take on certain fractions of the current BPM, which is equivalent to note values in this case. The default update rate is treated as a full note (1/1). -
Set the parameter that the Region modulates for itself to Pitch.
-
If you decided to modulate the update rate of the Region, now is the time to set up that modulation through one or more other Regions.
-
Play the Region (and any other Regions that modulate it). It will now play a melody where the pitch of the notes is determined by its outline!
If you're using a pluck (or any other sound that doesn't have contant loudness), you'll also want to set up a Region that resets the melody-playing Region's playback position to zero on every new note. You can do so by setting its focus point directly onto the outline, its LFO frequency to zero, and copying the melody-playing Region's update rate settings. Make sure that any Regions modulating the melody-playing Region's update rate also modulate the update rate of the resetter Region in the exact same way.