Editing the website
Watch the demo:

- Request access by following this SugarLearning item
- Accept invite once SysAdmins have approved (Tip: Ping them to speed them up)
- Go to https://app.tina.io/account/settings
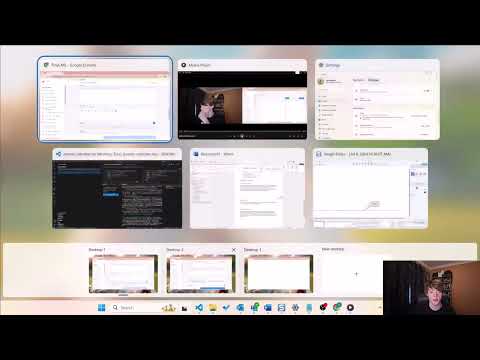
- Important - Enable
Enable co-authoring- this is so your change will have your name associated with it

Figure: Your settings should look like this
- Log into Tina
- Online
- Navigate to https://ssw.com.au/admin
- Authenticate with your Tina credentials
- Create a new branch using the branch selector in the top left corner
- Locally
- Pull latest code from
main - Follow
READMEto get site up and running - Use git to make a new branch (and push changes when done)
- Navigate to localhost:3000/admin
- Pull latest code from
- Online
- Using the left side-panel, press the hamburger menu

- Select the desired collection

- Create or edit content as required (see below)
- Go to GitHub and raise a PR (this will deploy a preview environment for you to get your changes checked)
- Get PR reviewed and merge
- Wait for changes to go live
- Press the "Create New" button within the collection

- Fill in the appropriate details for the new content you wish to make.

- Press the "Save" button once you've made your desired edits to create the new page.
- Select the desired page to edit

- From there, simple make the changes you want via the left admin side-panel. Make sure to press the "Save" button once you've made your desired edits.

Demo video: https://youtu.be/yyw82EXodcI
- Request access by following this SugarLearning item
- Accept invite once system admins have approved
- Navigate to https://ssw.com.au/admin.
- Create a new branch by opening the branch menu in the top left corner. Then, enter the name of your new branch at the bottom of the dialogue.

Figure: Opening the branch menu

Figure: The branch menu
- Then navigate to "Opportunities" on the sidebar
- Click "Create New" on the right hand side of the screen

Figure: Employment Opportunities list
- Fill out the form with the required information.

Figure: Employment Opportunity input form
- Click on "Employment Pages" in the sidebar
- Open the "index" page

Figure: The "Employment Pages" list page
- On the sidebar on the left hand side of the screen, scroll down to the "Opportunities" section

Figure: Opportunities section on the edit pane of the employment page
- Next, click the blue plus icon to the right of "Opportunities"
- This will create a "New Opportunity" object, click the edit button on the "New Opportunity" item on the list:

Figure: The "New Opportunity" object
- This will open a separate panel, editing the object. You can now select the opportunity you created in the first part.

Figure: Selection of the previously created opportunity in a list
- Click "Save", and then create a pull request
We are using JotForm to render the sign up form and capture form submissions.
These submissions are added to our mailing list by a Power Automate flow.
- Visit and sign in with credentials from Keeper
- Select "SSW Newsletter signup form" and "Edit"
-
You can make simple changes to text and colors on the Build page:
 Figure: Build mode of the form
 -
More in depth changes + injecting CSS can be done via "Advanced Designer":
 Figure: Advanced Designer mode of the form
 -
Changes are automatically saved and affect the live version of this form as you work with it so pay attention whilst making changes. Previous changes are tracked and can be reverted to if required by clicking the circle-arrow next to the save information:
 Figure: Revisions being tracked
 -
Explore more options using the "Settings" and "Publish" tabs:
 Figure: Various settings of the form
We've moved all of the events from our SharePoint list to Tina. The Therefore the editing workflow for adding new events and editing old ones looks different now.
(2m:24s)
- go to ssw.com.au/admin | Events - Calendar

-
Click on the year that you would like to add an event, then click "Add Files". Note: For new events this will be the current year.

-
Fill out all of the relevant fields (See the table below for details on each field). Once you've finished editing the event click "Save".
Note: The livestream URL is generally filled out by the TV team.
- (Optional) - Go to github.com/SSWConsulting/SSW.Website/pulls | [branch you created]. Wait for the staging url to appear at the bottom of the page, and then

- Once you're happy with the changes you've made, get your pull request merged and the new event should go live.
| Field | Description |
|---|---|
| Title | what will appear on the events page |
| URL | where people can go to find out more information about events. (e.g. meetup, ssw.com.au/netug/sydney for user groups in sydney) |
| Thumbnail | The thumbnail that will be shown on ssw.com.au/events |
| Presenter Name | The name of the main presenter for the event |
| Presenter profile URL | |
| Start Date/Time | The start time for the event as shown in the banner at the top of the page |
| End Date/Time | When the event finishes, usually later the same day |
| Website - Show livestream banner start time | The time when the livestream banner will show |
| Website - Show livestream banner end time | When the live stream banner will disappear |
| Event type | The type of event. Can be used to filter the event on ssw.com.au/events |
| City | Where the event is being hosted |
| Category | The main topic of the event |
| Abstract | A short description of the event that will be shown on the user group page |
| Description | A brief description of the event. Will appear on ssw.com.au/events |
| Presenters | a list of presenters for the event, including the main presenter. To add more presenters that aren't in the list go Events - Presenters | Add Files. Please note that for user groups the presenter must have the Torso Image filled out in Tina. |
| Youtube ID | The ID of the Youtube livestream. Leave this blank if the event is not a livestream. This is filled out by the TV Team close to the event starting |
| Delayed Livestream Start | whether or not the livestream starts immediately at the scheduled time. Will affet how the livestream banner shows the start time |
| Live Stream Delay | How long the TV team will play the user group prommo trailer before the livestream. |
| Trailer Video - URL | A link to the promo video for the event. This is mostly used for User Groups. |
| Hosted at SSW | Determines how the event will appear on the events page. If this is ticked the location link on events will appear as "SSW Chapel [City]" |
| Show on SSW Website | Determines whether the event will be shown on the website |
| Internal Note | A note that will only be read in the Tina view. |
-
Navigate to https://ssw.com.au/admin.
-
Open the branch selector window in the top-left hand corner.
 Figure: open the branch selector
- Create a new branch in the branch selector. It may take about 30 seconds to index the new branch after you create it. Once it has completed indexing, select the branch you created from the list.
 Figure: Creating a new branch in the branch selector
- Click the sidebar icon on the left hand side of the screen, then navigate to "Newsletters".
 **Figure: The "Newsletters" collection on the sidebar list
- Select the current year from the list of newsletters.
 Figure: Selecting the current year from the list
-
Click the "Create New" button in the top right of the "Newsletters" section.
-
Select the "New newsletter" item in the list.
 Figure: creating a new newsletter item
-
Enter the month number, and then upload the HTML file.
-
Upload any corresponding images in the images field using the TinaCMS Media Manager folder and fill out the description field.
-
Click "Save", and then create a pull request
 **Figure: adding the newsletter files + information"
- Done - your changes will then be reflected on the site!
-
Navigate to https://github.com/SSWConsulting/SSW.Website/pulls.
-
Now, click "New Pull Request"

Figure: Create a new pull request
- Select the "compare: main" button on the right hand side of the arrow. Then, select the branch you created using TinaCMS.

Figure: Select your branch from the list and create the PR
- Now, select "Create pull request", and request a reviewer for the PR. Once the PR has been approved, it will be merged into the GitHub repo, and your changes should show up on the website.
-
Navigate to ssw.com.au/admin and follow the standard TinaCMS branching workflow stated above (steps underneath Creating/Editing content on the website).
-
Click the home icon in the upper left corner of the page.
 Figure: the home icon to navigate to the list of data used on the page
- Select
content/megamenu/menu.jsonfrom the list.
 Figure: the list of data that is used on the page
- Now, you can edit items on the menu and see them instantly reflected on the page.