Ready-to-use Node.JS Content Moderation Admin App with an implemented REST API and Automation Endgine.
Тhe reality that there are approximately 4.54 billion internet users(June 2020) worldwide generating an unprecedented quantity of content only increases the urge of finding an approach for optimizing content moderation. And this task is getting heavier by the facts that the number of active users is constantly steeping, content volumes also grow exponentially, Machine Learning and AI can be very pricey and manual moderation is very time-consuming and delayed in time.
So now we're at a point where any platform that allows user-generated content is facing a similar problem. Luckily, Machine learning has already matured to the point where advances in computer processing power, storage, data tools, web, etc made machine learning technologies to become more and more affordable. This and the constant strive for innovation, led SashiDo's team to create this simple and elegant fully-functional Content Moderation Service built with only Open-Source tools and libraries. It consists of three main components - Image Classification Rest API, Automation Engine and Admin Panel, which can be integrated separately or altogether into any Parse Server Node.JS project and hosted anywhere.
A simple illustartion of our desktop and mobile-friendly Admin Panel. Check the full demo here.

The images displayed for approval at the Admin App are the ones that are flagged for manual moderation from the Automation Engine based on your specific criteria.

Here are some examples of how pictures from specific classes are classified by the REST API.
| Image Source | Image Source | Image Source |
|---|---|---|

|

|

|
| Classification Result | Classification Result | Classification Result |
[{
  "className": "Neutral",
  "probability": 0.93821
}, {
  "className": "Drawing",
  "probability": 0.05473
}, {
  "className": "Sexy",
  "probability": 0.00532
}, {
  "className": "Hentai",
  "probability": 0.00087
}, {
  "className": "Porn",
  "probability": 0.00085
}]
|
[{
  "className": "Sexy",
  "probability": 0.99394
}, {
  "className": "Neutral",
  "probability": 0.00432
}, {
  "className": "Porn",
  "probability": 0.00164
}, {
  "className": "Drawing",
  "probability": 0.00006
}, {
  "className": "Hentai",
  "probability": 0.00001
}]
|
[{
  "className": "Drawing",
  "probability": 0.96063
}, {
  "className": "Neutral",
  "probability": 0.03902
}, {
  "className": "Hentai",
  "probability": 0.00032
}, {
  "className": "Sexy",
  "probability": 0.00001
}, {
  "className": "Porn",
  "probability": 0.00005
}]
|
| Neutral Demo | Sexy Demo | Drawing Demo |
This service is built in Node.JS with Mongo DB and Parse Server. You can use it in a standard Express app, but keep in mind that the file structure of the repo is Parse specific. The code is organized in a src folder and src/cloud/main.js is the root file for the service. React vizualization logic lays respectively into the scr/react folder.
The REST API works with NSFW.JS classification, which uses Tensorflow pre-trained models. Given an URL, it returns predictions how likely the image falls into each of the classes - Drawing, Neutral, Sexy, Porn and Hentai. More details on the logic behind and stack used you can find in this blog post.
The API offers two approaches for classifying images - from an Express route or directly from a Cloud Code function using any of the Parse SDKs or the Parse REST API.
-
Classify from the Express endpoint
curl http://localhost:1337/api/image/classify?url=https://nsfw-demo.sashido.io/sexy.png -
Classify from a nsfwImageClassify Cloud Code function - REST API Example.
curl -X POST \
  -H "X-Parse-Application-Id: myAppId" \
  -H "X-Parse-REST-API-Key: myRestApiKey" \
  --data-urlencode "{\"url\":\"https://nsfw-demo.sashido.io/sexy.png\"}" \
  http://localhost:1337/functions/nsfwImageClassify
The Automation Engine's purpose is to check how the classification of a certain image corresponds to the parameters you’ve set as safe for your project. The process is automated with a Parse Server afterSave trigger.
In the beginning, it is essential to define which of the five NSFW classes and values can contain toxic pictures and which are safe. All classes that might be disturbing for your audience should be included in the moderation preferences.
To illustrate what's the idea and setup, let's imagine we need to set the criteria for adult's dating app. As any dating app, users have a profile pic and are allowed to upload different photos. We can assume the type of photos should be mainly Neutral...and maybe some sexy pics will be also allowed. So we will add all other classes to our moderation preferences. Something like:
{
  "Sexy": { "min": 0.6, "max": 1 },
  "Drawing": { "min": 0.5, "max": 0.8 },
  "Porn": { "min": 0.4, "max": 0.8 },
  "Hentai": { "min": 0.2, "max": 0.8 }
}
The Automation Engine will auto-reject all images that are classified above the max limit set in our preferences and approve all that are below the min value.
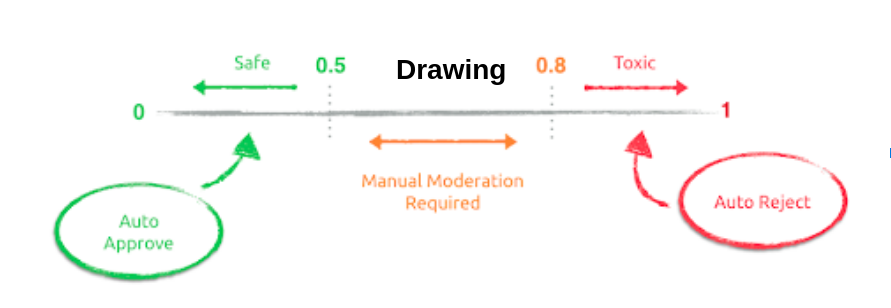
More details on how to fine-tune the parameters for your project you can find in the article here.
The moderation preferences will be saved into a moderationScores config parameter for the production application, as that will allow you to modify them on the fly if needed.
An afterSave trigger is hooked to the user-generated collection automatically checks newly uploaded photos and marks them as either safe, deleted or for moderation. The afterSafe contains logic for matching how the API classification of an image corresponds to the moderation preferences defined. Based on all data passed, the decision is made and the result is saved to your database.
To keep a neat record of the REST API predictions and Automation Engine results, you will need to add a few columns to your Database collection that holds user-generated content.
You should add the following columns to the UserImageCollection
- isSafe(Boolean) - If an image is below the
minvalue of your moderation preferences, it’s markedisSafe - true. - deleted(Boolean) - Likewise, the Automation Engine will mark the inappropriate pictures, as
deleted - true. Those pictures won’t be automatically deleted from the file storage. - moderationRequired(Boolean) - Those are loaded in the Admin Panel for manual moderation.
- NSFWPrediction(Array) - Stores the NSFW predictions as json for this image.
The afterSave fires automatically, but we've added an additional API endpoint, in case you need to check manualy if an image is toxic for your audience.
curl http://YOUR_PARSE_SERVER_URL/api/image/is_safe?url=https://nsfw-demo.sashido.io/sexy.png
The final touch is a plain ReactJS-based Admin Application. It has a simple login/logout feature and only approved moderators are granted access.
The pictures that are flagged by the Automation Engine as moderationRequired=true are displayed into the app. We've made sure to build both desktop and mobile-friendly user interface, so you can approve or reject images easily even from your phone while travelling.
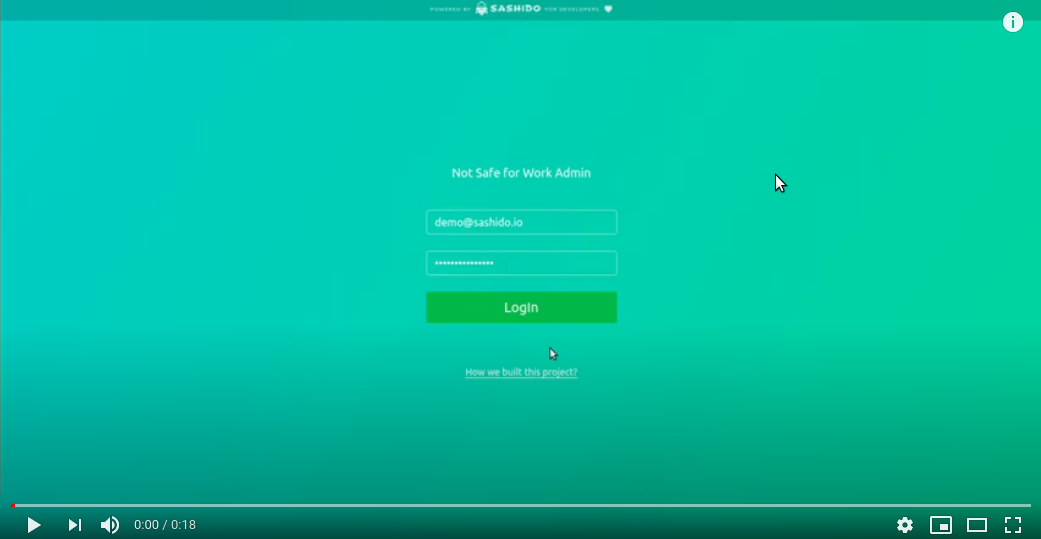
Test by yourself playing around with the images at our demo!
-
Node.JS >= 10.2.1
-
Mongo DB
-
Parse Server
Clone the repo:
git clone https://github.com/SashiDo/content-moderation-application.git
cd content-moderation-application
Copy the env.example to .env file and set the environment variables for your local environment with your favorite editor:
cp env.example .env
Place your MongoDB URI and files URL. If your app is hosted at SashiDo, you can use the credentials of your SashiDo project. You can find all keys and URLS at app's Dashboard -> App Settings.
NB! To load images that require manual moderation into the Admin application locally, you will need to place also the actual APP_ID!
As this is a full-featured example, all dependencies are present to the package.json. You only need to run:
npm install
npm run dev
Set the following Parse.Configs for your production server.
-
moderationScores object should be saved as a Parse.Config, so preferences can be updated on the fly.
-
moderationAutomation option of boolean type that allows enabling/disabling content moderation automation.
For production, you need to set the NSFW model URL, NSFW Model Shape size and variable for Automation Configs caching.
- SashiDo stores three NSFW models, each one you can set easily using the following URLs:
| Model URL | Size | Shape Size | Accuracy |
|---|---|---|---|
| https://ml.files-sashido.cloud/models/nsfw_inception_v3/ | Huge | 299 | 93% |
| https://ml.files-sashido.cloud/models/nsfw_mobilenet_v2/90/ | 2.6 MB | 224 | 90% |
| https://ml.files-sashido.cloud/models/nsfw_mobilenet_v2/93/ | 4.2 MB | 224 | 93% |
Please note the Inception_v3 model used for this projects has high RAM/CPU consumption. While the two mobilenet models are far more lightweight.
TF_MODEL_URL =  MODEL_URL
TF_MODEL_INPUT_SHAPE_SIZE = MODEL_SHAPE_SIZE
CONFIG_CACHE_MS = CONFIG_CAHE_IN_MILISECONDS

# Example
TF_MODEL_URL = "https://ml.files-sashido.cloud/models/nsfw_mobilenet_v2/93/"
TF_MODEL_INPUT_SHAPE_SIZE = 224
CONFIG_CACHE_MS = 10000- In SashiDo - This is probably the simplest way to deploy the code in production. At SashiDo we have implemented an automatic git deployment process following The Twelve-Factor App principle.
Connect your SashiDo app with GitHub and next the code can be easily deployed with two simple commands for adding a remote branch and pushing changes.
git remote add production git@github.com:parsegroundapps/<your-pg-app-your-app-repo>.git
git push -f production master
- On other providers - Basically, you need to follow the same steps as for SashiDo Deployment. Simply follow the requirements of your hosting provider when setting environment variables for production and deploying the code
Thanks for looking at this section. We’re open to any cool ideas, so if you have one and are willing to share - fork the repo, apply changes and open a pull request. :)
Copyright © 2020, CloudStrap AD. See LICENSE for further details.