experiments.alpha.arduino
mcphysics.experiments.alpha.arduino provides a scriptable graphical user interface for the Arduinos connected to the alpha decay experiments. To create an instance:
import mcphysics
a = mcphysics.experiments.alpha.arduino()
This should pop up a window that looks something like this:
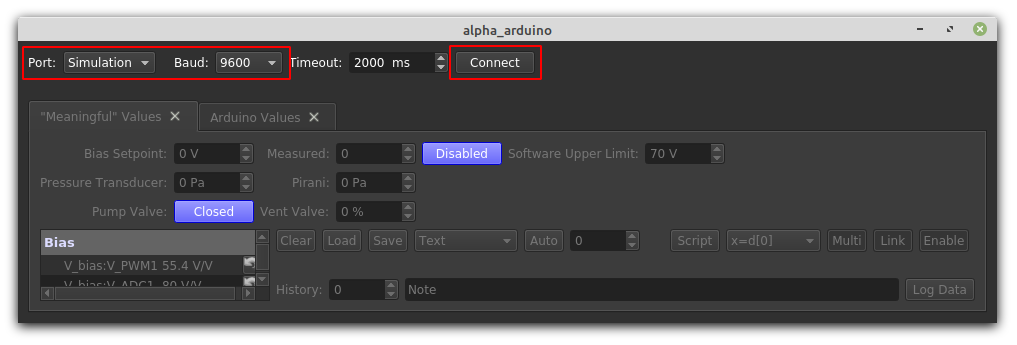
If the Arduino is connected to the computer, it should appear in the "Port" combo box. We have configured them to communicate over this port with a baud rate of 9600. Make sure this matches and click "Connect". The lower part of the window will enable, and it will start streaming the state of the valves, pressure gauges, and bias:
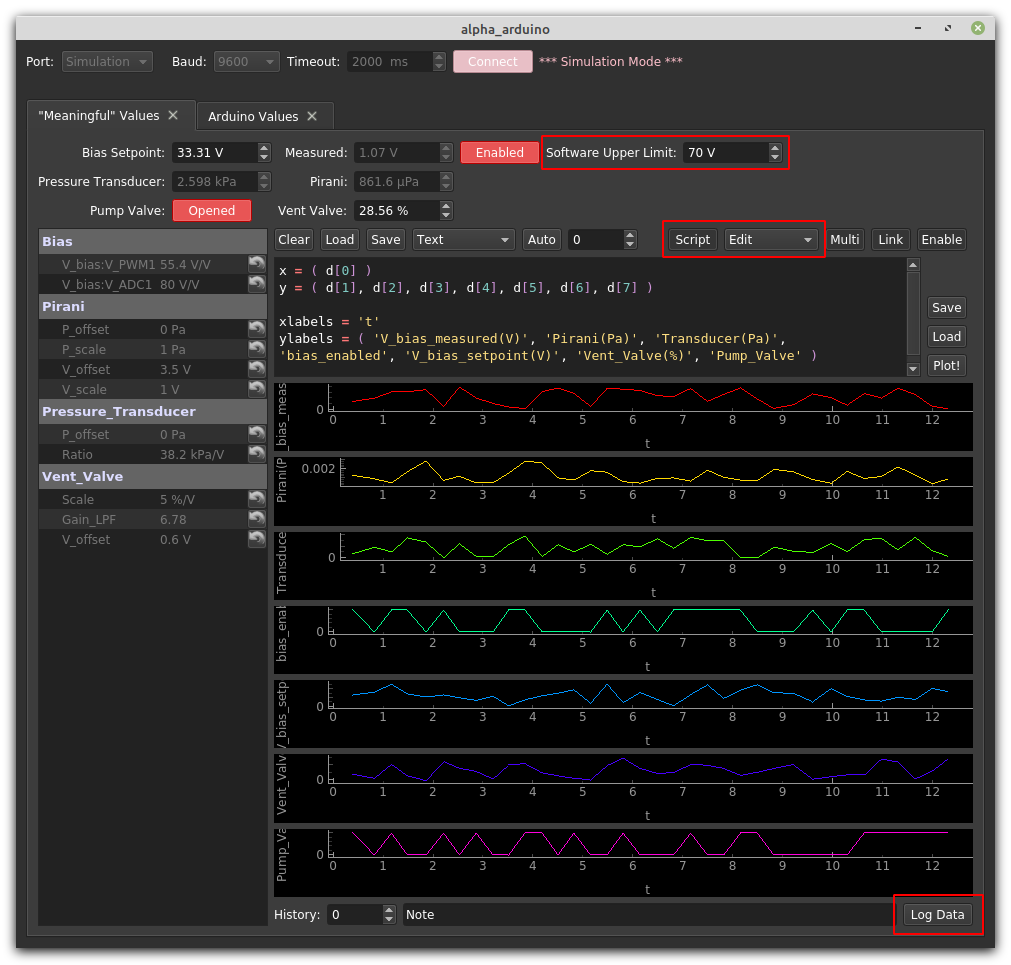
There are two tabs. First, a "Meaningful Values" tab showing nominal measured and set values of the bias, pressure sensors, and valves. These are converted from the raw voltages measured by the Arduino using the settings list on the left of the window. You can learn about each of these by hovering your mouse over them, but here are a few important features:
-
The "Software Upper Limit" on the bias (red box) prevents the number in the "Bias Setpoint" box from exceeding the shown value. You can (in some cases should) increase it, but please triple-check that you will not damage the detector by doing so.
-
You will probably want to adjust the data that is plotted. You can do this by clicking the "Script" button, and selecting "Edit" as shown in the red box. Within this script,
dis the (Databox Plotter)[https://github.com/Spinmob/spinmob/wiki/6.-Easy-GUI-Generator-(egg)#databox-plotter] instance, and you just need to definex,y, and the label variables as shown. More information about this can be found (here)[https://github.com/Spinmob/spinmob/wiki/6.-Easy-GUI-Generator-(egg)#databox-plotter]. -
You can log the incoming data to a file using the "Log Data" button. When clicked, this will prompt you for an output file, write everything that is currently shown to that file, and then start appending incoming data points after that.
The "Arduino Values" tab reports the nominal voltages at the Arduino, and can be used for troubleshooting.
All actions you can manually perform with this interface can be scripted. For example, to set the vent valve to 37%:
a.number_vent_valve_setpoint.set_value(37) # Shorthand: a.number_vent_valve_setpoint(37)Or to read the currently-displayed pirani value:
a.number_pressure_pirani.get_value() # Shorthand: a.number_pressure_pirani()To open the vacuum valve:
a.button_pump_valve.set_checked(True) # Shorthand: a.button_pump_valve(True)The conversion settings reside in the (Tree Dictionary)[https://github.com/Spinmob/spinmob/wiki/6.-Easy-GUI-Generator-(egg)#tree-dictionaries] a.settings. You should be able to find every control using code completion, and to help navigate, all number boxes start with number_, all buttons start with button_, and so on.