FAQ
How to update the widget without losing my configuration settings
Before you begin, take a look at the changelog for the new version here.
You can get the updated code as follows:
- Download here the version that you need
- Download it from the main page -> click Code -> click Download ZIP
Important! The widget version must not be higher than the app backend version.
-
Obtain the
threadswidget-6.6.0.min.jsfile and place it in the same directory where the previous chat version was located (it can be the root folder of the site/the site catalog). -
In the
settings.jsonconfiguration file, change thefilenamevalue – the difference will only be in the widget version specified in the name.For example:
The previous value was as follows:
"filename": "../../threadswidget-3.28.0.min.js",
You have downloaded the 6.6.0 version of the widget, so you change the value as follows:
"filename": "../../threadswidget-6.6.0.min.js",
In some cases, if specified in release notes, you need to update the widget initialization code. The code is available in the documentation: the Widget code section in the Widget installation article.
How to manage permissions for sending files by clients
-
To disable clients' ability to add attachments to messages, change the
buttonsPlacementsetting of theChatInputcomponent by removing the"attach"element from the list of buttons.For example:
The previous value of the
buttonsPlacementsetting was as follows:"buttonsPlacement": [ ["emoji"], ["attach", "send"] ]
To disable the attachment button, remove the
"attach"element:"buttonsPlacement": [ ["emoji"], ["send"] ]
-
To prohibit clients attaching specific types of files and/or to change the maximum allowed size of the files that can be attached, please contact the support team for their assistance with the configuration.
What are WebPush notifications and how to check their work
Using WebPush notifications for the web chat helps you expand the possibilities of communication with your clients. This technology delivers messages to the client even if the tab with the widget is not opened.
For WebPush, service worker (sw) is used. service worker is a script that the browser runs in the background, separate from the page.
You can find the how-to on the WebPush configuration and getting the service worker script in the Getting started article.
To check WebPush notifications, do the following:
-
Log into the agent WP and switch to the Active status (you get your credentials from your account manager).
-
In another browser, load the page with the widget and send a message in it. You will see this message in the agent WP.
-
Close the page with the widget, but leave the browser running.
-
Reply to the message in the agent WP.
In the browser, you will receive a web notification about a new message from the agent.
How to embed the widget into the authorized zone of the website (for example, dashboard, online bank)
In the authorized zone of the website, you can pass an identifier that is unique for each user to the chat. This is required to create the "client in WP"-"website user" connection.
Such a user's session can access the chat history on any tab where the website with the chat is opened within the authorized zone. For more details, refer to the Widget installation article.
How to change the image of the chat's standard start button
You can change the standard image ("cloud") to your own one that matches your website better. To do this:
- Code the required image in the base64 format using any online service.
- In the
themesection of thesettings.jsonconfiguration file, configure theChatButtonparameter. - In the "backgroundImage" value, specify the link to the required image in the base64 format.
- If necessary, adjust the sizes of the image and the button, their backgrounds and indents.
For example:
"theme": {
    "desktop": {
        "ChatButton": {
        "backgroundImage": "data:image/jpeg;base64...."
        "backgroundColor": "#61298a",
        "backgroundSize": "80%",
        "width": "100px",
        "height": "100px",
        "right": "20px",
        "bottom": "72px",
        "borderRadius": "50%",
        "boxShadow": "0 4px 25px 0px rgba(0,0,0,.5)"
        }
    }
},| Default state | State after |
|---|---|
 |
 |
How to create your own chat button
You can use a custom button to open/hide the chat instead of the standard start button. To switch the chat to the mode without the standard start button, set the isContainerHidden parameter in the settings.json configuration file to true. To see the example of the file, go here.
When using a custom button, you need to ensure the implementation of standard business cases for the chat users. To do this, ensure that these methods are called by embedding them in the code of your site page.
A required script is as follows:
- Open the widget (the container with the chat) when a user clicks the custom button. The
ThreadsWidget.showChat()method is used.
Optional scripts (use them if you want to apply these features)
- Show the number of messages unread by the client on your button. The
ThreadsWidget.on(event, callback)method allows you to subscribe to thechangeUnreadCounterevent. When the even occurs, thecallbackfunction receives the number of messages that the client hasn't read yet. You can display the resulting number on your button. - Hide the button if the widget display rules are configured in the admin WP of the chat platform (for example, during the contact center's non-working hours or for any other reason). The
ThreadsWidget.on(event, callback)method allows you to subscribe to thechangeOperationModeevent. When the event occurs, parameters on the reason why that chat has become unavailable will be passed to thecallbackfunction. You can use these parameters to hide the chat button or to warn the client. - Forcibly hide the chat at any moment. The
ThreadsWidget.hideChat()method is used.
See additional descriptions of the API methods in the Methods and properties of API article.
See the examples of embedding the methods in the code in the example.html file here.
How to change the widget localization and customize your texts
You manage the language localizations in the settings.json configuration file using the locale and locales parameters.
Specify the preferred locale in the locale parameter.
You can configure tests in settings.json as well. To do this, specify the following in the locales parameter:
- The label key
- The language code
- The value for this language
See the example of the file here.
For more details on localization processes, refer to the Setting up language localization article.
How to set up advanced widget theming
You specify the widget theme in the theme section of the settings.json file.
See the example of the theme configuration for individual chat components here. In the example, the following settings are shown:
- Size of the chat area
- Chat's background color
- Theme of clients' and agents' messages
- Notification that the agent is typing a message
All themes with components available for configuration are described in the Theme settings article.
How to install the widget via npm or yarn
The repository contains the package.json file, which allows using the chat widget as a Node.js module.
-
To install the chat widget by the rpm package manager, use the following command:
npm i git+https://github.com/ThreadsMobileLib/edna-sdk-web.git -
To install the chat widget by the yarn package manager, use the following command:
yarn add git+https://github.com/ThreadsMobileLib/edna-sdk-web.git
How to install the chat code via Google Tag Manager
Note that any issues with Google Tag Manager also effect the chat widget operation. If you have the ability to directly insert code into your website, then it is better to use it.
To install the chat widget on your website via Google Tag Manager, you need to complete the steps similar to the ones described in the Getting started article, except that the initialization code will be placed not on the page, but on the GTM platform.
-
Before you begin, make sure the Google Tag Manager code is installed on the website where you want to place the chat widget.
-
Complete the steps described in Getting started up to step 9.
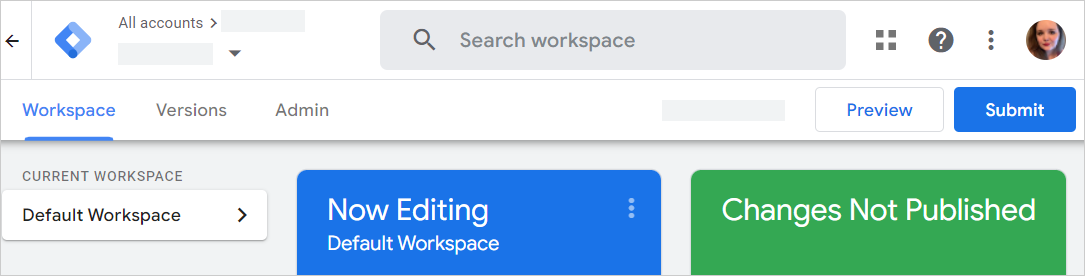
-
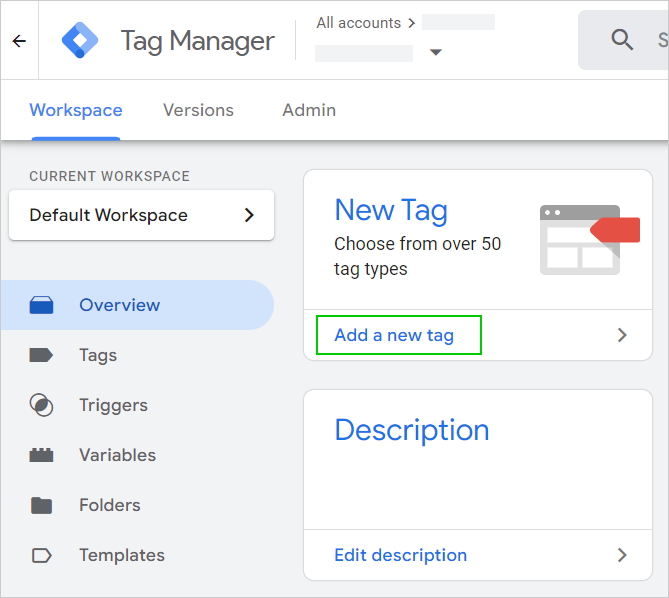
Open Google Tag Manager and go to Workspace -> Overview -> Add a new tag.
-
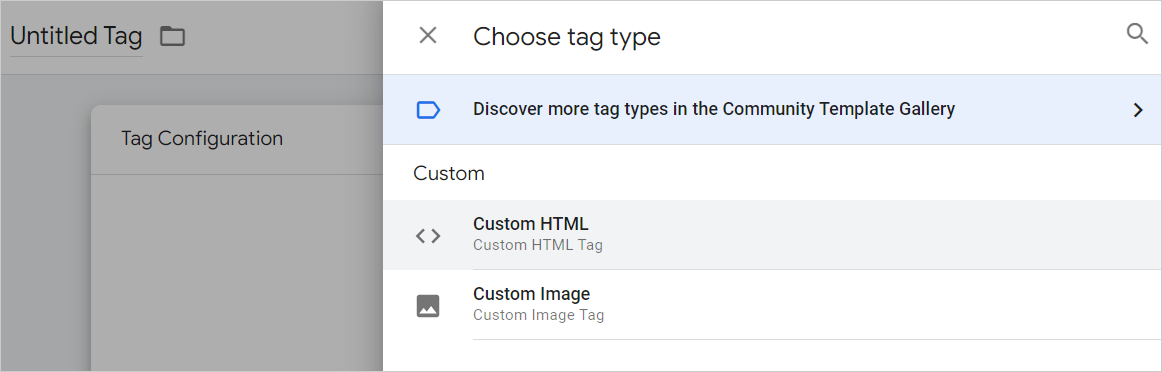
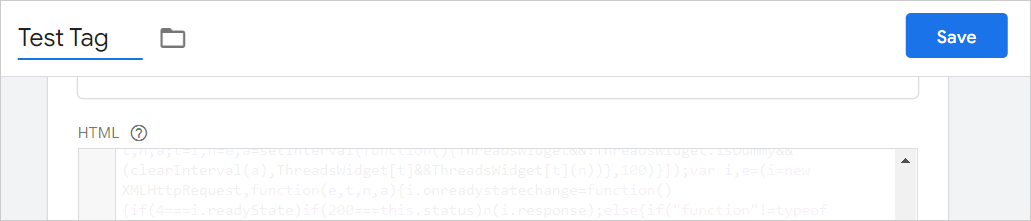
Click Add a new tag -> Tag Configuration and select Custom HTML.
-
Copy the widget initialization code from the Getting started page and insert it into the HTML field.
-
At the end of the initialization script, specify the path to the
settings.jsonconfiguration file. Make sure to set the absolute path to the file from the root of your site as the value of the parameter. For more details, refer to the Getting started article. -
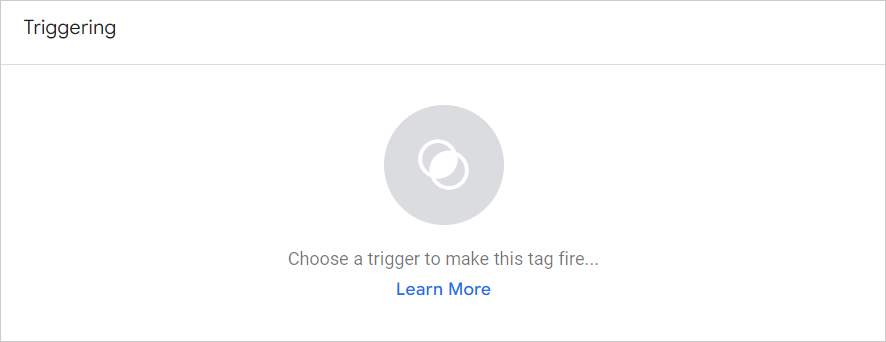
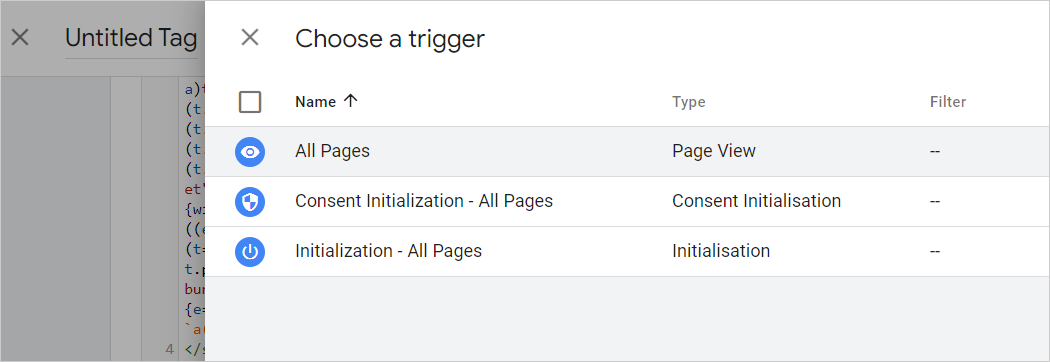
Scroll down and click anywhere in the Triggering section to select a trigger to activate the tag on your website.
-
Select the All pages trigger and leave the rest of the default settings.
-
Click Save and enter the tag name.
-
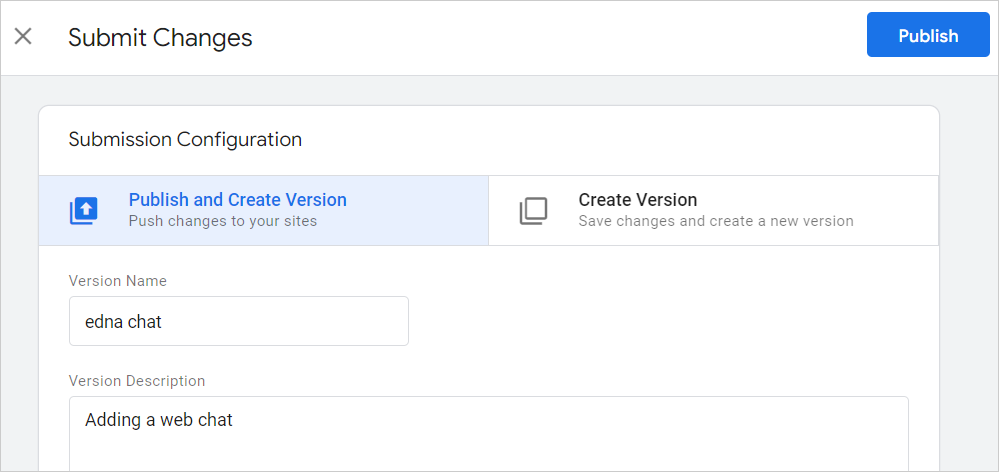
Click Submit in the upper right corner of the workspace.
-
Add the name and the description of the version and click Publish.
The chat widget will appear on your website in several minutes.