Widget installation
On the web page where you want the chat to be displayed, add the following code before the closing tag </body> to enable the chat widget:
<!-- BEGIN CHAT {literal} -->
<script type="text/javascript">
  !function(e,n){"use strict";function a(e,t){const n=setInterval(function(){ThreadsWidget&&!ThreadsWidget.isDummy&&(clearInterval(n),ThreadsWidget[e]&&ThreadsWidget[e].apply(void 0,t))},100)}window.ThreadsWidget={},e=e||"/settings.json",ThreadsWidget.isDummy=!0,["hideInvite","version","commitHash","showChat","hideChat","onHideChat","onScenarios","onLoad","on","reInit","init","unInit"].forEach(t=>{ThreadsWidget[t]=(...e)=>{a(t,e)}});i=new XMLHttpRequest;var i,t=function(e,t,n,a){i.onreadystatechange=function(){if(4===i.readyState)if(200===this.status)n(i.response);else{if("function"!=typeof a)throw new Error(i.response);a(i)}},i.open(e,t),i.send()};function o(t){t.webchat&&(t.webchat.filename=t.filename),n&&"string"==typeof n&&(t.webchat.currentLocale=n),n&&"object"==typeof n&&(n.locale&&"string"==typeof n.locale&&(t.webchat.currentLocale=n.locale),n.unavailable&&"boolean"==typeof n.unavailable&&(t.webchat.isUnavailableOnStart=n.unavailable));try{sessionStorage.setItem("__threadsWidget",JSON.stringify(t.webchat))}catch(e){window.__threadsWidget=JSON.stringify(t.webchat)}var e;t.filename?((e=document.createElement("script")).type="text/javascript",e.async=!0,e.src=t.filename,(t=document.getElementsByTagName("script")[0])?t.parentNode.insertBefore(e,t):document.body.appendChild(e)):console.error("Invalid bundle")}function s(){t("GET",e+"?rnd="+Math.random(),function(e){const t=JSON.parse(e);o(t)})}"complete"===document.readyState?s():window.addEventListener("DOMContentLoaded",s,!1)}("settings.json",{});
</script>
<!-- {/literal} END CHAT -->Place the settings.json file on your website so that this file is available on http(s)://your.site.ru/your/path/to/settings.json. We recommend that you place the file to the same directory where the **_.js chat files are located.
IMPORTANT!
The path to the settings file settings.json is set at the end of the initialization script:
... ("settings.json")As the value for this parameter, use the absolute path from the root of your website. Example:
('/your/path/to/settings.json');If necessary, you can set additional parameters during the initial initialization.
'/your/path/to/settings.json',
  {
    locale: 'en',
    unavailable: true,
  };
where:
-
locale- Locale language -
unavailable- Widget unavailability (trueif unavailable). Ifunavailableis set totrue, the chat will be hidden after the chat page loads, unless the client has an active thread.
The chat settings are stored in the provided settings.json file. The file contains file storage connection data, appearance theme settings, connection settings, and API keys you need to use for edna API.
The settings are unique for each new connection. In the examples of edna SDK they are set to "FIX_ME" and you must edit them before the launch. You must do it for the following parameters:
webchat/package = <application_package>webchat/uid = <application_uid>webchat/websocket = <push server websocket URL>webchat/datastore = <datastore URL>webchat/backend/history = <datastore history URL>webchat/backend/rootUrl = <datastore API URL>
You will get the values of these parameters from the deployment manager.
Note: In case of on-premise deployment of edna Datastore, the parameters webchat/datastore, webchat/backend/history and webchat/backend/rootUrl depend on the address of the installed edna Datastore.
The chat widget can be in one of the two modes:
-
Guest mode. The time of the user session existence are defined by the parameters in
settings.json.webchat/backend/unauthorizedHistory. For example:{ "count": 20, "enable": true, "cookie": {"Max-Age": 15552000} }where:
-
count- The number of messages uploaded per one history request (the request fulfills when the widget loads and when a user scrolling up in chat body); -
enable- Enable/disable history storing; -
Max-Age- Time in second of history storing for the site users
The session identifier is stored in cookie, the storing parameters are configured in the
webchat/backend/unauthorizedHistory/cookieobject, where the key corresponds to the specifications of the cookie directives. -
-
Authorized mode. The mode can be activated for an authorized website user by passing the unique user identifier to the chat to create a link "edna client" - "website user". The session of such a user is not linked to the current browser tab, the user will see the chat history on any tab where the chat is open. Set the parameter
clientIdin thesettings.jsonfile in the global JavaScript object window to pass the unique identifier of the authorized user to the chat. Do this before the chat initialization. The string in thesettings.json(in its simplest form) can look as follows:"clientId": "clientId",
This way, if you decide to place the unique user identifier in the property of the
windowobject, which you decide to nameclientId(as in the example above), insert the following string before the initialization code:window.clientId = 'user identifier';
You can pass additional client data the same way (in the JSON format). This client data will be displayed in the client information in the agent WP. To do this, in the
clientDataparameter ofsettings.json, set the name of the property, in which you will pass the client's details. Usually, the name is left the same -clientData- as in the example below:"clientData": "clientData",
Then, in the global JavaScript object
window, set the value of this property. To do this, insert the following string before the initialization code:window.clientData = `<client data>`;
where
<client data>is a JSON object converted into a string. As you see in the example, the data is passed inwindow.clientData, asclientDatawas set as the name of the property. Following is an example of passing the client details that consist ofname,phone,email,personal_manager, andcustomField:window.clientData = '{"name":"Name Surname","phone":"+7-999-999-99-99","email":"e@mail.com","personal_manager":"login","customField":"customValue"}';
NOTE: The examples in the SDK contain all necessary settings.
Optionally, you can pass additional parameters in requests to the server. For these settings, use the extendedAuth section of the parameters in settings.json.
The dataKey parameter is a string that contains the name of the property in the global JavaScript object window that stores the object with extended data for authorization.
The parameter is optional, its default value is extendedAuth.
window.extendedAuth = <JSON data>;For example:
{
  "custom-property": "value for custom header",
  "token": "some token value",
  "type": "token type"
}
The http.enabled parameter enables or disables the extended authorization mode for HTTP(S)-requests (boolean).
The http.headersMap parameter is an object whose keys are the names of the headers passed in HTTP(S)-requests, and their values are the names of the properties from the extended data object. This way, you can configure any number of optional headers.
For example:
"extendedAuth": {
    "dataKey": "extendedAuth",
    "http": {
        "enabled": true,
        "headersMap": {
            "Header-Name": "custom-property",
            "X-Auth-Token": "token",
            "X-Token-Type": "type"
        }
    }
}
Example of a request with extended authorization headers:
GET /some/backend/url
Host: example.com
Content-Type: application/json
Header-Name: value for custom header
X-Auth-Token: some token value
X-Token-Type: token type
...
Once you save the settings, open the webpage with the tab with the chat in your browser. You will see the chat button in the right bottom corner. Once you click it, the start chat window opens (img. 1).
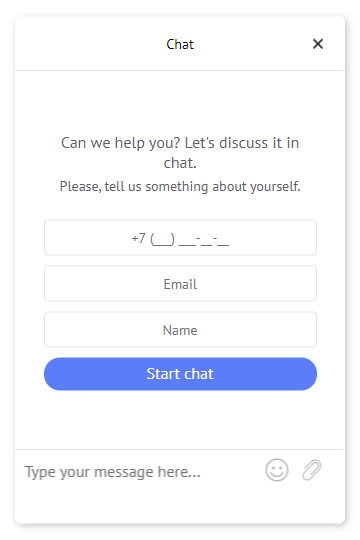
Img. 1. Start chat window