Tutorial Part 2A: Running XIA over GENI
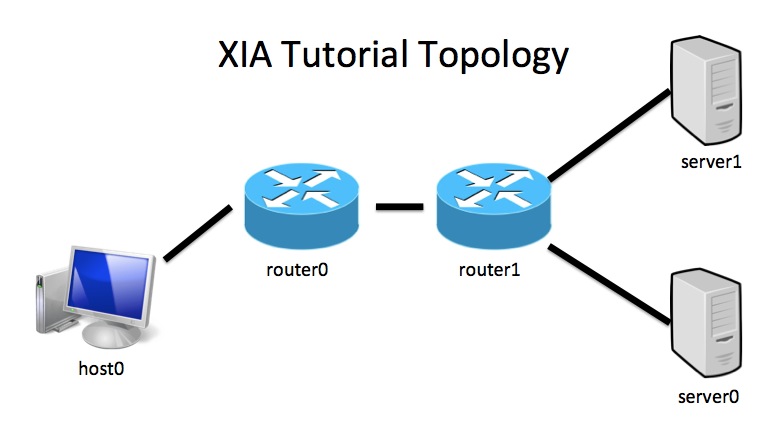
In this part of the tutorial we will walk you through setting up a simple 5 node topology and then running a simple file transfer across the network. We show how XIA enables opportunistic file caching using Content Identifiers (CIDs) by fetching the same content from (now populated) content caches within the network. We'll see how these transfers work in detail by examining packets on the wire.
Once all of the network nodes are in the ready state we can boot the xia network.
Here's our 5 node topology once again:
- Check the status of your sliver
Creating the XIA network will take approximately 15 minutes.readyToLogin slicename --useSliceAggregates --no-keys
Once all the nodes are up and running the output from readyToLogin should resemble the following:

- Switch to the tutorial specific
.ssh/configfile.- Save your present config file
mv ~/.ssh/config ~/.ssh/config.keep
- Create a tutorial specific config file and copy it to the .ssh directory.
readyToLogin  --useSliceAggregates -o slicename
mv ./sshconfig.txt ~/.ssh/config
- Save your present config file
- Add private key (associated with your public key on the GENI portal) to ssh-agent so ssh can forward your credentials.
ssh-add /path/to/private_key
- Log into router1
ssh -A router1
- Boot the network
cd /xia-core
tutorial/xboot
Once you see many lines that say "running" at the end, hit enter. - Examine the routing table on
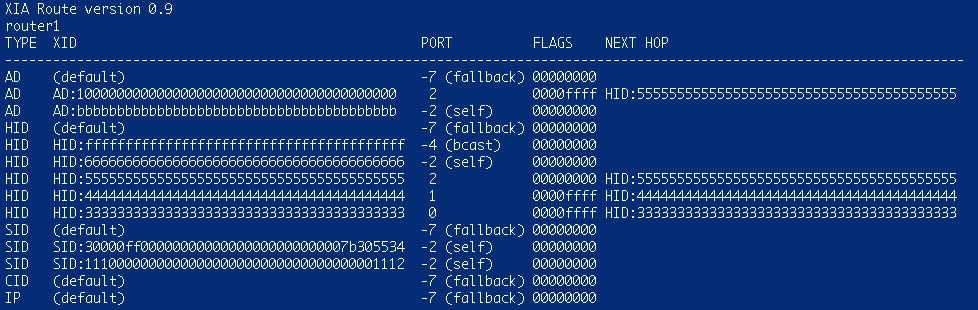
router1bin/xroute
The output should look like the following: The routing table output shows the routes for each of the 5 default principal types supported by XIA. Notice specific routes for each device connected directly to
 router1, as well as some control router (e.g., routes with negative port values) and default routes. In Part 2B of the tutorial we will add a new principal type to this forwarding table.
Run the following command to see the routing table without using human-readable namesbin/xroute -v
It will look like:
- We're going to transfer a file from
server0tohost0using an ftp-like protocol. To do this over XIA, we first send a request to an service (SID) residing onsever0that returns us a list of content (CIDs) to fetch. We then request these CIDs from the network (providing a fallback to the HID forserver0). Since the network does not know about these CIDs, the fallback toserver0is used and the content is returned fromserver0. Thus all content is transferred fromserver0. We will verify this by using tcpdump on the link betweenrouter1andserver0.- Run tcpdump on
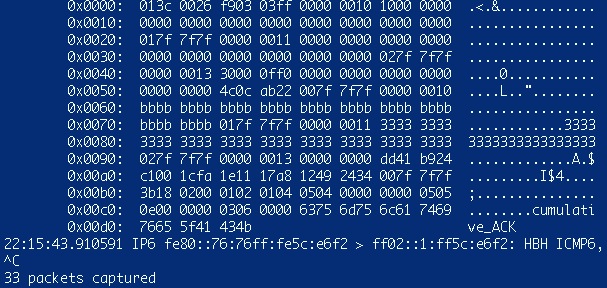
router1.sudo tcpdump -i `ifconfig | awk '/10.10.3.1/ {print $1}' RS="\n\n"` "not ether dst ff:ff:ff:ff:ff:ff"This monitors all traffic betweenrouter1andserver0, ignoring broadcast traffic. - Open a new terminal window, log into
server0and start thexftp_basic_server.ssh server0 cd /xia-core/applications/example ./xftp_basic_server
- Open a new terminal window, log into
host0and start theftp_basic_client.ssh host0 cd /xia-core/applications/example ./xftp_basic_client
- Transfer a file.
get sample.txt sample.txt.1
- Close tcpdump on
router1C-c
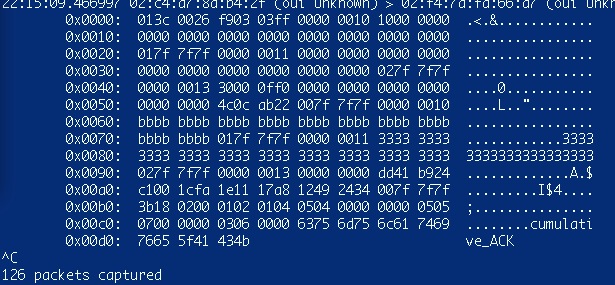 Note how CID requests have gone through
 router1to reachserver0by looking at the number of packets transmitted.
- Run tcpdump on
- See the effects of opportunistic caching.
When the content (CIDs) were being transferred through the network, routers opportunistically cached them. Now when future requests for these CIDs are sent, the fallback toserver0does not need to be used, and the requests can be satisfied by the network itself. This means that there should be much less traffic on the link betweenrouter1andserver0, verified using tcpdump.- First, verify that the network (e.g.,
router1) has opportunistically cached this content.bin/xroute
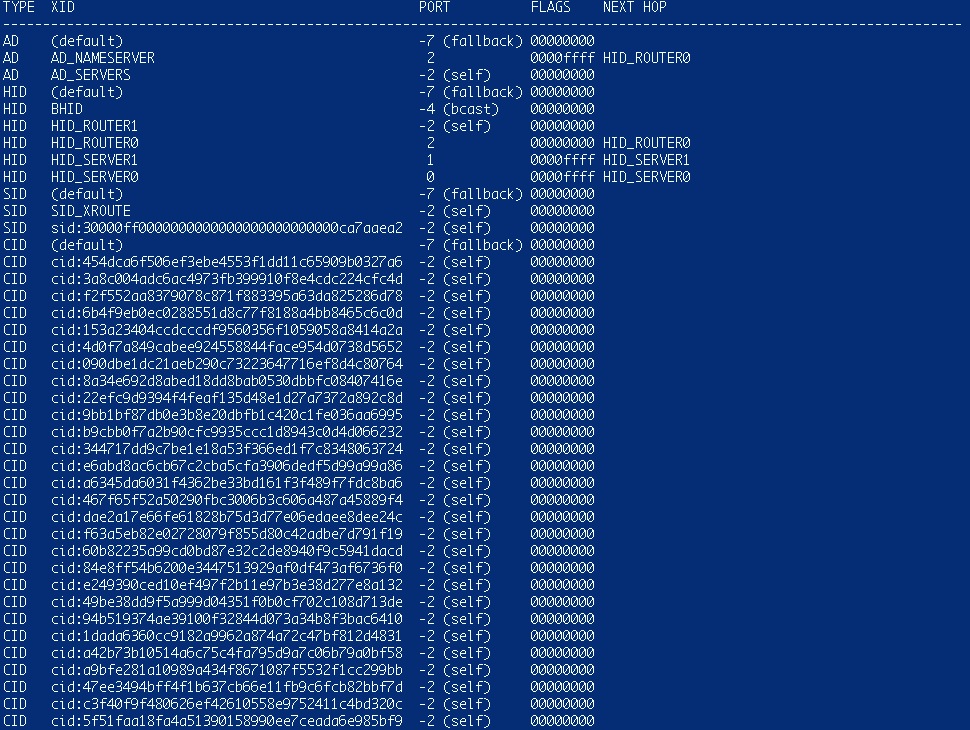 Note the many CIDs with "self" routes indicating the content is cached in
 router1 - Relaunch tcpdump on
router1sudo tcpdump -i `ifconfig | awk '/10.10.3.1/ {print $1}' RS="\n\n"` "not ether dst ff:ff:ff:ff:ff:ff" - Transfer the file again on
host0.get sample.txt sample.txt.2
- Close tcpdump on
router1C-c
 Note how CID requests have not gone through
 router1to reachserver0by looking at the number of packets transmitted. - Close xftp on
server0C-c
- Close xftp on
host0C-c
- First, verify that the network (e.g.,