Heroku Deployment Guide
In order to upload images / documentation for equipment models, you'll need Amazon S3 for hosting static files. Please hit the "Try Amazon S3 for Free" button on that page to set up your AWS S3 account and create an S3 Bucket. You'll also have to obtain access credentials. Before proceeding, make sure you have your Bucket Name, Region, Access Key ID, and Secret Access Key written down.
-
Make sure you've installed the Heroku Toolbelt
-
Authenticate using your Heroku credentials
heroku login -
Download the Reservations source code
git clone https://github.com/YaleSTC/reservations.git -
Copy config files (
YOUR_OSis your operating system abbreviation, i.e.fedora,osx, orubuntu)cp config/database.yml{.example.YOUR_OS,} cp config/secrets.yml{.example,} -
From within the
reservationsdirectory (you can typecd reservations), create your Heroku appheroku create [APP_NAME](note that
APP_NAMEis optional) -
Set the custom buildpack (see here for more info)
heroku buildpacks:set https://github.com/orenyk/heroku-buildpack-ruby
-
Install a MySQL add-on for your database
heroku addons:add cleardb:ignite -
Install the mandrill add-on for e-mail
heroku addons:add sendgrid:starter -
Install the scheduler add-on for cron jobs
heroku addons:add scheduler:standard
For more information about the various configuration parameters, see this page.
-
Make sure
rakeis installedbundle install -
Generate all the secret keys / tokens
heroku config:set DEVISE_SECRET_KEY="$(bundle exec rake secret)" heroku config:set DEVISE_PEPPER="$(bundle exec rake secret)" heroku config:set SECRET_KEY_BASE="$(bundle exec rake secret)" -
Configure the e-mail settings
heroku config:set RES_SMTP_DOMAIN=herokuapp.com heroku config:set RES_SMTP_ADDRESS=smtp.sendgrid.net heroku config:set RES_SMTP_PORT=587 heroku config:set RES_SMTP_AUTH=1 heroku config:set RES_SMTP_USERNAME="$(heroku config:get SENDGRID_USERNAME)" heroku config:set RES_SMTP_PASSWORD="$(heroku config:get SENDGRID_PASSWORD)" -
Configure the hostname for e-mail links
heroku config:set RAILS_HOST_NAME=$(heroku info -s | grep web_url | cut -d/ -f3) -
Enable static asset serving
heroku config:set SERVE_STATIC=1 -
Set up the gem groups
heroku config:set RAILS_GROUPS=heroku -
Set up the MySQL credentials
heroku config:set DATABASE_URL=$(heroku config:get CLEARDB_DATABASE_URL | sed 's/mysql/mysql2/g') -
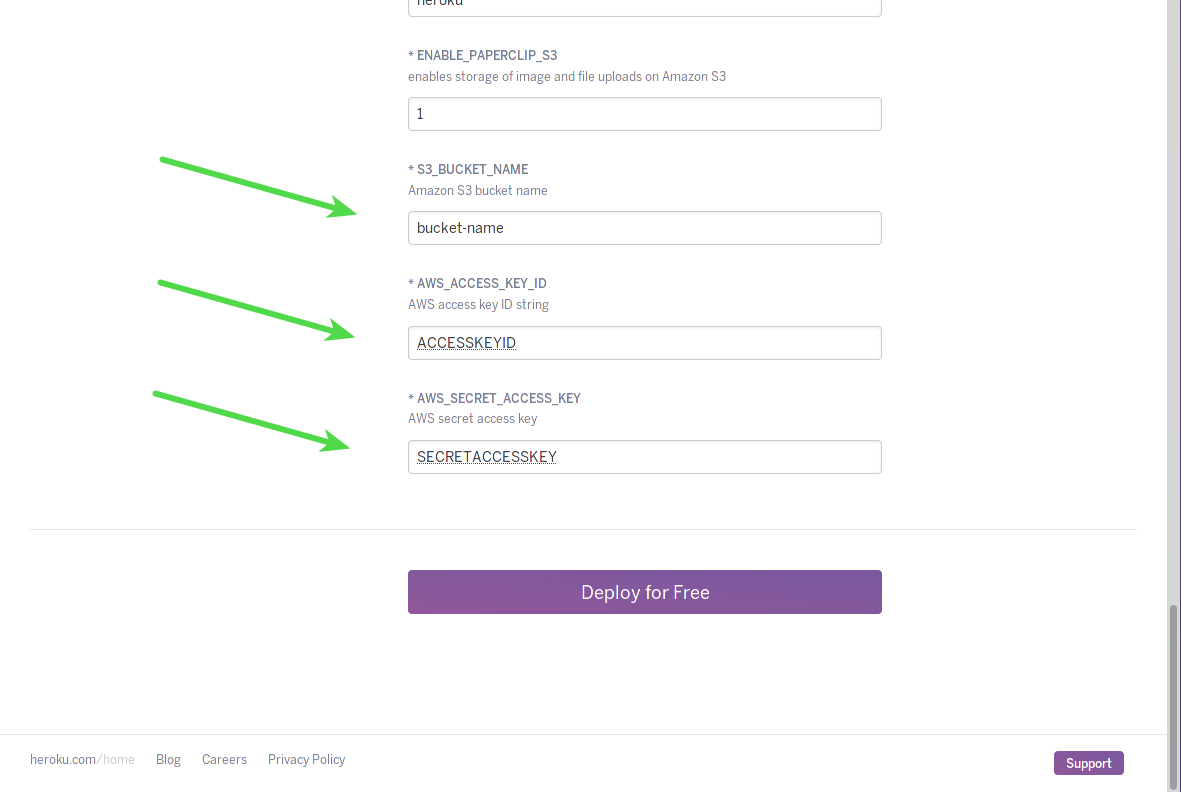
Enter your Amazon AWS credentials and S3 bucket name (see above for details). Do not include the brackets below!
heroku config:set S3_BUCKET_NAME=[YOUR S3 BUCKET NAME] heroku config:set AWS_S3_REGION=[YOUR AWS S3 BUCKET REGION] heroku config:set AWS_ACCESS_KEY_ID=[YOUR AWS ACCESS KEY ID] heroku config:set AWS_SECRET_ACCESS_KEY=[YOUR AWS SECRET ACCESS KEY] -
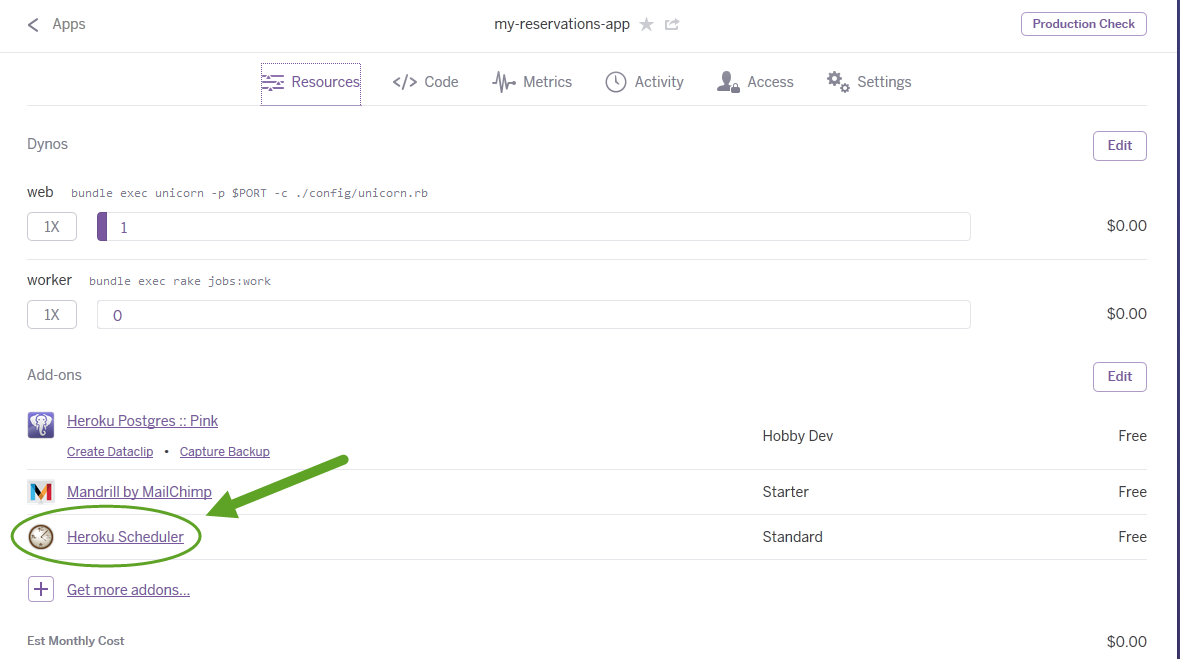
Set up cron jobs through the Heroku website
-
Visit your application dashboard (
https://dashboard.heroku.com/apps/[APP_NAME]/resources) -
Click on the scheduler add-on
-
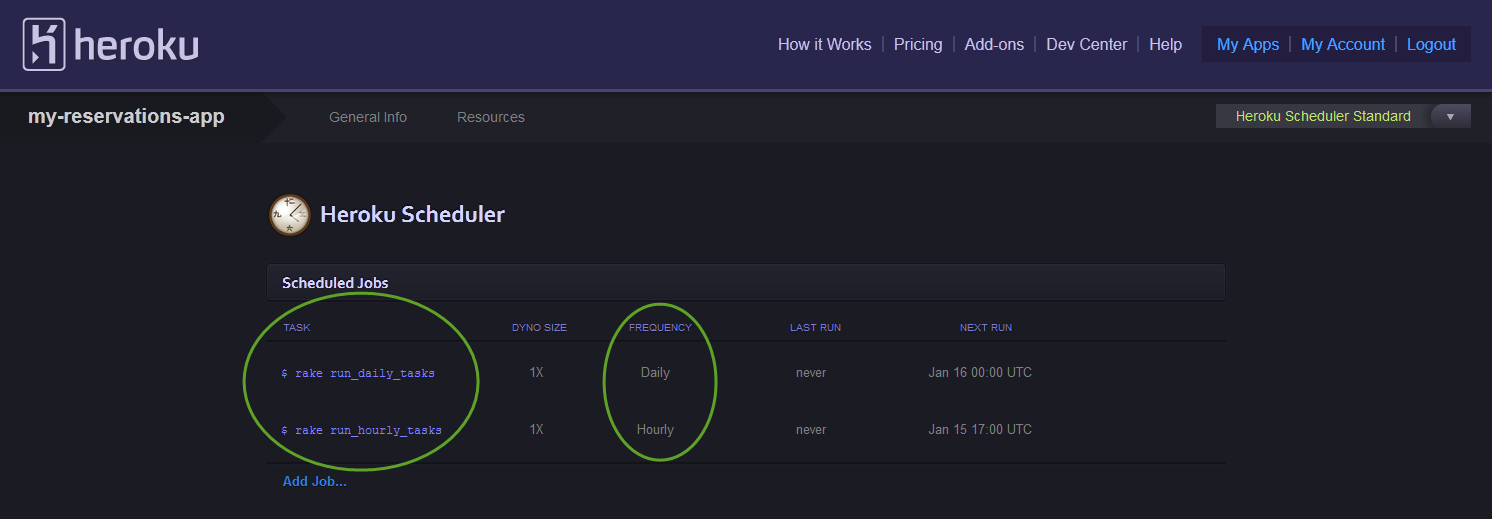
Schedule hourly (
rake run_hourly_tasks) and daily (rake run_daily_tasks) rake tasks* Note that these jobs will consume Heroku resources and can result in your application costing you money.
-
(Optional) Set up CAS authentication
heroku config:set CAS_AUTH=1
heroku config:set CAS_BASE_URL=https://[YOUR.CAS.URL]
git push heroku [branch_name:]master
(note that you can push a different branch from master to Heroku, but you must push it to the master branch on Heroku)
-
Load the database schema
heroku run rake db:schema:load -
Run the following command to go through the application setup script. Follow the prompts to set up your user account and the application settings
heroku run rake app:setup -
(Optional) Seed your database with dummy data
heroku run rake db:seed
- Visit our documentation site for instructions on how to use your new app!
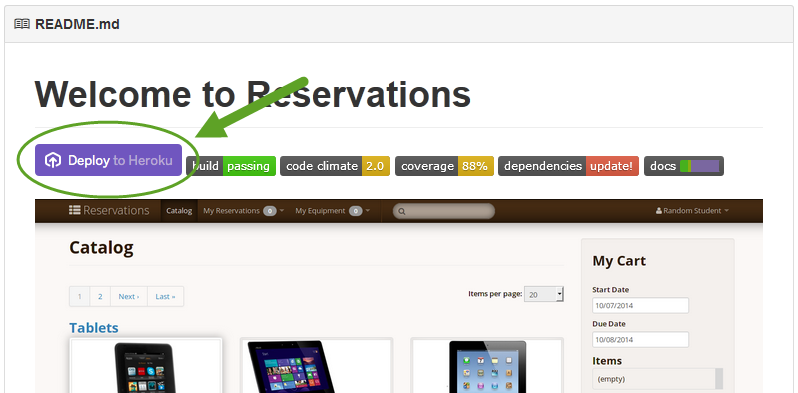
Deploying to Heroku with the Heroku button is quick, easy, and a great way to get an instance of Reservations up and running quickly. The steps for a fully-functioning deployment are as follows: [NO LONGER WORKS]
- Click on the "Deploy to Heroku" button in the README
- Create a Heroku account or sign in to your existing account
- Enter an application name (this must be unique across all users of Heroku)
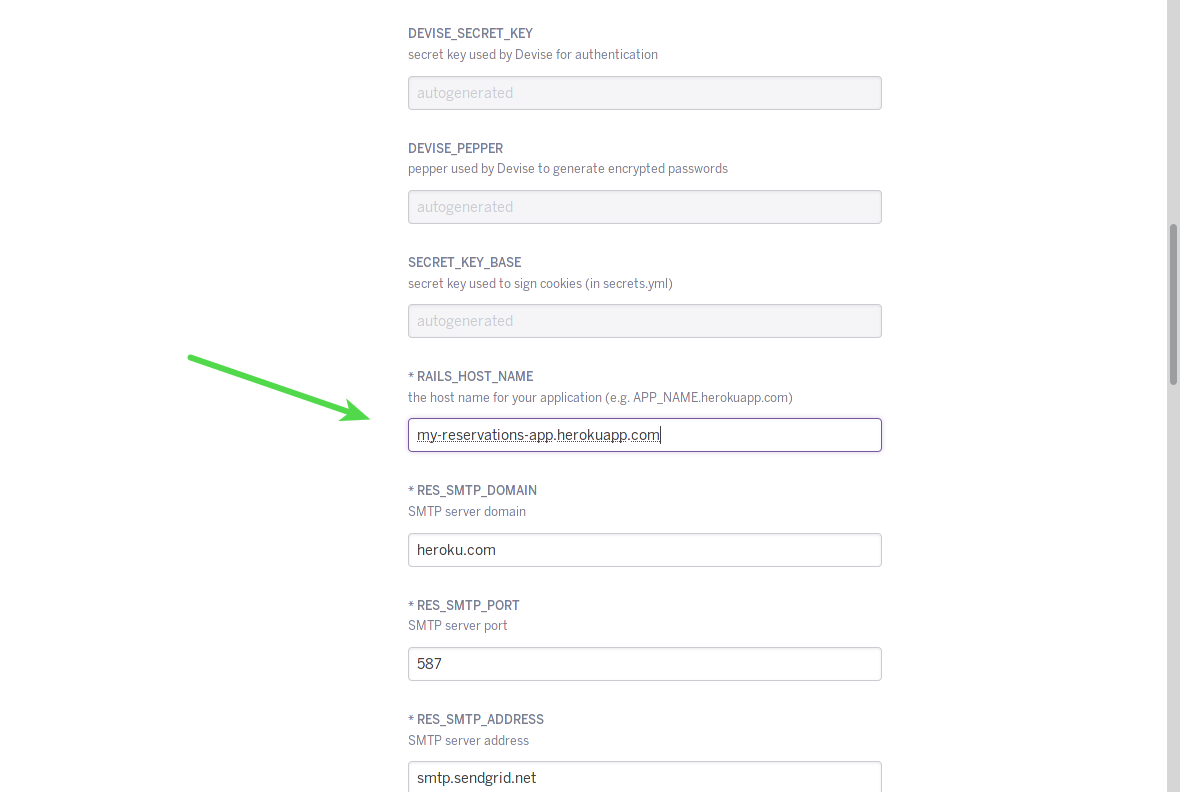
- Enter the instance hostname for the
RAILS_HOST_NAMEconfig setting - Enter your Amazon AWS credentials and S3 bucket name (see above for details)
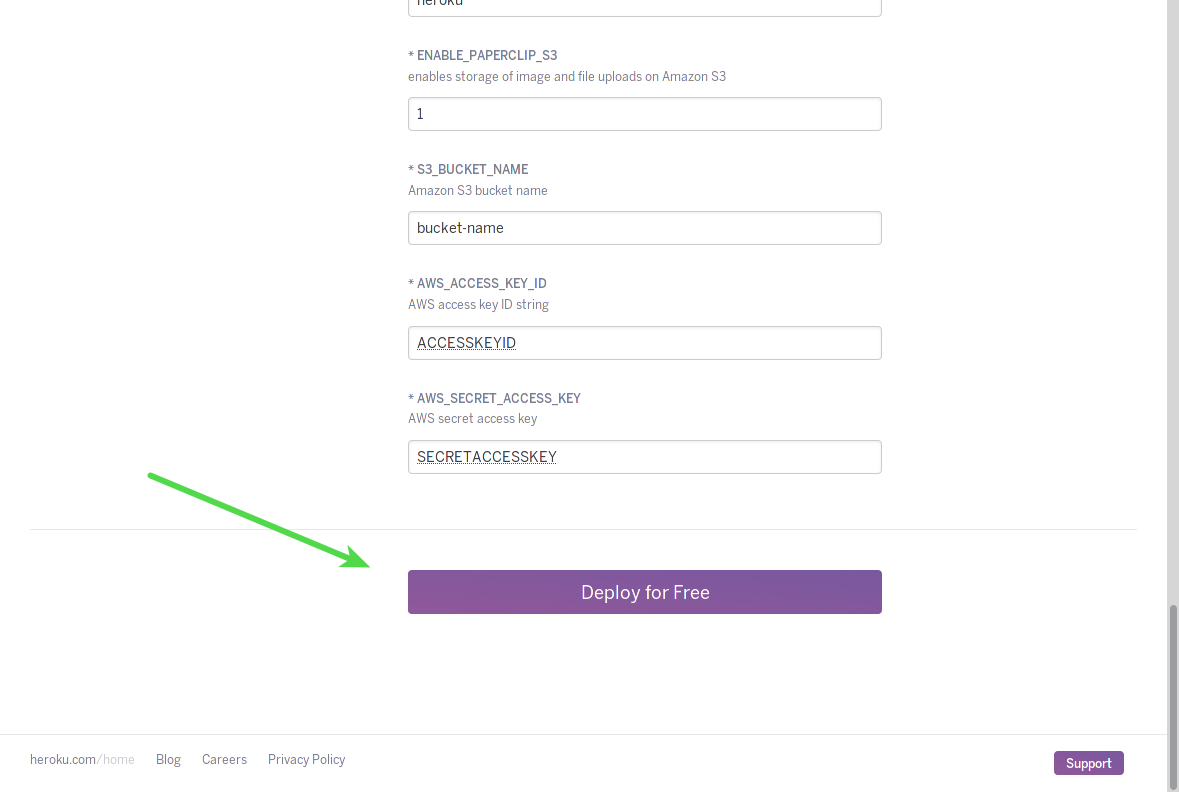
- Click the "Deploy for Free" button

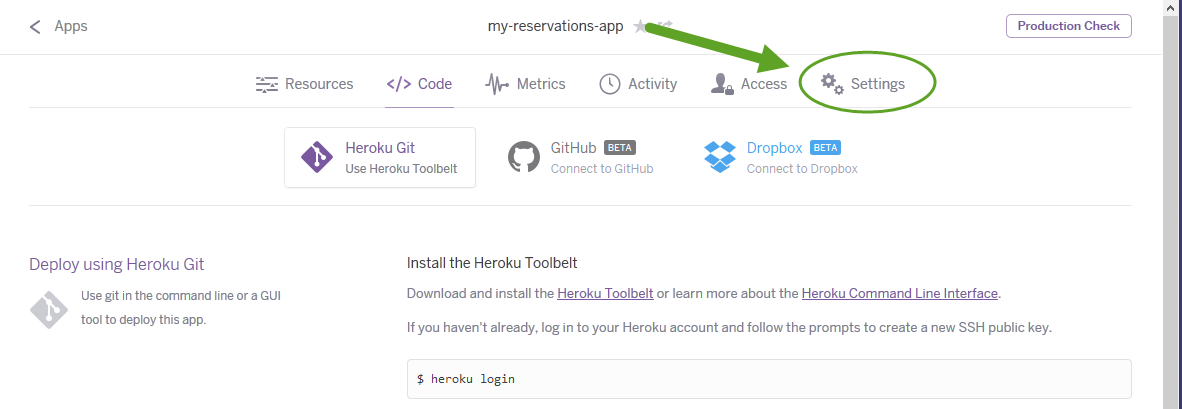
- When deployment is finished, click on the "Manage App" button
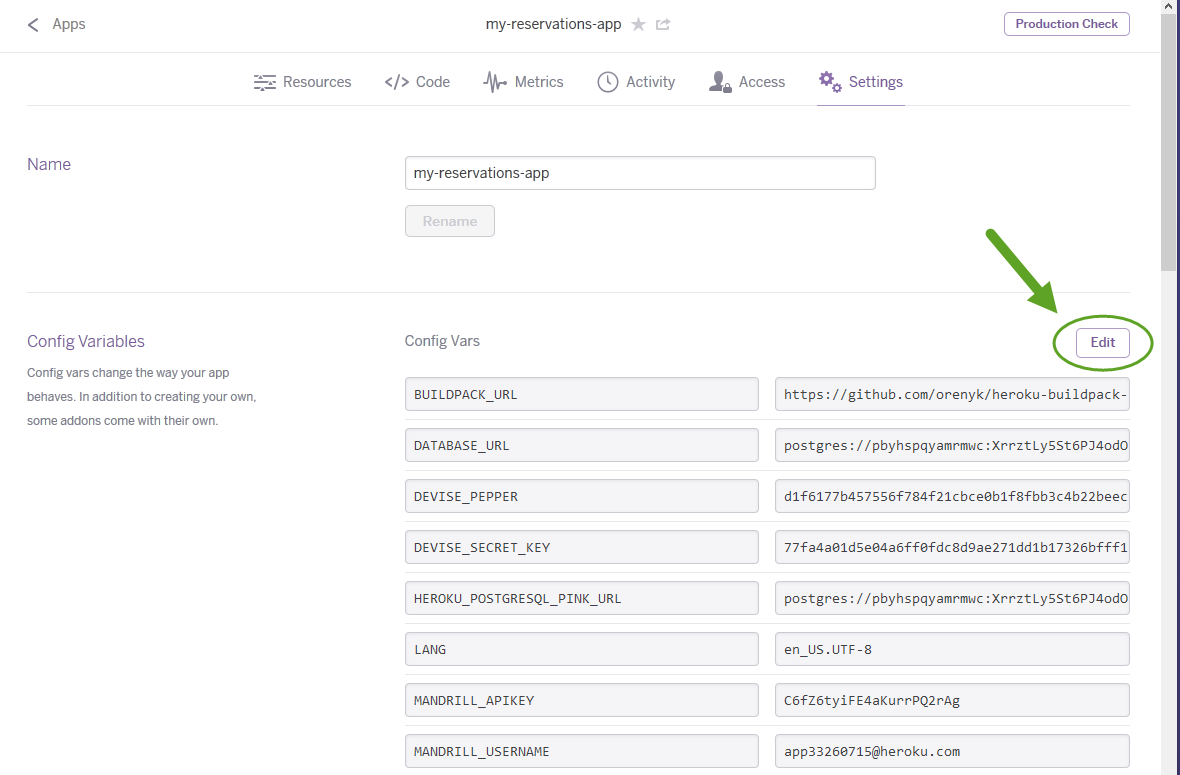
- Click on the "Settings" link
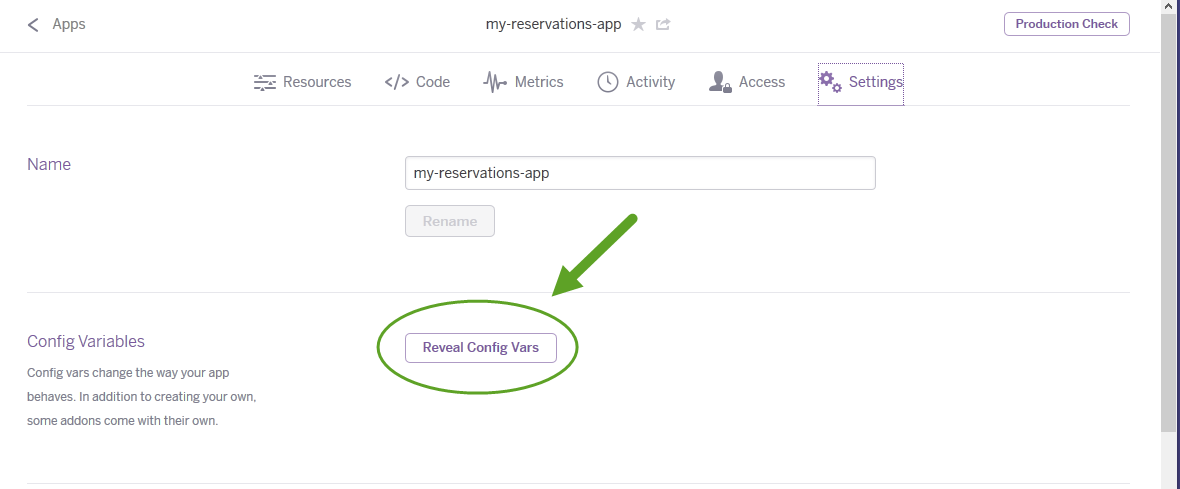
- Click on the "Reveal Config Vars" button
- Click on the "Edit" button
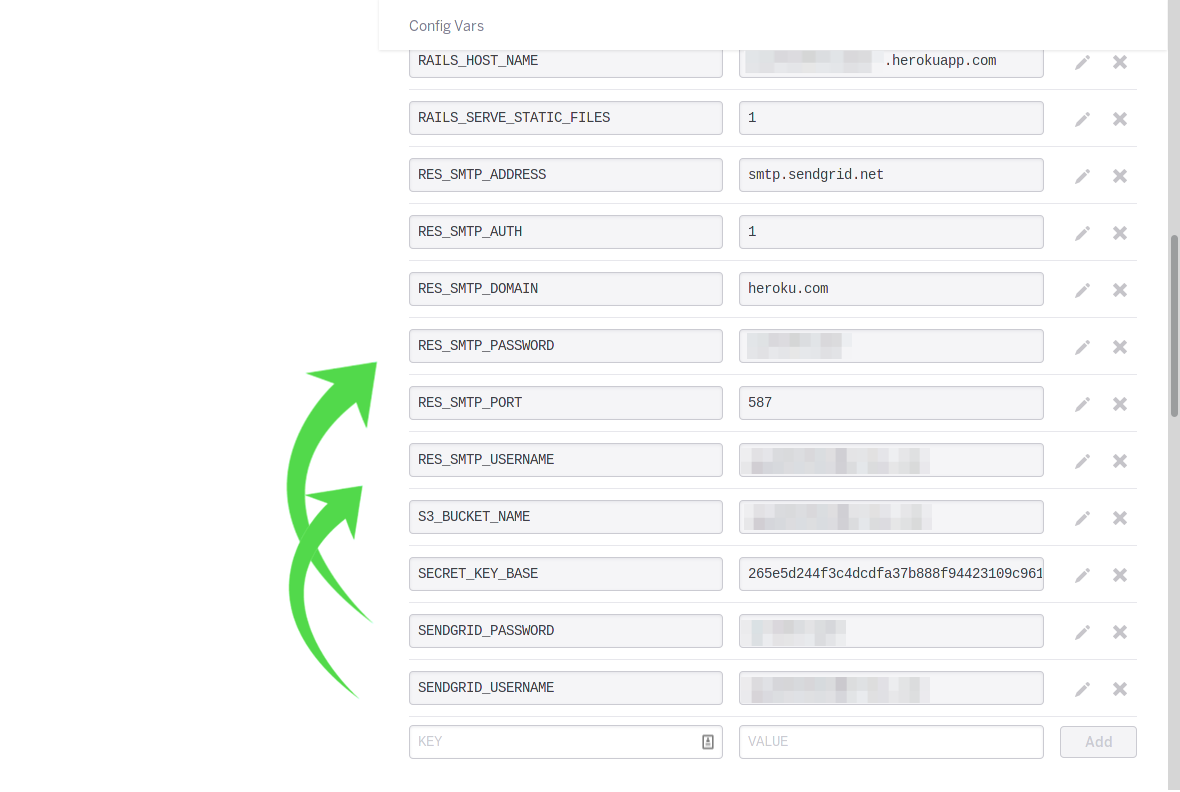
- Copy the
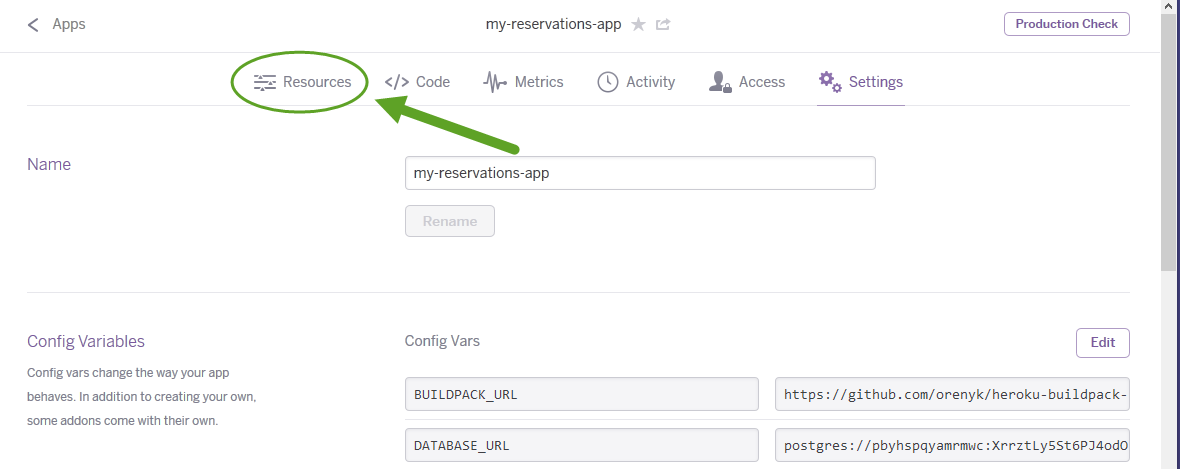
SENDGRID_PASSWORDvar into theRES_SMTP_PASSWORDvar and theSENDGRID_USERNAMEvar into theRES_SMTP_USERNAMEvar and click the "Save" button - Click on the "Resources" link
- Click on the "Scheduler" add-on link
- Schedule hourly (
rake run_hourly_tasks) and daily (rake run_daily_tasks) rake tasks

- Note that these jobs will consume Heroku resources and can result in your application costing you money. For more information see here.
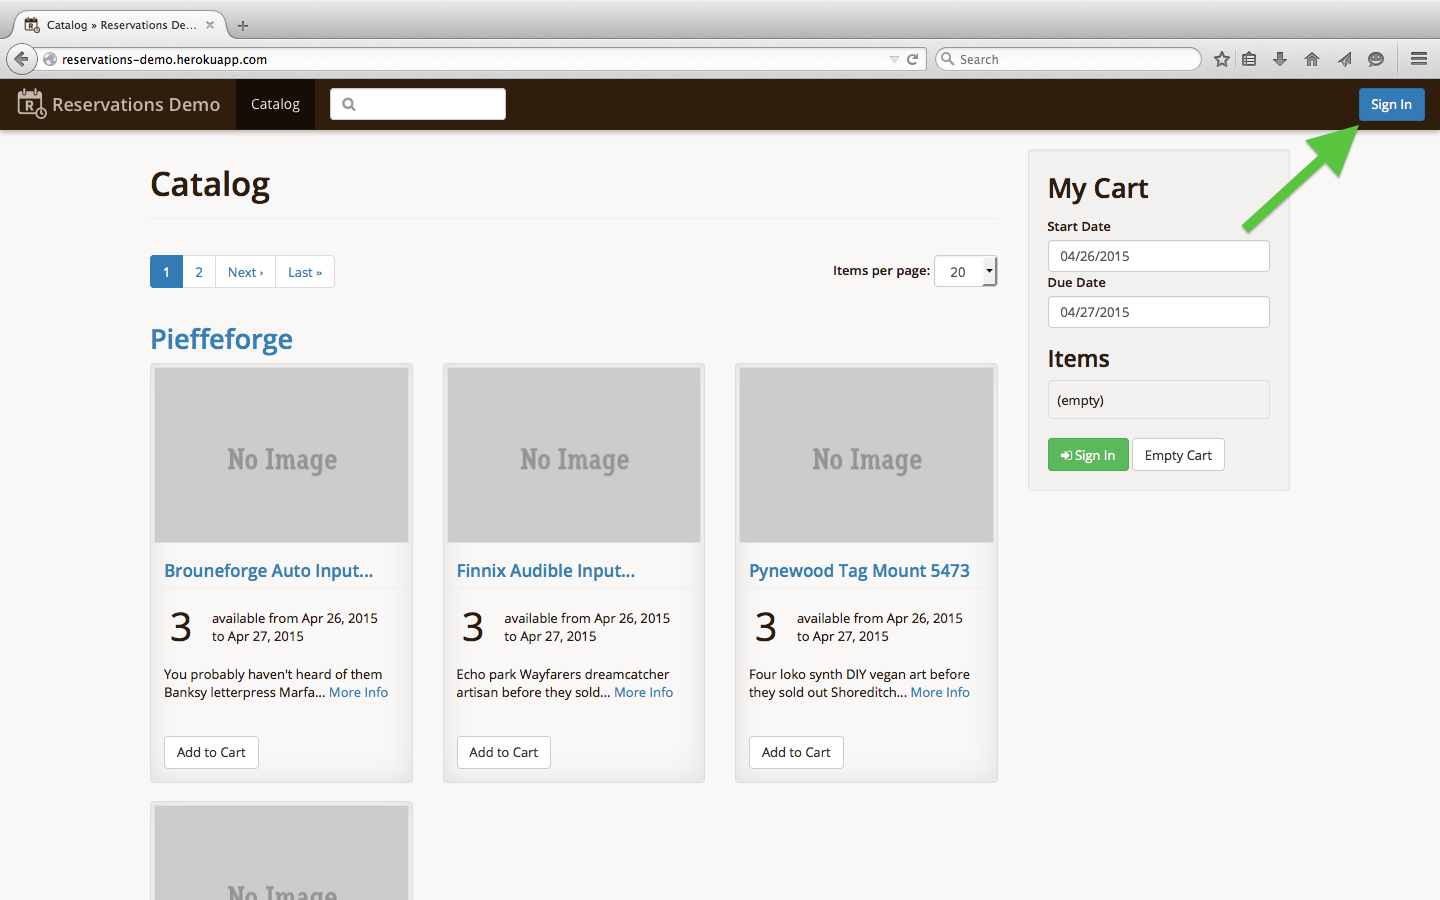
- Visit your instance (
http://my-reservations-app.herokuapp.com) - Click on the "Sign In" link on the top-right corner
- Log in with the email
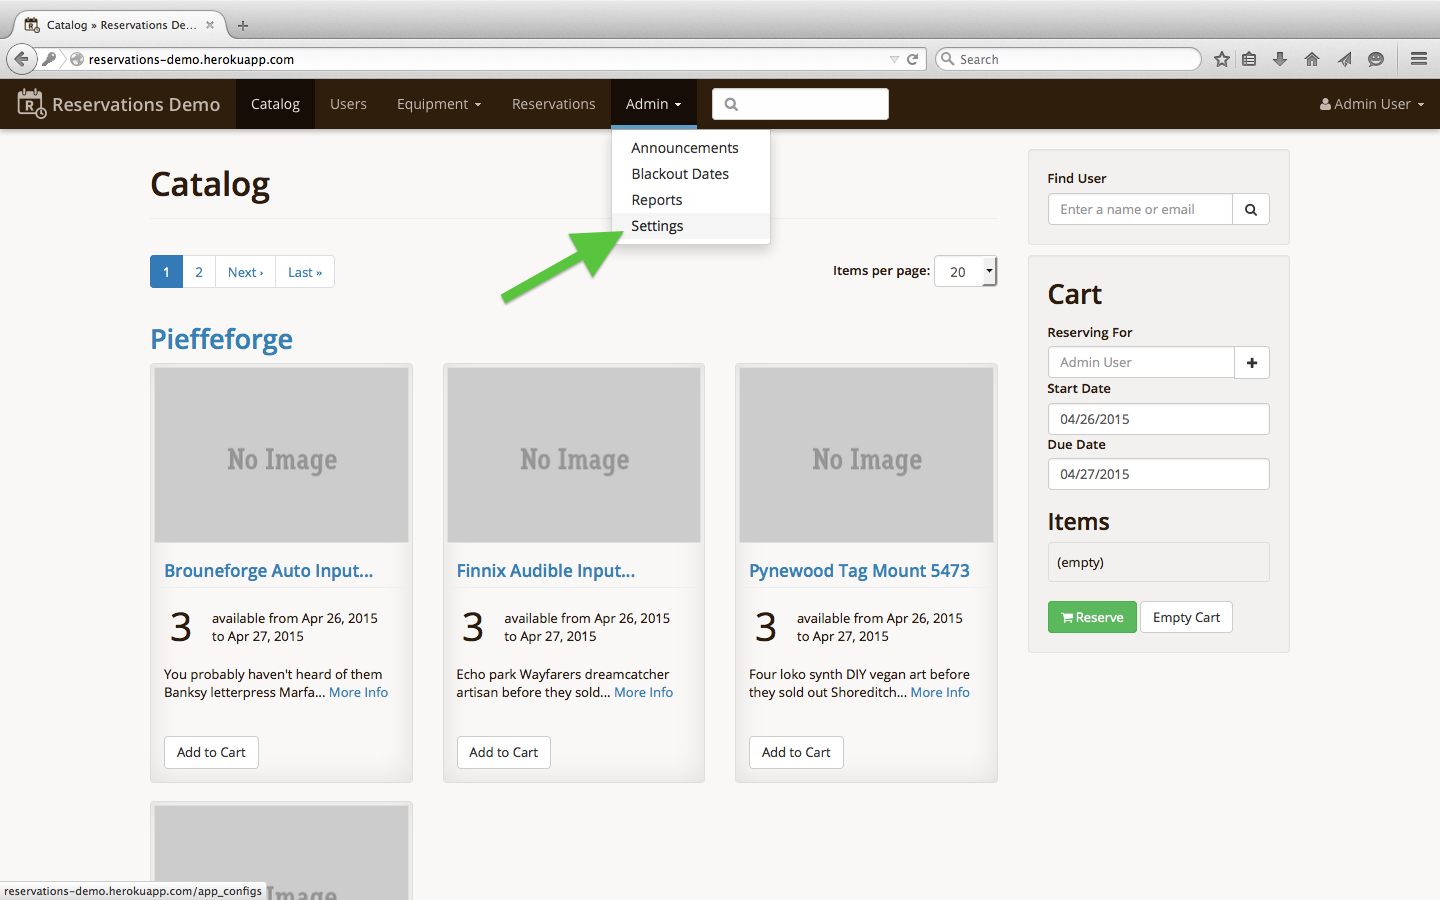
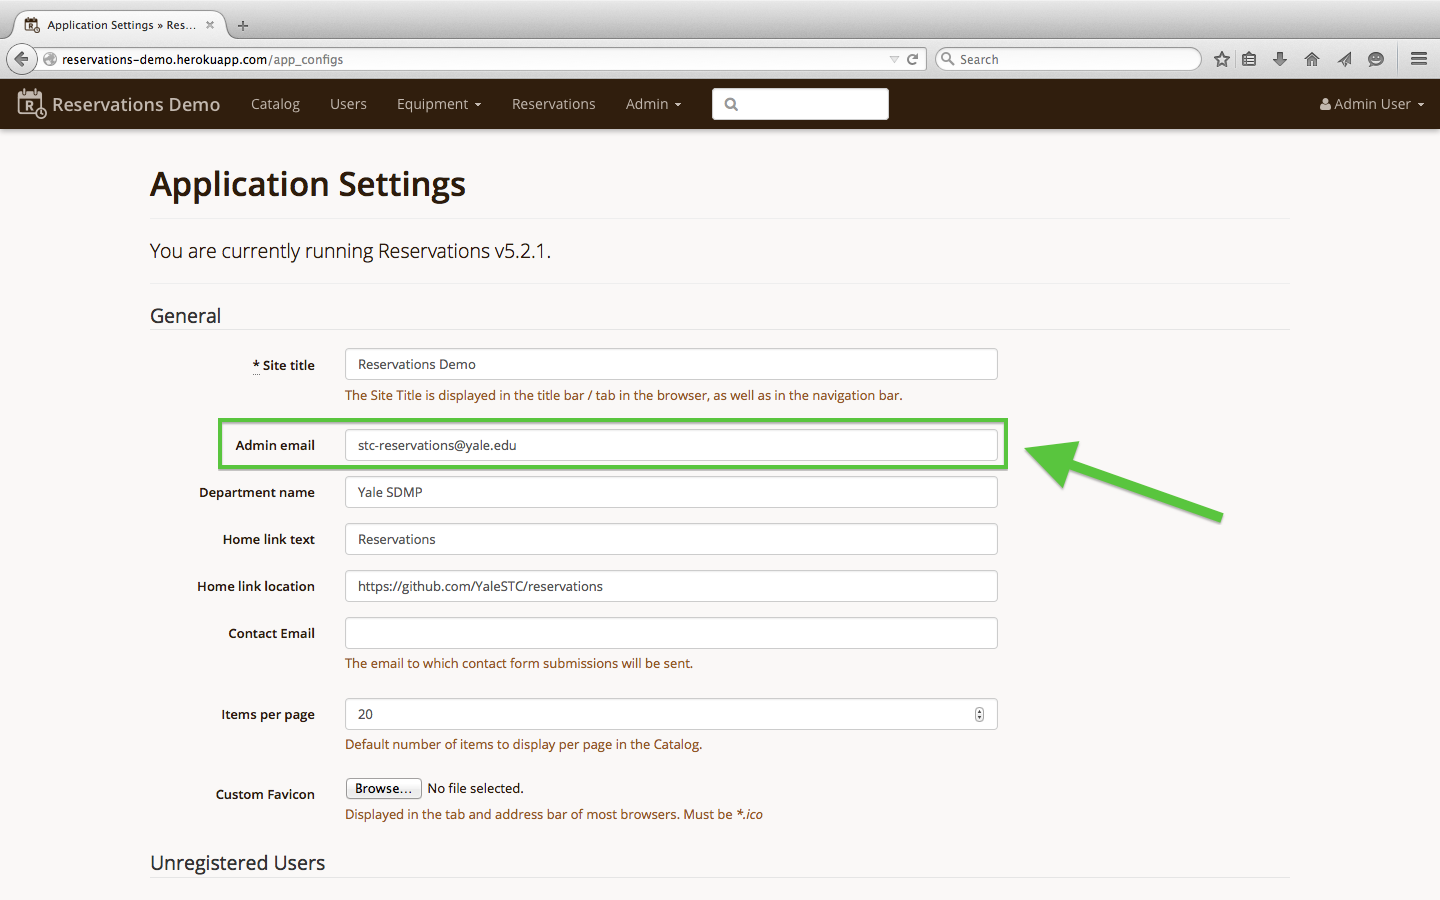
email@email.comand passwordpassw0rd - Visit the application settings
- Edit the settings to your liking and click on the "Update Settings" button on the bottom of the page; make sure to change the "Admin email" setting to your e-mail address so you receive notifications
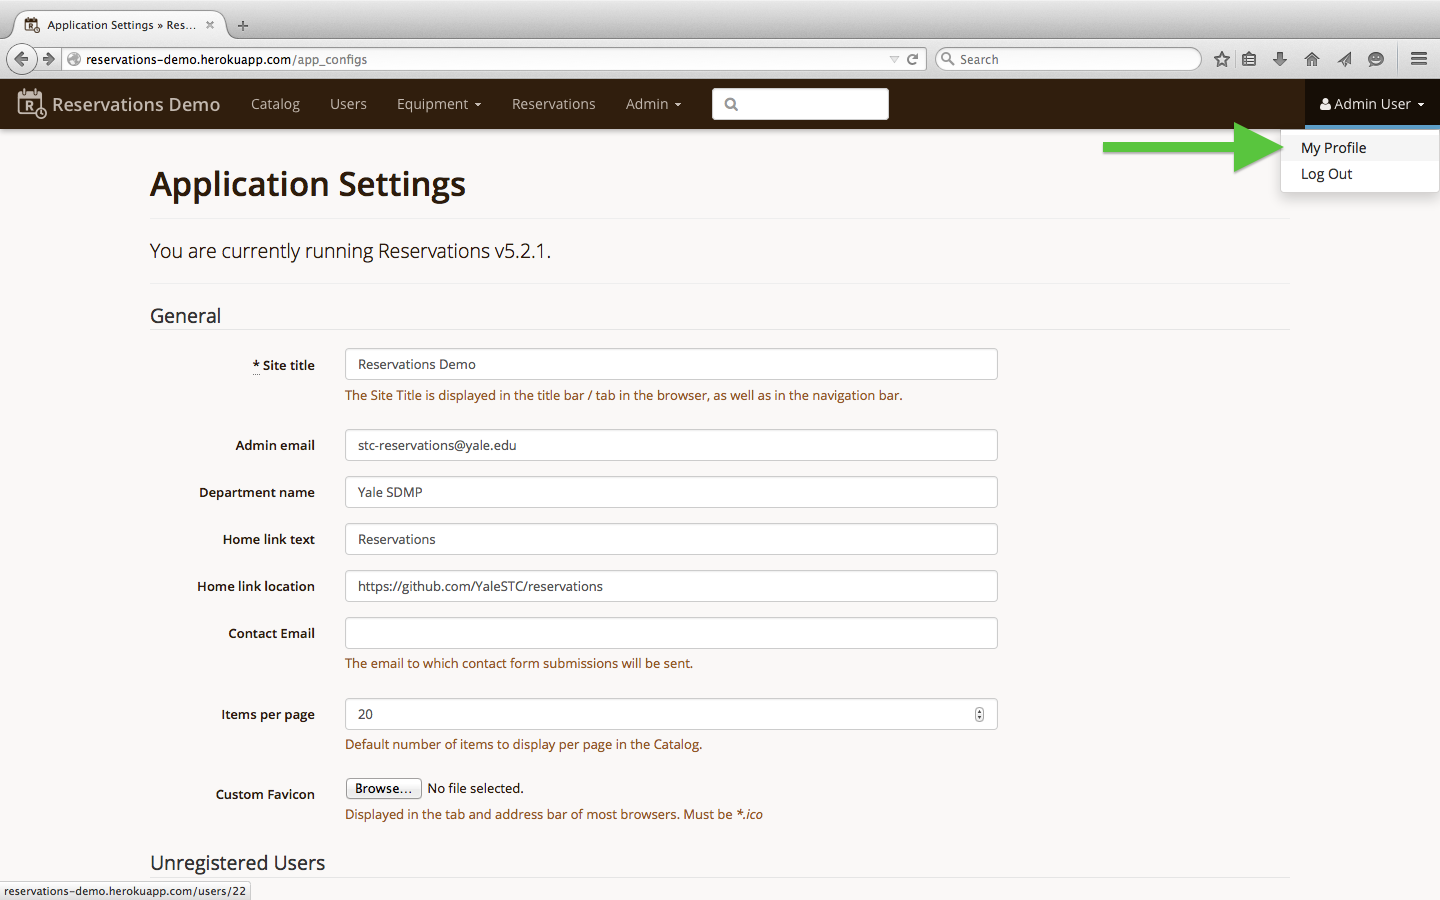
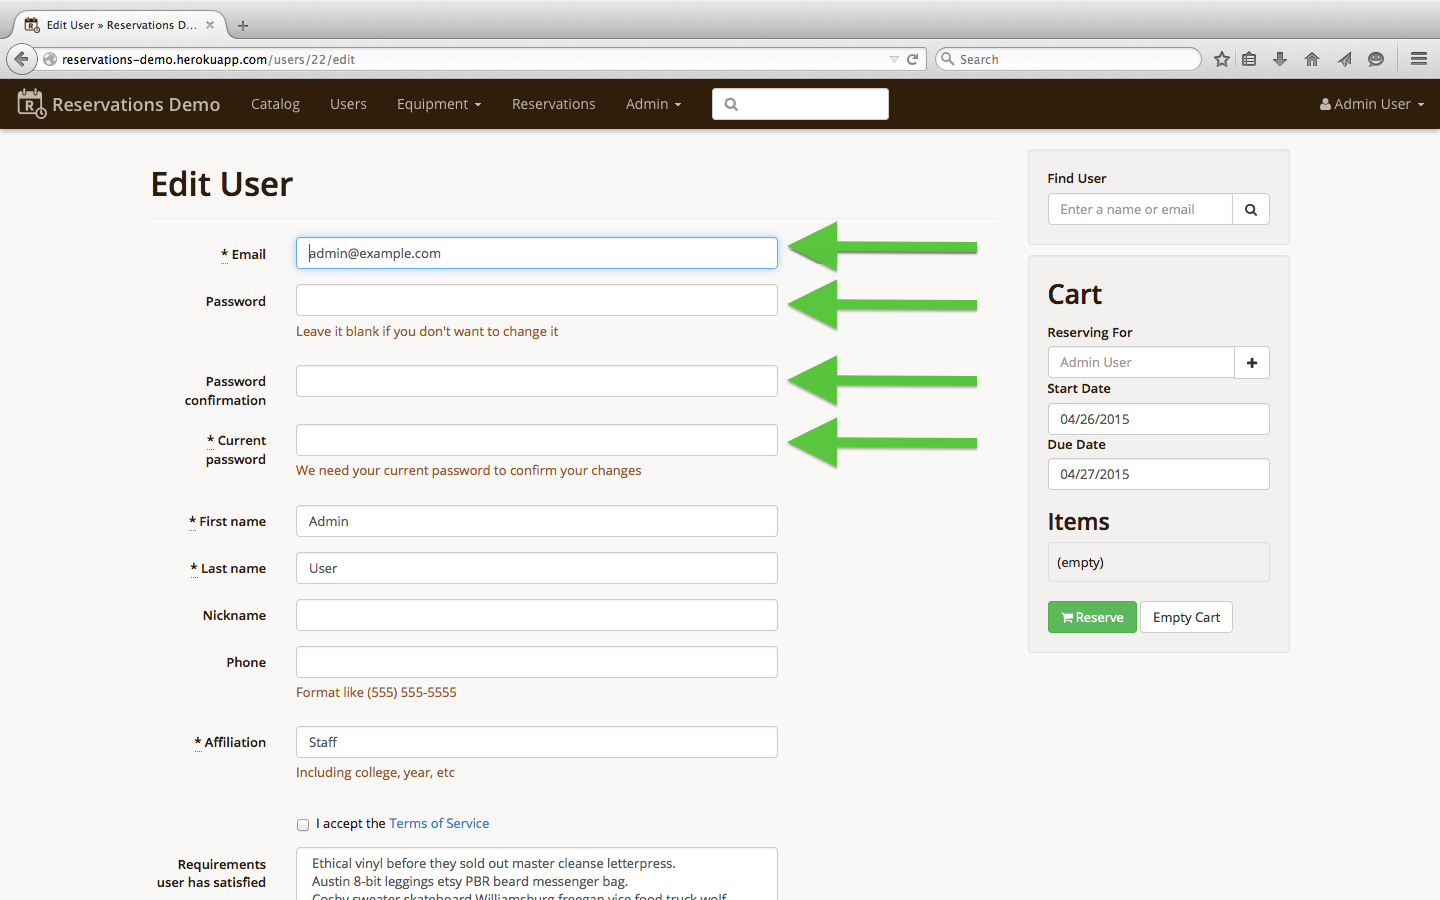
- Visit your user profile
- Click on the "Edit Information" button on the bottom of the page and edit your profile as desired; make sure to change your "Email" and "Password" at a minimum
-
Visit our documentation site for instructions on how to use your new app!
-
If you want to clear the database and start fresh, you should run the following from the command line with the Heroku remote set up properly (see here for more info):
heroku pg:reset DATABASE_URL
heroku run rake db:schema:load
heroku run rake app:setup
Follow the instructions to set up your user profile and application settings and continue from there!