Creation of a laboratory for malware analysis in AWS
After completing the course Practical Malware Analysis & Triage (PMAT), which I highly recommend, I realized that I needed a laboratory that I could create and destroy as needed. This is why I decided to use Terraform to automate the creation and destruction of the lab.
In this repository I'll show how to create our own lab on AWS to analyze malware using FlareVM, Apache Guacamole and Terraform.
To be able to create the laboratory it is essential to have an AWS account.
The following are the steps we will take to configure the laboratory:
- In AWS, manually create a Windows instance.
- We'll use FlareVM to configure this instance.
- Based on this instance, we will create an AMI that will be used to test our malware.
- We will delete the instance that was created and configure Terraform.
- We will use Terraform to build, destroy, and regenerate our FlareVM as many times as necessary.
The laboratory will have two possible configurations:
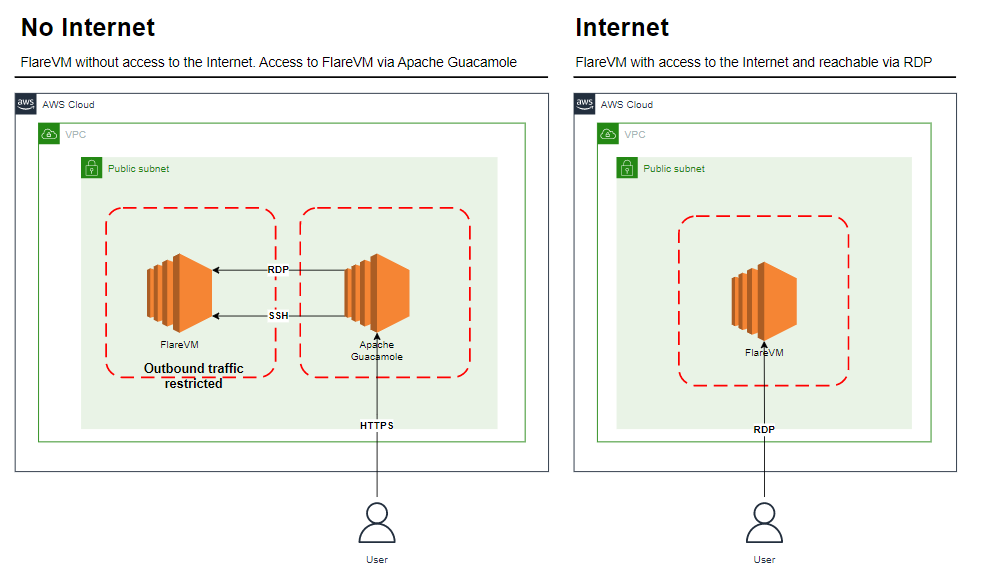
Configuration with Internet: Only one Windows instance with FlareVM will be created that will have access to the Internet and which can also be accessed via RDP from the Internet. In this configuration we will have to take into account that the malware samples will be able to connect to the Internet.
Configuration without Internet: Two instances will be created: a Windows instance with FlareVM that will not have Internet access, and an instance with Apache Guacamole that will have Internet access. We will use Apache Guacamole to connect to FlareVM. For this configuration, we will need to set up an SFTP server on the FlareVM machine to allow us to upload the malware samples for analysis.
At the end of this section we should have a personalized AMI image and the machine's administrator password.
We will access the AWS console via the web, go to instances and create a new instance.
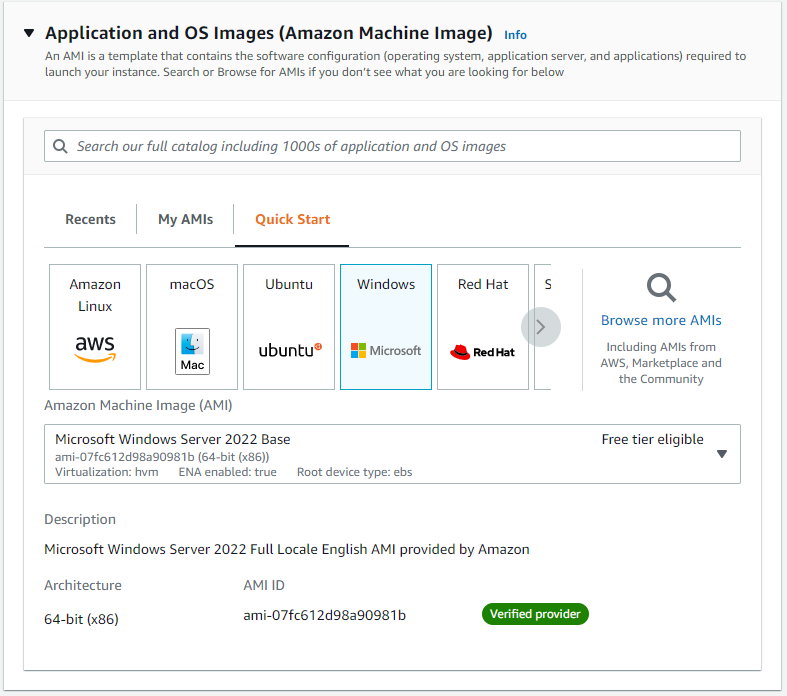
We will select a Windows AMI, in my case I selected Microsoft Windows Server 2022 Base.
We will select the instance type, an instance of type t2.medium should be enough, and choose one of our keys. If we don't have any keys already generated, we should generate one.
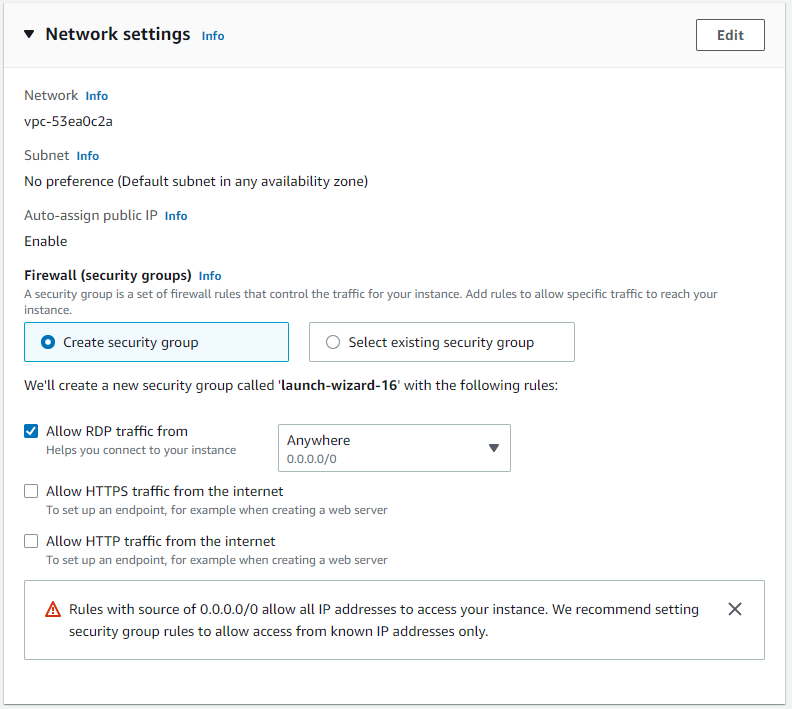
In the network configuration, we must ensure that the instance is in a public VPC, that it has auto-assign public IP enabled, and that the security group allows access via RDP.
Finally, in the storage configuration section, we will increase the capacity to 60 GB to avoid space problems in the future. After this we will create the instance.
In the instances section, we will wait for the instance to be initialized before accessing it. Then we will click Connect, download the RDP file, and obtain the password. Important, we must keep this password safe because it will be used to access our Windows machine now and in the future. Once we've created the AMI, we won't be able to get the password using this method.
With the configuration file and the password we will be able to access the instance via RDP.
Now we must install all the tools that we want to have in our laboratory, this machine is the one that we will use to detonate the malware.
We will install FlareVM first
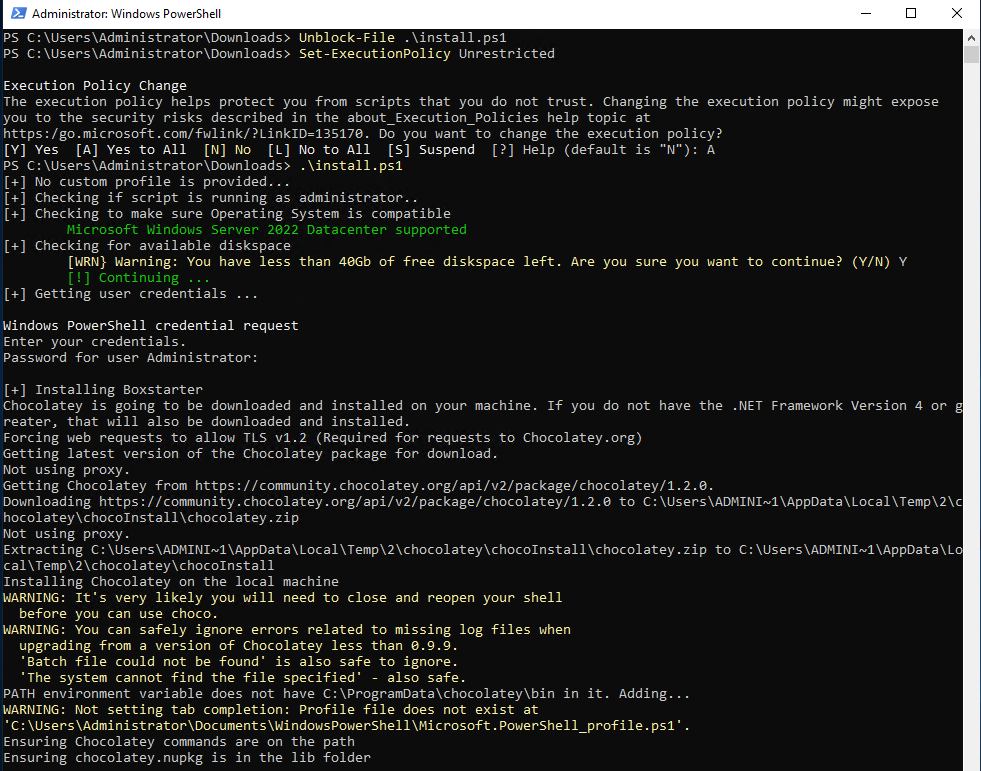
Download the installation file: https://github.com/mandiant/flare-vm/blob/master/install.ps1
Open a PowerShell console as Administrator
Unblock the installer: Unblock-File .\install.ps1
Enable script execution: Set-ExecutionPolicy Unrestricted
Finally we will run the installer (it will ask us for the administrator password): .\install.ps1
FlareVM installation is slow, so go and grab a coffee :)
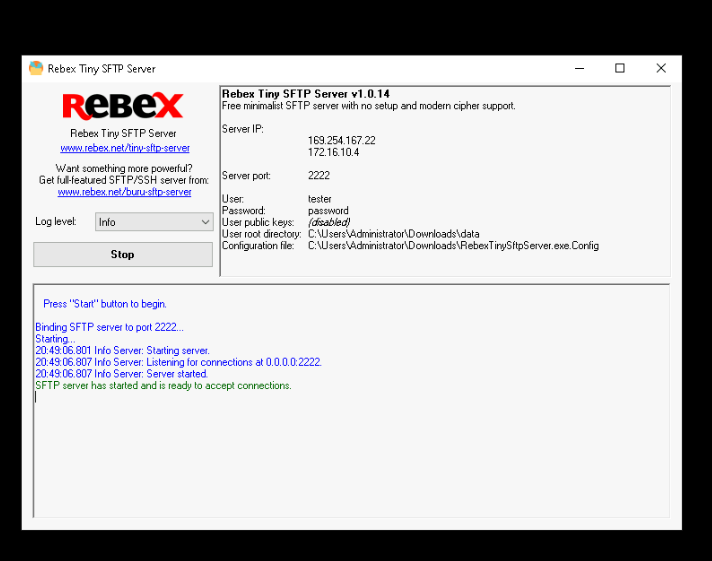
If we want to run FlareVM in an environment without Internet access, we'll need to set up an SFTP server to transfer files from Apache Guacamole to FlareVM. Downloading Rebex Tiny SFTP Server is a quick option.
Additionally, now is the perfect moment to install any additional tools you may need.
We will move on to creating the base image after we are confident with the configuration.
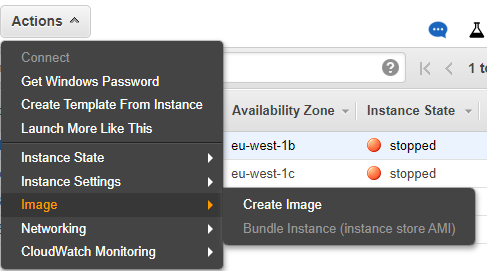
We'll return to the AWS console, choose instances, and shut down the Windows instance we just configured. Once turned off, we will select the instance again and in actions we will go to Image - Create Image
We will specify a unique name for the AMI and if we wish a description. With this we click on Create Image
Here we can find more information on how to create the AMI from our instance if we have problems.
We will go to AMIs and there we will see how our image is being created. We write down the AMI ID that, together with the password obtained previously, will be the values that we will need for the next steps.
We will proceed to delete the created instance, the only thing we will need in our account (and what we will pay for) will be the generated AMI.
To be able to create the laboratory we will need:
- The AMI ID and the administrator password of the machine created in the previous step.
- AWS Access Keys with permissions to manage the network and instances.
- A terminal with configured AWS keys.
- Have Terraform, jq and git installed.
- (Optional) if we want to use the option without Internet and with access through Apache Guacamole, accept the Apache Guacamole license https://aws.amazon.com/marketplace/pp?sku=6sq2ud425j12tj4didc8xzf6m (The software has no price, but it is packaged by Bitnami)
Once we have the requirements, we clone adanalvarez/AWS-malware-lab repository:
git clone https://github.com/adanalvarez/AWS-malware-lab
cd aws-malware-lab
We have to create a configuration file, with the name shared.auto.tfvars.json like this:
{
    "environment": "malware-lab",
    "ami": "ami-xxxxxxxxxxxxxxxxx",
    "account" : "222222222222",
    "region": "eu-west-1",
    "enable_guacamole": false,
    "enable_inetsim": false
}
Here we will configure, the environment, the AMI ID of the image created in the previous step, our AWS account, the region where we will deploy the lab and if we want to enable Apache Guacamole or not.
We will initialize Terraform and make a plan to see what resources will be created:
terraform init
terraform plan
After this, we will perform an apply to create our laboratory.
terraform apply
After a few minutes our lab will be created and ready to use.
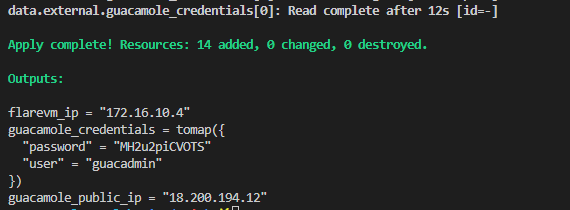
After performing the terraform apply, the public IP of our FlareVM machine will appear in the console.
We can access directly through RDP with the Administrator password that we have from the first section.
After performing the terraform apply, the public IP of Apache Guacamole, the administrator user and the generated password will appear in the console.
If the generated username and password are blank, wait a few minutes and perform a terraform plan. If after several minutes the password does not appear, follow these instructions: https://docs.bitnami.com/aws/faq/get-started/find-credentials/
Through a browser we will access the URL HTTPS://guacamole_public_ip and enter the username and password that appeared in the Terraform output.
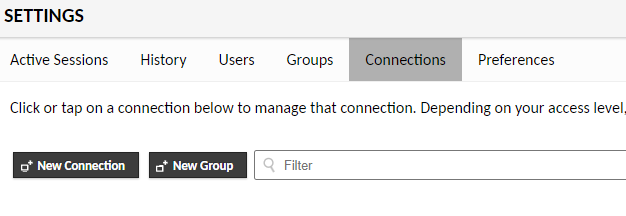
Once in the Apache Guacamole interface we are going to configure a new connection
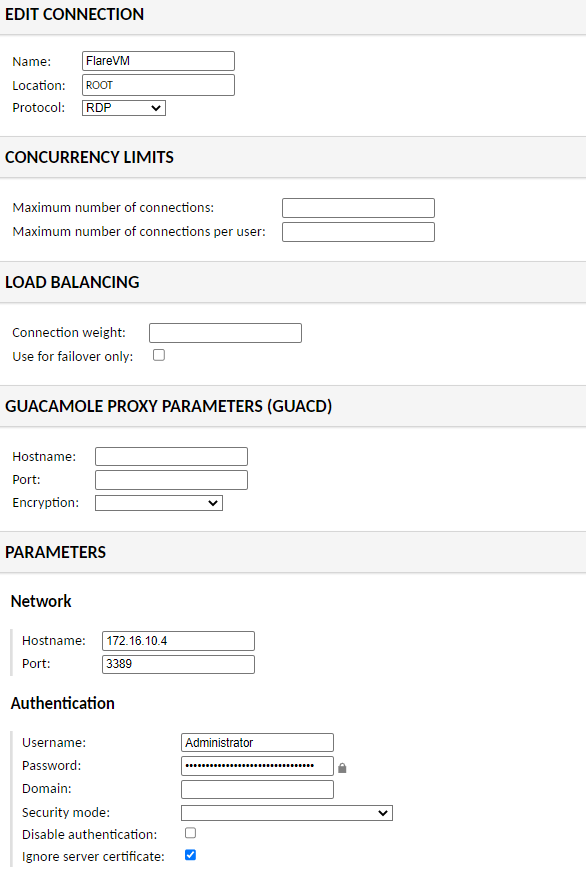
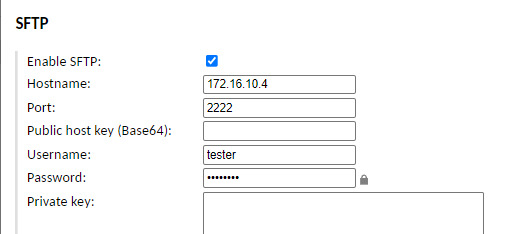
Here we will configure an RDP connection with the data of our FlareVM machine, the IP will be 172.16.10.4 (it will appear in the Terraform output), the user will be administrator and the password will be the one we have from the first section.
Our FlareVM machine won't have an Internet connection if we enable the Guacamole option, so in order to transfer files, we'll need an SFTP server. It is advised to use a simple server, such as Rebex Tiny SFTP Server, which we should have downloaded in the first step.
If we have the executable in our FlareVM machine, we will only have to execute it and click on Start to have the server working.
Once it is working, we return to the Guacamole configuration options, edit the connection and enable the SFTP service.
We will launch a new session and in this one we will be allowed to copy files to the machine, for this you simply have to drag the file from your machine to the browser. The files will appear in: C:\Users\Administrator\Downloads\data
In order to restore the FlareVM machine to its original state after ruining malware on our system, we can use the following Terraform command:
terraform apply -replace=aws_instance.flarevm
Important when working with Guacamole enabled, it will be necessary to modify the connection and turn off SFTP before trying to connect again; otherwise, we won't be able to connect.
To cut costs, we will destroy the environment after we have finished analyzing malware. To do this, we'll run the following command:
terraform destroy
The next time we want to analyze malware, we will only need to run the terraform apply command because this won't remove our AMI.
The only expense we will incur after the lab is shut down (destroyed) is for the space the AMI consumed. A 60 GB drive is priced at approximately: $3 per month.
When the lab is powered on, we will pay for the instances and their disks. The environment with Apache Guacamole will have an approximate cost of: 0.12 $/H
The environment without Apache Guacamole will have an approximate cost of: 0.17 $/H
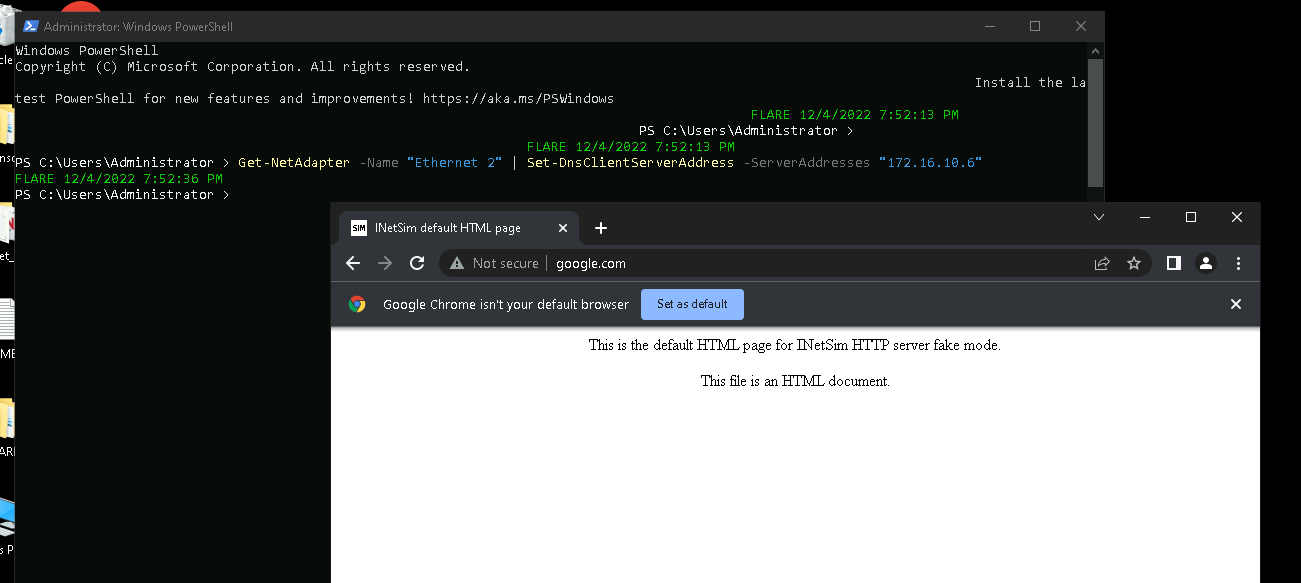
We can add an extra instance to the configuration that will run INetSim. INetSim is a network simulation tool that can be used to simulate network services such as DNS, HTTP, and FTP for testing and development purposes.
In our scenario, we can use INetSim to simulate the presence of the internet without actually connecting to the internet. This will allow the malware to interact with INetSim and believe that it has access to the internet.
We can set the DNS server of the FlareVM to use the DNS from INetSim by running the following PowerShell command:
Get-NetAdapter -Name "Ethernet 2" | Set-DnsClientServerAddress -ServerAddresses "172.16.10.6"
To enable INetSim, we can set the enable_inetsim parameter to true in the configuration file. This will ensure that INetSim is running and available for the malware to interact with.
- [ ]Making the first step optional by publishing an AMI
- Run a small Linux instance with INetSim in the option without Internet.
