Introduction to UnrealEngine using CPP
Note 1: This tutorial is developed for UnrealEngine 4.11.*
UnrealEngine 4 provides two ways to create a game:
A tutorial on how to use UnrealEngine 4 using Blueprint is given here -> https://blog.gollahalli.me/2016/05/10/introduction-to-unrealengine-4/
This tutorial focuses on how to use the C++ language with the UnrealEngine.
- Basic knowledge in Object Oriented Programming
- A Mac with XCode or Windows 7+ with Visual Studio 2015 Community
- UnrealEngine
Depending on the operating system you use, there are different ways of running or compiling a C++ program. By default, UnrealEngine creates a XCode project on Mac and Visual Studio project on Windows.
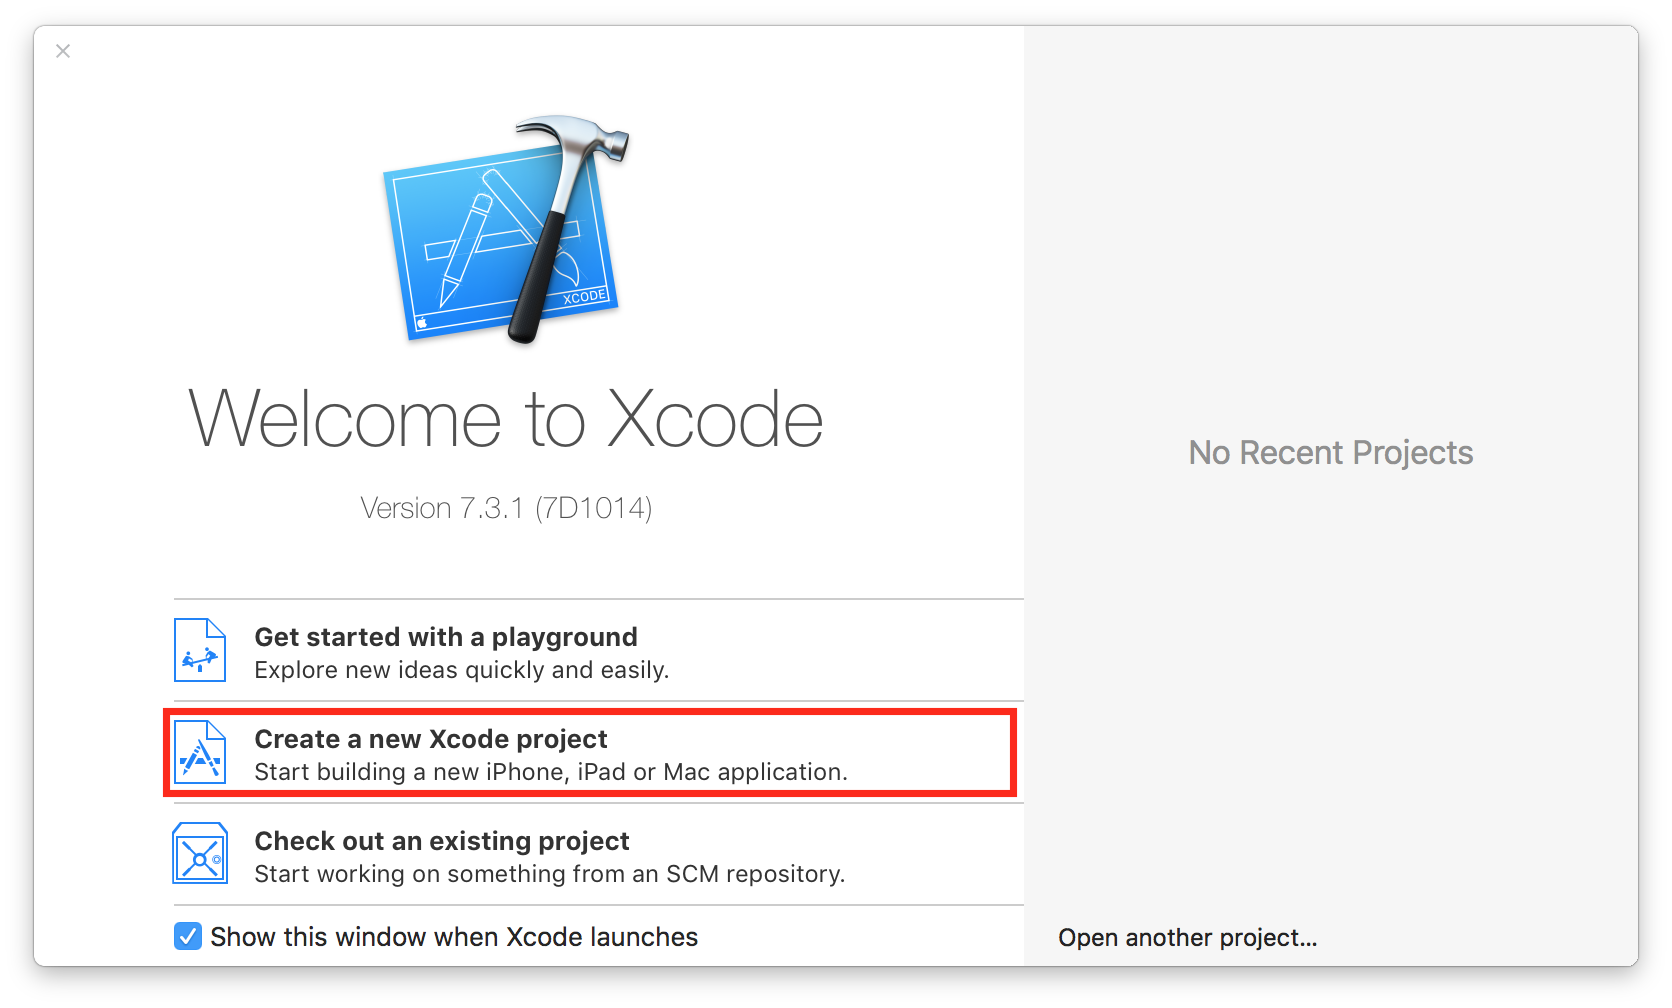
- Open
XCode.app, then click onCreate a new XCode project
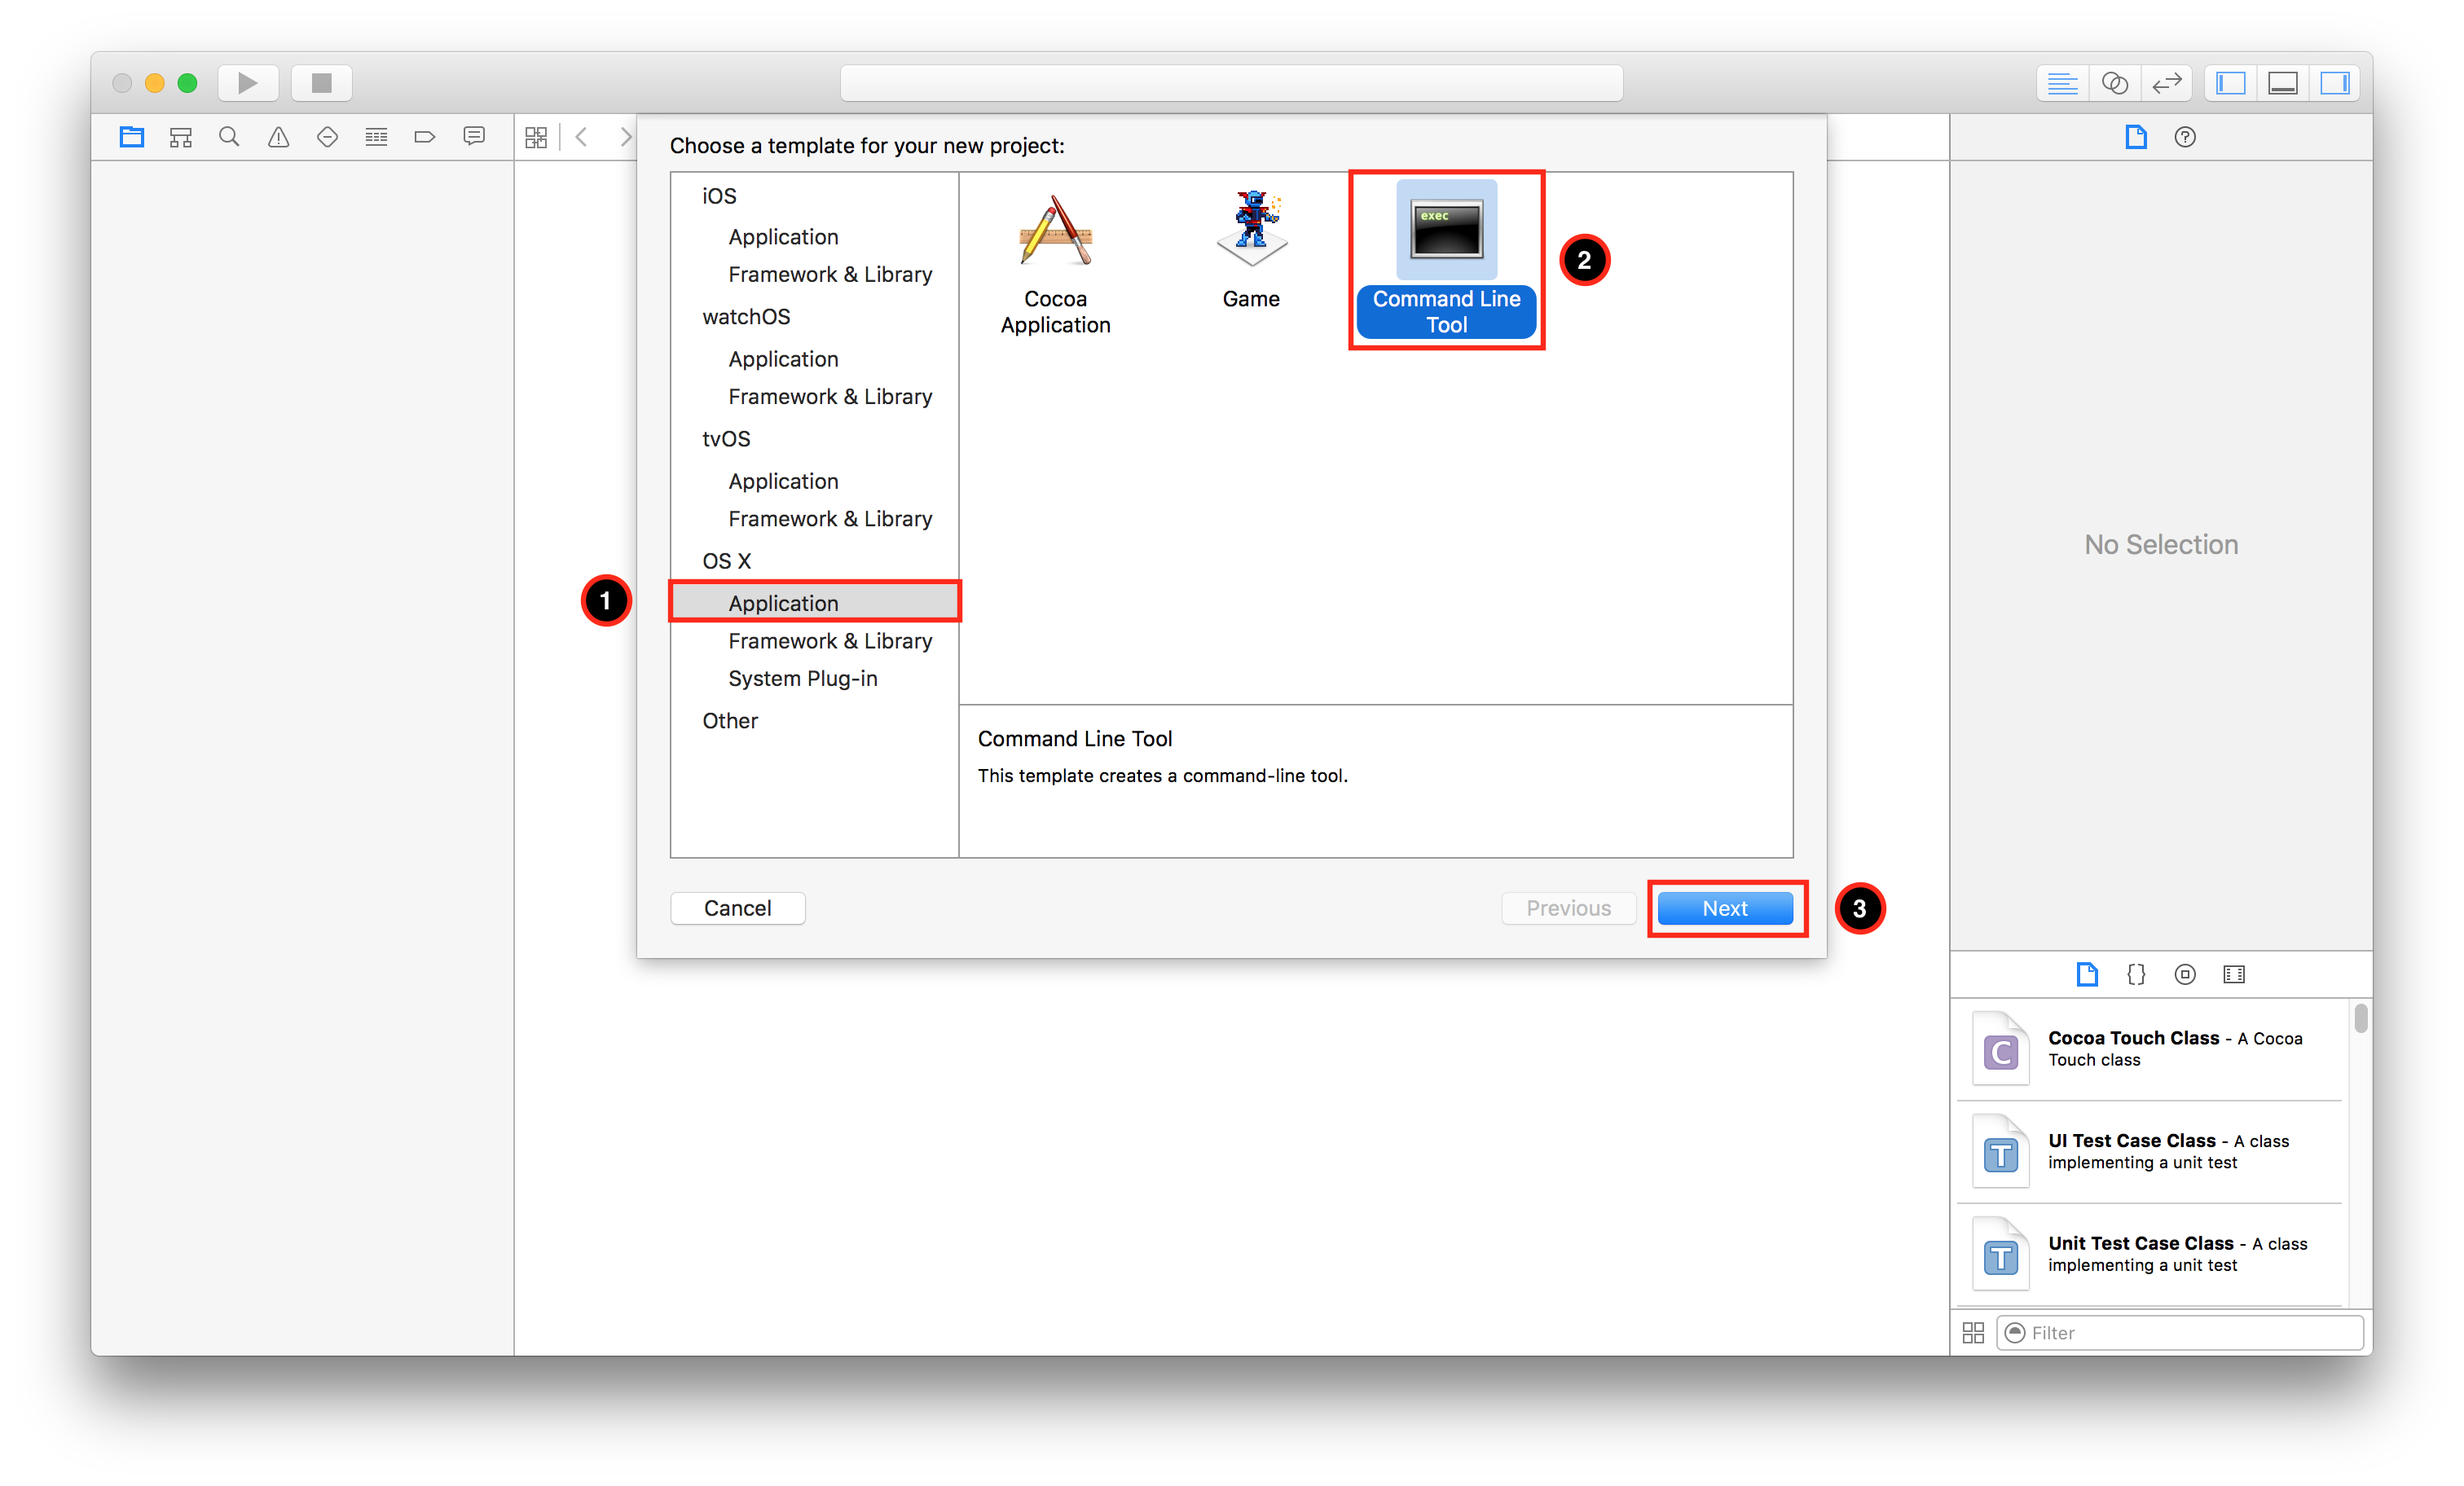
- Under
OS Xclick onApplication -> Command Line Tooland finally click Next
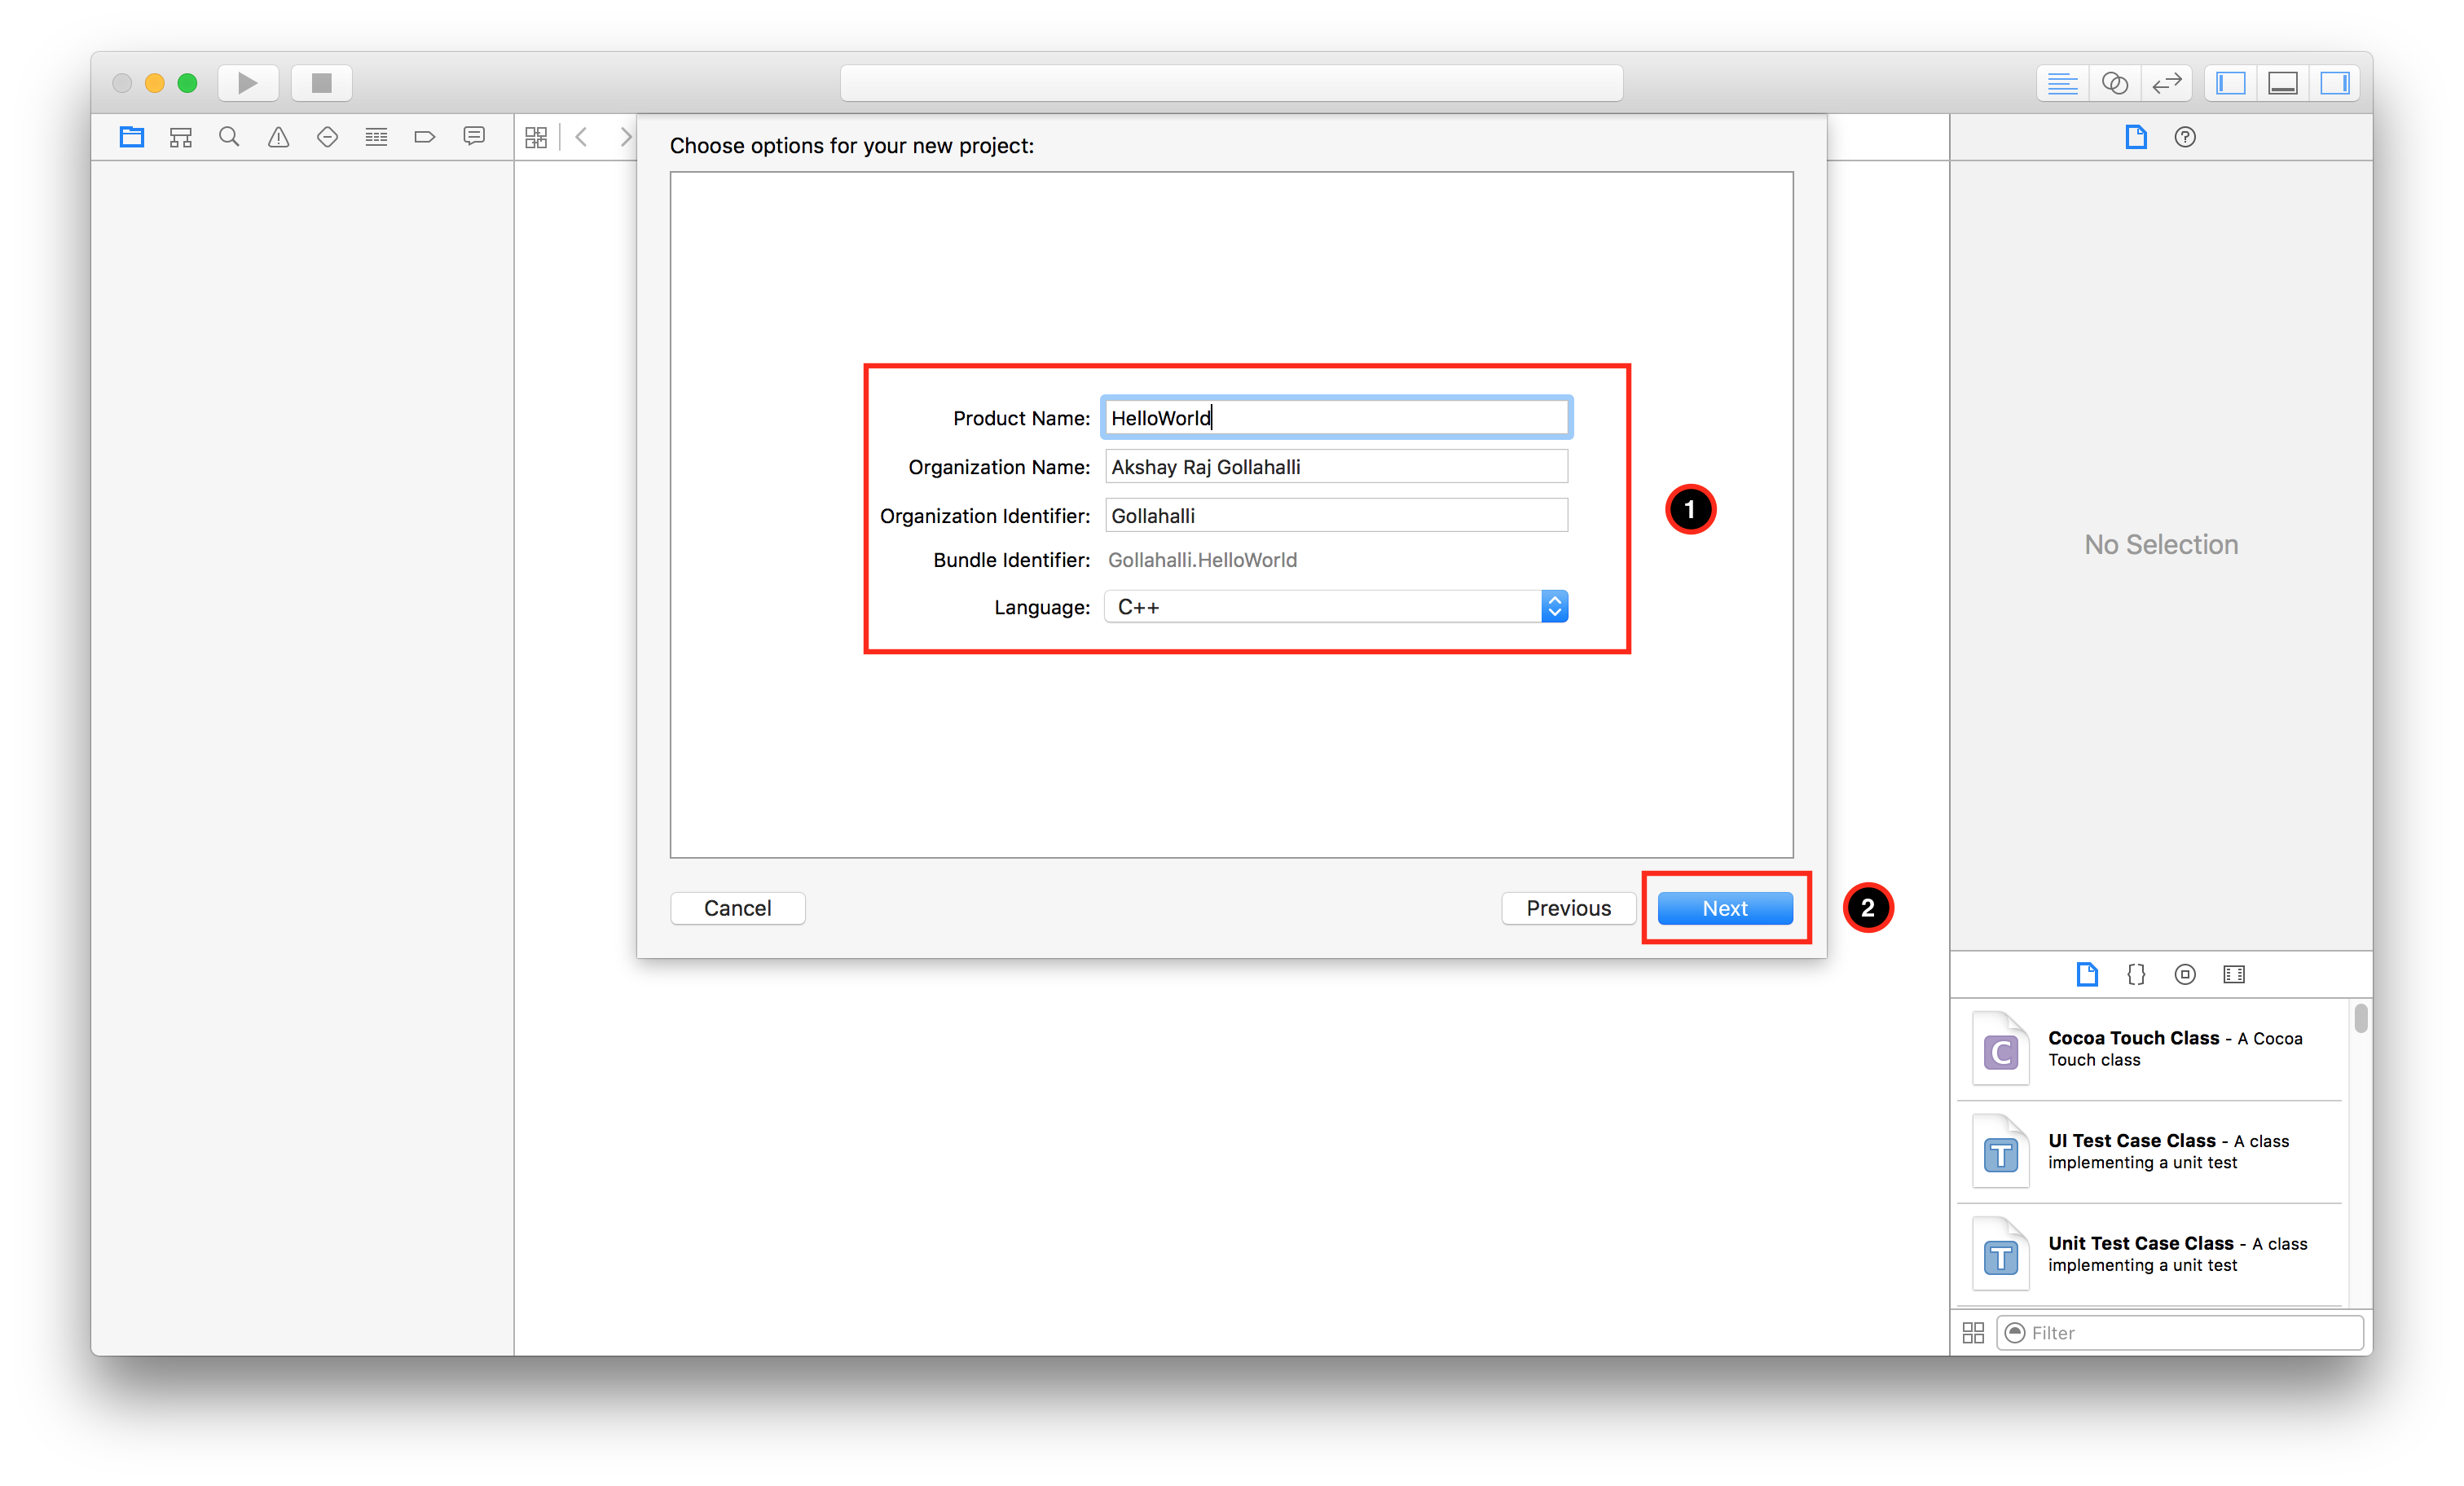
- Next, fill in the details and click Next.
-
This will open a pop-up asking you to choose a destination, once selected, click Create.
-
A new project wind is opened that looks like this:
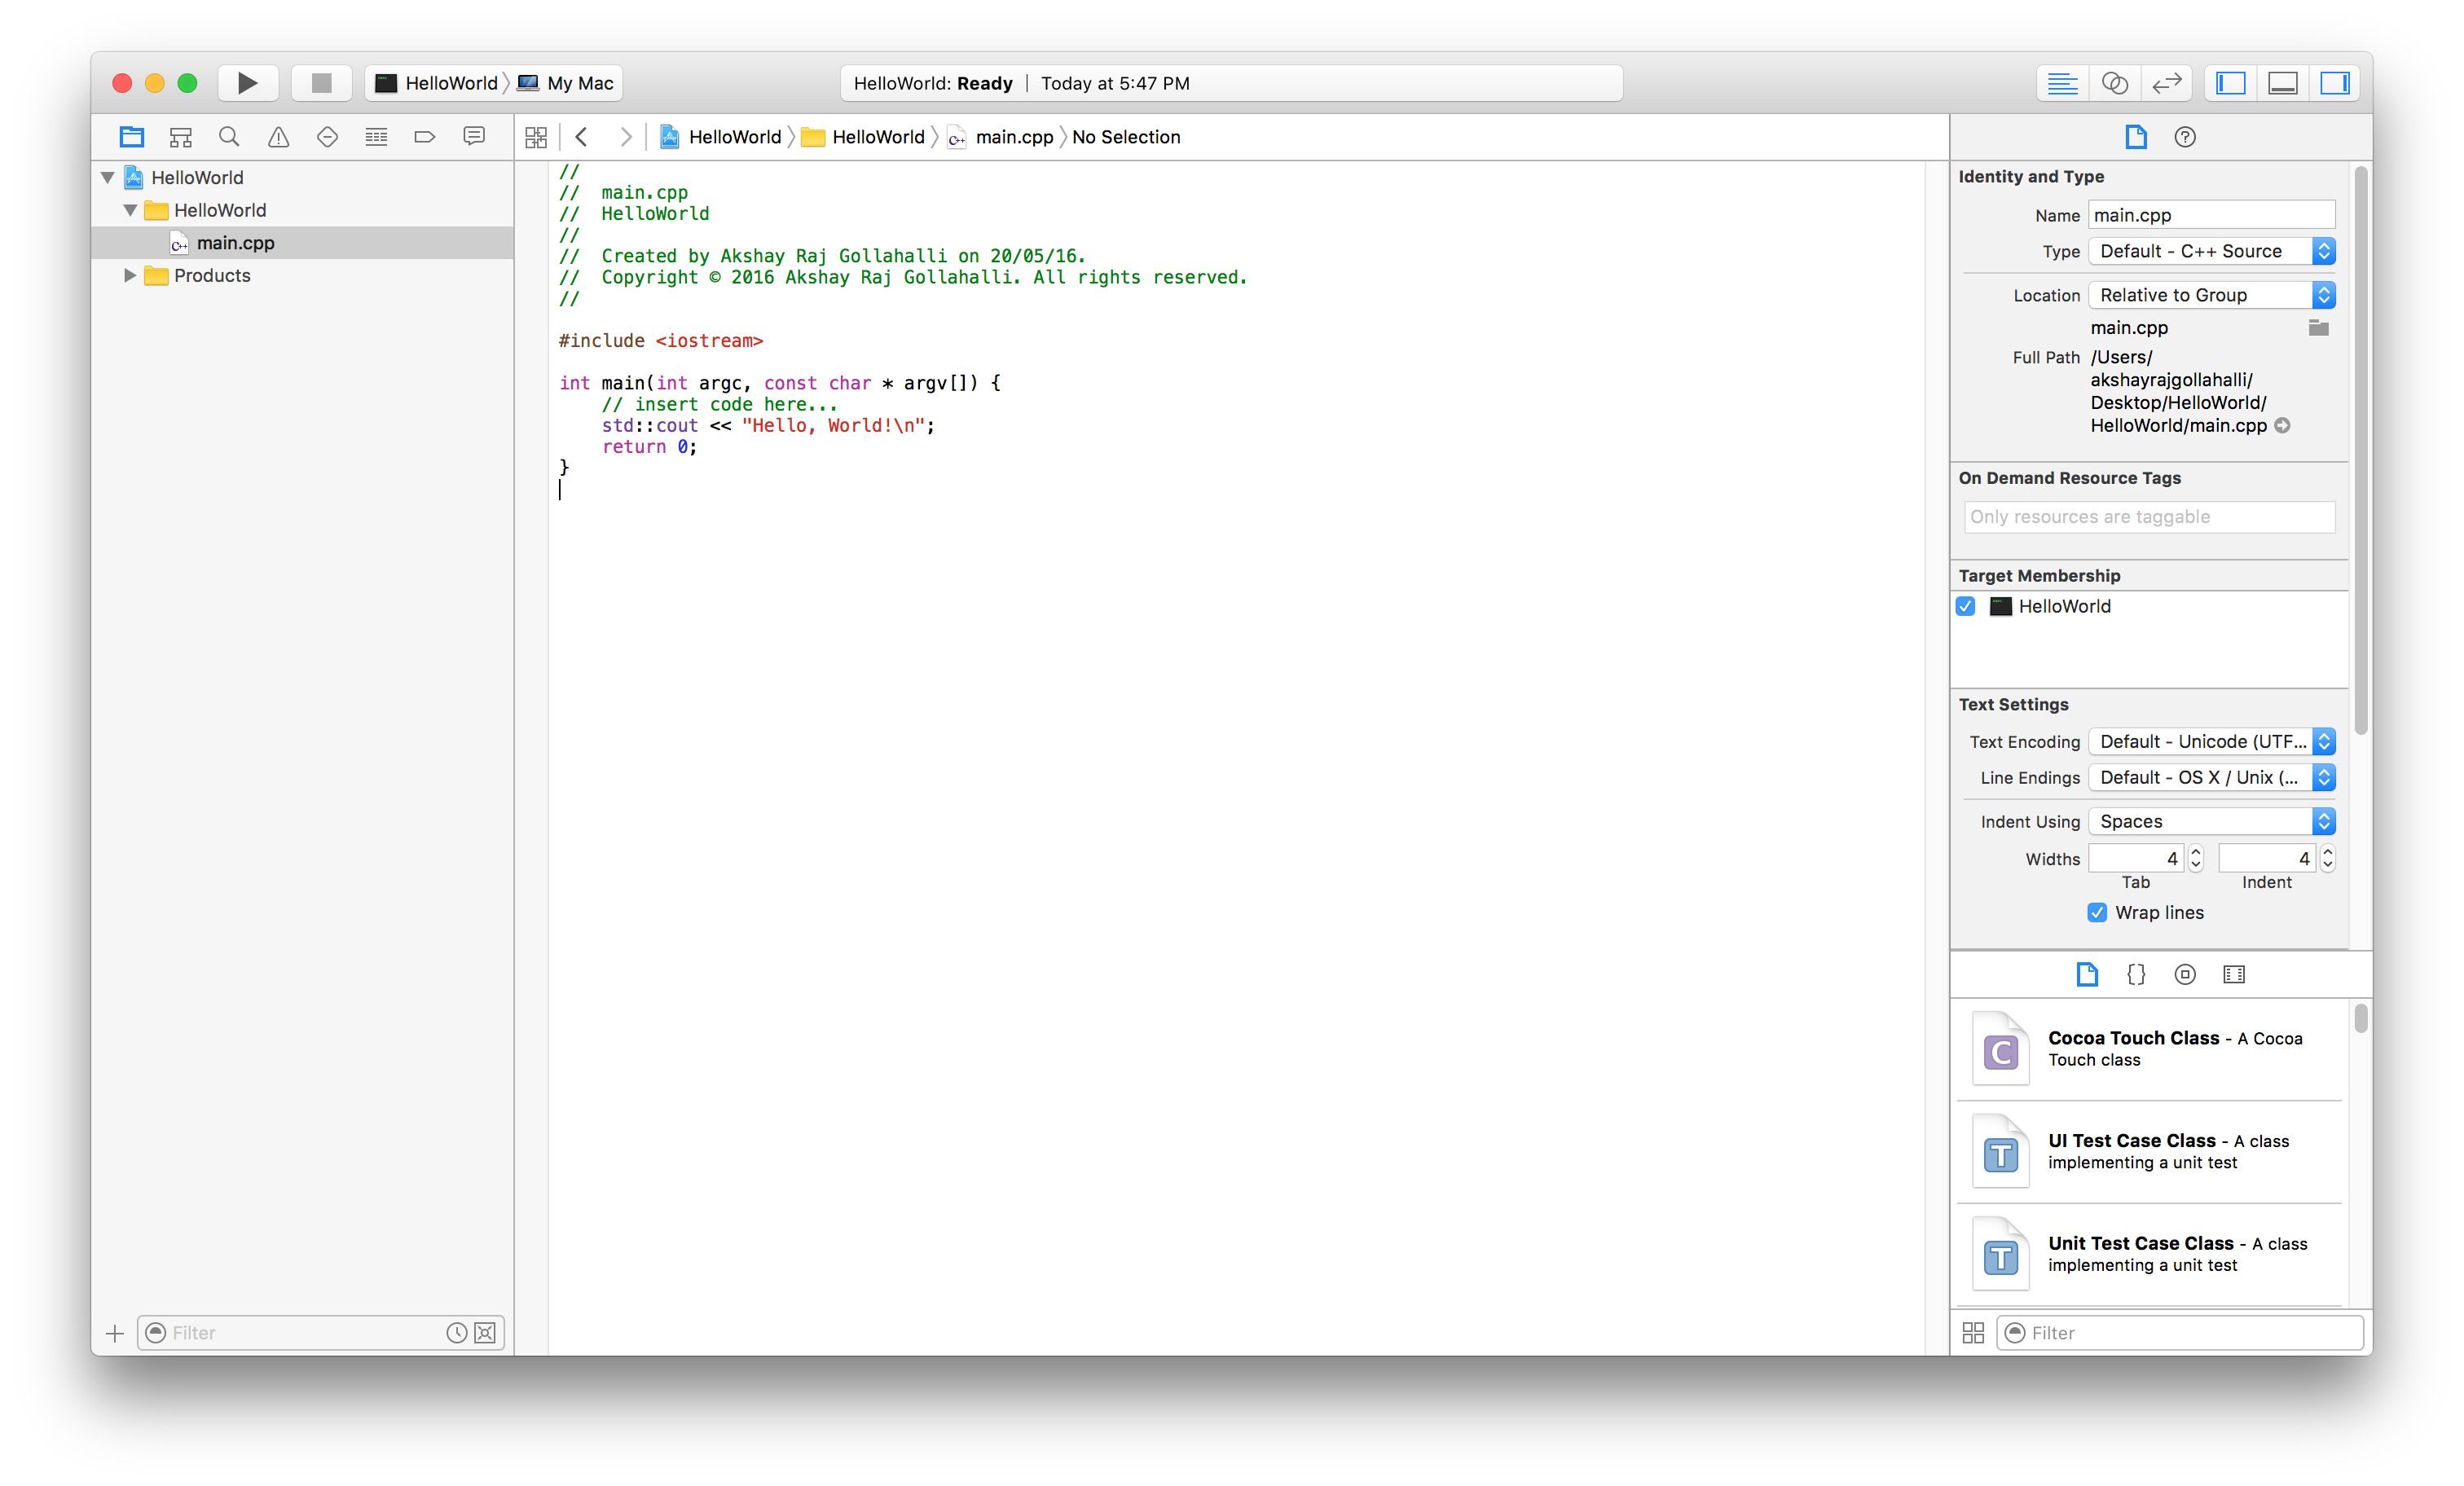
//
//  main.cpp
//  HelloWorld
//
//  Created by Akshay Raj Gollahalli on 20/05/16.
//  Copyright © 2016 Akshay Raj Gollahalli. All rights reserved.
//

#include <iostream>

int main(int argc, const char * argv[]) {
    std::cout << "Hello, World!\n";
    return 0;
}
Running the code
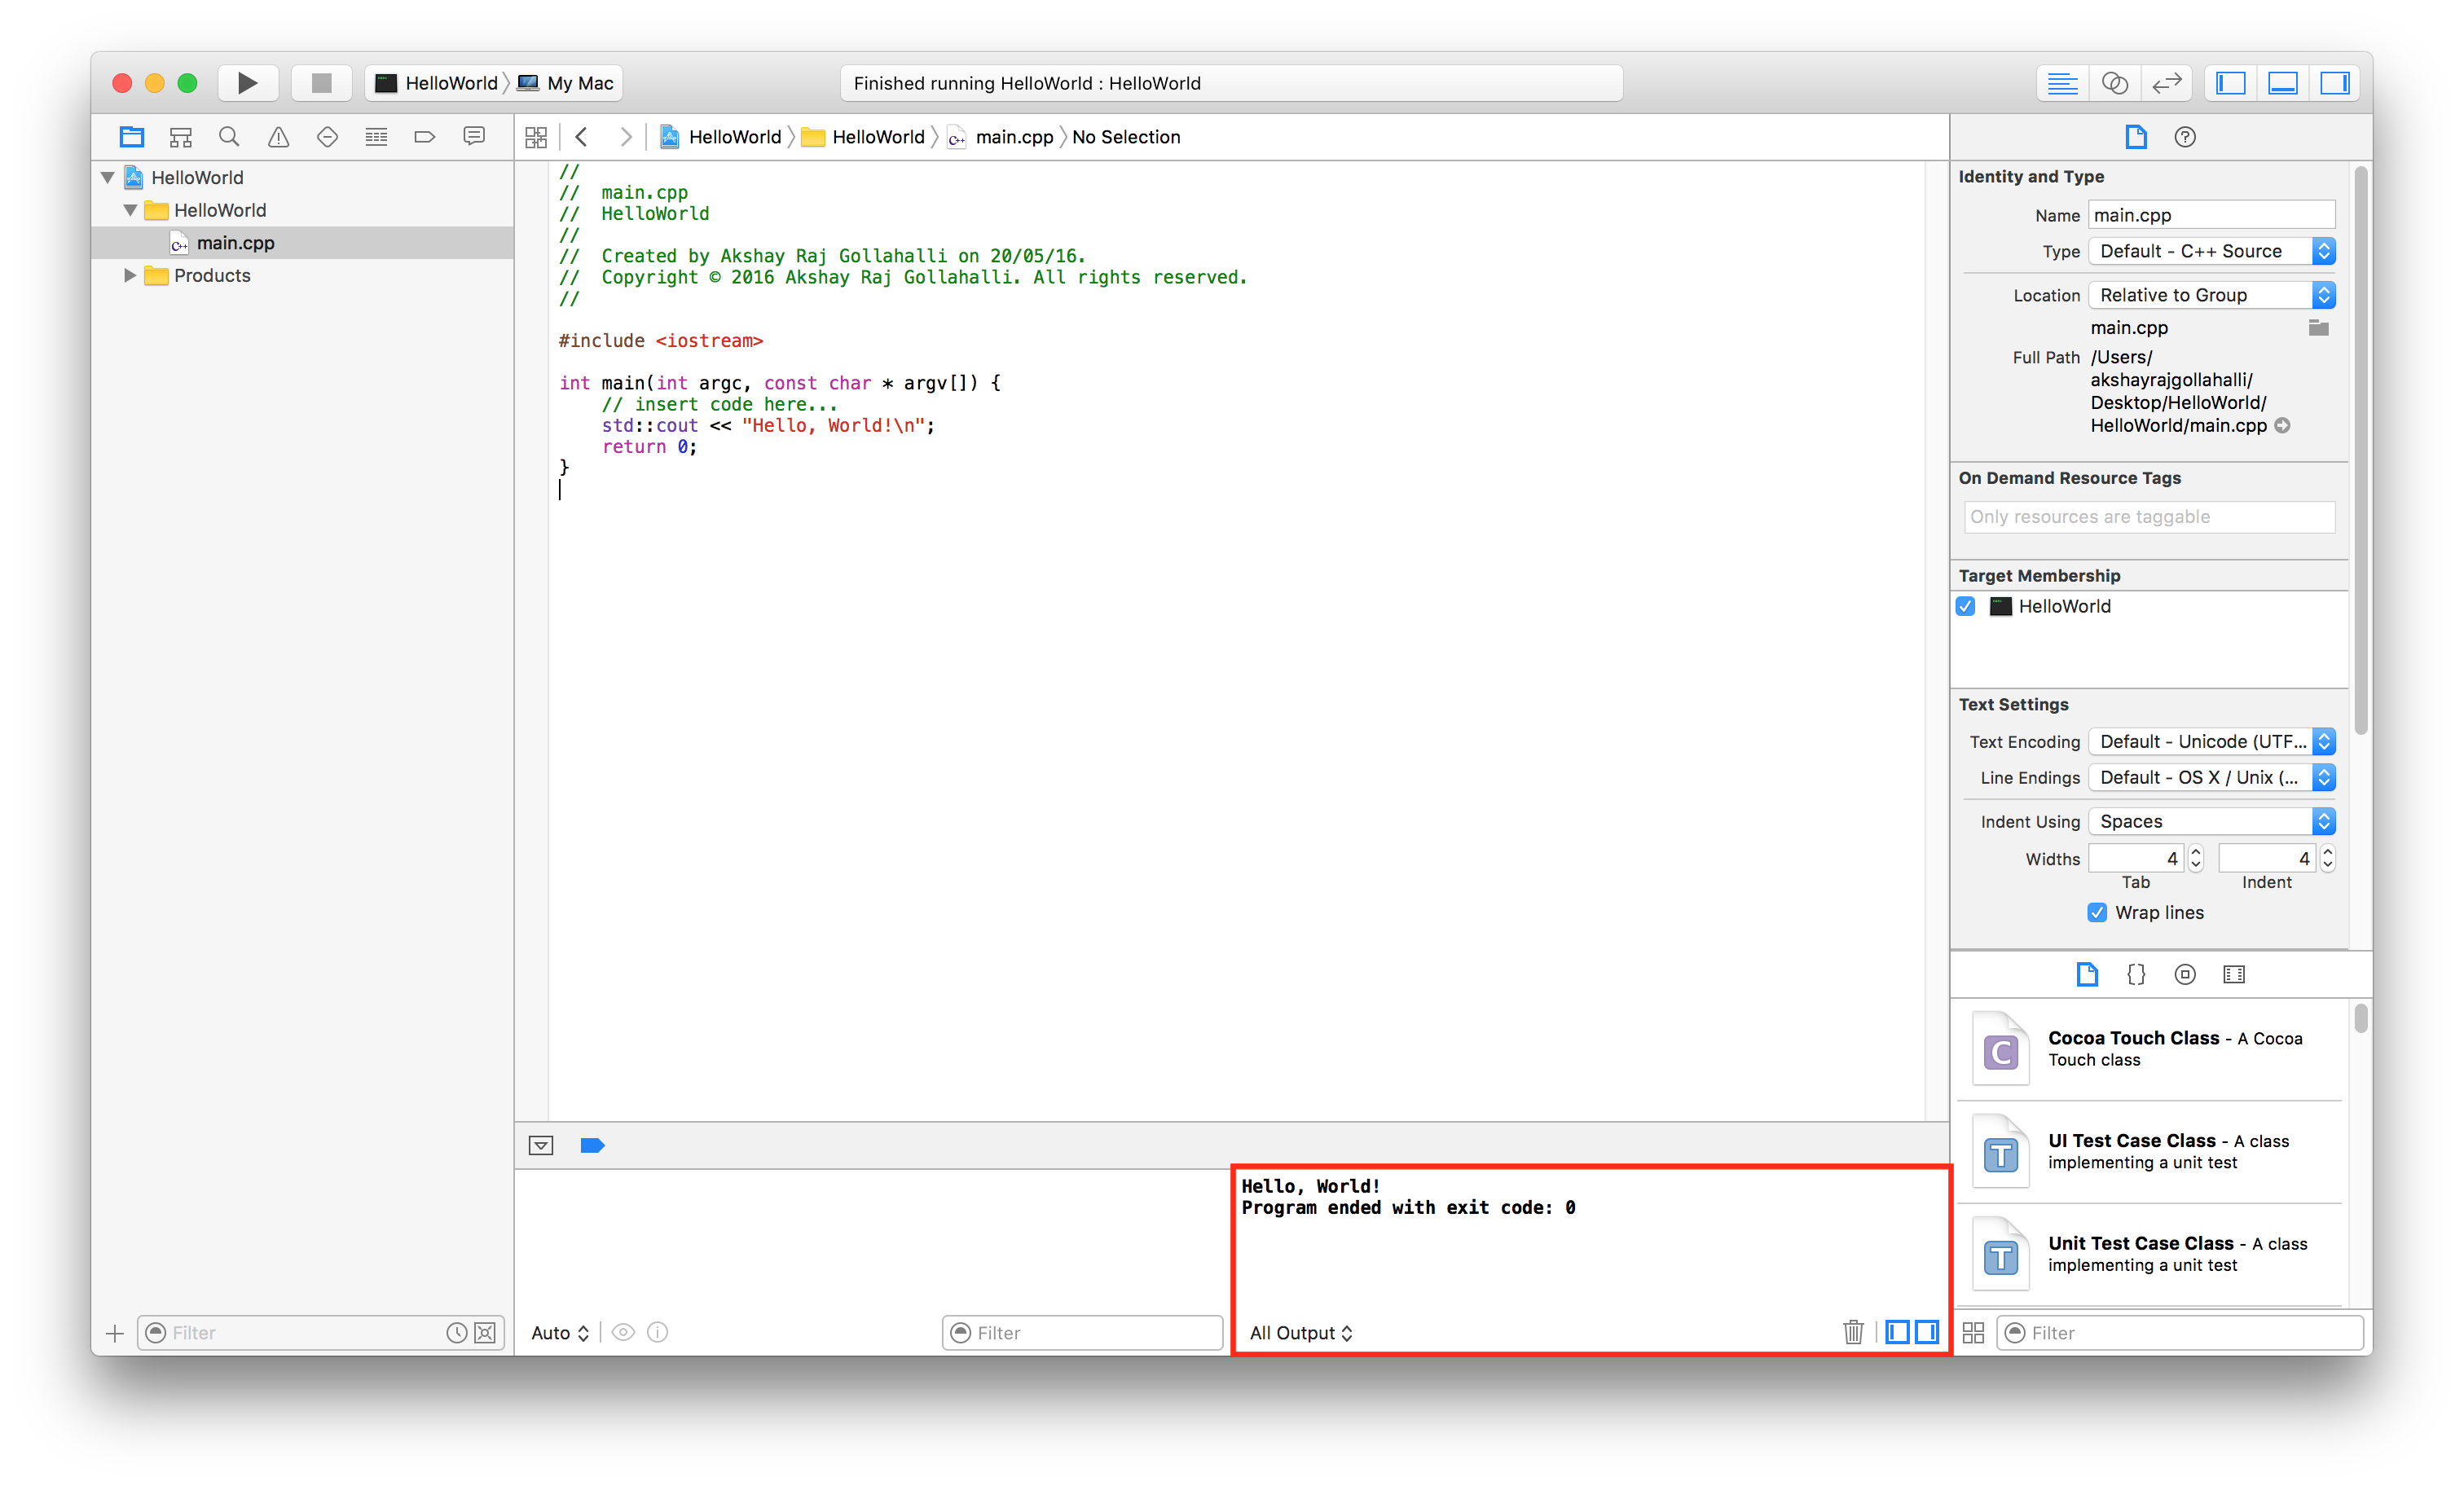
To run the code do the following, from the menu bar click on Product -> Run or cmd+R

If you are running XCode for the first time, you might have to enable developer mode on your Mac.
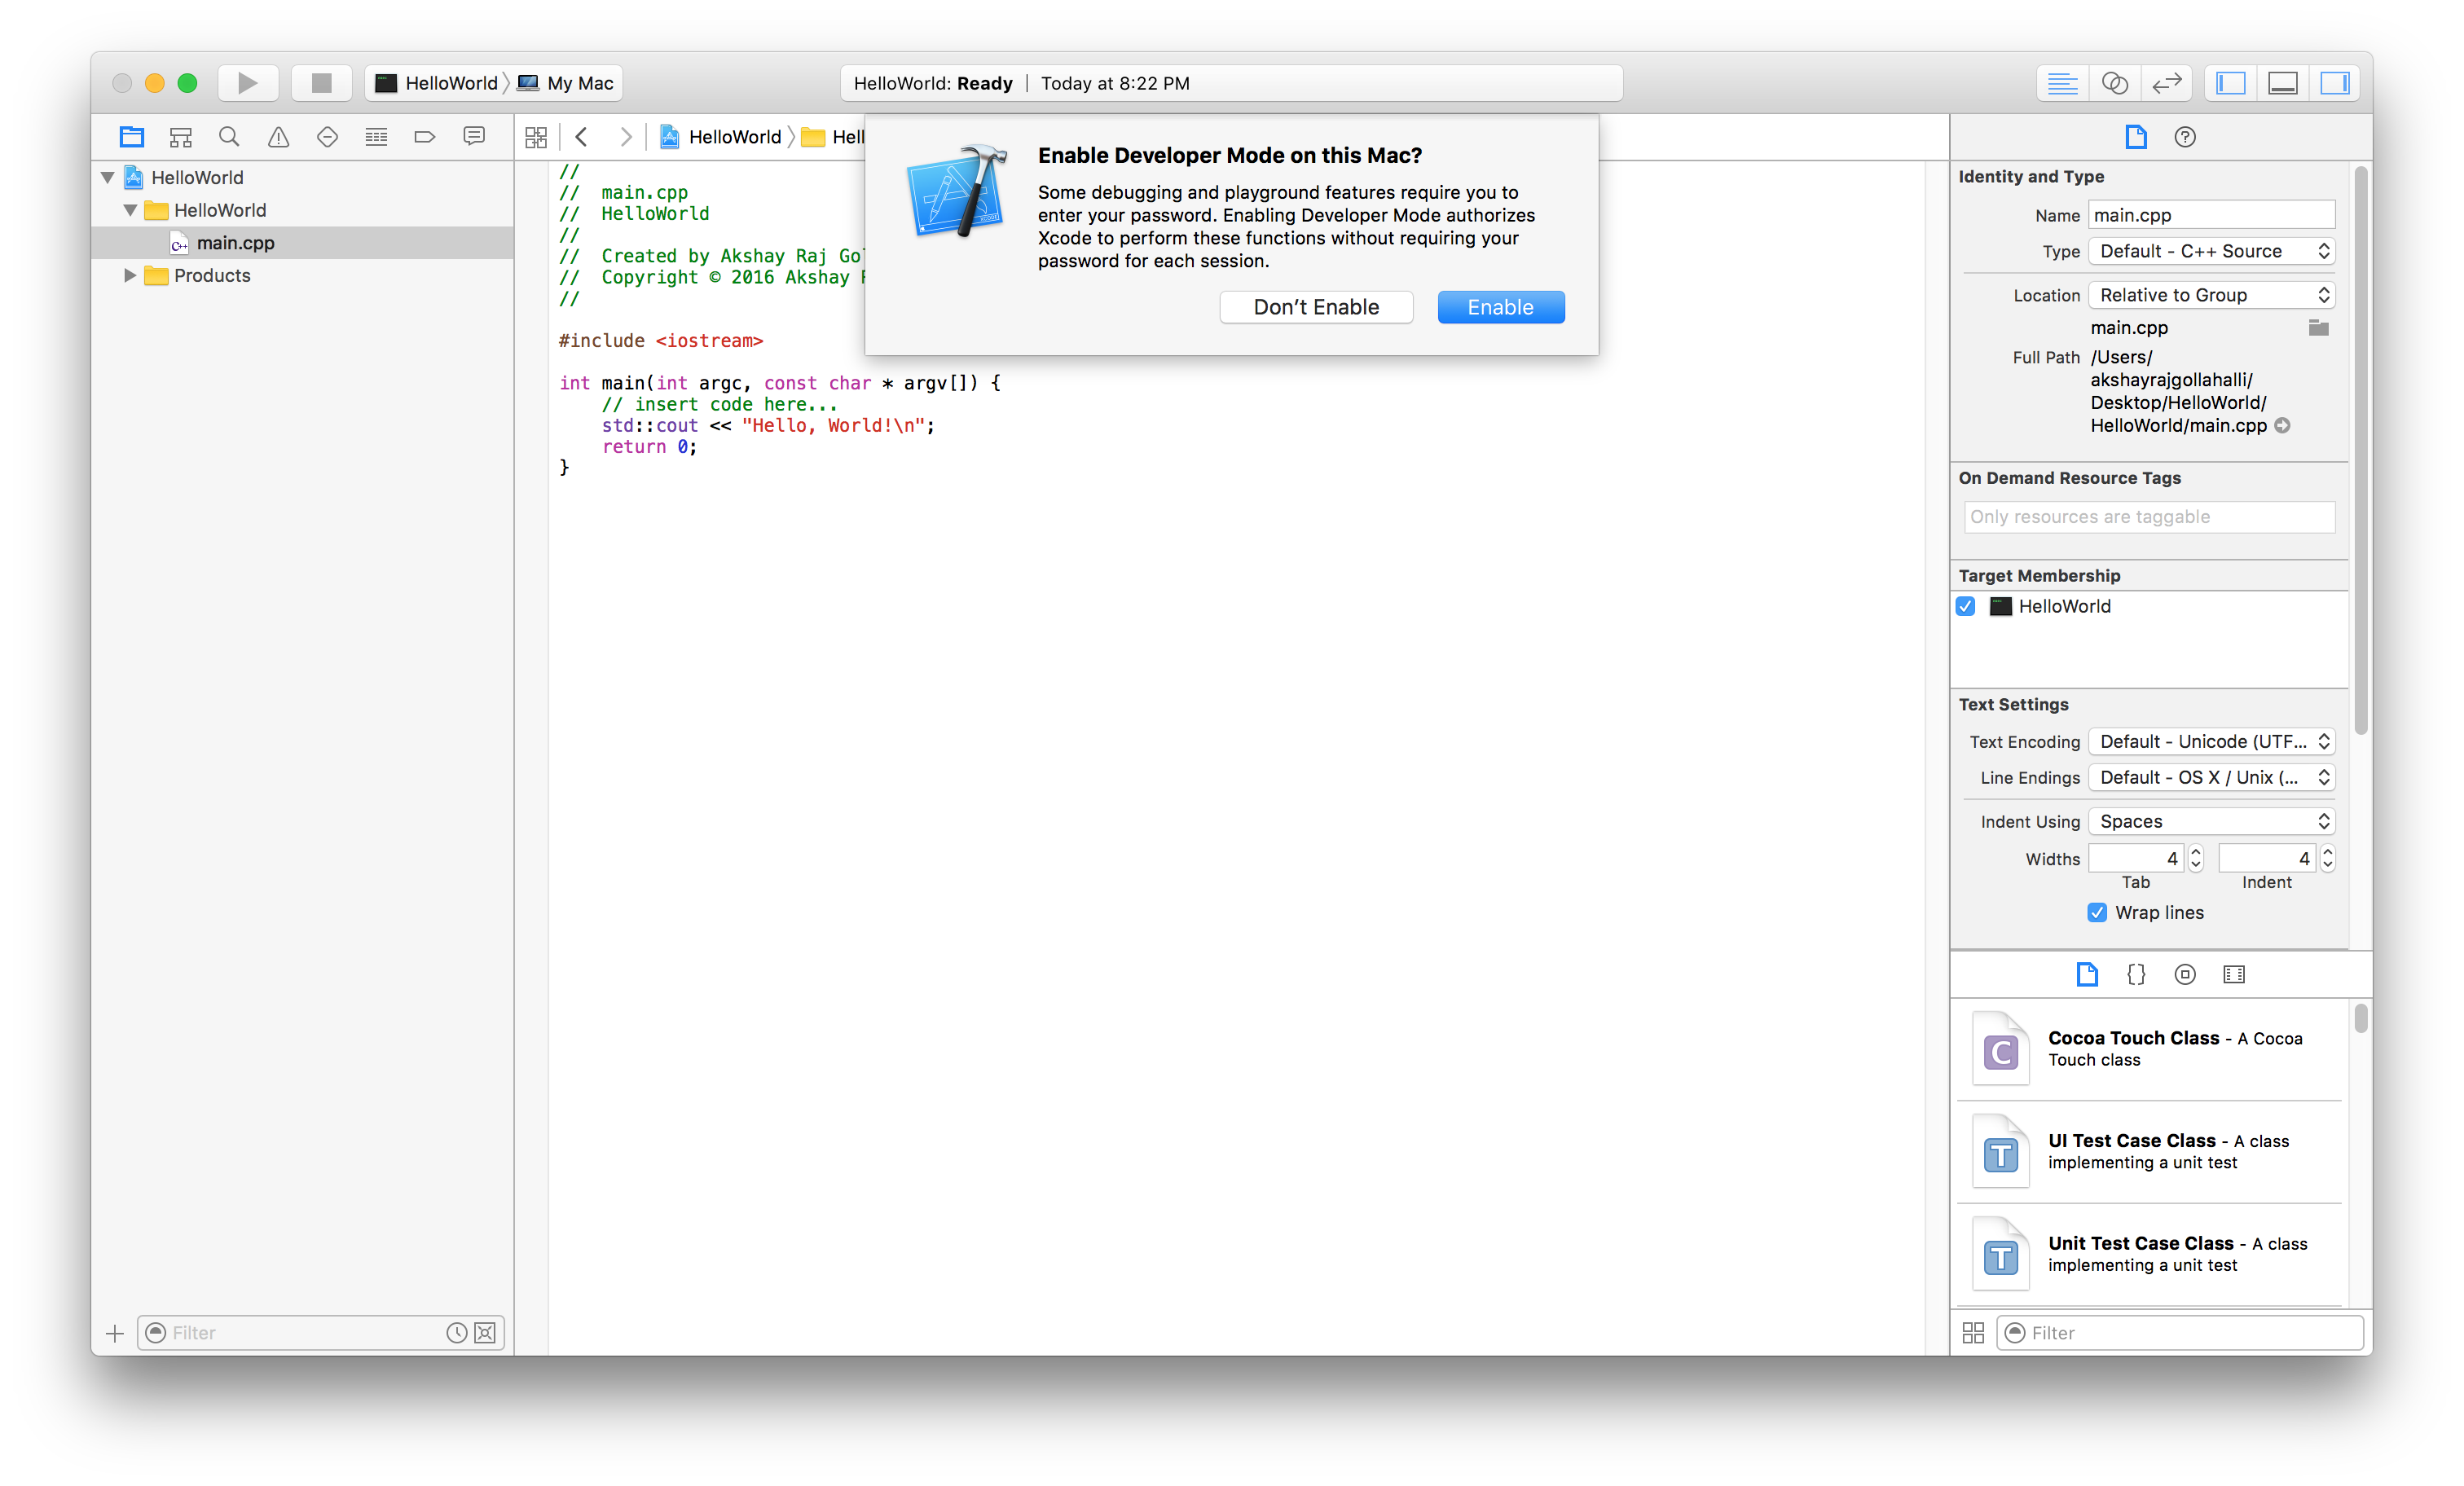
Click on Enable, this will ask you for your username and password for authentication. Once authenticated, you will find the result at the bottom of the XCode.
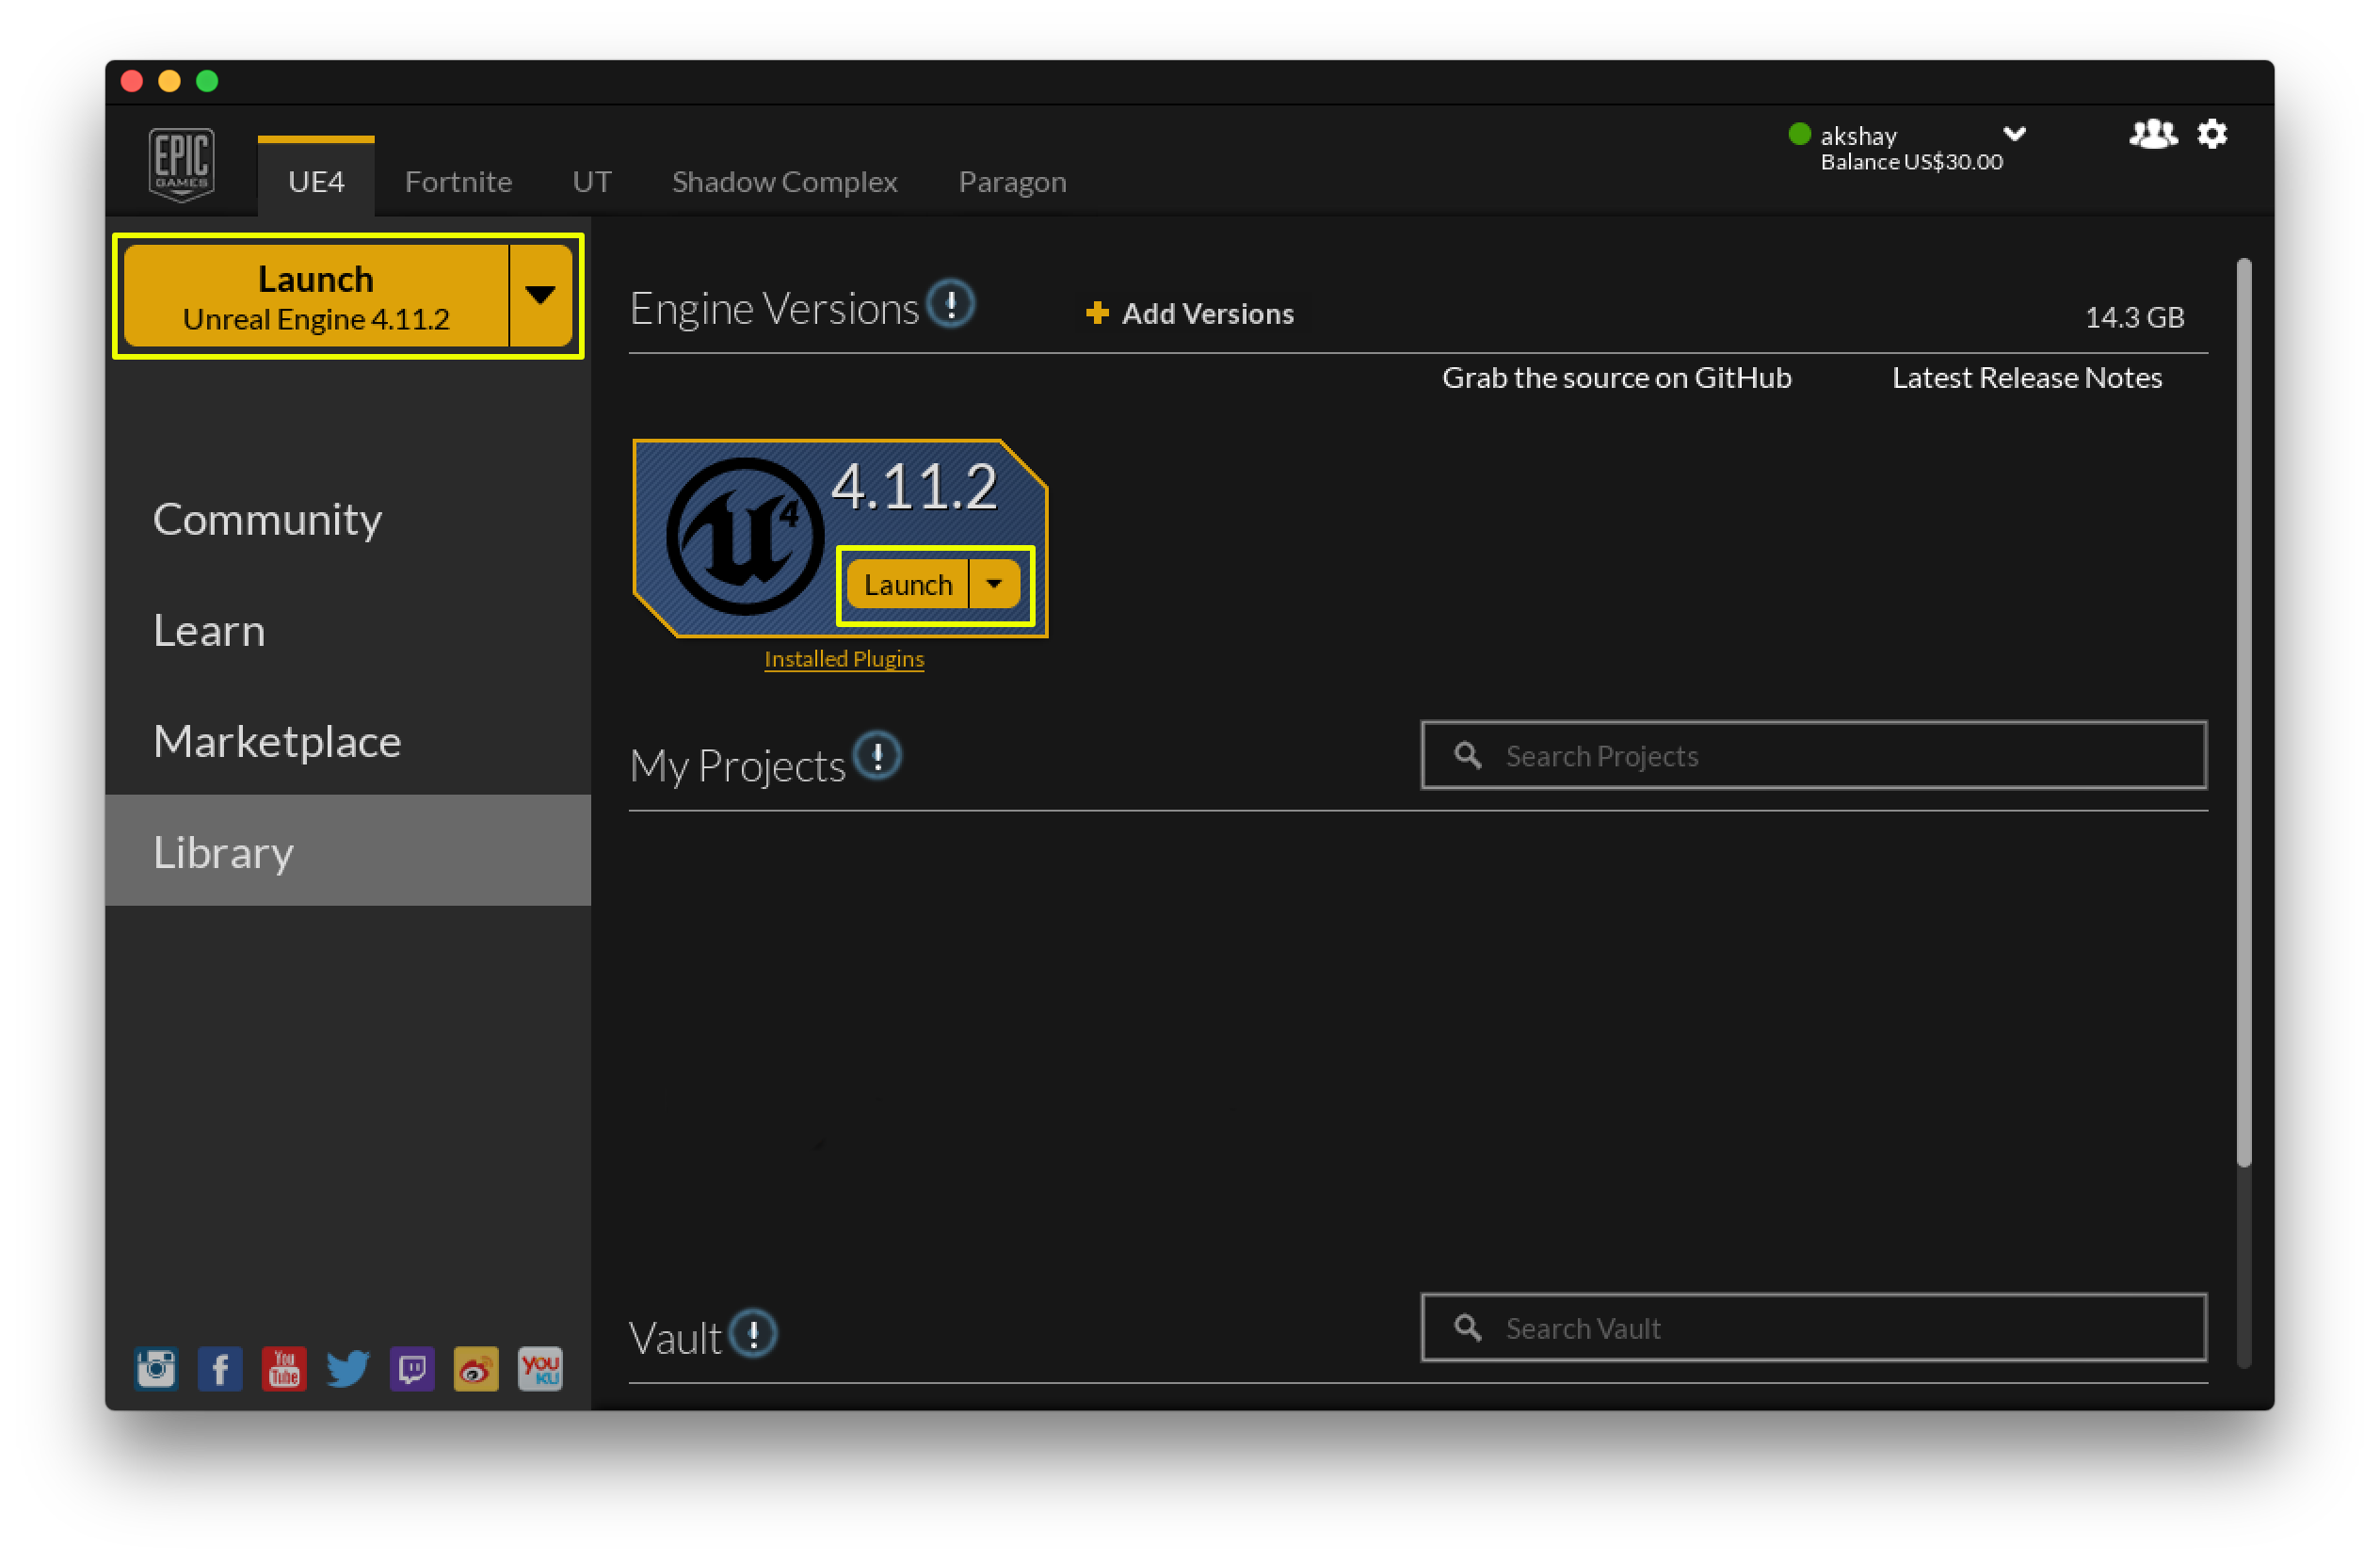
To create a project, open the Epic Game Launcher. There are two ways to launch UnrealEngine
- Click on the big button on the left side of the launcher, that says
Launch. - Or, go to
Library, underEngine Versionsclick onLaunch.
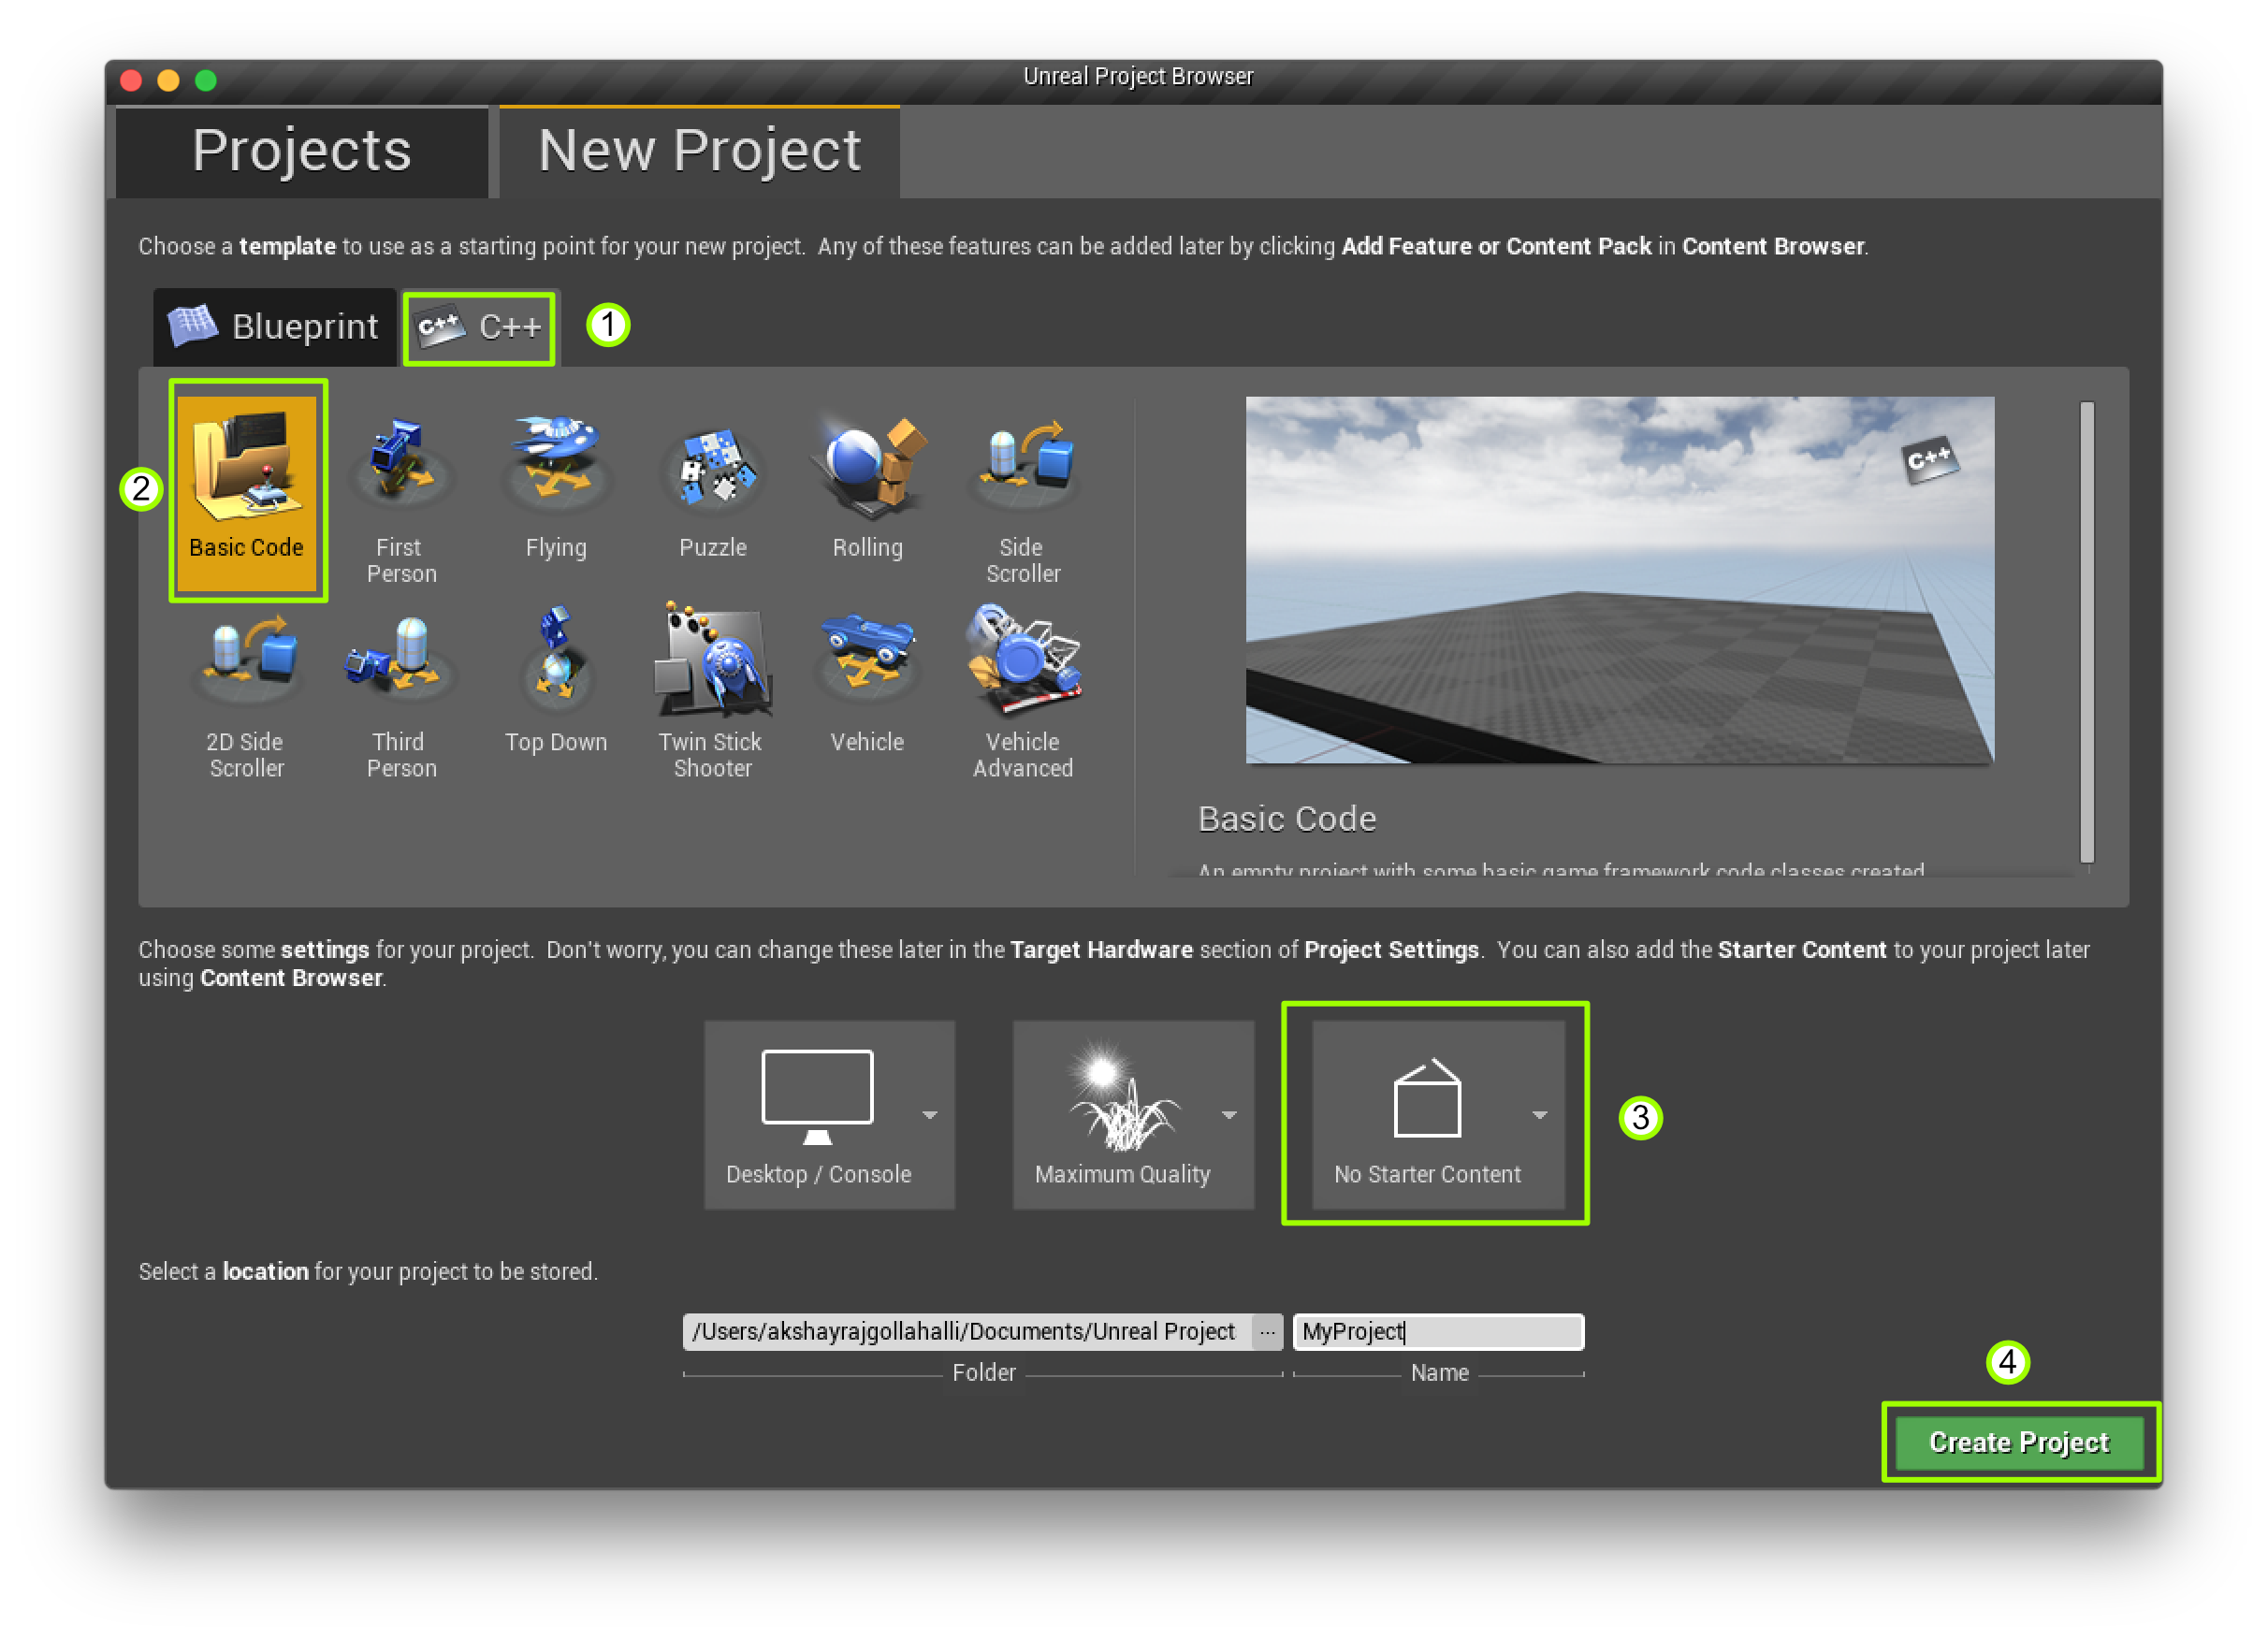
Once the UnrealEngine is up and running, you would have to create a project, to do that, click on C++ tab, under that click on Basic Code, then click on Starter Content and select No Starter Content then finally click on Create Project.
Tip 1: press cmd + alt (Mac) and move the cursor on an icon to get a quick help.
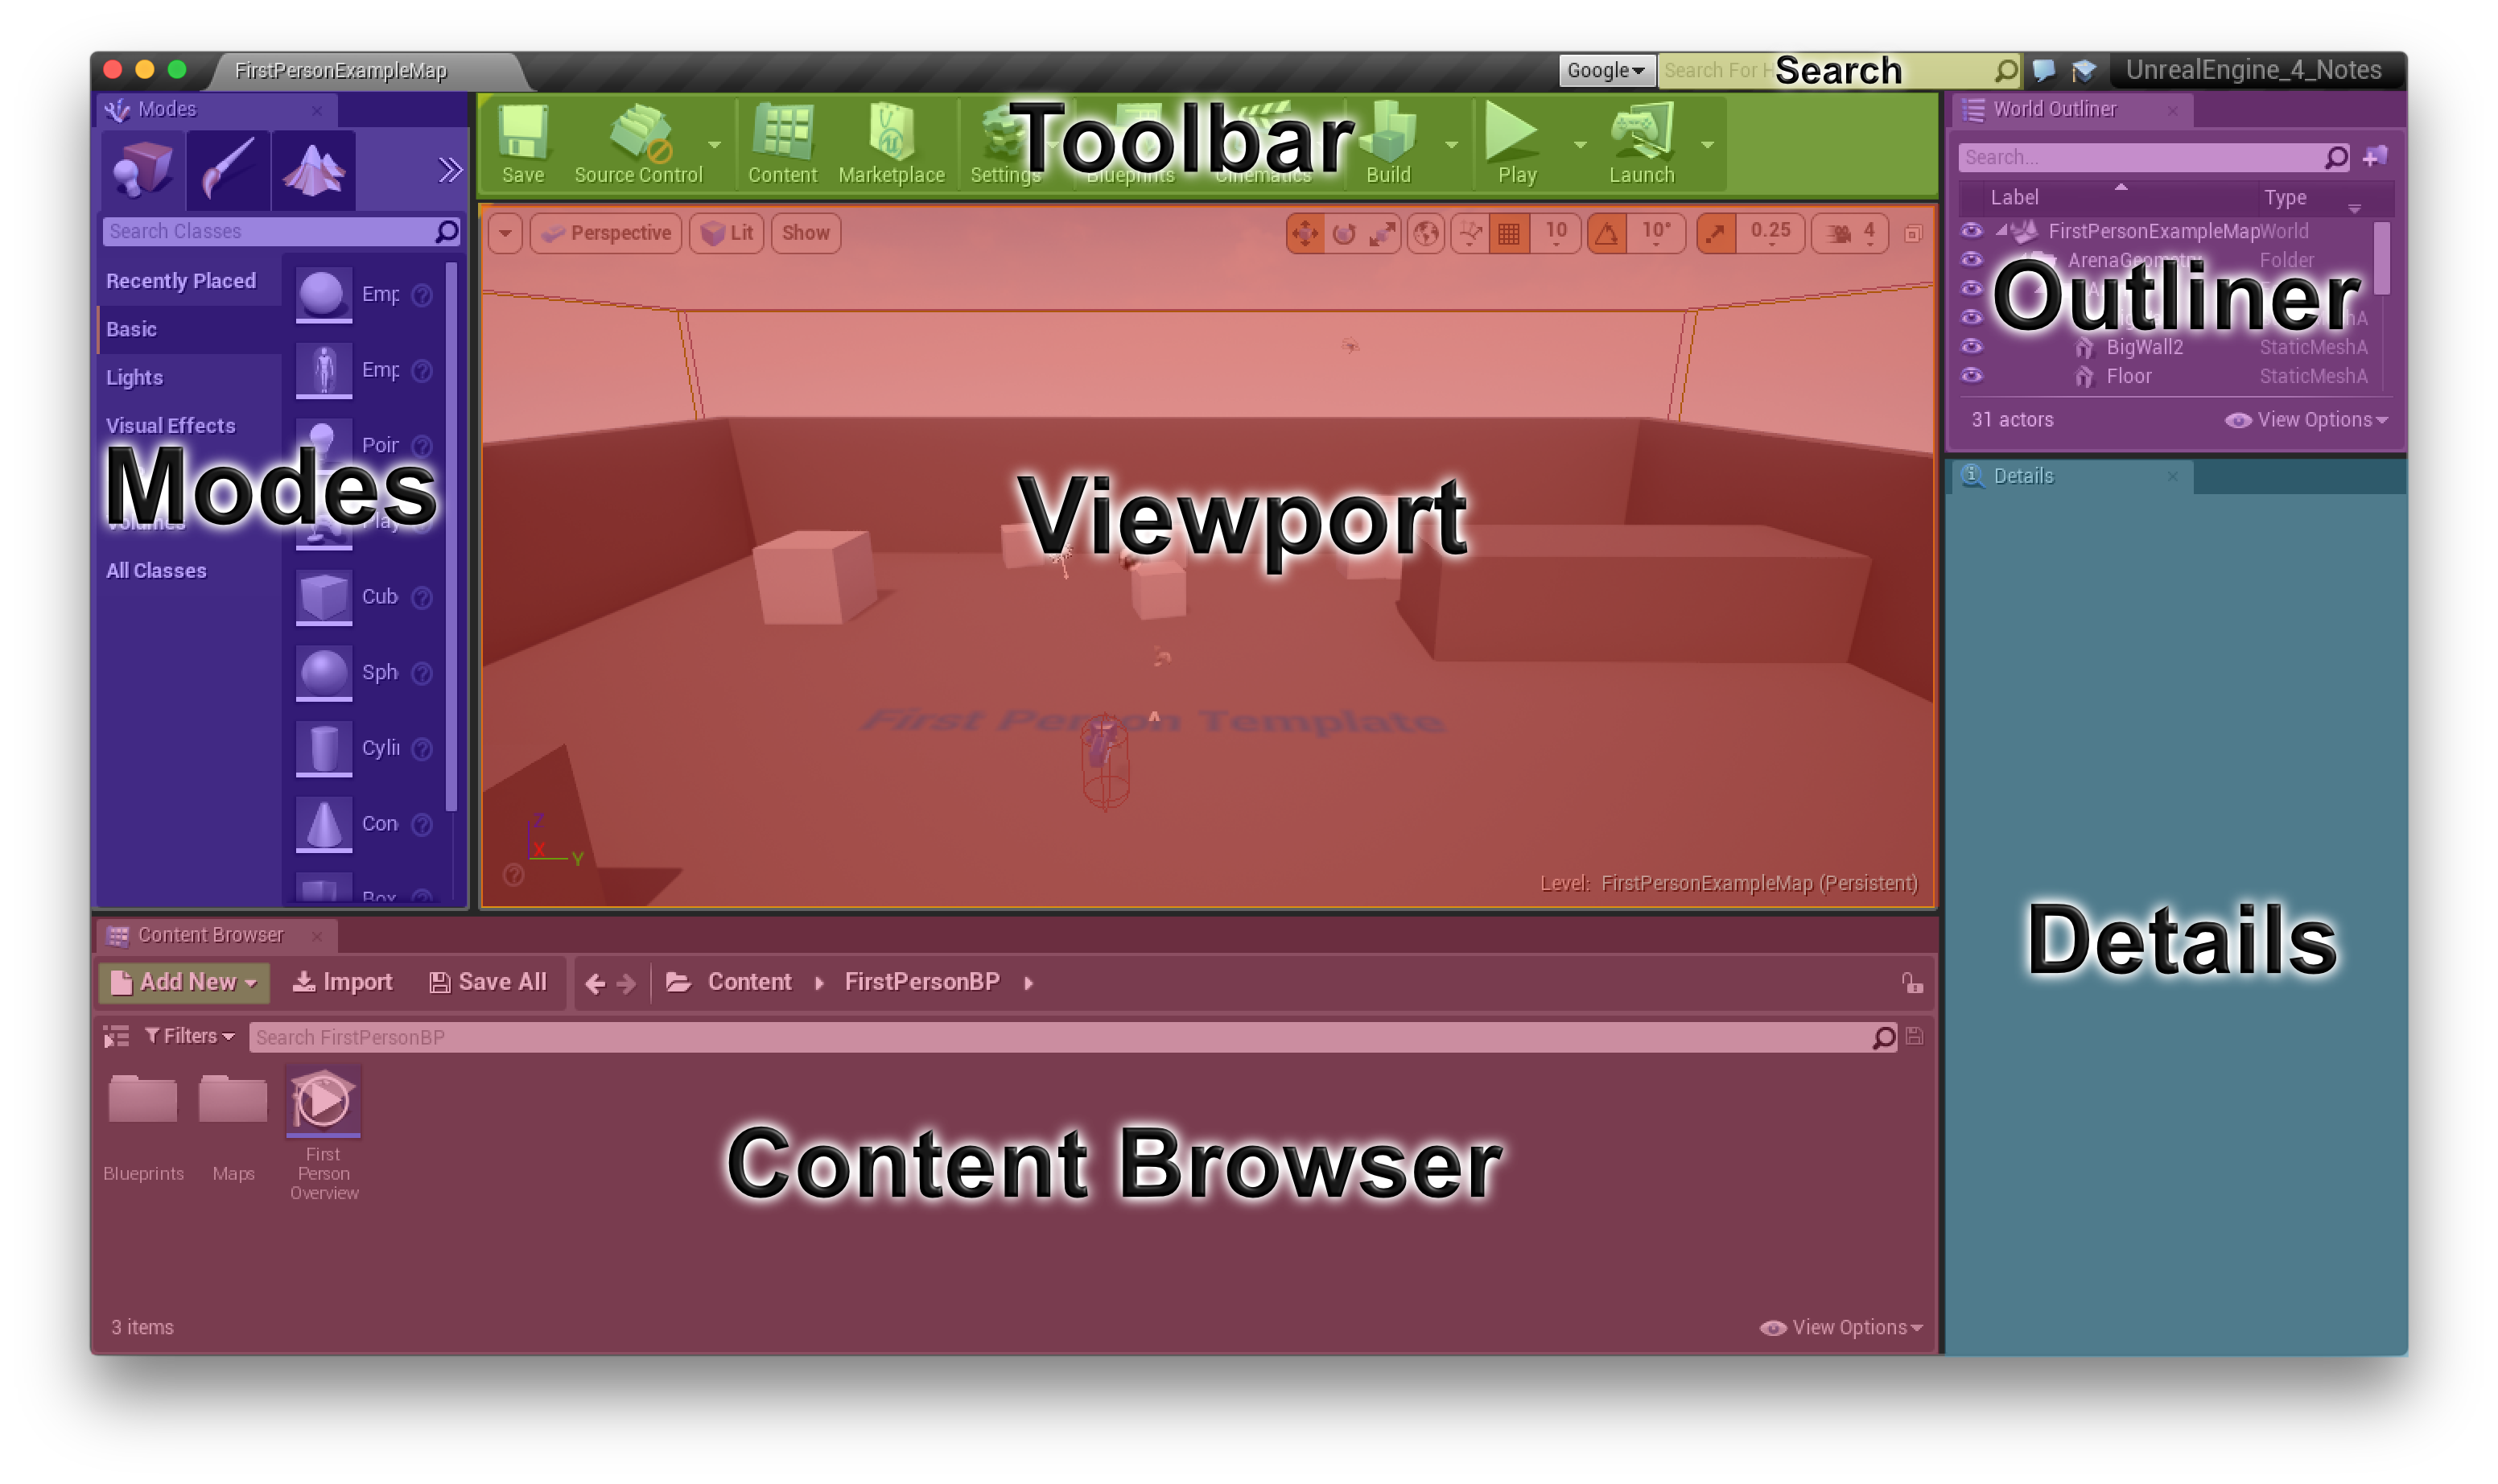
UnrealEngine (for me or maybe for everyone) is divided into seven parts:
- Modes - This is where all the tool to build an environment is kept.
- Content browser - All your project files can be browsed from this place.
- Details - When you click an object (Actor, Pawns, Lights, etc..) all its details are displayed here.
- World outliner (Outliner) - Whatever is available in the viewport, can be seen here. It is like a Content browser but for you viewport.
- Toolbar - Buttons to Save, Play, etc. are here.
- Search - This is where you can search for help regarding an object.
- Viewport - Your design area or the Editor.