![]()
![]()
![]()


Bombard is a tool for stress test and benchmarking your HTTP server. Especially it's good to simulate a heavy load and initial burst of simultaneous HTTP requests with complex logic.
It is designed to be extremely simple yet powerful tool to load test functional behavior.
Thanks to optional Python inlines you can fast and easy describe complex logic for the tests.
Test report shows you how many requests per second your server is capable of serving and with what latency.
pip install bombard --upgradeAfter that use bombard (bombard.exe in Windows) executable:
bombard --helpRequests can be just URL or contain JSON described like this
supply:  # you can redefine variables from command line (--supply host=http://localhost/)
  host: https://jsonplaceholder.typicode.com/

getToken:
    url: "{host}auth"  # use custom {host} variable to stay DRY
    method: POST
    body:  # below is JSON object for request body
        email: name@example.com
        password: admin
    extract:  # get token for next requests
        token:
In first request you can get security token as in example above.
And use it in next requests:
postsList:
   url: "{host}posts"
   headers:
       Authorization: "Bearer {token}"  # we get {token} in 1st request
   script: |
       for post in resp[:3]:  # for 1st three posts from response
           # schedule getPost request (from ammo section)
           # and provide it with id we got from the response
           reload(ammo.getPost, id=post['id'])
Included examples. To list examples
bombard --examplesFrom command line you can change number of threads, loop count, supply vars, customize report and so on.
Also you can bootstrap your own bombard.yaml file from any example you
like:
bombard --init --example simple
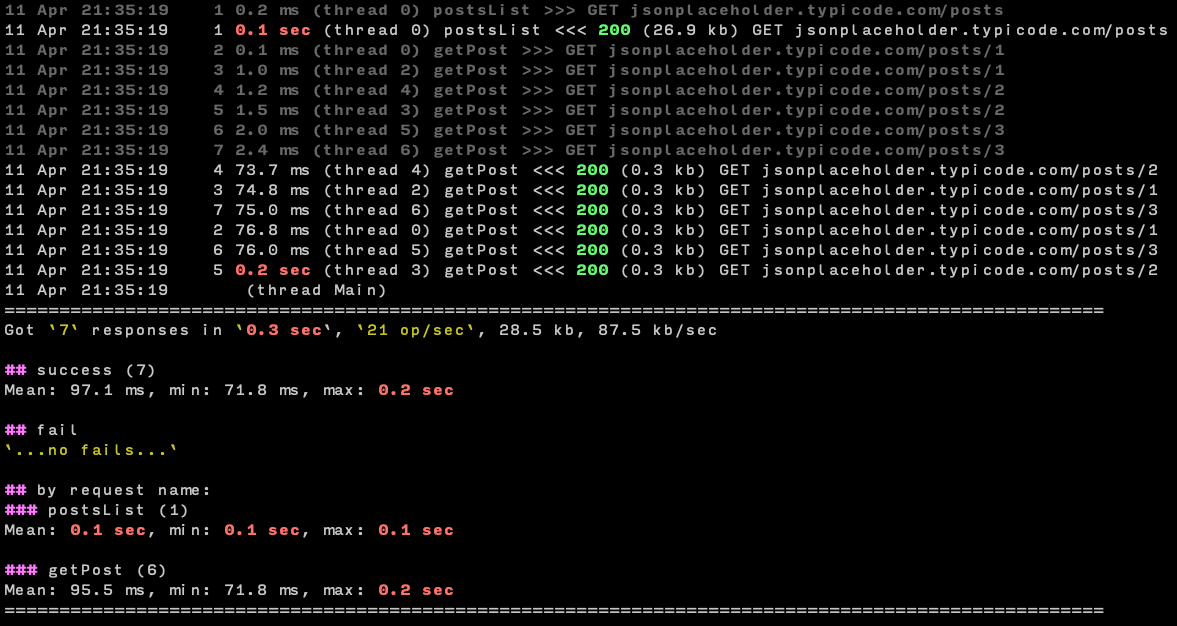
Example of report for the command:
bombard --example simple --repeat 2 --threshold 100
Automatically published on pypi on create release on github.
If for some reason you want to publish from local machine: 1) Place pypi password into ~/.pypirc 2) make upload
Translation managed with Transifex
make help