Javascript dashboard auto-generation script to mimic comfortable Munin behaviour in Grafana. Main project goal is to be able to see all the stats for the added machine in one dashboard (to have possibility to add auto-generated URL to the existing monitoring system alarm notification for faster incident investigation). Project is written and tested with CollectD->InfluxDB+(input_plugins.collectd) as a system stats collector but with minor configuration changes should be collector independent.
✅ Tested for Grafana 2.6.0 and InfluxDB v0.8.8
✅ Tested for Grafana 2.6.0 and InfluxDB v0.11.1
✅ Tested for Grafana 3.1.1 and InfluxDB v1.0.2
✅ Tested for Grafana 4.1.2 and InfluxDB v1.2.0
There is a bash installation script included. Substitute GRAFANA_ROOT_DIR with a path to your Grafana installation (e.g. /usr/share/grafana).
# for grafana 2.6.0 and influxdb v0.8
git clone -b influxdb_v0.8 --depth=1 https://github.com/anryko/grafana-influx-dashboard.git

# for grafana 2.6.0 and influxdb >= v0.9
git clone -b grafana2.6_influxdb0.11 --depth=1 https://github.com/anryko/grafana-influx-dashboard.git

# for grafana 3.1 and influxdb >= v0.9
git clone -b grafana3.1_influxdb1.0 --depth=1 https://github.com/anryko/grafana-influx-dashboard.git

# for grafana >= 4.0 and influxdb >= v0.9
git clone --depth=1 https://github.com/anryko/grafana-influx-dashboard.git

cd grafana-influx-dashboard
sudo ./install.sh GRAFANA_ROOT_DIR
README is branch-specific. Please refer to the correct README when cloning branches.
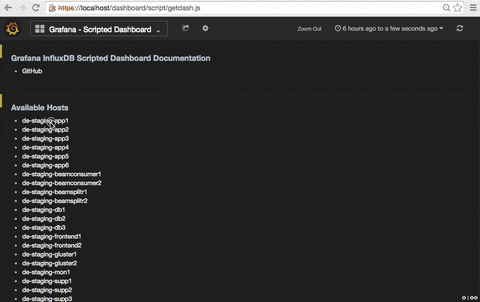
http://grafanaIP/dashboard/script/getdash.js
http://grafanaIP/dashboard/script/getdash.js?host=hostname
http://grafanaIP/dashboard/script/getdash.js?host=hostname&metric=cpu,load
http://grafanaIP/dashboard/script/getdash.js?host=hostname&metric=load,database
http://grafanaIP/dashboard/script/getdash.js?host=hostname&metric=load&time=7d
http://grafanaIP/dashboard/script/getdash.js?host=hostname&metric=disk&time=12h&span=6
http://grafanaIP/dashboard/script/getdash.js?metric=redis&span=4&legend=false
http://grafanaIP/dashboard/script/getdash.js?host=hostname0*&span=6&legend=false
http://grafanaIP/dashboard/script/getdash.js?host=hostname64,hostname01&span=6
http://grafanaIP/dashboard/script/getdash.js?host=hostname(01|64)&span=6
http://grafanaIP/dashboard/script/getdash.js?host=hostname&metric=disk&instance=sda1
http://grafanaIP/dashboard/script/getdash.js?host=hostname&metric=disk&instance=sd*
http://grafanaIP/dashboard/script/getdash.js?host=hostname&metric=disk&instance=sda1,sdb1
http://grafanaIP/dashboard/script/getdash.js?host=hostname&metric=disk&instance=sda[1-3]
http://grafanaIP/dashboard/script/getdash.js?host=hostname&refresh=5s
http://grafanaIP/dashboard/script/getdash.js?host=hostname&metric=disk&instance=sda1&refresh=1m
http://grafanaIP/dashboard/script/getdash.js?metric=docker&time=30m&legend=alignAsTable,rightSide
- cpu
- load
- memory
- swap
- interface
- netlink
- df
- disk
- processes
- entropy
- users
- uptime
- redis
- memcache
- rabbitmq
- elasticsearch
- nginx
- connstate
- ping
- posgresql
- zookeeper
- mesos
- apache
- nfs
- ipvs
- conntrack
- hddtemp
- lvm
- mysql
- tcpconns
- kafka
- mongooseim
- docker
- couchbase
- system
- middleware
- database
For time :
/(\d+)(m|h|d)/
For refresh :
/(\d+)(s|m|h|d)/
Grouping by time is automatically adjusted.
This HOWTO will guide you through initial script configuration and example of adding additional plugins/metrics.
Grafana datasource configuration is used for InfluxDB backend requests.
When you are using CollectD metric collector no configuration is required and preconfigured plugins will work out of the box. Otherwise, some additional getdash.js setup is needed and you will have to configure your plugins from scratch. First, for hosts discovery defaultQueries should be set to InfluxDB measurement name shared among all the hosts. If there is no one such measurement, list can be supplied. Second, defaultHostTags should be set to the InsluxDB tag containing hostname value. If it works you should be able to see hosts list on http://grafanaIP/dashboard/script/getdash.js. If this is the case, you can start developing your custom plugins in getdash.conf.js Start with setting-up pluginConfProto.tags to meet your setup. Multi-collector setup is also possible. In that case plugins.<name>.config.tags.<tag> can be set per plugin.
Lets assume you have some metric in your InfluxDB and you want it to be displayed. Before starting plugin configuration you will need hostname, series and type. For this demonstration I will use <hostname>, disk_read/disk_write and disk_ops accordingly. If you are not sure about series you can list all host series by querying your InfluxDB:
curl -sG 'http://<influxIP>:8086/query?pretty=true' --data-urlencode "db=collectd" --data-urlencode "q=SHOW SERIES WHERE host = '<hostname>';" | grep "\"name\":"
                    "name": "cpu_value",
                    "name": "df_value",
                    "name": "disk_read",
                    "name": "disk_write",
                    ...
And get other available parameters:
curl -sG 'http://<influxIP>:8086/query?pretty=true' --data-urlencode "db=collectd" --data-urlencode "q=SHOW SERIES FROM /disk_.*/ WHERE host = '<hostname>';" | grep "host="
                            "disk_read,host=<hostname>,instance=sda,type=disk_merged",
                            "disk_read,host=<hostname>,instance=sda,type=disk_octets",
                            "disk_read,host=<hostname>,instance=sda,type=disk_ops",
                            ...
To configure plugin for selected metrics you need to add following configuration to your getdash.conf.js.
// collectd disk plugin configuration
plugins.disk = new Plugin();
plugins.disk.config.multi = true;
plugins.disk.config.regexp = /\d$/;

plugins.disk.diskOps = {
  'graph': {
    'read': {
      'color': '#447EBC',
      'apply': 'derivative',
      'type': 'disk_ops'
    },
    'write': {
      'color': '#508642',
      'math': '* -1',
      'apply': 'derivative',
      'type': 'disk_ops'
    }
  },
  'panel': {
    'title': 'Disk Operations for @metric',
    'grid': { 'max': null, 'min': null, 'leftMin': null }
  }
};
Applying 'derivative' will use derivative(mean(value), 1s) by default. However, more extensive derivative syntax is supported. Examples: derivative(10s), derivative(last), derivative(max, 1s), derivative(min(value), 10s).
OK. So let's go line by line and I'll explain what was done here. Firs you create new Plugin and the name of plugin have to match the beginning of the series for that plugin. In this case it have to be disk.
plugins.disk = new Plugin();Next you define that this plugin have multiple metrics split in separate graphs. There are probably multiple disks/partitions on your system. In this example I have sda, sda1 and sda2.
plugins.disk.config.multi = true;For something like memory, where you have just one metric per host you wouldn't need to setup that.
Because we actually want to see only sda1, sda2 on our graphs (sda and sda1 are identical in my case) we apply a regular expression to match the metric. In this case I want to see only metrics with digit at the end.
plugins.disk.config.regexp = /\d$/;Next we configure "Disk IO" graph itself. We want to see disk_read and disk_write for type=disk_ops.
Now lets describe this in the graph configuration. graph defines that we are configuring a graph :). read and write objects describe the series we want to graph. Those should match begining/ending of the series name or type_instance. Inside those graph configurations we define type to distinguish particular type of disk_read/write series we want to graph. Then we add color we want and InfluxDB function on the stored value with the apply keyword.
plugins.disk.diskOps = {
  'graph': {
    'read': {
      'color': '#447EBC',
      'apply': 'derivative',
      'type': 'disk_ops'
    },
    'write': {
      'color': '#508642',
      'math': '* -1',
      'apply': 'derivative',
      'type': 'disk_ops'
    }
  },
Supported configuration keys are:
- color - if not defined color will be random
- alias - used to change metric name on the graph
- column - used to define requested column
- math - used to define mathematical expression which will be applied to the column value
- apply - used to apply InfluxDB SQL value function (e.g. max, min, count, etc.)
- type - used in case when you have multiple graphs per series
Next we define Panel title and grid.
  'panel': {
    'title': 'Disk Operations for @metric',
    'grid': { 'max': null, 'min': null, 'leftMin': null },
  },
};
@metric is a special keyword which will be substituted with sda1 and sda2 dynamically.
This should be sufficient introduction to start adding your own metrics as needed. It was one of the most feature reach examples. Usually configuration is much more straightforward. Like this config for memcached.
// collectd memcached plugin configuration
plugins.memcache = new Plugin();

plugins.memcache.hits = {
  'graph': {
    'hitratio': { }
  },
  'panel': {
    'title': 'Memcached Hitratio',
    'y_formats': [ 'percent' ]
  }
};

// collectd nfs plugin configuration
plugins.nfs = new Plugin({ 'alias': 'nfs' });

plugins.nfs.nfs = {
  'graph': {
    '/.*/': { 'apply': 'derivative' }
  },
  'panel': {
    'title': 'NFS for @metric',
    'y_formats': [ 'pps' ]
  }
};
You can also describe metric using JS regular expressions syntax as it is done in the nfs plugin example above.
If you understand your data and how it is structured inside database you should be able to describe it as a plugin configuration with current feature set. If you are having any troubles with that feel free to register an Issue and I'll try to help.
http://grafanaIP/render/dashboard-solo/script/getdash.js?host=hostname&metric=cpu&panelId=1&time=6h