
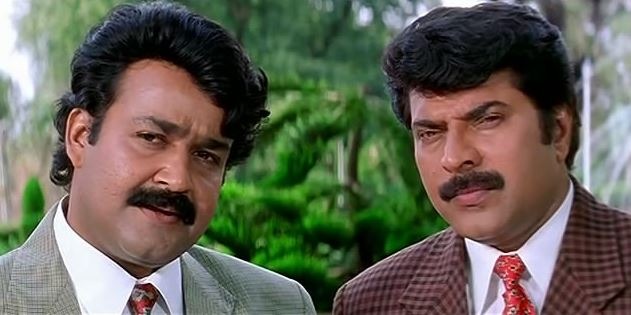
A Image classifier that classifies actors mammooty and mohanlal. This model takes in images of mammooty or mohanlal and classifies them. It was built by training the model with large amount of cleaned data , which helps to identify between mammooty and mohanlal. The data was scrapped from Google and cleaned using opencv face detection algorithm and was manually checked after that. We used suitable algorithm to produce better results out of the model. The final product can now classify the images , but not with very high accuracy. It has good accuracy and we spend a lot of time to make it to this point where it can perform like this.
Unfortunately we couldn't host it because there isn't any free services that could host our model because of its large size.
Now we can test images by using the script we wrote , we can change image path and test any desired image.
It was a great learning experience for us. We are newbies to machine learning world, but this project helped us understand some core concepts and workflows on making a model. We learned how to train a model efficiently and how to clean a dataset simply. We learned about main algorithms for training our model. Overall it was a great learning experience.
Input taken : Image
Output : Prediction as String
You can download the dataset from here.
BFH/recxiM4z57LubiX39/2021
(https://www.loom.com/share/75b6c06d59b64d95b7b7dc5cd3669cc3)
- Model was pretrained using datasets of both actors and it was saved.
- You can pass a test image to the saved model and it will predict the output.
opencv-python==4.5.2.52
tensorflow==2.5.0
keras==2.4.3
matplotlib==3.4.1
numpy==1.19.5
1. Installing pip [Python Package Manager]
$ sudo apt-get install python3-pip2. Clone this repository to your local drive
$ git clone https://github.com/arjun-ms/20-203. Install dependencies
$ pip3 install -r requirements.txt4. Open the Server Folder
5. Download Our Model and Paste it in the Sever Folder Download Our Model
6. Open Terminal and Run the Flask Server
$ python app.py7. The Server will be running now you can get prediction by uploading Images
Thank You.