
The pydeck library is a set of Python bindings for making spatial visualizations with deck.gl, optimized for a Jupyter Notebook environment.
For interactive demos, click the binder logo below:
See the documentation at the pydeck website
pip install pydeckThe library is available via conda as well:
conda install -c conda-forge pydeckTo install pydeck for Jupyter Notebook, run the following commands on your Jupyter server:
jupyter nbextension install --sys-prefix --symlink --overwrite --py pydeck
jupyter nbextension enable --sys-prefix --py pydeck
To install pydeck for JupyterLab, run the following:
jupyter labextension install @jupyter-widgets/jupyterlab-manager
DECKGL_SEMVER=`python -c "import pydeck; print(pydeck.frontend_semver.DECKGL_SEMVER)"`
jupyter labextension install @deck.gl/jupyter-widget@$DECKGL_SEMVERLike deck.gl, the pydeck library takes its basemap tiles from Mapbox. Register with Mapbox, and you can find your Mapbox access token here. The service is free until a certain level of traffic is exceeded.
You will need to inform pydeck about your key by setting an environment variable. In your terminal, run export MAPBOX_API_KEY=<mapbox-key-here>, which pydeck will read to use Mapbox basemaps. You can also refer to the pydeck docs to see how to pass the key as a variable.
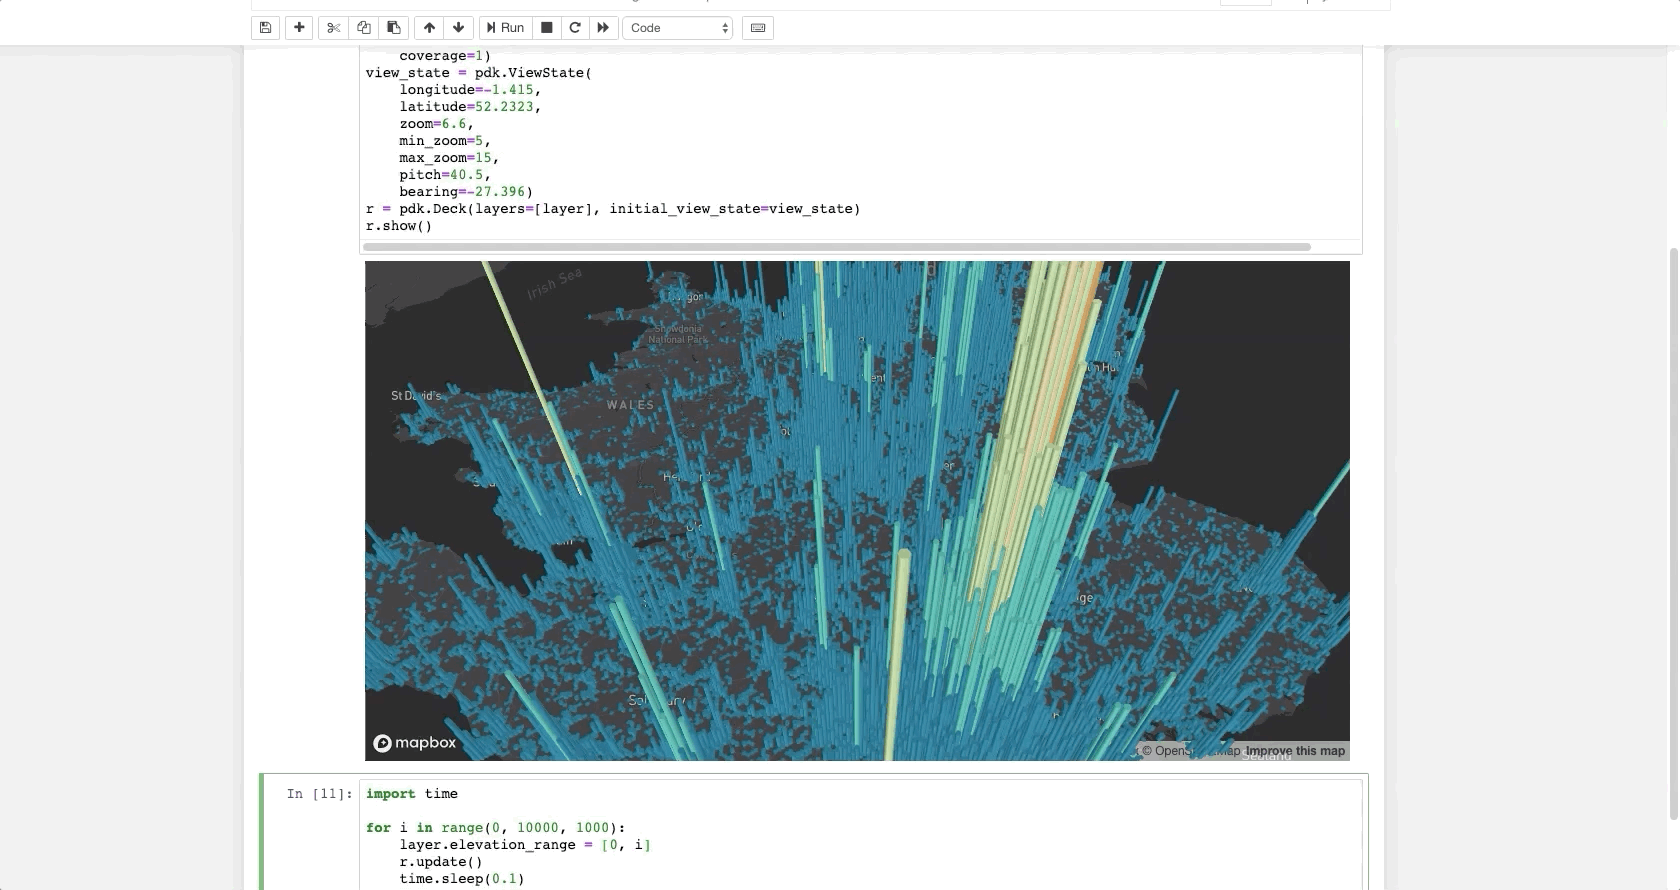
The following code renders a visualization similar to the one above in a Jupyter notebook:
import pydeck as pdk

# 2014 locations of car accidents in the UK
UK_ACCIDENTS_DATA = ('https://raw.githubusercontent.com/uber-common/'
                     'deck.gl-data/master/examples/3d-heatmap/heatmap-data.csv')

# Define a layer to display on a map
layer = pdk.Layer(
    'HexagonLayer',
    UK_ACCIDENTS_DATA,
    get_position=['lng', 'lat'],
    auto_highlight=True,
    elevation_scale=50,
    pickable=True,
    elevation_range=[0, 3000],
    extruded=True,
    coverage=1)

# Set the viewport location
view_state = pdk.ViewState(
    longitude=-1.415,
    latitude=52.2323,
    zoom=6,
    min_zoom=5,
    max_zoom=15,
    pitch=40.5,
    bearing=-27.36)

# Render
r = pdk.Deck(layers=[layer], initial_view_state=view_state)
r.to_html('demo.html')
If you're doing this outside a Jupyter environment, you can run:
r.to_html('demo.html', notebook_display=False)For more, check out the docs and Binder examples above.
Currently, some errors in pydeck will only appear in your browser's developer console. If a visualization fails to render, open the developer console. Error handling will be expanded in future versions of pydeck.
If you encounter an issue, file it in the deck.gl issues page and include your browser's console output, if any.
# Clone the deck.gl repo
git clone https://github.com/visgl/deck.gl/

# Navigate to the pydeck module
cd deck.gl/bindings/pydeck

# Create a virtual environment
python3 -m venv env3
. env3/bin/activateFrom the directory of this README, set up the developer environment for pydeck:
make initDevelopment inside a virtual environment is preferred.
JupyterLab is the recommended environment for development testing with pydeck.
The jupyter lab --watch command can be used to provide hot reloading for development.
Tests are handled by pytest. In the top-level pydeck directory, you can type:
pytest